How to Drill Level Holes: Tips and Tricks for Perfectly Straight Holes

Drilling level holes is an essential skill for any DIY enthusiast or professional. Whether you’re hanging shelves, installing cabinets, or mounting artwork, having perfectly straight and level holes is crucial to the success of your project. Uneven or slanted holes can throw off the alignment of your installation, leading to a sloppy and unprofessional finish.
Fortunately, there are several tips and tricks you can use to ensure that your holes are perfectly level every time. One of the most important factors to consider is the choice of a reliable drilling tool. Investing in a high-quality drill with a level bubble built into it or a laser level attachment can make a world of difference in the accuracy of your drilling.
Another key aspect of drilling level holes is proper preparation and measurement. Before drilling, it’s essential to mark the exact position of each hole using a pencil or marker. This will serve as your guide throughout the drilling process. Additionally, using a spirit level or laser level to mark a straight line will help you ensure that your holes are in line with each other.
When drilling, it’s important to apply even pressure and drill straight in line with the marked position. A gentle, steady hand is crucial to avoid any deviation or slant in the drilling. Additionally, using a low speed setting on your drill can help you maintain control and precision.
If you’re drilling into a wall, it’s also essential to consider the type of material you’re drilling into. Different materials require different drilling techniques and tools. For example, drilling into wood may require a different type of drill bit than drilling into concrete or metal. Researching the appropriate drill bits for your specific project will go a long way in ensuring success.
By following these tips and tricks, you can drill level holes with confidence and achieve a professional-looking finish for all your DIY projects. Remember, practice makes perfect, so don’t be discouraged if your first attempts aren’t flawless. With time and experience, you’ll be able to master the art of drilling level holes.

Importance of Level Holes for Various Projects
When it comes to drilling holes, achieving a level hole is crucial for a variety of projects. Whether you are working on a woodworking project, installing shelves, or mounting electrical fixtures, having level holes ensures that your project is stable, safe, and aesthetically pleasing.
Stability and Durability
Level holes are essential for providing stability to any structure or object that requires fastening. When you drill level holes, it allows screws, nails, or bolts to be inserted securely and evenly, resulting in a more stable and durable finished product. This is especially important for load-bearing structures or items that will be subjected to constant use or weight.
Safety
Drilling level holes also plays a crucial role in ensuring the safety of your projects. Uneven holes can cause items to be unstable or wobble, increasing the risk of accidents or injuries. For example, if you are installing shelves on a wall, having level holes will prevent the shelves from tilting or falling down, which could potentially harm people or damage belongings.
Aesthetics
Level holes are not only important for functional purposes but also for aesthetic reasons. When you have perfectly straight and aligned holes, it enhances the overall appearance of your project. Whether it’s a set of evenly spaced hooks, a row of neatly installed lights, or a symmetrical arrangement of decorations, level holes contribute to a clean and professional-looking finished result.

Alignment and Compatibility
When drilling level holes, you ensure that the various components of your project align correctly. This is especially important when working with multiple pieces or parts that need to fit together seamlessly. Level holes make it easier to achieve proper alignment, ensuring that everything fits together as intended. It also allows for compatibility with other standardized components or accessories that may need to be attached or integrated into the project.
Professional Finish
Whether you are working on a DIY project or a professional construction job, level holes are essential for achieving a polished and professional finish. Straight, level holes demonstrate attention to detail and precision in your workmanship, giving your project a high-quality appearance. This is especially important if you plan to showcase or sell your work, as customers and buyers are likely to appreciate the level of craftsmanship.
In conclusion, drilling level holes is crucial for various projects, providing stability, safety, aesthetics, alignment, and a professional finish. So, it’s important to invest the time and effort into drilling your holes accurately and ensuring they are level. By doing so, you can ensure the success and longevity of your projects.

Choosing the Right Tools and Equipment
When it comes to drilling level holes, having the right tools and equipment is essential. Here are some important factors to consider when choosing your tools:
1. Drill Machine
Investing in a high-quality drill machine is the first step towards achieving perfectly straight holes. Look for a drill that has adjustable speed settings, a level bubble, and a depth stop feature. These features will help you control the drilling process and maintain accuracy.
2. Drill Bits
Selecting the right drill bits is crucial for drilling level holes. For most drilling applications, a twist drill bit is recommended. Twist drill bits are available in various sizes, so choose the size that matches the diameter of the hole you want to drill.
Additionally, consider investing in specialty drill bits such as spade bits or hole saws for specific drilling tasks, if necessary.

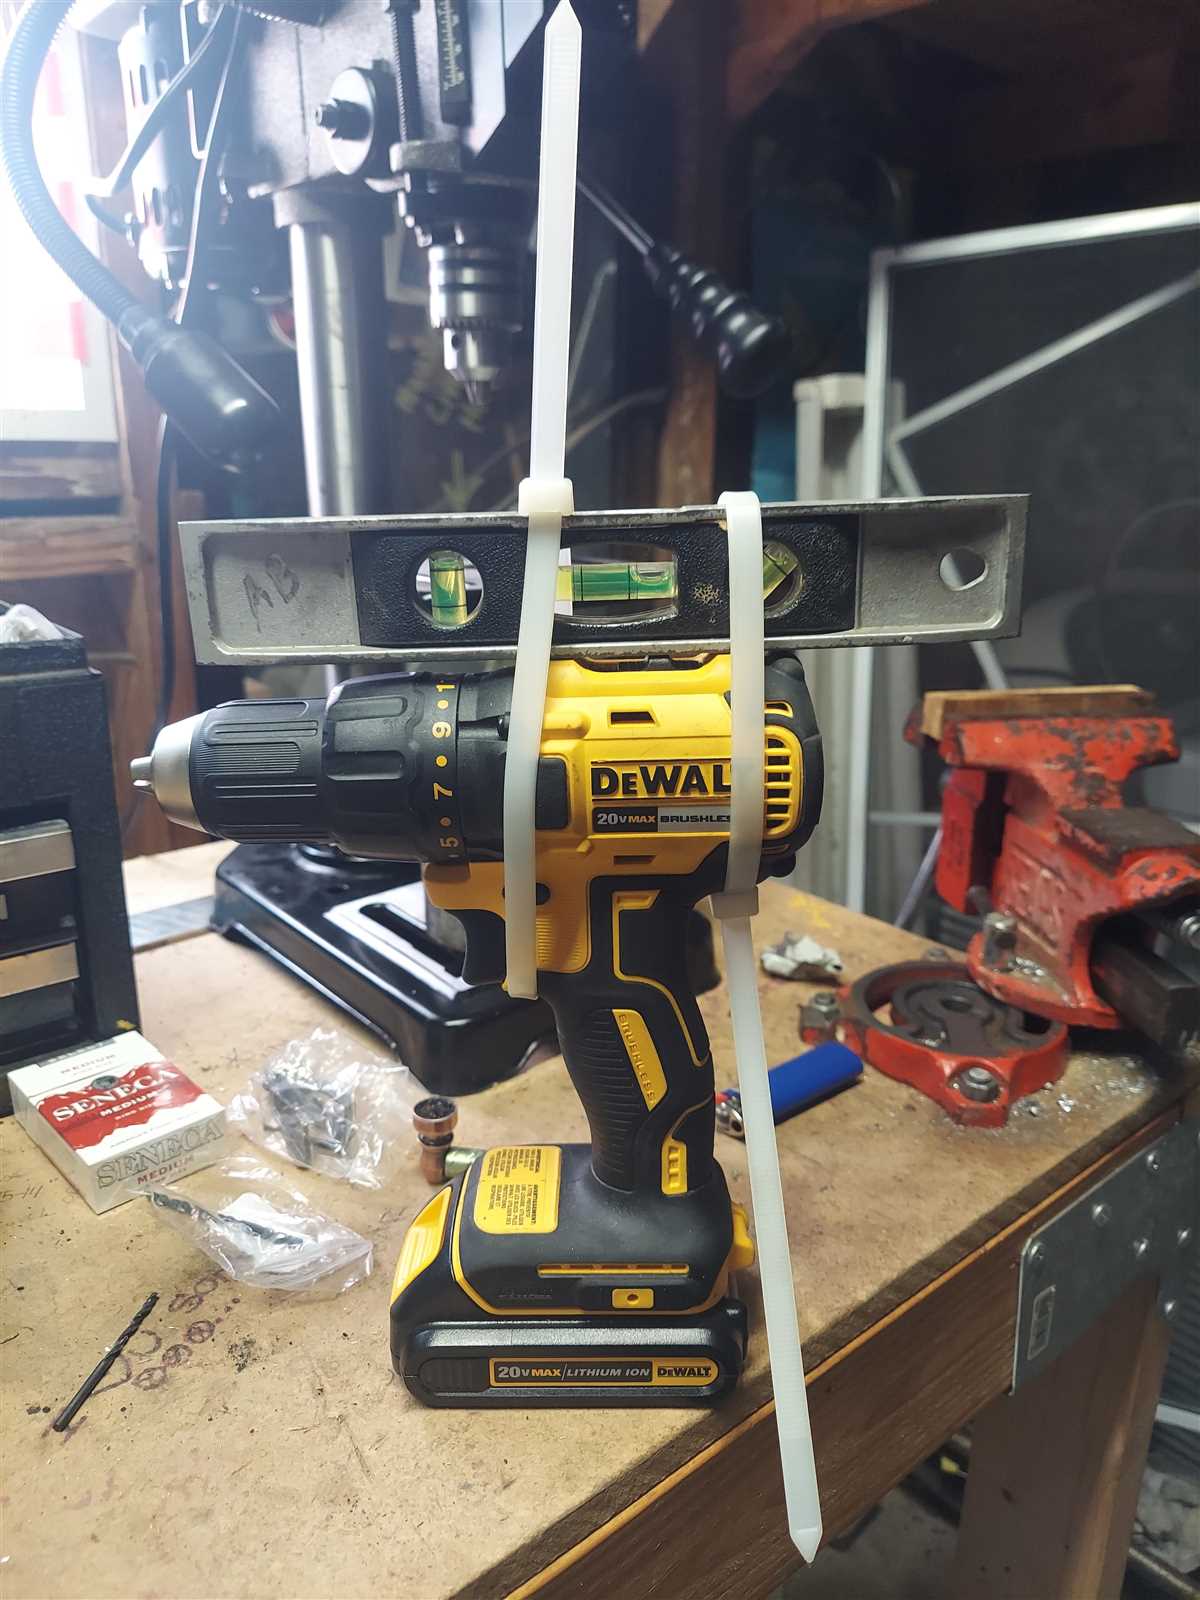
3. Level Tool

A level tool is an important tool for ensuring that your holes are perfectly straight. Use a bubble level or a laser level to check the levelness of your work surface and guide your drilling process.
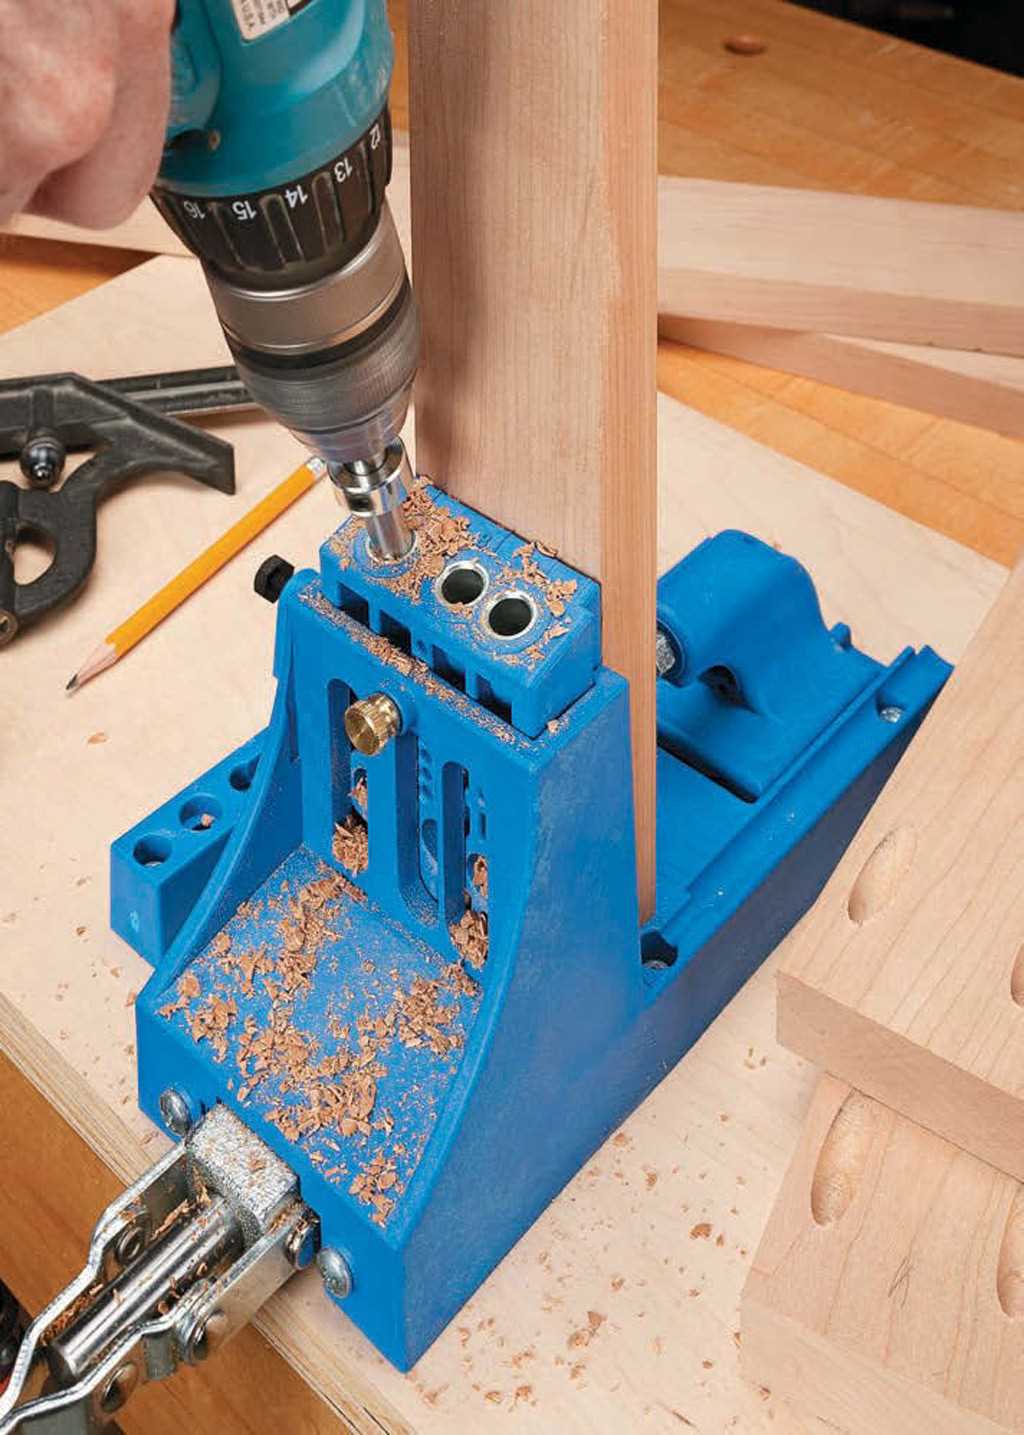
4. Clamps or Vise
When drilling, it’s crucial to secure your workpiece firmly to prevent it from moving. Use clamps or a vise to hold the workpiece securely in place. This will help you maintain stability and accuracy while drilling.
5. Measuring Tools
Accurate measurements are necessary for drilling level holes. Use measuring tools such as a tape measure, ruler, or a combination square to mark the drilling positions accurately. This will ensure that your holes are evenly spaced and aligned.
6. Safety Equipment

Always prioritize safety when using power tools. Wear safety goggles to protect your eyes from debris and gloves to protect your hands. Additionally, use hearing protection if necessary, especially when working with loud drills.
By choosing the right tools and equipment, you’ll be well-equipped to drill level holes with precision and accuracy. Remember to always read and follow the instructions provided by the manufacturers for best results.
Preparing the Work Area for Drilling
Before you start drilling, it’s important to take the time to properly prepare your work area. This will not only help ensure your safety but also contribute to the accuracy of your drilling. Here are some tips to help you prepare:
Clean the Area
Clear the work area of any debris, clutter, or obstacles that could potentially hinder your drilling process. Remove any loose objects or tools that might get in the way. Having a clean work area will make it easier to maneuver and position yourself properly when drilling.
Secure the Workpiece
Make sure your workpiece is properly secured before starting to drill. Depending on the material and size of the workpiece, there are different methods you can use. For smaller pieces, you can use clamps or a vise to hold it in place. Alternatively, for larger pieces, you may need to use adjustable supports or a workbench to prevent movement during drilling.
Mark the Drilling Points
Using a pencil or a marker, mark the spots where you want to drill. This will help guide you during the drilling process and ensure that your holes are placed accurately and evenly. Double-check your measurements and make any necessary adjustments before proceeding.
Protective Measures
Before drilling, make sure to take appropriate safety precautions. Wear safety goggles to protect your eyes from debris, especially if you’re drilling into hard materials. If you’re working with metal, consider wearing gloves to protect your hands. Additionally, it’s a good idea to have a fire extinguisher nearby in case of any accidents.
Positioning the Drill
Position yourself and the drill in a comfortable and stable stance. Ensure that you have a good grip on the drill, and that it is properly balanced before starting. Make sure the drill bit is securely fastened in the chuck and that it rotates freely without wobbling.
Work Area Organization
Keep your work area organized and free from clutter. Have a designated space for your drill bits, screws, and any other tools you may need during the drilling process. This will save you time and minimize the chances of misplacing or losing important components.
Marking the Position for a Level Hole
Before you start drilling a level hole, it’s crucial to accurately mark the position where the hole should be. This will ensure that your hole is precisely aligned and level.
Materials Needed
- Marker or pencil
- Measuring tape or ruler
Step-by-Step Instructions
- Measure the desired location for the hole using a measuring tape or ruler. Determine the exact distance from the edge of the surface to the center of the hole.
- Using a marker or pencil, make a small dot at the designated spot. This dot will serve as your reference point.
- If you need to drill multiple level holes, repeat steps 1 and 2 for each desired location.
Tips and Tricks
- Double-check your measurements before marking the position for the hole to ensure accuracy.
- Use a level to confirm that your dot is perfectly aligned horizontally or vertically, depending on your desired hole orientation.
- For larger projects, consider using a laser level to mark the position for multiple holes. This will ensure consistent alignment over long distances.
Summary
Accurately marking the position for a level hole is a crucial step in achieving perfectly straight holes. By following these instructions and using the right tools, you can ensure that your holes are aligned and level, resulting in professional-looking results for your projects.
Techniques for Drilling Perfectly Straight Holes
Drilling straight holes may seem like a daunting task, but with the right techniques and tools, you can achieve perfect results. Here are some tips and tricks to help you drill perfectly straight holes:
1. Mark your drilling points
Before you start drilling, it’s important to mark the exact points where you want your holes to be. Use a pencil or a marker to make clear and visible marks on the surface.
2. Use a drilling guide
A drilling guide or a template can help you maintain the desired angle and direction while drilling. You can purchase a drilling guide or create one yourself using a piece of scrap wood or plastic.
3. Clamp your workpiece
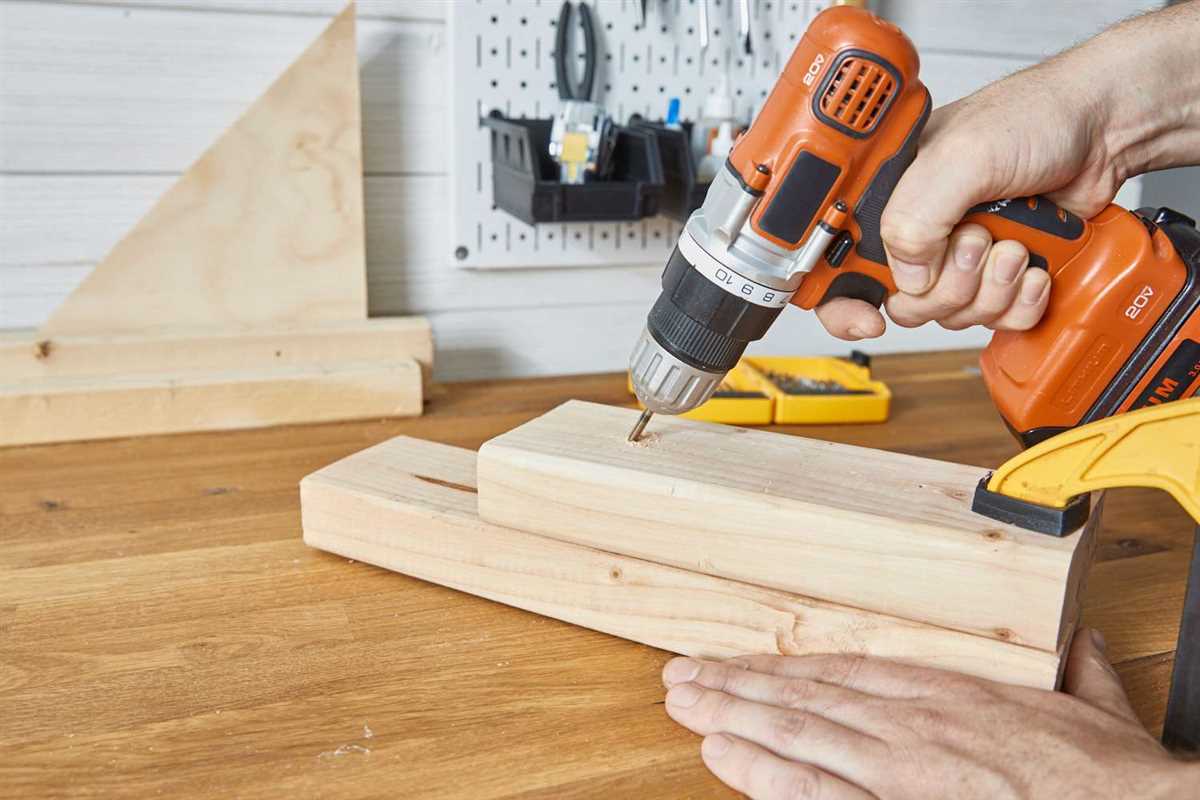
To ensure stability and accuracy, securely clamp your workpiece to a stable surface. This will prevent it from moving or shifting while you drill.
4. Start with a pilot hole
For larger holes, it’s best to start with a smaller pilot hole. This will help guide your drill bit and prevent it from wandering off course.
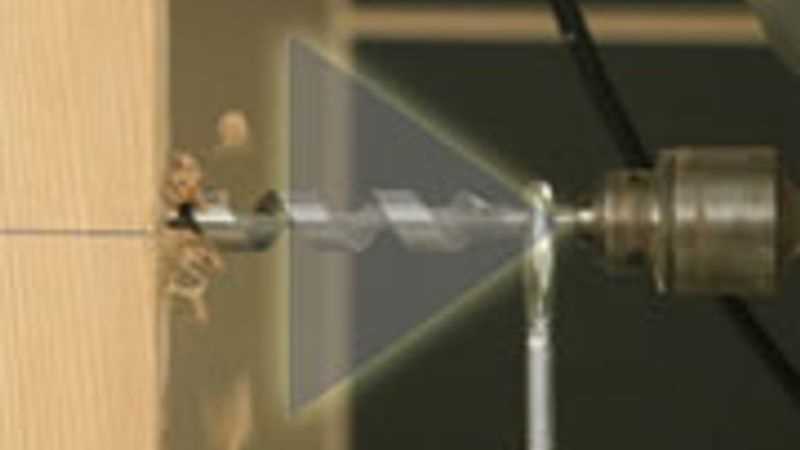
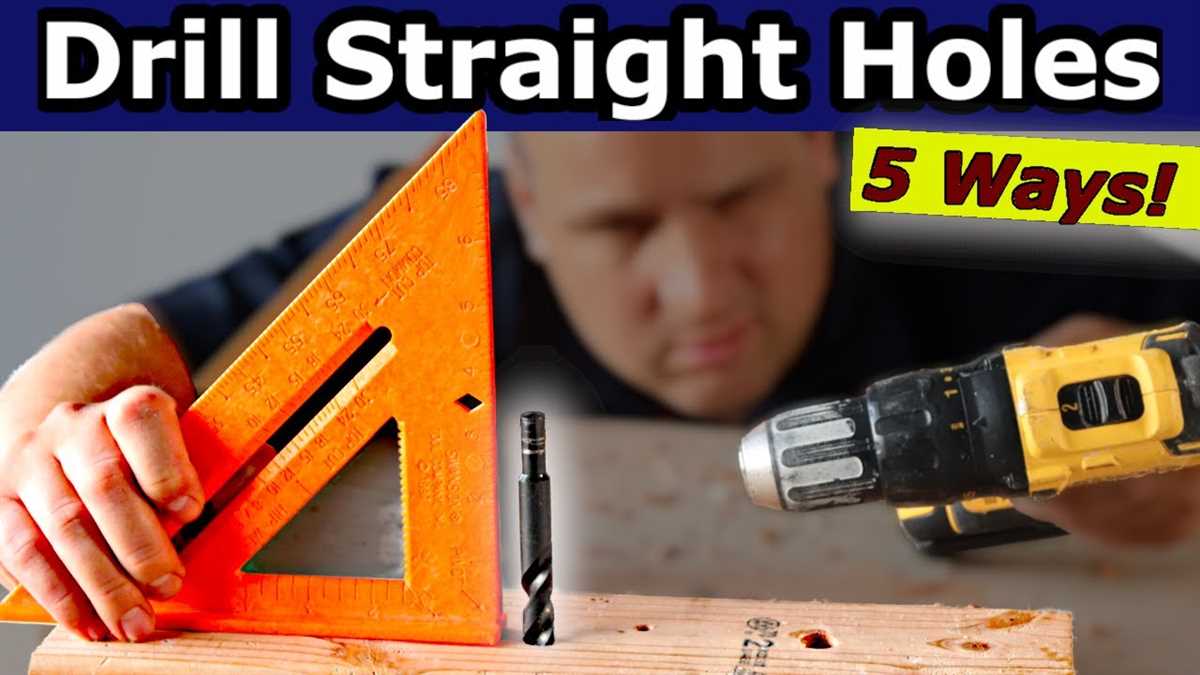
5. Use a level or a square
Place a level or a square against your drill to ensure that it is perpendicular to the surface. This will help you maintain a straight drilling angle.
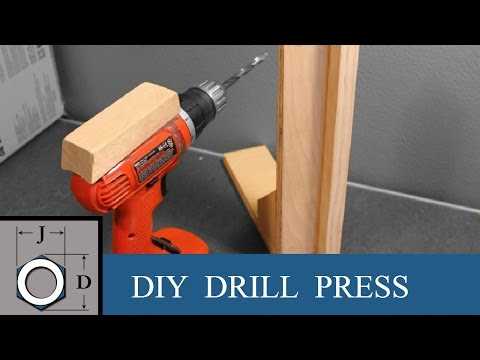
6. Use a drill press
If you have access to a drill press, it can greatly increase the accuracy of your holes. A drill press allows you to set the desired drilling depth and angle, ensuring consistent and straight holes.
7. Take your time
Drilling straight holes requires patience and precision. Take your time and apply consistent pressure while drilling. Avoid rushing or forcing the drill, as this can lead to crooked holes.
8. Check your progress
Periodically stop and check your progress to ensure that you are drilling straight. Use a straightedge or take a step back to visually inspect your holes.
9. Choose the right drill bit
Using the right drill bit for the material you are drilling into is crucial for straight holes. Different materials may require different types of drill bits, such as twist bits, spade bits, or hole saws.
10. Practice on scrap material
If you’re new to drilling straight holes, it’s a good idea to practice on scrap material before working on your final project. This will help you perfect your technique and gain confidence.
By following these techniques and practicing regularly, you’ll be able to drill perfectly straight holes with ease and precision.
Common Mistakes to Avoid
- Not using the right drill bit: One of the most common mistakes when drilling level holes is using the wrong drill bit. Make sure to choose the appropriate drill bit for the material you are drilling into, whether it’s wood, metal, or concrete.
- Incorrect drilling speed: Another common mistake is drilling at the wrong speed. Different materials require different drilling speeds, so be sure to adjust the speed of your drill accordingly.
- Failure to measure and mark: Many people skip the important step of measuring and marking the spot where they want to drill. This can result in off-center or uneven holes. Always take the time to carefully measure and mark your drilling locations.
- Not securing the workpiece: Failing to secure your workpiece can lead to movement and instability, making it difficult to drill level holes. Use clamps or other methods to hold your workpiece securely in place before drilling.
- Using too much force: It’s important to apply steady pressure while drilling, but using too much force can cause the drill bit to wander and create an uneven hole. Let the drill do the work and maintain a consistent amount of pressure.
- Drilling at an angle: Drilling at an angle instead of straight can result in holes that are not level. Take care to hold the drill perpendicular to the surface and drill straight down to ensure level holes.
- Not cleaning the drill bit: Over time, drill bits can become clogged with debris, which can affect their performance. Clean the drill bit regularly to remove any built-up debris and ensure smooth drilling.
- Skipping pilot holes: For larger holes or when drilling into harder materials, it’s important to create pilot holes before drilling the final hole. This helps to guide the drill bit and prevent it from wandering off course.
- Not using a level: It may seem obvious, but using a level to ensure your holes are straight is crucial. Don’t rely solely on your eye – use a level to double-check your work and make any necessary adjustments.
- Rushing the drilling process: Taking your time and being patient during the drilling process is key to achieving level holes. Rushing can lead to mistakes and uneven holes. Stay focused and work slowly to ensure accuracy.
Tips and Tricks for Achieving Level Holes
- Use a Level: Before drilling, make sure to use a level to determine the desired position of the hole. This will help ensure that the hole is drilled straight and level.
- Mark the Spot: Once the level has determined the desired position, use a pencil or marker to mark the spot where the hole will be drilled. This will serve as a guide and help maintain accuracy during the drilling process.
- Start with a Pilot Hole: To help maintain accuracy and prevent the drill bit from wandering, it’s a good idea to start with a pilot hole. This can be done using a smaller drill bit before switching to the desired size.
- Use a Drill Guide: If you’re drilling multiple holes in a straight line, using a drill guide can be helpful. A drill guide is a tool that helps keep the drill bit aligned and ensures that the holes are drilled at the same depth and angle.
- Secure the Material: To prevent the material from moving or shifting while drilling, it’s important to secure it properly. This can be done using clamps or by applying pressure to keep it in place.
- Go Slow and Steady: When drilling, it’s important to maintain a slow and steady pace. Applying too much pressure or drilling too quickly can result in an uneven or crooked hole. Take your time and let the drill do the work.
- Inspect the Hole: After drilling, inspect the hole to ensure it is level and straight. Use a level, ruler, or straight edge to check for any deviations and make any necessary adjustments.
By following these tips and tricks, you can achieve level holes that are perfectly straight. Remember to take your time, use the proper tools, and double-check your work for the best results.
FAQ:
What are some tips for drilling level holes?
Some tips for drilling level holes include using a level or straight edge to mark the spot where you want to drill, using a drill bit that is appropriate for the type of material you are drilling into, and using a drill with a level or laser guide to ensure the hole is straight.
What is the importance of drilling level holes?
Drilling level holes is important for a variety of reasons. It ensures that the holes are properly aligned and that any screws or nails inserted into the holes will be straight and secure. Level holes also contribute to the overall appearance and function of the project.
How can I ensure that my drill holes are straight?
To ensure that your drill holes are straight, you can follow several steps. Start by marking the spot where you want to drill using a level or straight edge. Use a drill bit that is appropriate for the type of material you are drilling into. Finally, use a drill with a level or laser guide to help you keep the drill bit straight as you drill.
What kind of drill bit should I use for drilling level holes?
The type of drill bit you should use for drilling level holes depends on the material you are drilling into. For wood, a standard twist bit or spade bit will work well. For metal, a high-speed steel bit is recommended. For concrete or masonry, a masonry bit or hammer drill bit is required.
Can I drill level holes without using a level or laser guide?
While it is possible to drill level holes without using a level or laser guide, it is more difficult to achieve perfectly straight holes. Using a level or laser guide helps to ensure that your drill bit is vertical and that the hole is straight. It is recommended to use these tools for best results.
Are there any alternative methods for drilling level holes?
If you don’t have a level or laser guide, you can try using a straight edge or ruler to help guide your drill bit. You can also try drilling a pilot hole first, then using it as a guide for drilling the final hole. These methods can help improve accuracy, but may not be as precise as using a level or laser guide.
What should I do if my drill holes come out crooked?
If your drill holes come out crooked, you can try filling them with wood filler or putty and re-drilling them. Another option is to use larger screws or nails to secure the object you are attaching. If the crooked hole is in a visible area, you may need to patch and repaint the surface to restore its appearance.
Video:


Meet Harrison Clayton, a distinguished author and home remodeling enthusiast whose expertise in the realm of renovation is second to none. With a passion for transforming houses into inviting homes, Harrison's writing at https://thehuts-eastbourne.co.uk/ brings a breath of fresh inspiration to the world of home improvement. Whether you're looking to revamp a small corner of your abode or embark on a complete home transformation, Harrison's articles provide the essential expertise and creative flair to turn your visions into reality. So, dive into the captivating world of home remodeling with Harrison Clayton and unlock the full potential of your living space with every word he writes.


