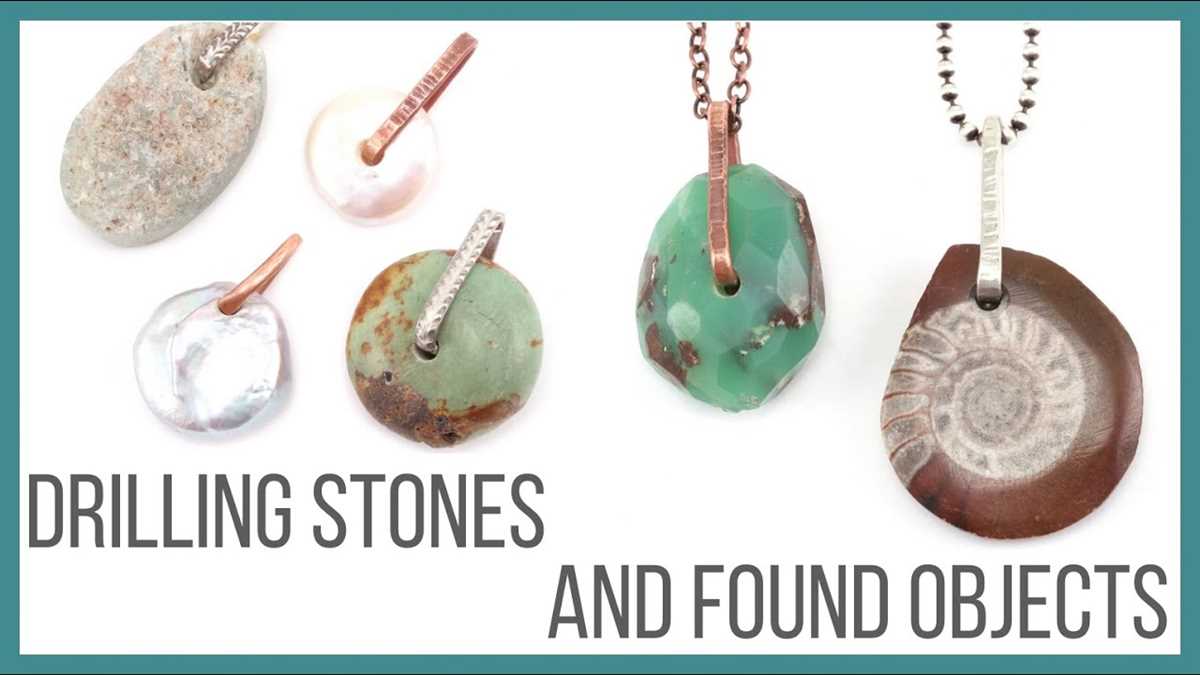
How to Drill into Rocks: Tips and Techniques for Success

Drilling into rocks can be a challenging task, but with the right techniques and tools, it can be done successfully. Whether you’re a professional contractor or a DIY enthusiast, knowing how to drill into rocks is a valuable skill to have. In this article, we will provide you with useful tips and techniques to help you achieve success.
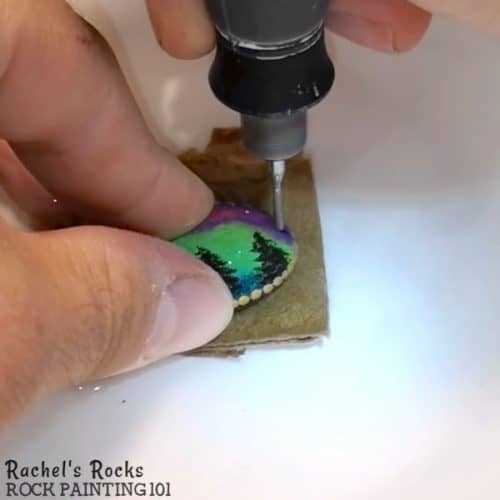
Choose the right drill bit: The type of drill bit you use will depend on the type of rock you are drilling into. For softer rocks, such as limestone or sandstone, a masonry bit with a carbide tip is recommended. For harder rocks, such as granite or basalt, a diamond drill bit is essential. Make sure to choose a drill bit that is the appropriate size for the hole you want to create.
Prepare the rock surface: Before you start drilling, it’s crucial to prepare the surface of the rock. Clean any loose debris or dirt from the area and mark the spot where you want to drill. You can use a permanent marker or a piece of tape to make the mark more visible.
Apply steady pressure: When drilling into rocks, it’s important to apply steady pressure to avoid damaging the drill bit. Start drilling at a slow speed and increase gradually as you make progress. Be patient and let the drill bit do the work – don’t force it or apply excessive pressure.
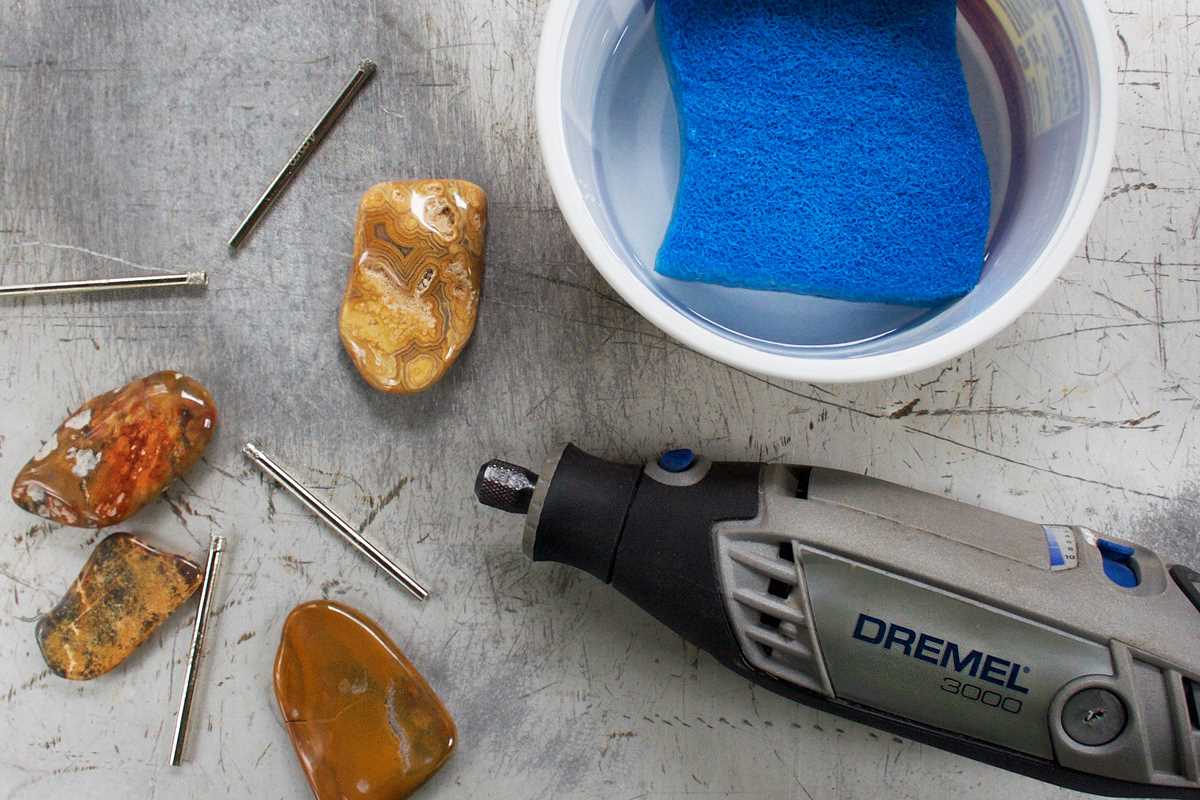
Use water as a lubricant: Drilling into rocks can generate a lot of heat, which can damage the drill bit and reduce its effectiveness. To prevent overheating, it’s recommended to use water as a lubricant. You can either pour water onto the drilling spot or spray it using a spray bottle. This will help keep the drill bit cool and increase its lifespan.

Remember to wear appropriate safety gear, such as safety goggles and gloves, when drilling into rocks. Also, make sure to secure the rock firmly in place to prevent it from moving during the drilling process. Following these tips and techniques will increase your chances of drilling into rocks successfully.
Selecting the Right Drill Bit
When it comes to drilling into rocks, selecting the right drill bit is crucial for success. Different types of drill bits are designed for specific types of rocks and drilling conditions. Here are some tips to help you choose the right drill bit for your project:
1. Determine the Type of Rock
The first step in selecting the right drill bit is to determine the type of rock you will be drilling into. Rocks can be classified into three main categories: igneous, sedimentary, and metamorphic. Each type of rock has different hardness and composition, which will affect the choice of drill bit.
- Igneous rock: These rocks are formed from cooled and solidified magma or lava. Examples include granite and basalt. They are generally hard and require strong drill bits such as diamond or carbide-tipped bits.
- Sedimentary rock: These rocks are formed by the accumulation of sediments over time. Examples include sandstone and limestone. They are relatively soft and can be drilled using regular masonry drill bits.
- Metamorphic rock: These rocks are formed by the transformation of existing rocks under high pressure and temperature. Examples include marble and slate. The hardness of metamorphic rocks can vary, so choose a drill bit based on the specific rock’s hardness.
2. Consider the Drill Bit Material
The next factor to consider is the material of the drill bit. The most common drill bit materials for drilling into rocks are high-speed steel (HSS), carbide, and diamond.
- High-speed steel (HSS): HSS drill bits are versatile and can be used for drilling into various rocks. They are affordable but may wear out more quickly than carbide or diamond bits.
- Carbide: Carbide-tipped drill bits are known for their durability and ability to cut through hard rocks. They are more expensive than HSS bits but can provide better performance and longer lifespan.
- Diamond: Diamond drill bits are the most effective for drilling into hard rocks like granite. They are the most expensive option but offer excellent cutting performance and long-lasting durability.
3. Consider the Drill Bit Size and Shape
The size and shape of the drill bit should also be taken into consideration. The size of the drill bit should match the diameter of the hole you need to drill. It’s important to choose a drill bit that is slightly larger than the desired hole size to allow for any deviations or imperfections.

The shape of the drill bit can also affect drilling performance. Straight shank bits are commonly used for rotary drilling, while hex shank bits are more suitable for hammer drilling.
4. Check the Drill Bit Compatibility
Before purchasing a drill bit, make sure that it is compatible with your drilling equipment. Check the specifications and requirements of your drill to ensure that the selected drill bit is compatible with the chuck size and drill type.
By following these tips and considering factors such as rock type, drill bit material, size and shape, and drill compatibility, you will be able to select the right drill bit for your rock drilling project and increase your chances for success.
Preparing the Rock Surface
Before you start drilling into rocks, it’s important to properly prepare the surface to ensure success. Here are some tips and techniques for preparing the rock surface:
Clean the Rock
The first step is to clean the rock surface. Use a stiff brush or a cloth to remove any dirt, debris, or loose particles. This will help provide a clean and even surface for drilling.

Mark the Drilling Spot
Once the rock is clean, use a pencil or a marker to mark the spot where you want to drill. Take your time and make sure to mark the exact point you want to drill. This will help guide your drilling and ensure accuracy.
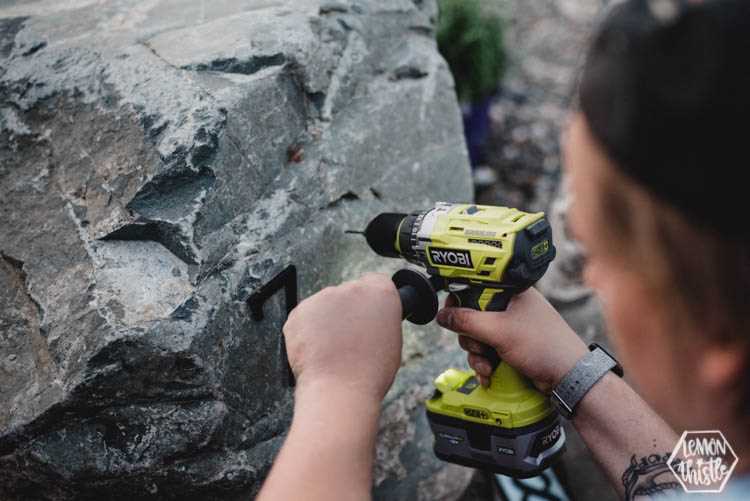
Secure the Rock
To prevent the rock from moving or shifting during drilling, it’s important to secure it. Place the rock on a stable surface or use clamps to hold it in place. This will provide stability and prevent accidents.
Wear Protective Gear
Drilling into rocks can produce dust and debris. To protect yourself, it’s important to wear proper protective gear. This includes safety goggles to protect your eyes from flying particles and a dust mask to prevent inhaling any dust.

Use a Center Punch
If you’re drilling into a particularly hard rock, it can be helpful to use a center punch to create a small indentation at the drilling spot. This will help prevent the drill bit from slipping and provide a starting point for drilling.
Choose the Right Drill Bit
Selecting the right drill bit is crucial for drilling into rocks. Use a masonry or carbide-tipped drill bit that is specifically designed for drilling into hard materials. Make sure the drill bit is the appropriate size for your project to ensure clean and accurate holes.
Apply Coolant/Lubricant
To prevent overheating and extend the life of your drill bit, it’s recommended to use a coolant or lubricant while drilling into rocks. Apply a small amount of water or cutting oil to the drilling spot to keep the bit cool and reduce friction.
Monitor Drilling Speed and Pressure
When drilling into rocks, it’s important to maintain a steady drilling speed and apply consistent but moderate pressure. Avoid pushing too hard or drilling too fast, as this can damage the drill bit or cause the rock to crack.
Inspect the Rock Surface
After drilling, inspect the surface of the rock to ensure that the hole is clean and smooth. Remove any remaining debris or dust using a brush or compressed air. This will help ensure that the hole is ready for any further processing or installation.

By following these tips and techniques for preparing the rock surface, you will be well on your way to successfully drilling into rocks for your project.
Using the Correct Drilling Technique
Drilling into rocks can be a challenging task, but by using the correct technique, you can achieve success. Here are some tips to help you drill into rocks effectively:
1. Choose the Right Drill Bit
When drilling into rocks, it is important to select a drill bit that is specifically designed for this task. Look for a masonry or carbide-tipped drill bit, as these are designed to handle the hardness of rocks.
2. Start Slowly
It is important to start drilling slowly and apply gentle pressure to prevent the drill bit from slipping or breaking. Rocks can be unpredictable, so it is crucial to take your time and avoid rushing the drilling process.
3. Use Water as a Lubricant
Using water as a lubricant can help cool down the drill bit and reduce friction, making the drilling process smoother. You can either spray water directly onto the drilling area or dip the drill bit into water periodically.
4. Create a Guide Hole
Creating a guide hole can help you stay on track while drilling into rocks. Start by using a smaller drill bit to create a shallow guide hole, and then switch to a larger drill bit to widen the hole to the desired size.
5. Take Breaks
Drilling into rocks can be physically demanding, so it is important to take breaks to rest and avoid overheating the drill. This will not only help prevent damage to the drill but also allow you to maintain focus and precision.
6. Clean the Hole
After drilling into rocks, it is essential to clean the hole to remove any debris or dust. This can be done using a vacuum cleaner or compressed air. Cleaning the hole will ensure a secure and stable fit for any anchors or screws that you plan to insert.
7. Wear Protective Gear
Lastly, always wear the appropriate protective gear when drilling into rocks. This includes safety goggles to protect your eyes from flying debris, gloves to protect your hands, and earplugs to reduce noise exposure.
By following these tips and using the correct drilling technique, you can successfully drill into rocks and complete your project with ease.
Applying the Right Amount of Pressure
When drilling into rocks, it is important to apply the right amount of pressure to achieve successful results. Too much pressure can cause your drill bit to break or become dull, while too little pressure can cause the drilling process to be slow and inefficient.
1. Start with a lighter pressure
Begin drilling with a lighter pressure to get a feel for the hardness and density of the rock. This will allow you to gradually increase the pressure as needed without causing any damage to the drill bit.
2. Increase pressure gradually

As you get a sense of how the rock is reacting to the drilling, you can gradually increase the amount of pressure you apply. This should be done in small increments to avoid sudden changes that could lead to accidents or damage.
3. Listen to your drill
Pay attention to the sound your drill makes while drilling. If the drill is screeching or struggling, it may be an indication that you are applying too much pressure. Adjust accordingly to avoid any further problems.
4. Let the drill do the work
Instead of forcing the drill into the rock with excessive pressure, let the drill bit and the rotation of the drill do the work. Applying too much pressure can cause the drill bit to skip or jump, resulting in an uneven hole or a broken bit.
5. Use a steady and even pressure
Apply a steady and even pressure throughout the drilling process. This will help maintain control and prevent any sudden jerks that could lead to accidents. Avoid pushing or pulling the drill too forcefully, as this can also cause problems.
6. Take breaks
If you are drilling into a particularly hard or dense rock, it is important to take breaks to prevent overheating of the drill bit. This can help extend the life of the bit and ensure more efficient drilling. Allow the drill bit to cool down before continuing.
By applying the right amount of pressure while drilling into rocks, you can achieve success without damaging your equipment. Remember to start with a lighter pressure, increase gradually, listen to the drill, let the drill do the work, use steady and even pressure, and take breaks when necessary.
Proper Use of Cooling Techniques
Drilling into rocks can generate a significant amount of heat due to the friction between the drill bit and the rock. This heat can cause the drill bit to become dull more quickly and can also damage the rock and surrounding area. To prevent this, it is important to use cooling techniques while drilling into rocks.
1. Water Cooling
One of the most effective cooling techniques for drilling into rocks is using water. Water helps to cool down the drill bit and the rock surface, reducing friction and heat buildup. To use water cooling:
- Fill a spray bottle with water.
- Spray water directly onto the drilling area while drilling.
- Continue spraying water periodically to keep the drill bit and rock surface cool throughout the drilling process.
Note: Be careful not to overuse water, as too much water can wash away necessary lubrication and make the drilling process more difficult.
2. Lubrication
In addition to water cooling, lubrication can also help reduce friction and heat. Lubricants such as oil or grease can be applied to the drill bit or the drilling area to improve the drilling process. It is important to select a lubricant that is compatible with the type of rock being drilled and the drill bit being used.
3. Cooling Breaks
Regardless of the cooling techniques used, it is important to take regular cooling breaks during the drilling process. This allows the drill bit and the rock to cool down and prevents overheating. Take breaks every few minutes or when you notice excessive heat or smoke coming from the drilling area.
4. Safety Precautions
When using cooling techniques, it is essential to prioritize safety. Wear protective gear such as safety goggles to protect your eyes from water or debris that may be generated during drilling. Also, be cautious when handling water and electricity simultaneously to avoid any electrical hazards.
| Cooling Technique | Advantages | Precautions |
|---|---|---|
| Water cooling | Effectively cools down the drill bit and rock surface. | Do not overuse water; can wash away lubrication if used excessively. |
| Lubrication | Reduces friction and heat buildup. | Select a lubricant compatible with the rock and drill bit. |
| Cooling breaks | Allows drill bit and rock to cool down. | Take breaks regularly to prevent overheating. |
By following proper cooling techniques, you can enhance the efficiency and lifespan of your drill bit while ensuring a successful drilling process into rocks.
Dealing with Potential Challenges
Drilling into rocks can be a challenging task due to their hardness and unpredictable nature. However, with the right techniques and tools, you can overcome these challenges and achieve success. Here are some potential challenges you may encounter when drilling into rocks and how to deal with them:
1. Rock Hardness
One of the main challenges when drilling into rocks is their hardness. Rocks vary in hardness, from soft sedimentary rocks to hard igneous and metamorphic rocks. The harder the rock, the more difficult it is to drill into.
To overcome this challenge, it is essential to use a drill bit specifically designed for drilling into rocks. Tungsten carbide-tipped masonry drill bits are the most commonly used for this purpose. These drill bits are harder than rocks and can effectively penetrate most types of rocks.
2. Rock Composition
Another challenge you may face when drilling into rocks is their composition. Different types of rocks have different compositions, and some may contain harder minerals or formations that can make drilling more challenging.
It is important to research and understand the composition of the rock you are drilling into. This can help you choose the right drill bit and drilling technique for the specific rock composition. For example, if the rock contains quartz or other hard minerals, you may need to use a diamond-tipped drill bit for better results.
3. Unpredictable Fracturing
Rocks can be unpredictable when it comes to fracturing. Some rocks may fracture easily with minimal force, while others may require more effort. Additionally, rocks can have hidden cracks and fissures that may affect drilling.
To deal with this challenge, it is essential to start drilling at a slow speed and apply consistent pressure. Gradually increase the drilling speed as you make progress, but be cautious not to apply excessive force that may cause fractures. Using water or a lubricating agent while drilling can also help reduce heat and prevent fractures.
4. Debris and Dust
When drilling into rocks, debris and dust can be generated, which can obstruct the drilling process and affect visibility. The presence of dust can also be harmful to your health if inhaled.
Wearing protective gear such as safety goggles, a dust mask, and gloves is crucial to protect yourself from debris and dust. Additionally, using a wet sponge or a dust extraction system can help control the debris and dust generated during drilling.
5. Equipment Maintenance
Rock drilling can put significant strain on your drilling equipment. The tough nature of rocks can wear down drill bits and other drilling accessories over time.
To deal with this challenge, it is important to regularly inspect and maintain your drilling equipment. Replace worn-out drill bits, lubricate moving parts, and clean out any debris that may accumulate in the drill holes. Proper maintenance will not only help prolong the life of your equipment but also ensure optimal drilling performance.
By being aware of these potential challenges and implementing the appropriate techniques and precautions, you can successfully drill into rocks and achieve your desired results.
Ensuring Safety while Drilling into Rocks
1. Wear Protective Gear
Before you start drilling into rocks, it is important to ensure that you are wearing the appropriate protective gear to keep yourself safe. This includes:
- Safety goggles to protect your eyes from flying debris.
- Earplugs or earmuffs to protect your hearing from the loud noise produced by the drilling process.
- Heavy-duty gloves to protect your hands from sharp edges or hot surfaces.
- A dust mask or respirator to protect your respiratory system from inhaling harmful dust or particles.
2. Choose the Right Drill Bit
Using the correct drill bit can make a significant difference in both your safety and the success of your project. Consider the type of rock you are drilling into and choose a drill bit specifically designed for that material. Diamond-tipped or carbide drill bits are commonly used for drilling into rocks due to their durability and ability to handle hard surfaces.
3. Secure the Rock Properly
Before you begin drilling, it is important to ensure that the rock you are working on is securely placed to prevent any movement or slipping. This can be achieved by using clamps or a vice to firmly hold the rock in place. Make sure the rock is stable and will not move during the drilling process to prevent accidents or injuries.
4. Start with Low Speed and Gentle Pressure
When drilling into rocks, it is important to start with a low speed setting on your drill to avoid causing damage to the drill bit or the rock. Apply gentle pressure and gradually increase the speed as needed. Using excessive force or high speeds can lead to the drill bit getting stuck or breaking, which can be dangerous.
5. Stay Alert and Focused
Drilling into rocks can be a challenging and potentially hazardous task. It is essential to stay alert and focused throughout the drilling process. Avoid distractions and maintain a steady grip on the drill to prevent accidents. If you notice any unusual noises or vibrations, stop drilling immediately and inspect the drill bit and rock for any issues.
6. Keep Children and Pets Away
Make sure to keep children and pets away from the drilling area to ensure their safety. Drilling into rocks can create flying debris or generate loud noises, which can be harmful to those nearby. Create a safe zone around the drilling area and restrict access to ensure the well-being of everyone present.
7. Properly Dispose of Debris
After drilling into rocks, it is important to properly dispose of any debris or waste generated. Rocks may produce dust or small particles that can be harmful if inhaled or ingested. Use a dustpan and brush to clean up the drilling area, and dispose of the debris according to local regulations or guidelines.
8. Seek Professional Assistance if Necessary
If you are unsure about drilling into rocks or if you encounter any difficulties during the drilling process, it is best to seek professional assistance. Professional drillers or contractors have the necessary experience and expertise to handle challenging drilling projects safely and efficiently.
Final Thoughts
In conclusion, drilling into rocks can be a challenging task, but with the right techniques and tips, you can achieve success. Here are some final thoughts to keep in mind:
- Choose the right drill bit: Using a diamond-tipped or carbide bit specifically designed for drilling into rocks will greatly improve your chances of success.
- Start with a pilot hole: Creating a small pilot hole before drilling the larger hole will help guide the drill bit and prevent it from slipping.
- Use the right drilling technique: Applying steady and consistent pressure, using a low speed, and periodically clearing away debris will make the drilling process more effective.
- Be patient: Drilling into rocks can take time, so it’s important to be patient and not rush the process. Allow the drill bit to do the work and let the progress be gradual.
- Take safety precautions: Always wear protective gear such as safety glasses and gloves to prevent injury. Additionally, ensure that the work area is secure and stable.
Remember, practice makes perfect. The more you drill into rocks, the better you will become at it. Don’t get discouraged if you encounter difficulties along the way. With persistence and the right techniques, you’ll be able to successfully drill into rocks and complete your projects with ease.
FAQ:
What are some tips for drilling into rocks?
Some tips for drilling into rocks include: using a hammer drill with a masonry bit, applying steady pressure while drilling, using water to keep the bit cool, and using a slow speed setting on the drill.
What kind of drill bit should I use for drilling into rocks?
You should use a masonry bit specifically designed for drilling into rocks. These bits have a carbide or diamond tip that is able to withstand the hardness of the rocks.
Is it necessary to use water while drilling into rocks?
Using water while drilling into rocks is not necessary, but it can help to prolong the life of the drill bit and keep it cool. Water helps to prevent the bit from overheating and becoming dull.
What can I do if the drill bit gets stuck in the rock?
If the drill bit gets stuck in the rock, you can try applying WD-40 or another lubricant to help loosen it. You can also try reversing the drill to see if it helps to remove the bit. If these methods don’t work, you may need to seek professional help.
Can I use a regular drill for drilling into rocks?
While it is possible to use a regular drill for drilling into rocks, it is not recommended. Rocks are much harder than wood or metal, so a regular drill may not have enough power or the right type of bit to effectively drill into rocks. A hammer drill is usually the best tool for the job.
What should I do if the drilled hole is not deep enough?
If the drilled hole is not deep enough, you can try using a longer drill bit to reach the desired depth. You should also double check that you are using the correct drill bit size for the job. If you are still having trouble, you may need to reposition the hole and start drilling again.
Video:


Meet Harrison Clayton, a distinguished author and home remodeling enthusiast whose expertise in the realm of renovation is second to none. With a passion for transforming houses into inviting homes, Harrison's writing at https://thehuts-eastbourne.co.uk/ brings a breath of fresh inspiration to the world of home improvement. Whether you're looking to revamp a small corner of your abode or embark on a complete home transformation, Harrison's articles provide the essential expertise and creative flair to turn your visions into reality. So, dive into the captivating world of home remodeling with Harrison Clayton and unlock the full potential of your living space with every word he writes.


