How to Drill into a Metal Stud: Step-by-Step Guide

Drilling into a metal stud can be a little more challenging than drilling into wood or drywall, but with the right tools and techniques, you can get the job done. Whether you are hanging a shelf, mounting a television, or installing a new light fixture, drilling into a metal stud is often necessary. In this step-by-step guide, we will walk you through the process of drilling into a metal stud.
Step 1: Gather the necessary tools. To drill into a metal stud, you will need a drill with a high-quality metal drill bit, a stud finder, a pencil, and a level. It is important to use a drill bit that is specifically designed for metal, as regular wood or drywall drill bits may become damaged or break when drilling into metal.
Step 2: Locate the position of the metal stud. Use a stud finder to locate the position of the metal stud in the wall. Once you have found the stud, mark its edges with a pencil. Make sure to also mark the desired location where you want to drill into the stud.
Step 3: Measure and mark the drilling spot. Use a level to draw a straight line on the wall, connecting the two marked edges of the stud. This will ensure that your drilling spot is accurate and level.
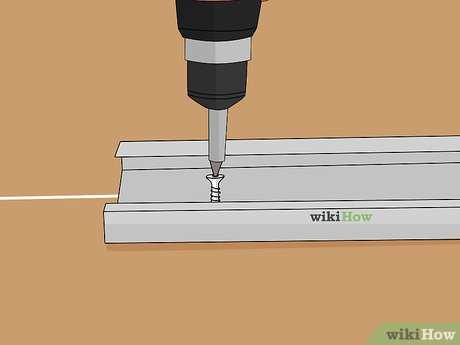
Step 4: Begin drilling. Start your drill at a low speed and gradually increase the speed as you penetrate the metal stud. Apply gentle pressure as you drill, but be careful not to push too hard, as this could cause the drill bit to break or become damaged.

Step 5: Clean up and secure your fixture. Once the hole is drilled, remove any metal shavings or debris from the area. You can use a vacuum or a damp cloth to clean up the mess. Finally, secure your fixture or mount into the hole, following the manufacturer’s instructions.
By following these steps, you can successfully drill into a metal stud and securely mount your fixtures or hang your items. Remember to always exercise caution and wear protective eyewear when working with power tools.
Preparing for the Drill
Before you begin drilling into a metal stud, it’s important to gather the necessary tools and materials to ensure a successful and safe drilling process. Here are the steps you need to take to prepare for the drill:
- Tools and Materials: Make sure you have the following tools and materials ready:
- Drill machine
- Drill bit suitable for metal
- Marker or pencil
- Tape measure
- Protective eyewear
- Locate the Stud: Use a stud finder or a magnet to locate the metal stud behind the wall. You can also try tapping the wall lightly to find the solid sounds indicating a stud.
- Measure and Mark: Once you have located the stud, measure and mark the exact spot where you want to drill. Use a pencil or a marker to make a small mark on the surface.
- Clear the Area: Clear the area surrounding the marked spot to ensure there are no obstructions or obstacles that may interfere with the drilling process. This will help prevent accidents or damage to the wall.
- Put on Protective Eyewear: Before you start drilling, make sure to put on protective eyewear to keep your eyes safe from any debris or sparks that may be produced during the drilling process.
By following these steps and properly preparing for the drill, you will be ready to start drilling into the metal stud with confidence and precision.
Tools and materials

Before you start drilling into a metal stud, it is important to gather the necessary tools and materials. Here is a list of what you will need:
Tools:
- Power drill
- Drill bits (recommended: high-speed steel or cobalt bits)
- Hammer
- Tape measure
- Pencil or marker
- Level
- Wrench or pliers (to secure drill bits)
Materials:
- Metal stud
- Mounting hardware (screws, anchors, or toggle bolts)
It is important to use the correct tools and materials to ensure a successful and safe drilling process. The power drill, drill bits, hammer, and tape measure are essential for drilling into the metal stud. The pencil or marker will be used to mark the drilling points, while the level will help ensure that the holes are straight and aligned. A wrench or pliers may be needed to secure the drill bits in the drill.
In addition to the tools, you will also need the metal stud itself and the appropriate mounting hardware. The type of mounting hardware will depend on the weight and size of the object you are planning to hang on the metal stud. Screws, anchors, or toggle bolts are commonly used for this purpose. Make sure to choose the appropriate size and type of mounting hardware to ensure a secure installation.
Identifying the stud
Before you start drilling into a metal stud, it is important to locate and identify its exact position on the wall. This will help you ensure that you are drilling into a solid area of the stud, rather than a hollow section.

Here are some methods you can use to identify a metal stud:
- Magnet test: Metal studs are typically made of steel, which is magnetic. By using a strong magnet, you can run it along the wall to locate the studs. The magnet will be attracted to the metal stud and stick to it.
- Visual inspection: Metal studs usually have a distinctive shape and appearance. They are often C-shaped and have small holes or indentations along the edges. Look closely at the wall and try to identify any signs of these metal studs.
- Tapping: Gently tap the wall with a hammer or your knuckles. If you hear a hollow sound, it is likely that you have found an empty section of the wall. However, if you hear a solid sound, it indicates the presence of a stud.
- Using a stud finder: A stud finder is a device specifically designed to locate studs behind walls. It uses electronic sensors to detect changes in density and can accurately identify the position of a stud.
Once you have identified the metal stud, you can proceed with the drilling process confidently, knowing that you are targeting a solid and secure area of the wall.
Choosing the Right Drill Bit
When drilling into a metal stud, it’s important to use the right drill bit to ensure clean and accurate holes. Here are some factors to consider when choosing the right drill bit for the job:
- Material: Drill bits are made from various materials, including high-speed steel (HSS), cobalt, and carbide. For drilling into metal studs, HSS drill bits are commonly used due to their durability and ability to withstand high heat.
- Diameter: The diameter of the drill bit depends on the size of the hole you need to create. Measure the diameter of the screws or anchors you’ll be using and choose a drill bit that is slightly larger to provide enough space for easy installation.
- Point Angle: The point angle of the drill bit determines how well it bites into the metal. For drilling into metal studs, a drill bit with a point angle of 135 degrees is recommended as it provides better control and minimizes the risk of the bit slipping off the surface.
- Coating: Some drill bits come with coatings that improve their performance in specific applications. For drilling into metal studs, look for drill bits with a titanium nitride (TiN) coating, as it helps reduce friction and extends the life of the bit.
- Flute Design: The flute design of the drill bit affects the chip evacuation during drilling. For metal stud applications, drill bits with twist or spiral flute designs are commonly used, as they allow for smoother chip removal and reduce the risk of clogging.
Before starting the drilling process, it’s essential to wear safety glasses to protect your eyes from flying debris. Additionally, always follow the manufacturer’s instructions and recommendations for the specific drill bit you’re using.
Understanding metal drill bits
Metal drill bits are specifically designed to drill into metal surfaces and are made from materials that can withstand the hardness of metal. They are essential tools for any DIY enthusiast or professional who works with metal regularly.

Types of metal drill bits
There are several types of metal drill bits available, each designed for specific purposes. Here are some common types to consider:
- High-speed steel (HSS) drill bits: These are the most common type of metal drill bits and are suitable for drilling into various metals, including steel, aluminum, and copper. HSS drill bits are versatile and can be used for general drilling tasks.
- Cobalt drill bits: Cobalt drill bits are made from a combination of cobalt and steel. They are more durable and can withstand higher temperatures than standard HSS drill bits. Cobalt drill bits are ideal for drilling into hard metals, such as stainless steel and cast iron.
- Titanium drill bits: Titanium drill bits have a coating of titanium nitride, which makes them more resistant to heat and friction. They are suitable for drilling into metal, as well as wood and plastic. Titanium drill bits are known for their long lifespan.
- Carbide drill bits: Carbide drill bits are the most durable and can easily handle the hardest metals, including hardened steel and cast iron. They are made from a combination of carbide and cobalt and are excellent for high-speed drilling applications.
Choosing the right metal drill bit
When selecting a metal drill bit, you need to consider the type of metal you will be drilling into, as well as the size and depth of the hole you require. Here are some factors to keep in mind:
- Material compatibility: Ensure that the drill bit you choose is suitable for the type of metal you are working with. Different metals have different hardness levels, and using the wrong drill bit can result in inefficiency or damage.
- Size and length: Determine the diameter and length of the hole you need to drill and select a drill bit that matches those specifications. Using a drill bit that is too small or too large can affect the performance of your drilling.
- Coating: Consider drill bits with specialized coatings, such as titanium, if you anticipate drilling into different materials or require increased durability.
- Speed and feed rates: Consult the manufacturer’s recommendations for the appropriate speed and feed rates when drilling different metals. This will help prevent overheating and ensure optimal drilling performance.
Remember to always wear appropriate safety gear, such as goggles and gloves, when drilling into metal surfaces. Follow the manufacturer’s instructions and guidelines for your specific drill bits to ensure safe and effective drilling.
Selecting the appropriate size
When drilling into a metal stud, it is important to select the appropriate size drill bit. Using the wrong size can lead to a weak or unstable fastening, or even damage the stud itself.

Step 1: Determine the material of the metal stud. Metal studs are typically made from steel or aluminum, and different materials may require different drill bit sizes.
Step 2: Consult the manufacturer’s guidelines. Some metal studs come with specific recommendations for drill bit sizes to use. Be sure to check the guidelines before proceeding.
Step 3: As a general guideline, a 1/8-inch (3mm) drill bit is typically suitable for drilling into a metal stud. However, this may vary depending on the thickness of the stud and the type of fastener being used.
Step 4: If you are unsure about the appropriate drill bit size, it is recommended to start with a smaller drill bit and test the hole before proceeding. This will help ensure that the hole is the right size and prevent any potential damage to the stud.
Step 5: Finally, always keep a few different sizes of drill bits on hand to accommodate different types of metal studs and fasteners. This will allow you to select the most appropriate size for any given project.
By selecting the appropriate drill bit size, you can ensure a secure and stable installation when drilling into a metal stud.
Drilling into the Metal Stud
When it comes to drilling into a metal stud, there are a few important steps you should follow to ensure success:
- Locate the stud: Use a stud finder to locate the metal stud you want to drill into. Make sure to mark the location with a pencil or tape.
- Gather the right tools: To drill into a metal stud, you will need the following tools: a power drill, a drill bit suitable for metal, a screwdriver bit, and safety goggles.
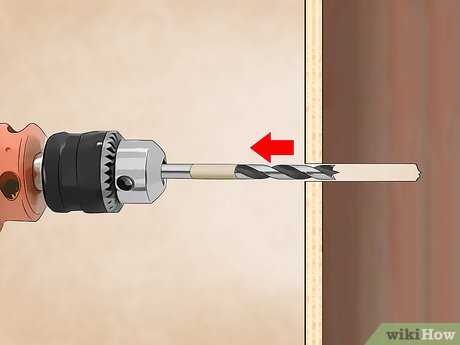
- Prepare the drill: Attach the appropriate drill bit for metal to your power drill. Make sure it is securely fastened.
- Put on safety goggles: Before you start drilling, put on a pair of safety goggles to protect your eyes from any flying debris.
- Drill a pilot hole: Start by drilling a pilot hole into the metal stud. Apply steady pressure and let the drill do the work. Take care not to push too hard, as this could cause damage to the stud or the drill bit.
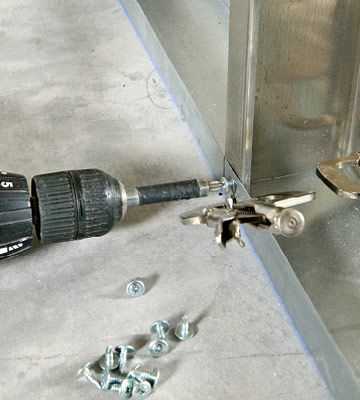
- Switch to a screwdriver bit: Once you have drilled the pilot hole, remove the drill bit and replace it with a screwdriver bit.
- Drive the screw: Insert the screw into the pilot hole and use your power drill to drive it into the metal stud. Apply steady pressure, but be careful not to overtighten the screw, as this could strip the hole or damage the stud.
- Repeat if necessary: If you need to drill additional holes into the metal stud, repeat the process outlined above.
Remember to always wear proper safety gear and take your time when drilling into a metal stud. With the right tools and a careful approach, you can successfully drill into a metal stud without causing any damage.
Marking the drilling spot
Before you begin drilling, it’s crucial to mark the exact spot where you want to drill into the metal stud. This will help ensure accuracy and prevent any unnecessary damage or mistakes.
Here’s how you can mark the drilling spot:
- Use a pencil or marker to make a small mark on the metal stud where you want to drill.
- Measure the distance from the edge of the metal stud to the spot where you want to drill. This will help you determine the precise location for drilling.
- Double-check your measurements and mark the spot again to confirm the accuracy.
Tip: It’s a good practice to use a stud finder to locate the metal stud before marking the drilling spot. This will ensure that you drill into a secure and stable area.
Once you have marked the drilling spot, you are ready to proceed with drilling into the metal stud.
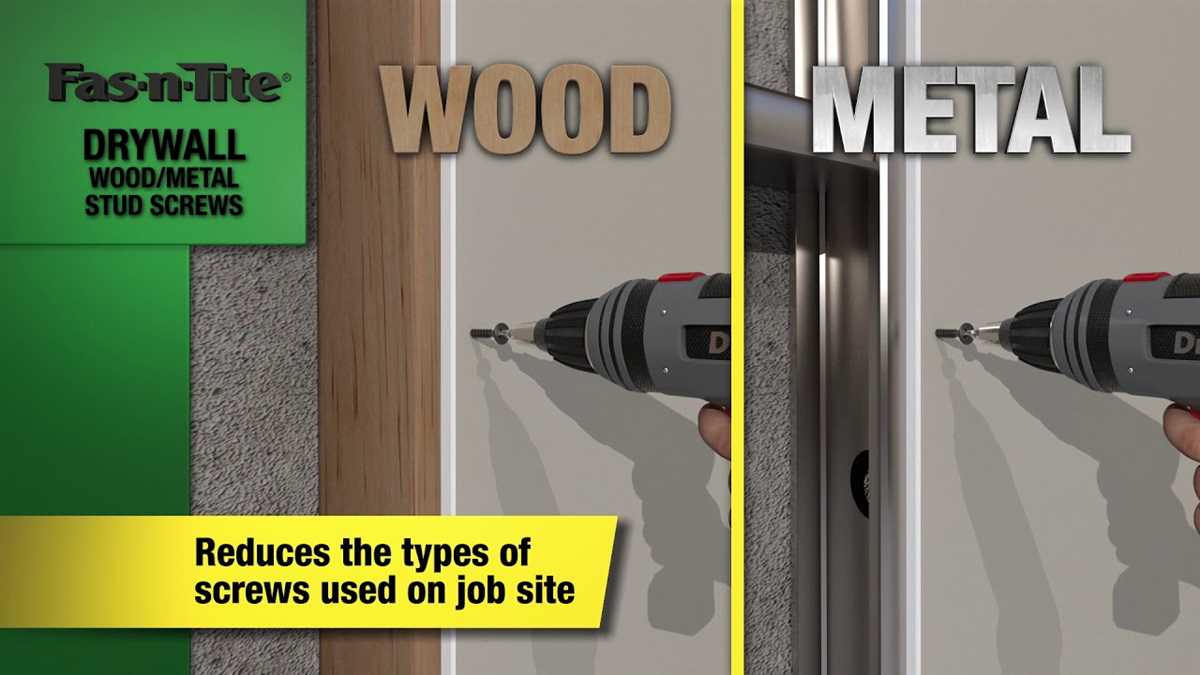
Using the correct drill technique
Drilling into a metal stud requires a different technique compared to drilling into wood or drywall. Here are the steps you need to follow to ensure you drill into a metal stud correctly:
1. Prepare the necessary materials:
- A power drill with adjustable speed
- A drill bit suitable for drilling through metal
- Safety goggles
2. Locate the position where you want to drill:
Use a stud finder or any other suitable method to locate the metal stud. Mark the position with a pencil or masking tape.
3. Choose the correct drill bit:
Make sure you select a drill bit specifically designed for metal. High-speed steel (HSS) or cobalt drill bits are commonly used for this purpose.
4. Put on safety goggles:
Protect your eyes from any debris or sparks that may occur during the drilling process by wearing safety goggles.
5. Adjust the drill speed:
Set your drill to a medium-low speed. This will help prevent the bit from overheating and ensure smooth drilling.
6. Apply firm pressure:
Hold the drill with a steady grip and apply firm pressure while drilling into the metal stud. This will help the bit penetrate the metal more effectively.
7. Start drilling:
Position the drill bit on the marked spot and start drilling slowly. Maintain a steady and consistent pressure throughout the drilling process.
8. Use lubrication (optional):
If you encounter resistance or the drill bit starts to overheat, you can use a lubricant such as cutting oil or WD-40 to reduce friction and keep the drilling smooth.
9. Secure the hole:
After you have drilled through the metal stud, you can insert a screw, anchor, or fastener into the hole to secure any objects or fixtures you want to hang on the stud.
Following these steps will help you drill into a metal stud safely and efficiently. Remember to always prioritize safety and take the necessary precautions when using power tools.
Troubleshooting
Problem: Drill bit is not making progress
If the drill bit is not making any progress while drilling into a metal stud, there are a few potential issues to consider:
- Dull drill bit: Check if the drill bit is dull or damaged. Replace it with a sharp, high-quality drill bit suitable for drilling metal.
- Incorrect drill speed: Make sure you are using the appropriate drill speed for metal drilling. Too low of a speed can cause the drill bit to get stuck, while too high of a speed can cause overheating.
- Insufficient pressure: Apply firm and steady pressure while drilling into the metal stud. If you press too lightly, the drill bit may slip or not make progress.
- Wrong drilling technique: Ensure you are drilling straight into the metal stud. Tilting the drill can cause the bit to catch and not drill properly.
Problem: Drill bit is breaking or bending
If the drill bit is breaking or bending while drilling into a metal stud, try the following troubleshooting steps:
- Use a stronger drill bit: Opt for a drill bit made of high-speed steel or cobalt, as they are sturdier and more suitable for drilling metal.
- Reduce drilling speed: Lower the drill speed to prevent excessive pressure and stress on the drill bit.
- Apply cutting lubricant: Apply a cutting lubricant or drilling oil to reduce friction and heat build-up, which can contribute to breakage.
- Inspect the drill bit: Check the drill bit for any defects or signs of wear. Replace it if necessary.
Problem: Drill bit is getting stuck
If the drill bit is getting stuck in the metal stud, try these troubleshooting tips:
- Increase pressure: Apply more pressure while drilling, but be careful not to apply excessive force that may cause the drill bit to break.
- Use a pilot hole: Start by drilling a small pilot hole using a smaller drill bit. This can help guide the larger drill bit and prevent it from getting stuck.
- Clear debris: Periodically remove any metal shavings or debris from the hole to prevent it from obstructing the progress of the drill bit.
- Try a different drill bit: If the drill bit keeps getting stuck, switch to a different type or size of drill bit that may be more suitable for the material and task.
Problem: Drilled hole is off-center
If the drilled hole in the metal stud is off-center, these troubleshooting steps may help:
- Mark the center: Use a center punch to mark the exact center of the hole before drilling. This can serve as a guide for keeping the drill bit centered.
- Start with a smaller hole: Begin with a smaller drill bit to create a pilot hole, then enlarge it gradually while keeping the drill bit centered.
- Hold the drill steady: Ensure that the drill is held firmly and perpendicular to the metal stud to maintain a centered hole.
- Practice drilling technique: Drill into a scrap piece of metal or practice on a less important area of the stud to improve your drilling accuracy.
FAQ:
What tools do I need to drill into a metal stud?
To drill into a metal stud, you will need the following tools: a power drill, drill bits suitable for metal, a stud finder, a pencil or marker, safety glasses, and a vacuum or brush for cleanup.
Can I use a regular drill bit to drill into a metal stud?
No, you cannot use a regular drill bit to drill into a metal stud. You need to use drill bits specifically designed for metal, as they have a different type of cutting edge that can handle the hardness and toughness of metal.
Where can I find a stud finder?
You can find a stud finder at most hardware stores or online retailers. They are relatively inexpensive and come in various types, such as magnetic stud finders, electronic stud finders, and even smartphone apps that use the phone’s magnetometer.
What precautions should I take before drilling into a metal stud?
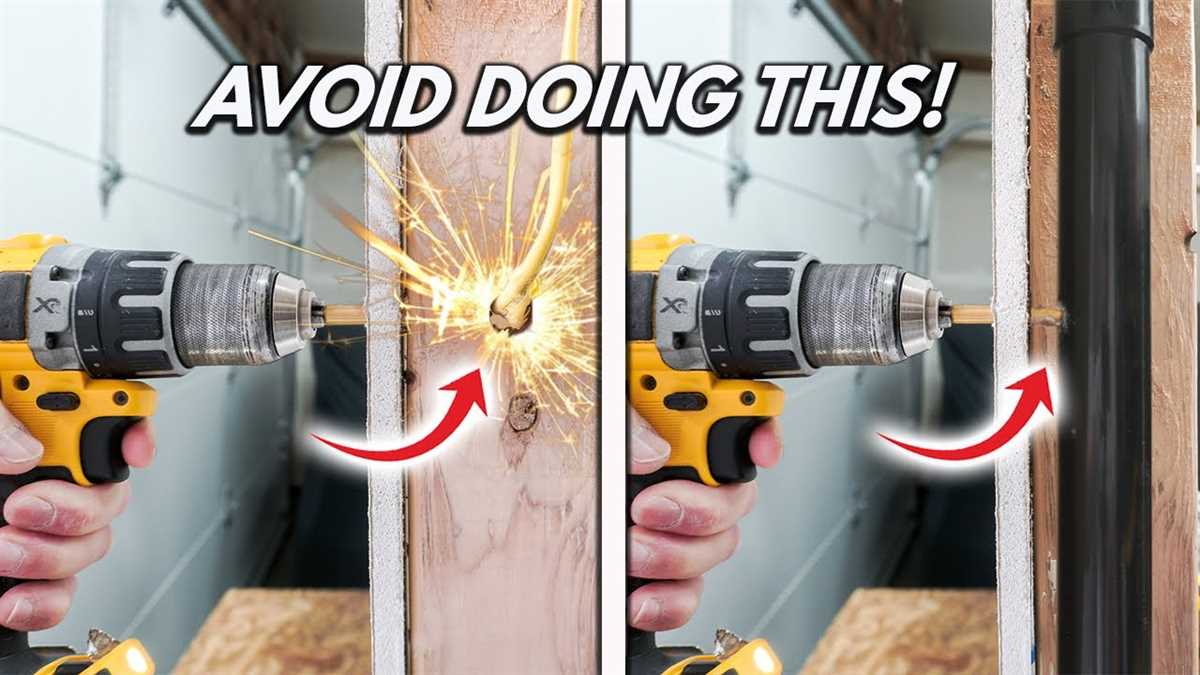
Before drilling into a metal stud, it is important to wear safety glasses to protect your eyes from any metal shavings or debris. Make sure that the area around the stud is clear of any furniture or other obstacles, and use a stud finder to locate the exact position of the stud to avoid hitting any electrical wires or plumbing pipes.
Should I use a low or high drill speed when drilling into a metal stud?
When drilling into a metal stud, it is generally recommended to use a low drill speed. This helps to prevent overheating of the drill bit and reduces the likelihood of the bit getting stuck or breaking. However, if you are using a carbide-tipped drill bit, you may be able to use a higher drill speed.
What should I do with the metal shavings after drilling into a metal stud?
After drilling into a metal stud, it is important to clean up the metal shavings to prevent any injuries or damage. You can use a vacuum cleaner with a brush attachment to suck up the shavings, or you can simply brush them away using a stiff brush. Make sure to dispose of the shavings properly, as they can be sharp and pose a safety hazard.
Can I use a regular pencil to mark the drilling spot on a metal stud?
While you can use a regular pencil to mark the drilling spot on a metal stud, it is generally recommended to use a marker or a permanent marker. This is because the markings made by a pencil may be faint and difficult to see on the metal surface, especially if it is painted or coated.
Video:

How to say peugeot
Meet Harrison Clayton, a distinguished author and home remodeling enthusiast whose expertise in the realm of renovation is second to none. With a passion for transforming houses into inviting homes, Harrison's writing at https://thehuts-eastbourne.co.uk/ brings a breath of fresh inspiration to the world of home improvement. Whether you're looking to revamp a small corner of your abode or embark on a complete home transformation, Harrison's articles provide the essential expertise and creative flair to turn your visions into reality. So, dive into the captivating world of home remodeling with Harrison Clayton and unlock the full potential of your living space with every word he writes.


