How to Drill Holes in Seashells: Step-by-Step Guide

If you’re a collector of seashells or enjoy creating unique jewelry or home decor, knowing how to drill holes in seashells can open up a whole new world of possibilities. Whether you’re looking to string seashells onto a necklace, create delicate wind chimes, or add a decorative touch to a craft project, drilling holes in seashells is a simple process that can be done with the right tools and a little bit of patience.
First, it’s important to gather all the necessary tools and materials. You will need a handheld power drill, preferably with variable speeds, a small diamond tip drill bit, a small piece of wood or cork, safety goggles, and a container filled with water. The water will act as a coolant, preventing the seashell from overheating or cracking during the drilling process. Make sure you wear your safety goggles throughout the entire process to protect your eyes from any flying debris.
Next, choose the seashell you want to drill a hole in. It’s important to pick a seashell that is thick enough and strong enough to withstand the drilling process without breaking. Hold the shell firmly in your hand or place it on a piece of wood or cork to stabilize it. Then, using your handheld power drill with the diamond tip drill bit, gently place the tip of the drill bit on the spot where you want the hole to be.
Preparing the Tools
Before you begin drilling holes in seashells, it’s important to gather and prepare all the necessary tools. Here are the tools you’ll need:
- Seashells – Choose a variety of seashells in different sizes and shapes for your crafting project.
- Drill – Use a small handheld drill with a diamond- or carbide-tipped drill bit.
- Clamp – Secure the seashells in place with a clamp to prevent them from moving while you drill.
- Safety Glasses – Protect your eyes from flying shell fragments by wearing safety glasses.
- Mask – Wear a mask to prevent inhaling dust or shell particles while drilling.
- Gloves – Use gloves to protect your hands from sharp edges or shell fragments.
- Water Container – Keep a container of water nearby to lubricate the drill bit and cool down the seashell during drilling.
- Marker – Use a marker to mark the spot where you want to drill the hole on the seashell.
- Ruler – Measure and mark the exact location for drilling using a ruler for precise results.
- Sanding Paper – Smooth the edges of the drilled holes with sanding paper to eliminate any roughness or sharpness.
Once you have gathered all the necessary tools, you are ready to move on to the next step: preparing the seashells.

Choosing the Right Drill Bit
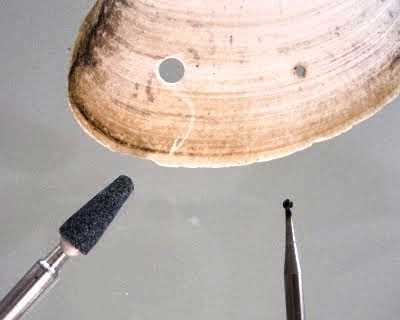
When it comes to drilling holes in seashells, using the right drill bit is essential. The type of shell and the size of the hole you want to create will determine the best drill bit to use. Here are some factors to consider when choosing a drill bit:
- Material of the Shell: Seashells come in different types of materials, such as conch, clam, or abalone. Some shells are softer while others are harder. It is important to choose a drill bit that is suitable for the specific material of the shell you are working with.
- Size of the Hole: Consider the diameter of the hole you want to create. Drill bits come in various sizes, so make sure to select one that matches the size of the hole you need. It is always better to start with a smaller bit and gradually increase the size if needed.
- Drill Bit Material: Drill bits can be made of different materials, such as steel, titanium, or carbide. Each material has its own characteristics and durability. Depending on the shell material and the number of holes you plan to drill, you may opt for a specific drill bit material that offers better performance and longevity.
It is recommended to have a variety of drill bits on hand so that you can choose the most suitable one depending on the specific seashell and hole size. Remember to always wear protective goggles and work in a well-ventilated area when drilling holes in seashells. With the right drill bit, you can create beautiful shell crafts and jewelry with ease.
Marking the Drill Location
Before you start drilling, it’s important to mark the exact location where you want to drill the hole in the seashell. This will help ensure that the hole is placed correctly and that it aligns with your intended design or purpose.
Materials:
- Seashell
- Pencil or marker
- Ruler or measuring tape
Steps:

- Choose the seashell you want to drill a hole in. Make sure it is clean and free of any sand, dirt, or debris.
- Decide where you want to place the hole. Consider the size and shape of the seashell, as well as the intended use of the drilled hole. For example, if you plan to use the seashell as a pendant, you may want to place the hole near the top for attaching a chain or cord.
- Using a ruler or measuring tape, measure and mark the desired location on the seashell with a pencil or marker. Make sure the mark is clear and visible.
- Double-check the placement of the mark to ensure it is where you want the hole to be drilled. Adjust if necessary.
Note: It’s important to be precise when marking the drill location, as any mistakes or inaccuracies may result in a misplaced or uneven hole.
Tips:
- Make multiple marks or dots if you want to drill multiple holes in the seashell.
- Practice on a spare seashell or a similar material before drilling into your desired seashell to familiarize yourself with the drilling process and ensure you are comfortable with it.
Once you have marked the drill location on your seashell, you are ready to proceed to the next step: Drilling the Hole.
Securing the Seashell
Before drilling a hole in a seashell, it is important to properly secure the shell to ensure stability and prevent damage. Here are the steps to follow:

- Choose a method for securing the seashell. There are several options available, including using a vise, a clamp, or a rubber grip.
- If using a vise or a clamp, make sure it is securely attached to a stable surface, such as a workbench or table. This will help provide support and prevent the shell from moving during drilling.
- If using a rubber grip, ensure that it is firmly holding the seashell in place. The rubber grip should provide enough friction to prevent slipping while drilling.
- Place the seashell in the selected securing method, making sure it is positioned in a way that allows easy access to the area you wish to drill.
- Double-check that the seashell is tightly secured and stable before proceeding with the drilling process.
Securing the seashell properly is essential to ensure safety and produce clean, accurate holes. Take the time to choose the appropriate securing method and ensure its stability before drilling.
Drilling the Pilot Hole
Before drilling the actual hole in the seashell, it is essential to create a pilot hole. The pilot hole helps in guiding the drill bit and prevents the shell from cracking or chipping.
- Choose the appropriate drill bit: Use a carbide or diamond-tipped drill bit for drilling into seashells. These types of drill bits are hard and durable, and they can effectively penetrate the tough shell material without breaking.
- Prepare the drill: Insert the chosen drill bit into the drill chuck and tighten it securely. Make sure the drill is set to a low speed to prevent the shell from splintering or cracking.
- Mark the spot: Use a pencil or a marker to mark the exact spot on the seashell where you want to drill the hole.
- Secure the seashell: Place the seashell on a stable surface or use a clamp to hold it securely. This will prevent the shell from moving or spinning while drilling.
- Drill the pilot hole: Position the drill bit tip directly on the marked spot on the seashell. Apply gentle pressure, and start drilling slowly. Keep the drill perpendicular to the shell’s surface to ensure a straight pilot hole.
- Apply water or lubricant: To prevent overheating and damage to the shell, periodically apply a small amount of water or lubricant to the drill bit and the drilling location.
- Check the progress: After drilling for a short period, pull the drill bit out slightly to remove any shell debris. This will allow you to check the size and depth of the pilot hole.
- Continue drilling: If the pilot hole is satisfactory, continue drilling until you reach the desired depth. Take breaks if the drill bit or the shell becomes overheated.
Once the pilot hole is completed, you can proceed to enlarge it to the desired size or shape using larger drill bits, files, or abrasive tools. Remember to handle the seashell with care and take necessary safety precautions while drilling to avoid any injuries.
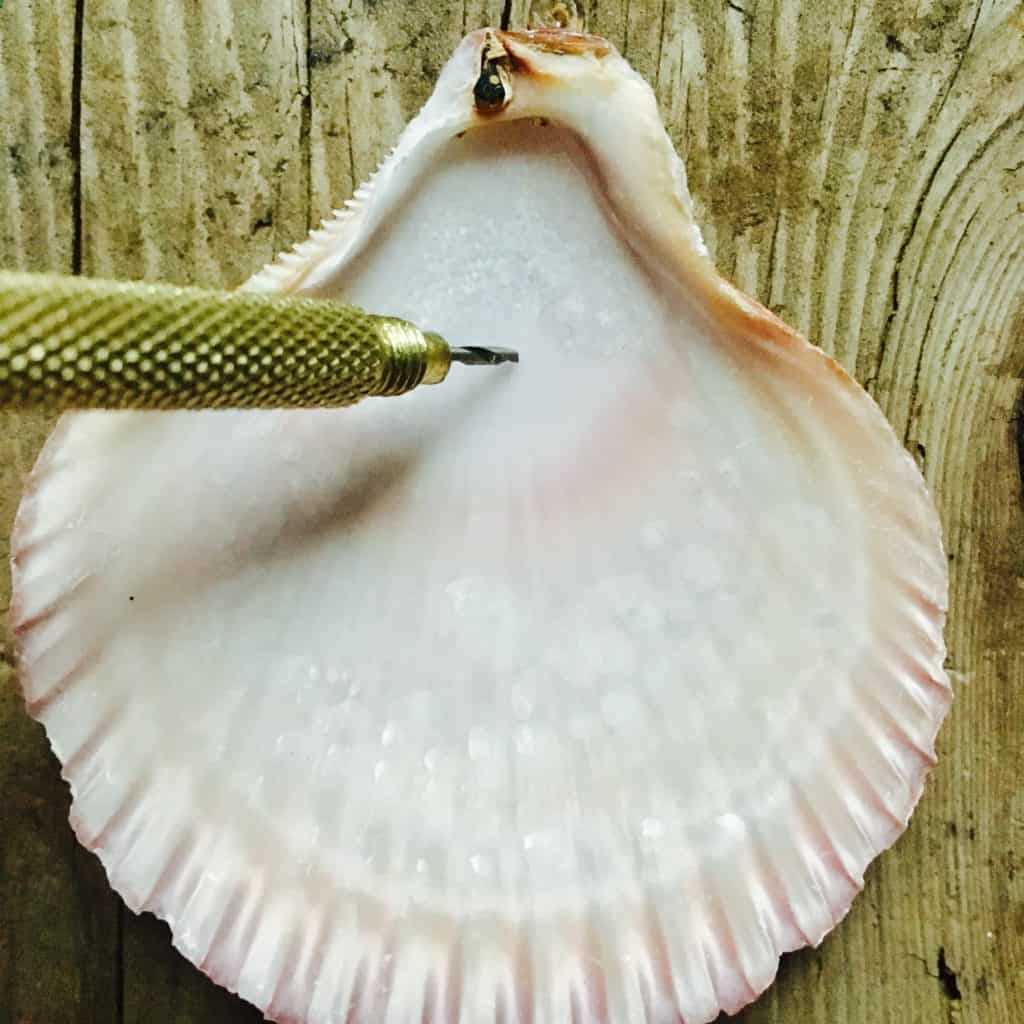
Drilling the Final Hole
Step 1: Prepare your work area
Before drilling the final hole in your seashell, it’s important to set up a suitable work area. Lay down a piece of newspaper or a drop cloth to catch any shell fragments or debris. Place your seashell securely on the work surface to ensure it doesn’t move or roll around while drilling.
Step 2: Choose the right drill bit
For drilling the final hole in a seashell, it’s recommended to use a small diamond drill bit. The diamond drill bit will provide a clean and precise hole without damaging the seashell. Ensure that the drill bit you select is compatible with your drill.

Step 3: Mark the spot
Use a pencil or a marker to mark the spot where you want to drill the final hole. Make sure the mark is clear and visible, as this will guide your drilling.
Step 4: Start drilling
Put on your safety goggles and gloves before proceeding with the drilling. Start the drill at a slow speed and position the drill bit on the marked spot. Apply gentle pressure and slowly increase the speed as you drill. Take care not to apply too much pressure or drill too quickly, as this could cause the shell to crack.
Step 5: Clean and finish
Once you have drilled through the seashell, turn off the drill and carefully remove the shell from the drill bit. Inspect the hole to ensure it is clean and free of any debris. If needed, use a small brush or compressed air to clean out any remaining shell fragments.
Step 6: Sand the edges
Using a fine-grit sandpaper or a sanding block, gently sand the edges of the drilled hole to smooth out any roughness or sharp edges. This will prevent the shell from chipping or scratching you or any other surfaces.
Step 7: Final touches

Inspect your drilled seashell for any imperfections or rough spots. If necessary, you can use a polishing cloth or a dab of clear nail polish to give the hole a smooth and polished finish. Allow it to dry completely before handling or using the seashell for any crafts or jewelry.
Remember to always take your time and be patient when drilling a seashell. With a steady hand and the right tools, you can create beautiful and functional holes in your seashells.
Removing the Dust
After drilling a hole in the seashell, it is important to remove any dust or debris that may be left behind. This will ensure that the hole is clean and ready for any crafting or jewelry-making purposes.
Here are some steps to effectively remove the dust from the drilled seashell:
- Blow – Gently blow on the seashell to remove any loose dust particles. This can help clear away the majority of the dust before proceeding to the next step.
- Brush – Use a soft-bristled brush or a toothbrush to brush away any remaining dust. Make sure to brush gently to avoid damaging the fragile seashell.
- Rinse – Rinse the seashell under lukewarm water to wash away any remaining dust. Use your hands to gently rub the shell and remove any stubborn particles. Pat the seashell dry with a towel afterward.
- Air dry – Allow the seashell to air dry completely before using it for any craft or jewelry projects. Placing the shell in direct sunlight or using a hairdryer may cause it to become brittle and fragile.
It is important to note that while these steps can help remove dust from the seashell, they may not completely clean the inner part of the drilled hole. If desired, you can use a cotton swab or a small pipe cleaner to carefully clean the inside of the hole.
By following these steps, you can ensure that your drilled seashells are clean and ready to be used in various creative projects!
Finishing Touches
Once you have drilled the holes in your seashells, it’s time to add some finishing touches to make them even more beautiful. Here are a few ideas to enhance your seashell crafts:
1. Cleaning the Shells
Before you start decorating, make sure your seashells are clean and free from any dirt or debris. You can gently rinse them with water and let them air dry.
2. Sanding the Edges
If the edges of your drilled holes are rough or sharp, you can sand them down using fine-grit sandpaper. This will give your shells a smoother finish and make them safer to handle.
3. Painting or Dyeing
If you want to add some color to your seashells, you can paint them with acrylic paints or dye them with fabric dyes. Use a small brush or sponge for more precise application and let them dry completely before handling.
4. Adding Beads or Charms
To create a more elaborate design, you can string beads or charms onto your seashell crafts. You can either attach them to the drilled holes or use jewelry wire to create beautiful patterns.
5. Shell Arrangements
Display your seashells in a creative way by arranging them in a decorative bowl or vase. You can also glue them onto picture frames, mirrors, or wooden plaques for a unique coastal decor.
6. Sealing the Surface
If you want to protect your seashells and make them more durable, you can apply a clear sealant or varnish to the surface. This will help prevent discoloration and keep them looking beautiful for longer.
7. Accessories and Jewelry
If you’re feeling crafty, you can turn your drilled seashells into accessories and jewelry. Attach them to earring hooks, bracelet chains, or necklace cords to create one-of-a-kind pieces.
8. Creative Ideas
Get creative and think outside the box! Incorporate seashells into other crafts, such as candle holders, wind chimes, or mobiles. The possibilities are endless!
Remember to let your imagination run wild and have fun with your seashell crafts!
FAQ:
What tools do I need to drill holes in seashells?
You will need a rotary tool with a diamond-tipped drill bit, water, and safety goggles.
Can I use any type of seashell?
Yes, you can use any type of seashell for drilling holes. However, it is important to make sure the shell is sturdy enough to withstand the drilling process.
How do I prevent the seashell from cracking while drilling?
To prevent the seashell from cracking, you should start drilling at a slow speed and apply a gentle, even pressure. It is also helpful to keep the shell submerged in water while drilling to prevent overheating.
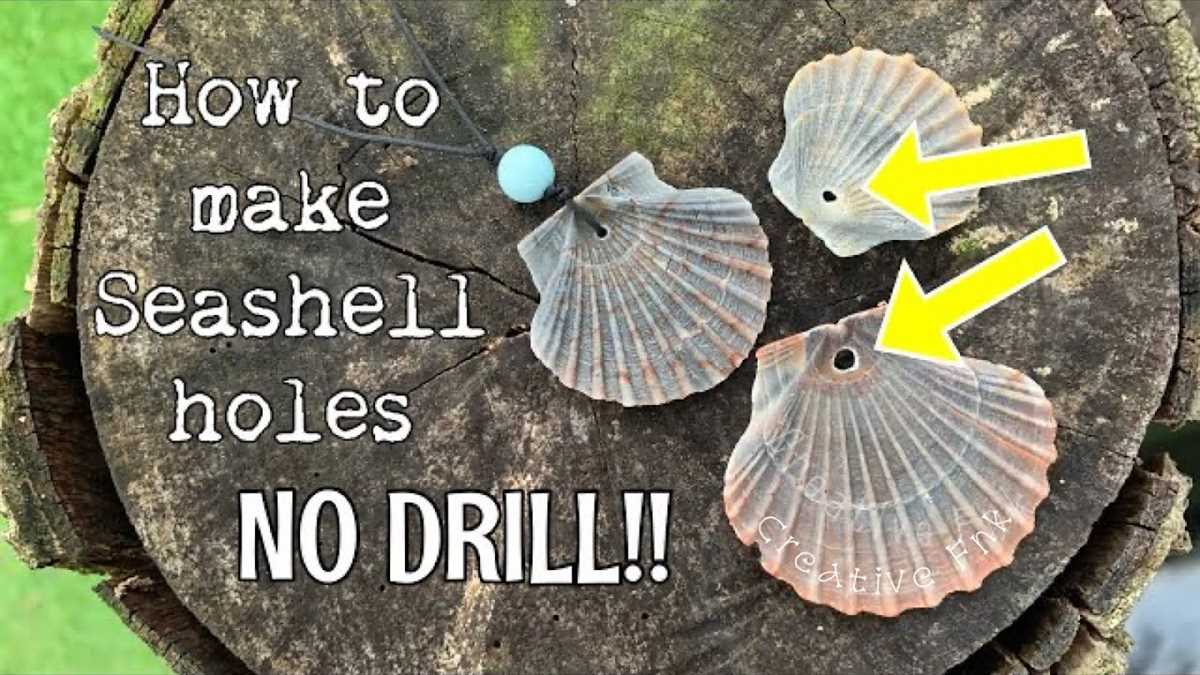
What can I do with seashells after drilling holes in them?
There are many creative ways to use seashells with drilled holes. You can use them to make jewelry, wind chimes, or decorative mobiles. You can also string them together to create a unique garland or curtain.
Do I need any special skills to drill holes in seashells?
No, drilling holes in seashells is a relatively simple process that can be done by anyone. However, it is important to exercise caution and follow the proper safety precautions to avoid injury.
Video:


Meet Harrison Clayton, a distinguished author and home remodeling enthusiast whose expertise in the realm of renovation is second to none. With a passion for transforming houses into inviting homes, Harrison's writing at https://thehuts-eastbourne.co.uk/ brings a breath of fresh inspiration to the world of home improvement. Whether you're looking to revamp a small corner of your abode or embark on a complete home transformation, Harrison's articles provide the essential expertise and creative flair to turn your visions into reality. So, dive into the captivating world of home remodeling with Harrison Clayton and unlock the full potential of your living space with every word he writes.


