How to Drill Holes in Gemstones for Jewelry: A Step-by-Step Guide
Gemstones are beautiful and versatile materials that can be used in a variety of jewelry designs. Whether you’re a professional jeweler or a DIY enthusiast, learning how to drill holes in gemstones is a valuable skill that opens up a world of new possibilities for creating unique and personalized jewelry pieces.
Drilling holes in gemstones requires careful precision and the right tools. In this step-by-step guide, we will walk you through the process of drilling holes in gemstones, from choosing the right gemstone and tools to ensuring a clean and accurate result. Follow these steps to add holes to your gemstones and take your jewelry-making to the next level.
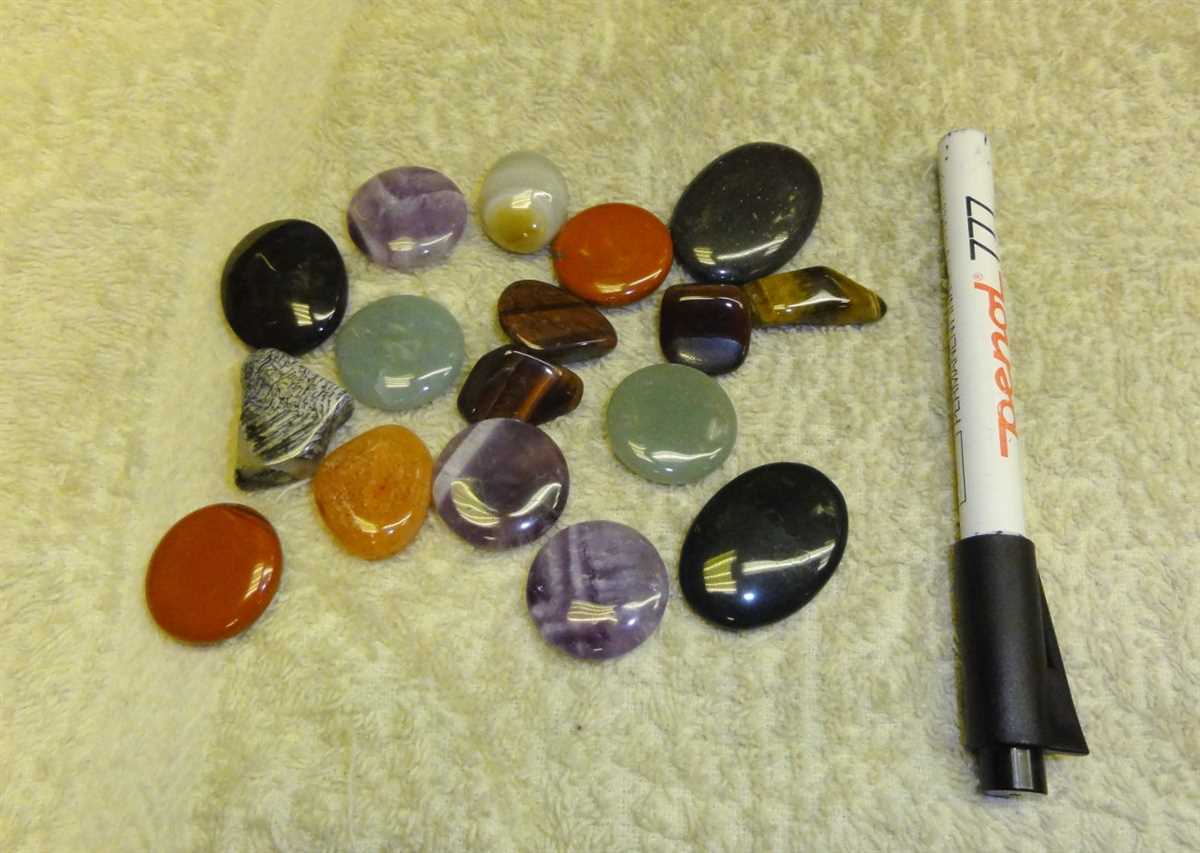
First, it is important to choose the right gemstone for drilling. Not all gemstones can withstand the drilling process, so it’s essential to select a gemstone that is hard enough to resist cracking or breaking. Some popular gemstones for drilling include quartz, amethyst, and jasper. Additionally, consider the size and shape of the gemstone, as this will impact the drilling process.
Once you have selected the proper gemstone, gather your tools. You will need a diamond drill bit, a drill press or Dremel tool, a clamp or vise to secure the gemstone, and a lubricant such as water or oil to cool and lubricate the drilling process. It’s important to use a diamond drill bit, as these are specifically designed to cut through hard materials like gemstones. Regular drill bits will not be effective and may cause damage to the gemstone.
In this guide, we will walk you through the step-by-step process of drilling a hole in a gemstone, including preparing the gemstone, setting up the drill press, and drilling the hole. Follow along to gain the skills and knowledge needed to successfully drill holes in gemstones for all your jewelry-making projects.

The Importance of Drilling Holes in Gemstones
When it comes to creating jewelry with gemstones, one of the key steps is drilling holes in the gemstones. This simple yet crucial process allows for the gemstones to be easily threaded onto chains or wires, enabling jewelry makers to create stunning necklaces, bracelets, earrings, and other accessories.
Drilling holes in gemstones serves several important purposes:
- Enhanced Versatility: By drilling holes in gemstones, their usability and versatility increase significantly. With holes in place, gemstones can be easily incorporated into various jewelry designs. This allows for endless possibilities and creativity when it comes to designing and creating unique pieces.
- Secure Attachment: Drilling holes in gemstones provides a secure attachment point for chains, jump rings, or wires. With a properly drilled hole, the gemstones will remain securely in place when worn.
- Proper Alignment: When creating jewelry with multiple gemstones, drilling holes ensures that the gems are properly aligned. This is important for achieving a balanced and aesthetically pleasing design.
- Facilitates Design Elements: Drilled holes in gemstones can also serve as design elements themselves. They can be used to incorporate additional decorative elements, such as beads or small charms, into the jewelry piece.
- Easy Stringing: With drilled holes, gemstones can be easily strung onto chains, cords, or wires. This makes the assembly process much more efficient and allows for quick creation of jewelry pieces.
Overall, drilling holes in gemstones is an essential step in the jewelry-making process. It not only enhances the versatility and usability of the gemstones but also provides secure attachment points and facilitates the creation of beautiful designs.
Choosing the Right Gemstone
When it comes to drilling holes in gemstones for jewelry, it is important to choose the right gemstone that suits your needs and preferences. There are several factors to consider when selecting a gemstone for drilling, including the hardness, color, size, and shape.
Hardness
One of the most important factors to consider when choosing a gemstone for drilling is its hardness. Gemstones vary in hardness, with some being much more delicate and prone to breaking than others. It is important to select a gemstone that is hard enough to withstand the drilling process without shattering or cracking. The Mohs scale of mineral hardness can be a useful tool in determining the hardness of a gemstone.

Color
The color of the gemstone is another important factor to consider. Gemstones come in a wide range of colors, from transparent to opaque, and each color has its own unique beauty. Consider the color of the gemstone and how it will complement the overall design of the jewelry piece.
Size
The size of the gemstone is another factor to consider. Depending on the type of jewelry you are making, you may want to choose a larger or smaller gemstone. Consider the scale of the jewelry piece and how the gemstone will fit into the overall design.
Shape
Gemstones come in a variety of shapes, including round, oval, square, and more. The shape of the gemstone can greatly impact the overall design of the jewelry piece. Consider the shape that will best fit your design and your personal style.
Overall, choosing the right gemstone for drilling holes for jewelry is a crucial step in the jewelry-making process. Consider the hardness, color, size, and shape of the gemstone to ensure that it meets your needs and complements your design. Happy drilling!

Factors to Consider
- Type of Gemstone: Different gemstones have varying hardness levels and compositions, which can affect the drilling process. It is important to research and understand the properties of the specific gemstone you are working with to ensure that it is suitable for drilling.
- Drill Bit Selection: Choosing the right drill bit is crucial for drilling holes in gemstones. There are various types of drill bits available, such as diamond-coated, twist, or core drill bits. The hardness and composition of the gemstone will determine the type of drill bit required for the drilling process.
- Drilling Method: There are several drilling methods that can be used for gemstones, including hand drilling, rotary drilling, and ultrasonic drilling. Each method has its advantages and disadvantages, and the choice will depend on the specific gemstone and the desired outcome.
- Lubrication: Using a lubricant during the drilling process can help reduce heat and friction, preventing damage to the gemstone. It is important to choose a lubricant that is compatible with the gemstone and drill bit being used.
- Support and Stability: Proper support and stability are essential when drilling holes in gemstones. It is recommended to use a clamp or a vise to secure the gemstone in place, ensuring that it does not move or slip during the drilling process.
- Drilling Speed: The drilling speed can greatly impact the success of drilling holes in gemstones. It is important to find the right balance between speed and pressure to prevent the gemstone from cracking or chipping.
- Safety Precautions: Working with gemstones can be hazardous, especially when using power tools for drilling. It is important to wear appropriate safety gear, such as goggles and gloves, to protect yourself from any potential accidents or injuries.
Preparing the Tools
Before you begin drilling holes in gemstones for jewelry, it’s important to gather all the necessary tools and materials. Here are the tools you’ll need:
- Safety goggles: Protect your eyes from flying debris and dust particles by wearing safety goggles.
- Gemstone: Choose the gemstone you want to drill a hole in. Make sure it is clean and free from any cracks or fractures.
- Drill press: A drill press is the safest and most efficient way to drill holes in gemstones. It provides stability and precision during the drilling process.
- Diamond drill bit: Use a diamond drill bit specifically designed for drilling into gemstones. Diamond drill bits are durable and can withstand the hardness of gemstones.
- Water or lubricant: To prevent the drill bit and gemstone from overheating, use water or lubricant as a cooling agent during the drilling process.
- Masking tape: Apply masking tape on the surface of the gemstone to prevent it from cracking or chipping while drilling.
- Container with water: Keep a container filled with water nearby to soak the gemstone periodically and prevent overheating.
- Rubber stopper or clamp: Use a rubber stopper or clamp to hold the gemstone securely in place on the drill press table.
- Marker or pencil: Mark the desired location for the hole on the gemstone using a marker or pencil.
Once you have gathered all the necessary tools, you are ready to move on to the next step of the drilling process.
Gemstone Drilling Tools
1. Diamond Drill Bits
Diamond drill bits are the most common and effective tools for drilling holes in gemstones. These drill bits are made with diamond particles bonded to the tip, which makes them incredibly strong and durable. They can easily cut through even the hardest gemstones.
2. Twist Drills
Twist drills are another type of drilling tool that can be used for gemstones. These drills have a spiral shape, which allows them to create holes by rotating and drilling into the material. Twist drills are available in a variety of sizes and materials, such as high-speed steel or carbide.
3. Core Drills
Core drills, also known as hollow drills, are designed specifically for drilling larger holes in gemstones. These drills have a cylindrical shape with a hollow center, allowing them to remove a core of material while drilling. Core drills are commonly used for creating beads or larger cabochons.

4. Drill Press
A drill press is a stationary machine that holds a drill bit and allows for precise drilling into gemstones. This tool is especially useful when drilling multiple holes or when drilling holes in larger gemstones. The drill press provides stability and control, resulting in more accurate and consistent holes.
5. Lubricant
When drilling holes in gemstones, it is important to use a lubricant to keep the drill bit cool and reduce friction. This helps to prevent the gemstone from cracking or chipping during the drilling process. There are specific lubricants designed for gemstone drilling, but water can also be used as a substitute.
6. Safety Equipment
When working with gemstone drilling tools, it is essential to prioritize safety. Safety goggles should be worn to protect the eyes from any flying debris. Gloves can also be used to protect the hands during the drilling process. Additionally, it is important to work in a well-ventilated area to avoid inhaling any dust or particles.
| Tool | Description |
|---|---|
| Diamond Drill Bits | Drill bits with diamond particles bonded to the tip for drilling through gemstones |
| Twist Drills | Drills with a spiral shape for rotating and drilling into gemstones |
| Core Drills | Drills with a hollow center for removing a core of material while drilling |
| Drill Press | Stationary machine that holds a drill bit for precise drilling into gemstones |
| Lubricant | Substance used to keep the drill bit cool and reduce friction during drilling |
| Safety Equipment | Goggles and gloves for protecting the eyes and hands during drilling |
Marking the Drilling Spot
Before you start drilling into your gemstone, it’s important to accurately mark the spot where you want the hole to be. This will ensure that you achieve the desired placement and prevent any mistakes.

Here’s how you can mark the drilling spot:
- Gather all the necessary tools and materials, including a ruler or measuring tape, a permanent marker or pencil, and the gemstone you wish to drill.
- Place the gemstone on a stable surface, such as a jewelry clamp or a non-slip rubber mat, to prevent it from rolling or moving during the marking process.
- Use a ruler or measuring tape to measure the exact location where you want the hole to be drilled. You can also use a template or a pre-drawn design to guide your measurements.
- Once you have determined the spot, make a small mark on the gemstone using a permanent marker or pencil. Ensure that the mark is visible and will not easily rub off.
- Double-check the placement of the mark to ensure it aligns with your intended design or pattern. If necessary, make any adjustments before proceeding.
Tips:
- It’s always a good idea to practice marking the drilling spot on a scrap piece of gemstone before working on your actual piece.
- If you plan to create multiple holes in the gemstone, consider making a guide or template to ensure consistent spacing and placement.
- Remember to handle the gemstone with care and avoid applying excessive pressure when marking the drilling spot to prevent any accidental damage.
By following these steps and taking proper precautions, you can accurately mark the drilling spot on your gemstone and proceed with confidence to the next step of the drilling process.
Techniques for Accurate Marking
Accurate marking is crucial when drilling holes in gemstones for jewelry, as it ensures the holes are in the right place and properly aligned. Here are some techniques to help you achieve precise markings:
1. Measure and mark the drilling points:
Use a ruler or a caliper to measure the desired location of the hole on the gemstone. Make small marks with a pencil or a fine-tip marker to indicate where the holes should be drilled.
2. Use a center punch:
For harder gemstones, such as diamonds or rubies, it is helpful to use a center punch to create a small indentation at the marking point. This will act as a guide for the drill bit and prevent it from slipping off the surface of the gemstone.
3. Create a custom drilling template:
If you need to drill multiple holes in the same pattern or alignment, it can be useful to create a custom drilling template. This can be done by drawing the desired hole pattern on a piece of sturdy material, such as acrylic or metal, and then using it as a guide for marking the gemstone.
4. Use a laser level:
When drilling holes in gemstones that require precise alignment, a laser level can be a valuable tool. The laser beam can be projected onto the gemstone surface, helping to ensure accurate and consistent markings.
5. Secure the gemstone:
Before marking the gemstone, make sure it is securely held in place. This can be done using a clamp or a specialized jewelry vice. A stable work surface and secure grip on the gemstone will help you make accurate markings.
6. Double-check your markings:
Before proceeding with drilling, double-check your markings to ensure they are accurate. Use a magnifying glass if necessary to verify the positioning and alignment of the marks.
By following these techniques for accurate marking, you can ensure precise hole placement when drilling gemstones for jewelry. Remember to always exercise caution and work slowly to avoid any damage to the gemstone. Happy drilling!
Drilling the Gemstone
What You’ll Need
- A gemstone
- A drill bit suitable for gemstone drilling
- A drill press or rotary tool
- A clamp or vice
- Water or lubricant
- Safety goggles and gloves
Step-by-Step Guide
- Choose the right drill bit size for your gemstone. The size will depend on the type of jewelry you plan to create and the size of the hole you want to drill.
- Secure the gemstone in a clamp or vice to keep it steady and prevent any unwanted movement during drilling.
- Put on safety goggles and gloves to protect yourself from any potential hazards.
- If you’re using a drill press, adjust the speed and depth setting according to the instructions for your specific machine. If you’re using a rotary tool, set it to a moderate speed.
- Apply water or lubricant to the gemstone and the drill bit to reduce friction and keep the stone cool during the drilling process.
- Position the drill bit on the desired spot where you want to drill the hole. Start drilling with a gentle pressure, allowing the drill bit to do the work. Avoid applying too much force as it may damage the stone.
- Keep the drill bit and the gemstone wet during the drilling process to prevent overheating. You can dip the gemstone in water or use a spray bottle to keep it lubricated.
- Drill slowly and evenly, checking the progress of the hole regularly. Take breaks if needed to prevent overheating and let the gemstone cool down.
- Once the hole has been drilled to the desired depth, remove the gemstone from the clamp or vice.
- Rinse the gemstone with water to remove any remaining debris or lubricant.
- Inspect the drilled hole to make sure it is clean and smooth. If necessary, use a small file or sandpaper to smooth out any rough edges.
- Your gemstone is now ready to be incorporated into your jewelry design!
Tips and Precautions
- Work slowly and patiently to avoid damaging the gemstone.
- Use a light touch and let the drill bit do the work, rather than forcing it.
- Always wear safety goggles and gloves to protect yourself from flying debris.
- Use water or lubricant to keep the gemstone and drill bit cool during drilling.
- Regularly check the progress of the hole and take breaks if needed to prevent overheating.
- Be mindful of the specific hardness and structure of the gemstone you’re drilling, as some may require different techniques or precautions.
Step-by-Step Process

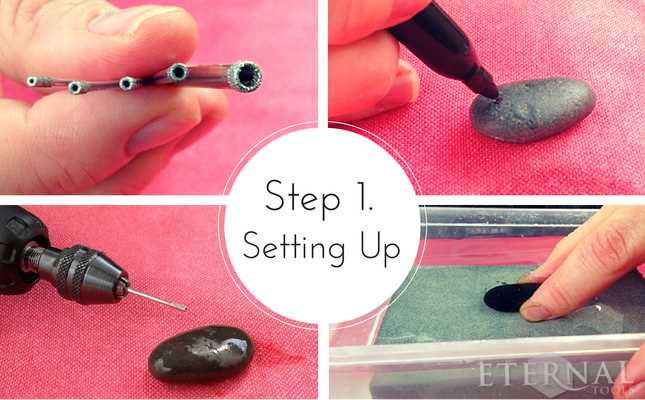
1. Prepare the Gemstone
Before you begin drilling, make sure the gemstone is clean and free from any dirt or debris. This will prevent any damage to the stone and allow for a more precise drilling process. You can use a soft cloth or brush to clean the gemstone.
Materials needed: Soft cloth or brush
2. Mark the Drilling Point
Using a fine-tip marker or pen, carefully mark the spot where you want to drill the hole on the gemstone’s surface. Make sure to choose a suitable location that won’t compromise the integrity of the stone.
Materials needed: Fine-tip marker or pen
3. Select the Drill Bit
Choose a drill bit that is specifically designed for drilling gemstones. These drill bits are usually made from diamond or tungsten carbide, which can easily cut through the hard surface of the stone without causing any damage.
Materials needed: Gemstone drill bit
4. Lubricate the Drill Bit
Apply a small amount of water or lubricant to the drill bit to reduce friction and keep it cool during the drilling process. This will help prevent the drill bit from overheating and potentially damaging the gemstone.
Materials needed: Water or lubricant
5. Secure the Gemstone
Place the gemstone securely in a vise or clamp to hold it in place while drilling. Make sure the gemstone is stable and won’t move around during the drilling process. This will ensure accurate and precise drilling.
Materials needed: Vise or clamp
6. Start Drilling
Slowly start drilling at the marked spot on the gemstone’s surface. Apply gentle and consistent pressure to gradually create a hole. Take breaks if needed to prevent overheating of the drill bit.
Materials needed: Drill, safety goggles, gloves (optional)
7. Check Progress
Periodically check the progress of the hole to ensure you are drilling in the right direction and at the desired depth. This will help prevent any mistakes and allow you to adjust your drilling technique if needed.
Materials needed: Clean cloth or brush
8. Clean the Gemstone
Once you have drilled the hole to the desired depth, remove the gemstone from the vise or clamp and clean it again to remove any debris or dust that may have accumulated during the drilling process.
Materials needed: Soft cloth or brush
9. Polish the Hole
Use a small file or sandpaper to smooth and polish the edges of the drilled hole, if necessary. This will make the hole look neat and ensure that it doesn’t snag on any jewelry components.
Materials needed: File or sandpaper
10. Final Cleaning
Give the gemstone a final thorough cleaning to remove any remaining debris or dust. This will ensure the gemstone is ready to be used in your jewelry-making projects.
Materials needed: Soft cloth or brush
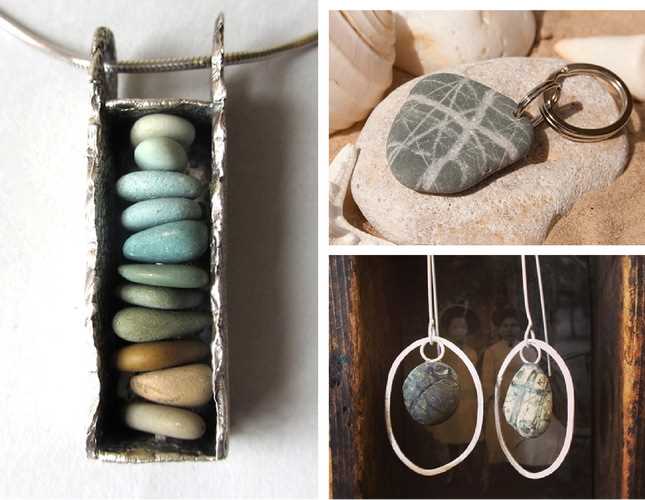
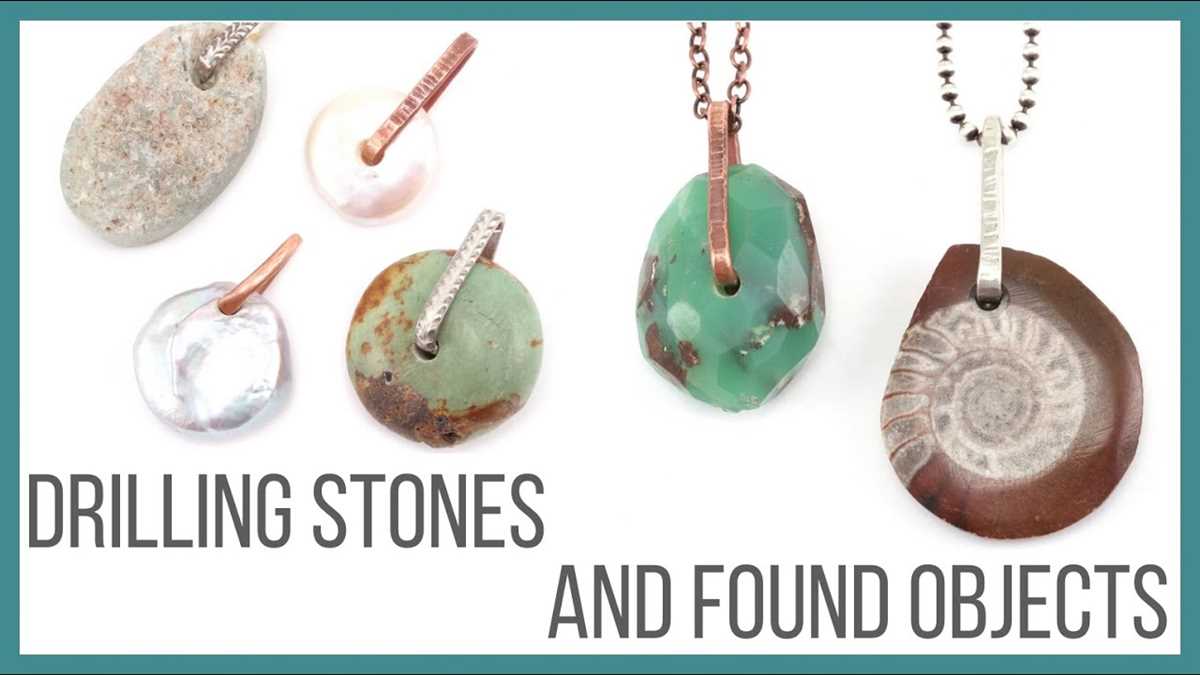
11. Use the Drilled Gemstone
Now that the gemstone has been drilled and cleaned, it is ready to be used in your jewelry-making projects. You can thread a cord or wire through the hole to create a pendant, bracelet, or other pieces of jewelry.
Materials needed: Cord or wire
Finishing Touches
- After drilling the holes in the gemstones, it is important to inspect them to ensure they are smooth and clean. Use a magnifying glass if necessary to check for any rough edges or debris.
- If any rough edges are found, use a small file or sandpaper to carefully smooth them out. Take care to keep the gemstone secure while doing this to avoid any accidental damage.
- Once the holes are smooth, clean the gemstones with a soft cloth or a mild jewelry cleaner to remove any dust or residue that may have accumulated during the drilling process.
- After cleaning, dry the gemstones thoroughly to prevent any water spots or streaks from forming.
- If desired, you can further enhance the appearance of the drilled gemstones by polishing them. This can be done by using a polishing cloth or a specialized jewelry polishing compound.
- If there are any imperfections or small cracks near the drilled holes, consider using a jewelry adhesive to fill in the gaps. This will help to strengthen the gemstone and prevent any further damage.
- Finally, if you plan to use the drilled gemstones for jewelry making, it is important to choose the appropriate findings and settings to securely attach them. This may include using jump rings, bails, or wire wrapping techniques.
FAQ:
What tools do I need to drill holes in gemstones for jewelry?
To drill holes in gemstones for jewelry, you will need a few essential tools. These include a Dremel or flex shaft with a diamond drill bit, a clamp to hold the stone securely in place, a bowl of water to use as a coolant, and a lubricant such as mineral oil or beeswax.
How do I choose the right diamond drill bit for drilling gemstones?
Choosing the right diamond drill bit is crucial for drilling gemstones. Look for drill bits specifically designed for use with gemstones and jewelry making. Consider the size of the hole you want to drill and the hardness of the gemstone. Smaller diamond drill bits are suitable for delicate stones, while larger bits are better for softer stones. It’s also important to ensure the drill bit is compatible with your Dremel or flex shaft.
Can I drill holes in any type of gemstone?
While it is possible to drill holes in most types of gemstones, some are more challenging than others. Softer gemstones such as turquoise, malachite, and opal can be drilled relatively easily. Harder gemstones like diamond, sapphire, and ruby require more specialized tools and techniques. It’s also important to note that some gemstones may have internal fractures or inclusions, making them more prone to breaking during drilling.
What precautions should I take when drilling holes in gemstones?
When drilling holes in gemstones, it’s essential to take certain precautions to ensure your safety and the integrity of the stone. Always wear safety goggles to protect your eyes from flying debris. Use a clamp or vise to secure the stone firmly in place, as it may slip during drilling. Apply constant, gentle pressure and allow the drill bit to do the work. Avoid excessive heat buildup by frequently dipping the stone and drill bit into a bowl of water. Finally, be patient and take breaks to avoid overheating the drill bit.
Video:


Meet Harrison Clayton, a distinguished author and home remodeling enthusiast whose expertise in the realm of renovation is second to none. With a passion for transforming houses into inviting homes, Harrison's writing at https://thehuts-eastbourne.co.uk/ brings a breath of fresh inspiration to the world of home improvement. Whether you're looking to revamp a small corner of your abode or embark on a complete home transformation, Harrison's articles provide the essential expertise and creative flair to turn your visions into reality. So, dive into the captivating world of home remodeling with Harrison Clayton and unlock the full potential of your living space with every word he writes.


