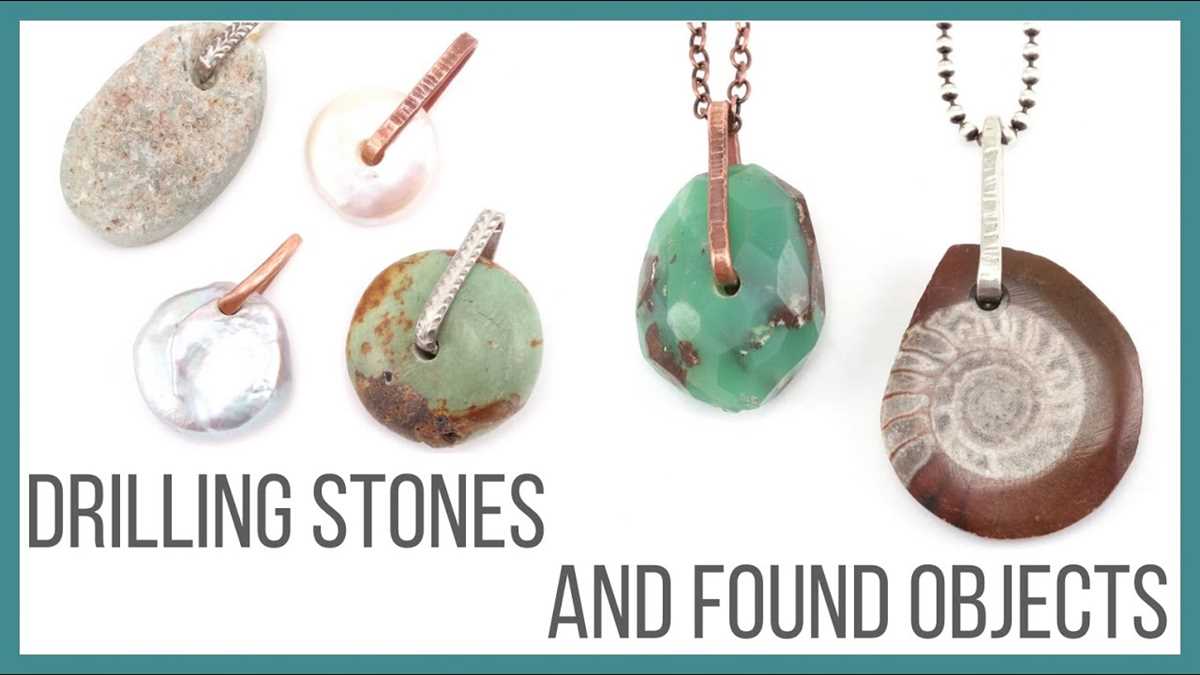
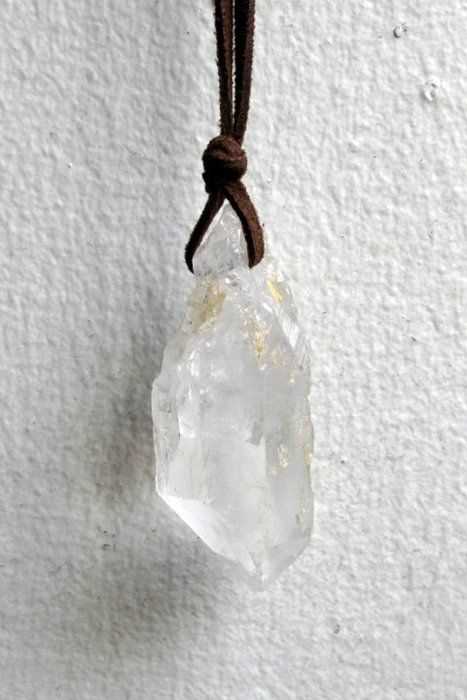
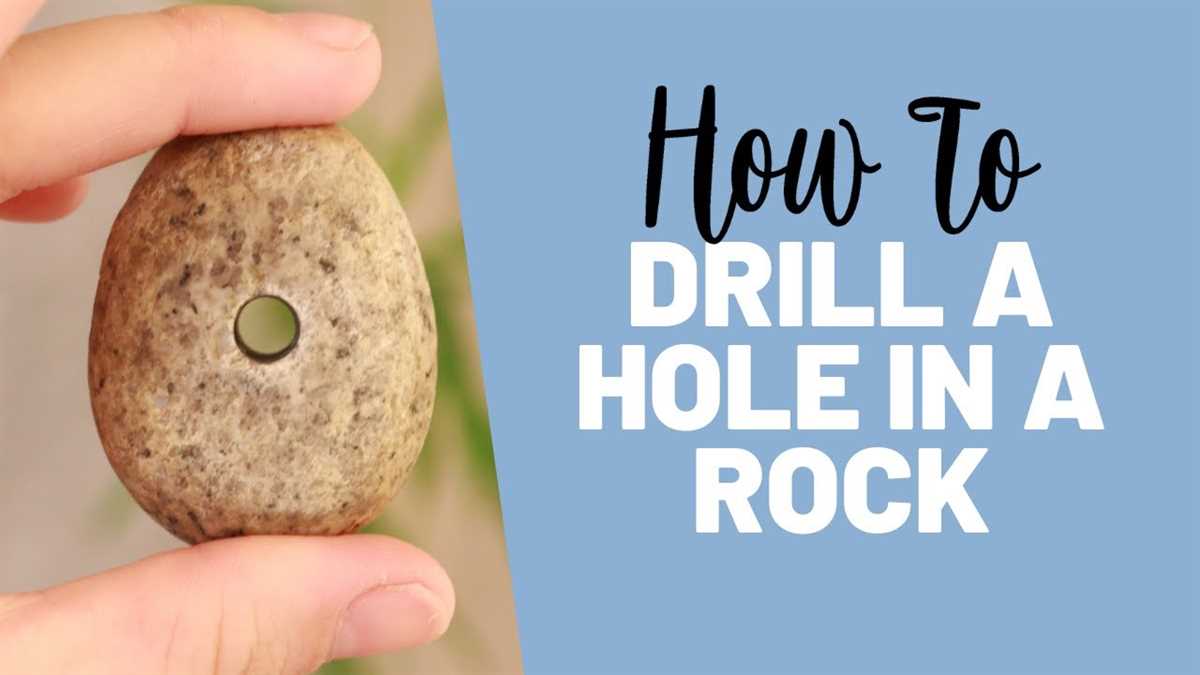
How to Drill Holes in Crystals for Jewelry: A Step-by-Step Guide

Crystals are not only beautiful in their natural form, but they can also be transformed into stunning pieces of jewelry. If you are a jewelry maker or simply want to add a personal touch to your accessories, learning how to drill holes in crystals can open up a world of creative possibilities. While drilling holes in crystals may seem daunting at first, with the right tools and technique, it can be a rewarding and enjoyable process.
Before you begin drilling, it is important to choose the right crystal for your jewelry project. Crystals with a uniform and consistent structure, such as quartz or amethyst, are ideal for drilling. You should also carefully consider the size and shape of the crystal, as this will determine the type of hole you will need to drill. Once you have selected the perfect crystal, it’s time to gather the necessary tools.
When it comes to drilling holes in crystals, having the right tools is essential. You will need a high-quality diamond-tipped drill bit, as this will be able to penetrate the hard surface of the crystal without causing damage. You will also need a drill press or a handheld rotary tool with a secure grip to ensure precision and control during the drilling process. Additionally, it is crucial to wear safety goggles and work in a well-ventilated area to protect yourself from any potential hazards.
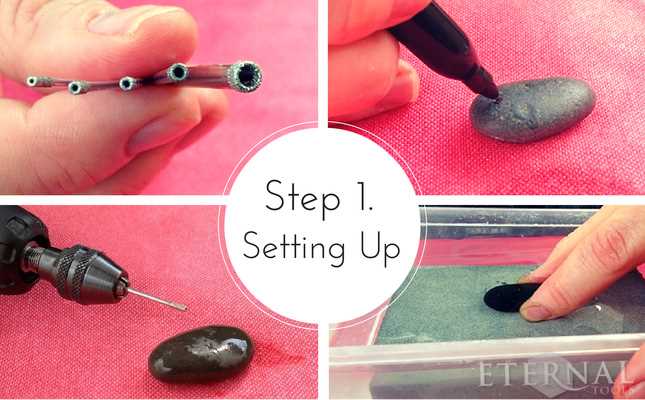
Now that you have your crystal and tools ready, it’s time to begin the drilling process. Start by marking the spot where you want the hole to be drilled with a permanent marker. This will act as a guide and prevent any mistakes during drilling. Next, position the crystal securely on a stable surface and attach the diamond-tipped drill bit to your drill press or rotary tool.
Slowly and steadily apply pressure to the crystal as you begin drilling. It is important to use a low speed and constantly lubricate the crystal and drill bit with water or a lubricant specifically designed for drilling. This will help to keep the crystal cool and prevent any potential cracking or splitting. As you drill, be patient and take breaks if necessary to avoid overheating the crystal. Once the hole has been successfully drilled, wipe away any excess debris and admire your beautifully crafted crystal for jewelry.

In conclusion, drilling holes in crystals for jewelry can be an exciting and creative process. By selecting the right crystal, using the proper tools, and following the step-by-step guide, you can achieve stunning results. Whether you want to create earrings, necklaces, or bracelets, drilling holes in crystals opens up endless possibilities for unique and personalized jewelry designs.
Gathering the Necessary Tools
Before you begin drilling holes in crystals for jewelry, it is important to gather all the necessary tools. Having the right tools will make the process easier and ensure that you achieve the desired results.
Here are some essential tools you will need:
- Diamond drill bits: These specialized drill bits are necessary for drilling through hard materials like crystals. Make sure to choose the appropriate size for the hole you want to create.
- Drill: An electric drill or a rotary tool with a drilling accessory is recommended for this task. Make sure it is in good working condition.
- Water source: Drilling through crystals can generate a lot of heat, so it is important to have a water source nearby to keep the drill bit and crystal cool. A bowl of water or a spray bottle will work.
- Clamps or vice: These tools will help secure the crystal in place during the drilling process. Make sure the clamps or vice are sturdy and provide a stable grip.
- Safety goggles: Protecting your eyes is crucial when drilling, as debris and water can splash. Wear safety goggles to prevent any injuries.
- Mask: Breathing in dust particles from drilling can be harmful. Wear a mask to protect yourself from inhaling any harmful substances.
- Soft cloth: A soft cloth will be useful for wiping away any excess water or debris during the drilling process.
Once you have gathered all these tools, you will be well-equipped to start drilling holes in crystals for your jewelry-making projects.
Preparing the Crystal and the Work Area
Before you begin drilling holes in crystals for jewelry, it’s important to properly prepare both the crystal and your work area. Taking the time to do this will ensure that you have a successful drilling experience and prevent any damage to the crystal.
1. Gather the necessary materials
Before starting the drilling process, gather all the materials you’ll need:

- Crystal to be drilled
- Drill bit suitable for drilling crystal (such as a diamond-tipped or tungsten carbide bit)
- Pin vise or drill press
- Clamp or vice to hold the crystal securely
- Protective goggles
- Protective gloves
2. Choose a suitable work area
Select a clean and stable work area where you can comfortably drill the crystal. Make sure you have enough space to maneuver and that the surface is protected against any potential damage from the drilling process.
3. Clean the crystal
Before drilling, thoroughly clean the crystal to remove any dirt, oils, or debris that could interfere with the drilling process. Use a mild soap and water solution and a soft cloth to gently clean the surface of the crystal. Rinse it well and pat it dry.
4. Decide on the drilling location
Choose the specific spot on the crystal where you want to drill the hole. Take into consideration the shape and size of the crystal, as well as the design of the jewelry piece you plan to create. Mark the drilling location with a small dot or a light pencil line.
5. Secure the crystal
To prevent the crystal from moving or slipping during the drilling process, securely fasten it to a clamp or vice. Make sure the crystal is held tightly but without exerting too much pressure that could cause it to crack or break.

6. Put on protective gear
Prior to drilling, put on protective goggles to shield your eyes from any flying debris or fragments. Additionally, wearing protective gloves will help protect your hands from potential injury.
7. Prepare the drill bit
If necessary, attach the appropriate drill bit to your pin vise or drill press, following the manufacturer’s instructions. Ensure that the drill bit is securely in place and aligned correctly before proceeding.
8. Set up a water basin
Filling a small basin with water and placing it near your work area will serve as a cooling system for both the crystal and the drill bit. The water will help prevent the crystal from overheating and ease the drilling process.
9. Ensure proper lighting

Make sure your work area is well-lit so you can clearly see what you’re doing. Adequate lighting will help you drill the hole accurately and reduce the risk of any mistakes or accidents.
By following these steps to prepare the crystal and your work area, you’ll be ready to move on to the drilling process with confidence and minimize the risk of any damage to the crystal.
Choosing the Right Drill Bit
When it comes to drilling holes in crystals for jewelry, choosing the right drill bit is essential. The type of drill bit you use will depend on the hardness of the crystal and the size of the hole you want to create. Here are some factors to consider when selecting a drill bit:
1. Material
The material of the drill bit is an important consideration. For drilling holes in crystals, it is recommended to use diamond or carbide drill bits. Diamond drill bits are the most durable and can handle hard crystals, such as quartz and sapphire. Carbide drill bits are also a good option and can work well on softer crystals, like amethyst and turquoise.
2. Size
The size of the hole you want to make in the crystal will determine the size of the drill bit you need. Drill bits come in various sizes, ranging from small to large diameters. It’s important to choose a drill bit that matches the size of the hole you want, as using a drill bit that is too small or too large can result in damage to the crystal.

3. Shank Size
The shank size of the drill bit should also be considered. The shank is the part of the drill bit that fits into the drill chuck. Make sure to choose a drill bit with a shank size that is compatible with your drill. Most drills have a standard chuck size of 3/8 inch, but it’s always a good idea to check the specifications of your specific drill before purchasing a drill bit.
4. Coating
Some drill bits come with a coating that helps reduce friction and heat during drilling. This can be beneficial when drilling through hard crystals, as it can prevent the bit from overheating and prolong its lifespan. Look for drill bits with a titanium or diamond coating for improved performance.
5. Quality
Lastly, it’s important to choose a high-quality drill bit. Cheap or low-quality drill bits may not be as effective or durable, and can result in subpar results or even damage to the crystal. Invest in a reputable brand and read reviews to ensure you’re getting a reliable drill bit.
By considering these factors and choosing the right drill bit for your specific needs, you’ll be well-equipped to drill holes in crystals for your jewelry projects. Remember to always use caution and follow safety guidelines when operating a drill.
Marking the Spot for the Hole
Before you start drilling into your crystal for jewelry making, it’s important to mark the exact spot where you want the hole to go. This will help ensure precision and accuracy in your drilling.
To mark the spot, follow these steps:
- Choose a suitable marker: Use a fine tip permanent marker or a small piece of tape to mark the desired spot on the crystal. Make sure the marker or tape is visible and won’t easily rub off.
- Clean the crystal surface: Use a soft cloth or a gentle cleaning solution to wipe the surface of the crystal where you plan to mark the spot. This will remove any dirt, dust, or oils that might interfere with the marker’s adhesion.
- Position the crystal: Carefully position the crystal on a stable surface, making sure it won’t move or roll during the marking process. You may want to use a clamp or a non-slip mat to secure the crystal in place.
- Mark the spot: Gently press the marker against the crystal surface at the desired location. Make a small dot or draw a small circle to clearly indicate where the hole should be drilled.
Note: It’s essential to double-check the position of the mark before proceeding to drill the hole. Once the mark is made, it may be difficult to correct or erase.
By following these steps, you’ll be able to accurately mark the spot for the hole in your crystal, ensuring that your jewelry-making project turns out just as you envision.
Securing the Crystal to Prevent Damage
When it comes to drilling holes in crystals for jewelry, it’s important to take precautions to prevent any damage to the crystal. This can be done by securely holding the crystal in place while drilling. Here are some ways you can secure your crystal:
1. Clamp Method
One of the most common methods to secure a crystal is by using a clamp. Here’s how to do it:
- Select a clamp that is suitable for the size and shape of your crystal.
- Place the crystal securely between the jaws of the clamp.
- Tighten the clamp to hold the crystal firmly in place.
2. Vice Method
Another option to secure your crystal is by using a vice. Follow these steps:
- Insert the crystal into the vice, making sure it is positioned securely.
- Tighten the vice to hold the crystal in place.
- Double-check to ensure that the crystal is firmly secured before starting to drill.
3. Sticky Wax Method
If you don’t have access to clamps or a vice, you can use sticky wax to hold the crystal in place. Here’s what to do:
- Take a small piece of sticky wax and soften it by kneading it in your hands.
- Press the crystal firmly onto the sticky wax, ensuring it is centered and secure.
- Place the crystal and sticky wax combination on a stable surface to prevent movement during drilling.
Remember, no matter which method you choose to secure your crystal, it’s crucial to take your time and be gentle to avoid any unnecessary damage. Additionally, using the proper drill bit and technique will also help reduce the risk of damaging the crystal.
Drilling the Hole
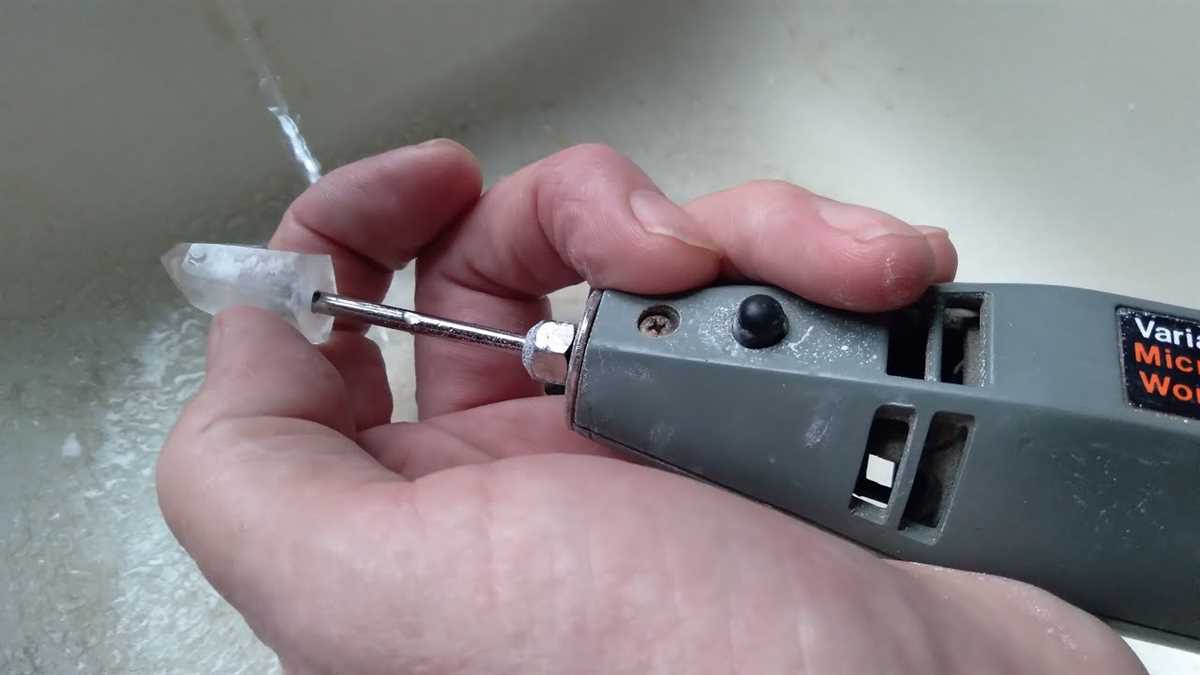
Drilling holes in crystals can be a delicate process, so it’s important to take your time and proceed with caution. Here is a step-by-step guide on how to drill holes in crystals for jewelry:
1. Gather Your Materials

- A crystal
- A diamond drill bit
- A Dremel tool or a drill press
- Water or lubricant
- Safety goggles
2. Prepare Your Work Area
- Choose a well-ventilated area with good lighting.
- Place a soft cloth or towel on your work surface to protect the crystal.
- Wear safety goggles to protect your eyes from any flying debris.
3. Mark the Spot
Use a permanent marker to mark the spot where you want to drill the hole on the crystal. This will help you maintain accuracy during the drilling process.
4. Set Up Your Dremel Tool or Drill Press
If using a Dremel tool, attach the diamond drill bit to the tool. If using a drill press, secure the crystal in the appropriate holder or vise.
5. Add Lubricant
Apply water or a lubricant to the area you marked on the crystal. This will help keep the drill bit cool and prevent it from overheating.
6. Start Drilling
Hold the Dremel tool or operate the drill press with a steady hand. Gently guide the drill bit into the crystal at a slow speed. Apply gentle pressure, letting the drill bit do the work.
7. Take Breaks
Drilling through crystal can generate heat, so it’s important to take breaks to prevent overheating. Every 10-15 seconds, remove the drill bit from the crystal and dip it in water to cool it down.
8. Clean the Hole
Once you have drilled the hole, rinse the crystal and hole with water to remove any debris or dust.
9. Test the Hole
Insert a piece of wire or string into the hole to ensure it is the desired size and shape.
Remember, drilling holes in crystals requires patience and precision. Take your time and be mindful of the crystal’s fragility. With practice, you’ll be able to create beautiful drilled crystals for your jewelry projects.
Removing the Crystal from the Drilling Area
Once you have successfully drilled a hole in your crystal, it is important to remove it from the drilling area carefully. Follow these steps to ensure the crystal is safely removed:
- Turn off the drill: Before attempting to remove the crystal, make sure you turn off the drill and unplug it from the power source. This will help avoid any accidental injury.
- Remove the drill bit: Carefully unscrew and remove the drill bit from the crystal. Take your time and be gentle to avoid any damage to the crystal or injury to yourself.
- Clean the crystal: Use a soft cloth or brush to remove any dust or debris that may have accumulated on the crystal during the drilling process. Be gentle and avoid using harsh chemicals or abrasive materials that could damage the crystal.
- Inspect the hole: Take a close look at the hole you drilled to ensure it is clean and free of any residual debris. If you notice any remaining material, use a toothpick or a small brush to carefully clean it out.
- Store the crystal: Once the crystal is completely clean and free of any debris, store it in a safe place where it won’t be damaged or scratched. Consider using a soft pouch or a jewelry box to protect the crystal.
By following these steps, you can safely remove the crystal from the drilling area and ensure it remains in optimal condition for your jewelry-making projects.
Finishing and Polishing the Hole
After drilling the hole in your crystal, the next step is to finish and polish the hole to ensure that it is smooth and ready for use in jewelry making.
Step 1: Sanding
- Start by using sanding paper with a medium grit to remove any rough edges or burrs around the hole.
- Gently sand the edges of the hole in a circular motion until they are smooth and even.
- Be careful not to apply too much pressure, as this can cause the crystal to crack or break.
Step 2: Polishing
- Once the edges of the hole are smooth, switch to a fine-grit sanding paper or a polishing wheel.
- Gently polish the edges of the hole in a circular motion, using water or a polishing compound to improve the shine.
- Continue polishing until the edges are glossy and the hole appears finished.
Step 3: Cleaning
- After sanding and polishing, it’s important to clean the crystal to remove any dust or residue.
- Use a clean cloth or a soft brush to wipe away any debris from the surface of the crystal.
- Ensure that the hole is also free from any polishing compound or debris.
Step 4: Final Inspection

- Take a close look at the finished hole to ensure that it is smooth and without any visible imperfections.
- If any rough spots or uneven edges are found, repeat the sanding and polishing process until the hole meets your desired finish.
- Make sure to handle the crystal carefully during this inspection to avoid any accidental damage.
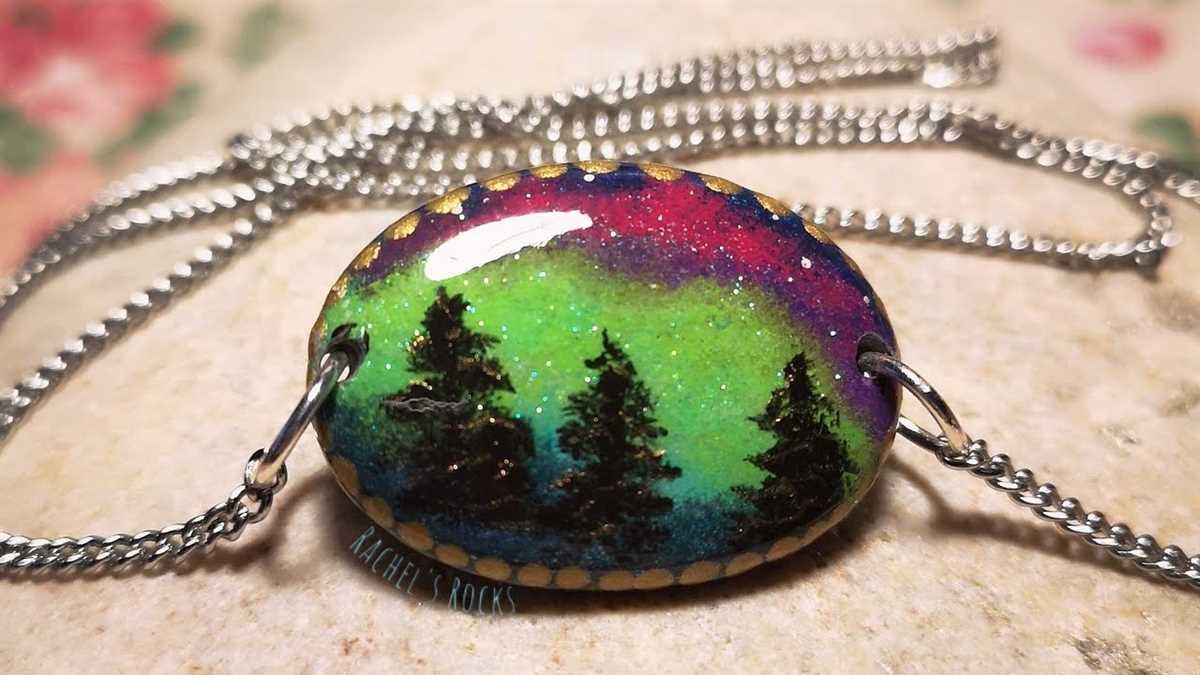
Once you have finished and polished the hole in your crystal, you can proceed with incorporating it into your jewelry design. The smooth and shiny hole will not only enhance the overall appearance of your piece but also ensure that it is comfortable to wear.
FAQ:
What tools do I need to drill holes in crystals for jewelry?
To drill holes in crystals for jewelry, you will need a Dremel tool or a rotary tool with a diamond drill bit, a small container filled with water, a piece of scrap wood, and some masking tape.
Can I use a regular drill instead of a Dremel tool?
A regular drill may work, but it is not recommended for drilling holes in crystals. A Dremel tool or a rotary tool with a diamond drill bit is more suitable as it provides better control and precision.
How do I choose the right diamond drill bit for drilling holes in crystals?
When choosing a diamond drill bit for drilling holes in crystals, make sure it is the right size for your desired hole diameter. Additionally, check that the drill bit is specifically designed for drilling through hard materials like crystals.
What is the role of water in the drilling process?
Water is essential when drilling holes in crystals as it helps to lubricate the drill bit and prevent the crystal from overheating. It also helps to flush away the debris and keep the drill bit cool during the drilling process.
How do I prevent the crystal from cracking or breaking while drilling?
To prevent the crystal from cracking or breaking while drilling, it is important to start with a small guide hole and gradually increase the size. Applying gentle pressure and using a slow speed setting on the Dremel tool will also help minimize the risk of damage.
What precautions should I take while drilling holes in crystals?
While drilling holes in crystals, it is important to wear safety glasses to protect your eyes from any flying debris. It is also recommended to work in a well-ventilated area and take breaks if the drill bit or crystal becomes too hot.
Can I use the same diamond drill bit for different types of crystals?
Yes, you can use the same diamond drill bit for different types of crystals. However, it is important to clean and dry the drill bit thoroughly between uses to avoid cross-contamination and ensure better performance.
Video:


Harrison Clayton
Meet Harrison Clayton, a distinguished author and home remodeling enthusiast whose expertise in the realm of renovation is second to none. With a passion for transforming houses into inviting homes, Harrison's writing at https://thehuts-eastbourne.co.uk/ brings a breath of fresh inspiration to the world of home improvement. Whether you're looking to revamp a small corner of your abode or embark on a complete home transformation, Harrison's articles provide the essential expertise and creative flair to turn your visions into reality. So, dive into the captivating world of home remodeling with Harrison Clayton and unlock the full potential of your living space with every word he writes.


