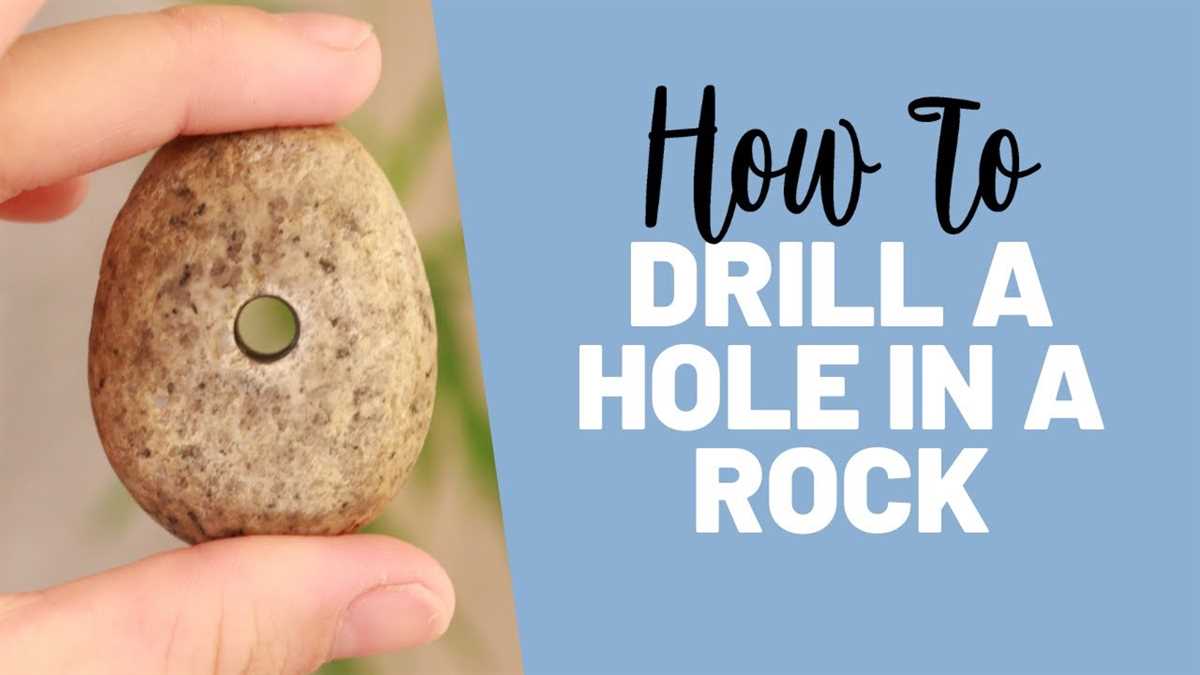
How to Drill a Hole in a Rock: A Step-by-Step Guide

Drilling a hole in a rock may seem like a daunting task, but with the right tools and technique, it can be accomplished with ease. Whether you’re creating a decorative rock for your garden or turning it into a unique piece of jewelry, drilling a hole in a rock opens up a world of creative possibilities. In this step-by-step guide, we will walk you through the process of drilling a hole in a rock, from choosing the right tools to finishing touches.
Step 1: Choose the Right Tools
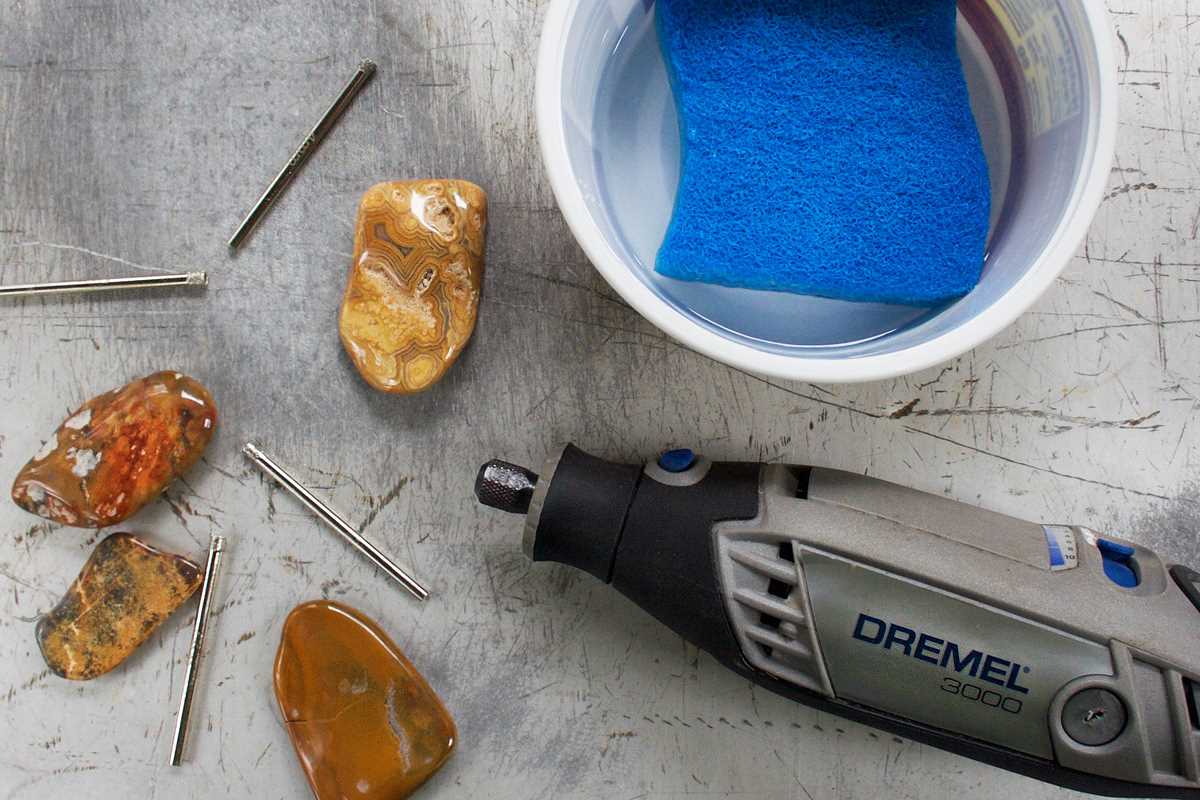
Before starting the drilling process, it is important to gather the necessary tools. The two main tools you will need are a drill with a diamond-tipped drill bit specifically designed for drilling into rocks and a clamp to secure the rock in place. You may also want to wear safety goggles and gloves to protect yourself from flying debris.
Step 2: Mark the Spot
Once you have your tools ready, it’s time to mark the spot where you want to drill the hole. Use a marker or a piece of tape to clearly indicate the exact location. This will help guide your drilling and ensure accuracy.
Step 3: Secure the Rock
Before you begin drilling, it’s important to secure the rock in place to prevent it from moving or slipping. Use a clamp or a vice grip to hold the rock firmly in position. Make sure the area you’re drilling is stable and won’t wobble or give way during the drilling process.
Step 4: Start Drilling

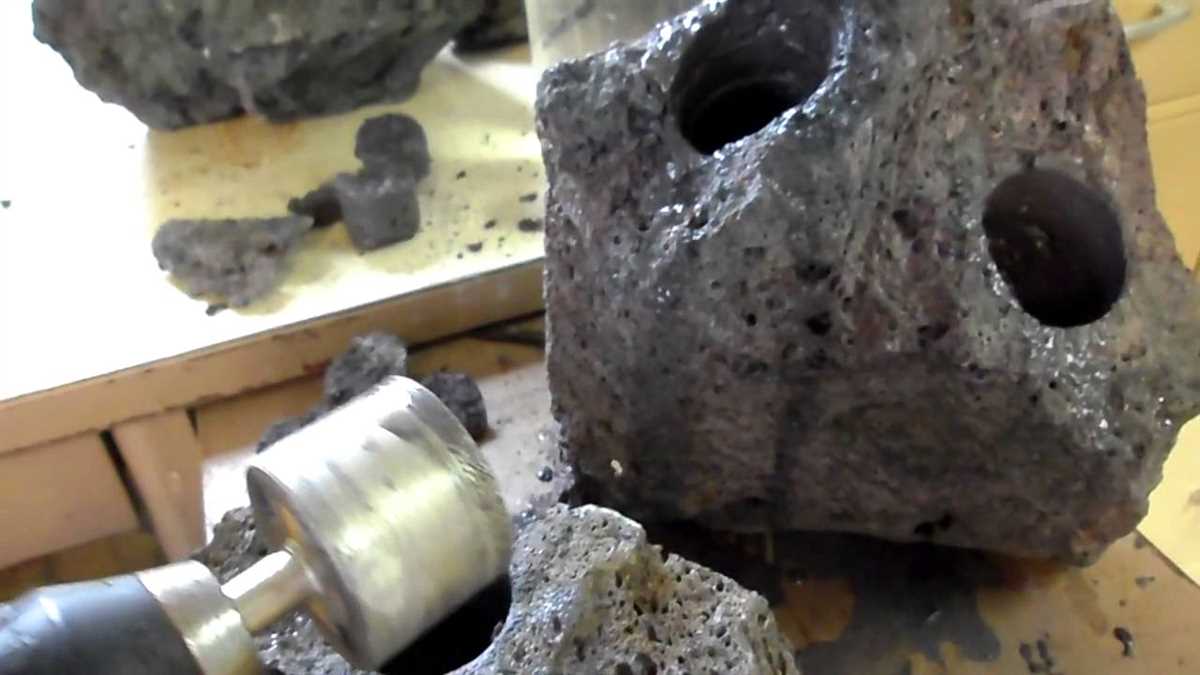
Now it’s time to start drilling. Place the diamond-tipped drill bit on the marked spot and apply downward pressure as you slowly rotate the drill. Keep the drill at a low speed to prevent overheating and damaging the drill bit or the rock. Be patient and let the drill do the work, applying steady pressure while keeping the drill bit cool with water or cutting oil.
Step 5: Finish and Clean Up
Once you’ve drilled the hole to the desired depth, carefully remove the drill bit and inspect your work. If the hole isn’t as neat as you’d like, you can use a round file or sandpaper to smooth out any rough edges. Clean up any debris from the drilling process and your rock is ready for whatever creative project you have in mind!
Drilling a hole in a rock can be a rewarding and satisfying endeavor. With the right tools, technique, and a little patience, you can transform an ordinary rock into a unique and versatile piece of art. So gather your tools, choose your rock, and let your creativity flow!
Choose the Right Drill Bit
When drilling a hole in a rock, it is essential to choose the right drill bit for the job. Different types of rocks may require different drill bits to achieve the best results.
Diamond Core Drill Bits
- Diamond core drill bits are the most common choice for drilling holes in rocks.
- These drill bits have a diamond coating on the tip, which allows them to cut through even the hardest rocks.
- Diamond core drill bits come in various sizes, so it’s important to select the right size for your project.
Carbide Tipped Drill Bits
- Carbide tipped drill bits are another option for drilling holes in rocks.
- These drill bits have a carbide tip, which provides excellent durability and resistance to heat.
- Carbide tipped drill bits are ideal for softer rocks, but they may struggle with harder rocks.
Masonry Drill Bits
- Masonry drill bits are commonly used for drilling holes in concrete and bricks, but they can also be used for drilling into certain types of rocks.
- These drill bits have a specially designed tip that allows them to penetrate hard materials.
- While masonry drill bits can work for drilling into rocks, they may not be as effective as diamond core drill bits or carbide tipped drill bits.
Consider the Rock Type
The type of rock you are drilling into should also be taken into consideration when choosing a drill bit.
- If you are drilling into a hard rock like granite or basalt, diamond core drill bits are your best option.
- For softer rocks like sandstone or limestone, carbide tipped drill bits may be sufficient.
- It’s important to do some research and understand the properties of the rock you are working with to determine the most appropriate drill bit.
| Drill Bit Type | Advantages | Disadvantages |
|---|---|---|
| Diamond Core Drill Bits | Durable, suitable for hard rocks | Expensive, may require water for cooling |
| Carbide Tipped Drill Bits | Durable, suitable for softer rocks | Less effective on hard rocks |
| Masonry Drill Bits | Can work for drilling into rocks | May not be as effective as other options |
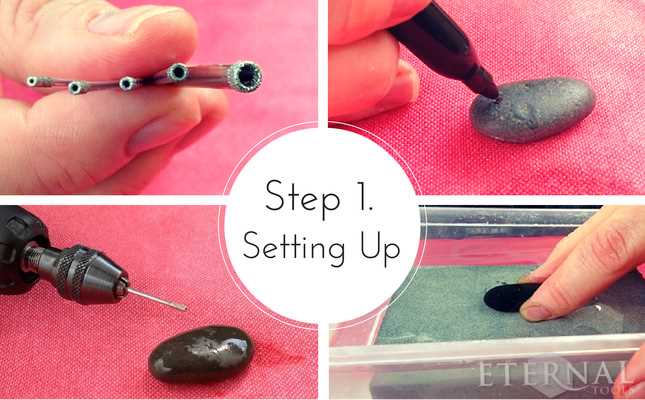
Mark the Position
Once you have chosen the rock that you want to drill a hole into, you will need to mark the position where you want the hole to be. This step is crucial in ensuring that the hole is drilled in the right place.
- Carefully examine the rock and determine the most suitable area for drilling the hole. Consider factors such as the shape, size, and stability of the rock.
- Using a marker or a pencil, make a small dot or mark on the surface of the rock at the desired location for the hole. Make sure the mark is visible and easy to follow.
- If you are drilling multiple holes, it is recommended to use a ruler or a measuring tape to ensure that the marks are evenly spaced and aligned.
Tips:
- Make sure to choose a flat and stable surface of the rock for marking the position, as it will make the drilling process easier.
- Avoid areas of the rock that are prone to breaking or cracking, as this can affect the stability and integrity of the hole.
- If the rock is too hard to mark with a marker or a pencil, you can use a small hammer and a chisel to create a small indentation that will serve as a guide for drilling.
By marking the position before drilling, you can ensure accuracy and precision in creating the desired hole in the rock.
Prepare the Rock
Before you start drilling a hole in a rock, it’s important to properly prepare the rock to ensure the best results. Here are the steps to prepare the rock:
- Clean the rock: Start by cleaning the rock thoroughly to remove any dirt, debris, or loose particles. You can use a brush or cloth to gently scrub the surface of the rock and remove any dirt.
- Choose the right rock: Not all rocks are suitable for drilling. It’s important to choose a rock that is relatively soft and not too hard. Rocks like sandstone, limestone, and shale are generally easier to drill through compared to granite or quartz.
- Inspect the rock: Examine the rock closely for any cracks or weak spots. If you notice any, avoid drilling near or through those areas, as they may compromise the structural integrity of the rock.
- Mark the drilling spot: Use a marker or pencil to mark the exact spot where you want to drill the hole. This will help you stay on track and drill in the desired location.
- Secure the rock: To prevent the rock from moving while drilling, you can use clamps or vise grips to hold it in place. Alternatively, you can place the rock on a stable surface and use your non-dominant hand to apply pressure and hold it steady.
Following these preparation steps will help ensure a successful drilling process and minimize the risk of damaging the rock.
Use Safety Equipment
Safety First
Drilling a hole in a rock can be a hazardous task, so it is essential to use proper safety equipment to protect yourself from potential accidents or injuries. Below are the essential safety equipment you should have before you start drilling:
Protective Eyewear
Wearing protective eyewear such as safety glasses or goggles is crucial to shield your eyes from any flying debris or particles that could be ejected when drilling into the rock. Make sure the eyewear provides adequate coverage and fits securely to provide maximum protection.

Dust Mask
When drilling a hole in a rock, it is common for dust and small particles to be released into the air. To protect your respiratory system from inhaling these potentially harmful particles, wear a dust mask. Choose a mask that is specifically designed for filtering fine particles and ensure a secure fit to prevent inhalation of dust.
Gloves
Wearing a pair of gloves is essential to protect your hands from potential injuries while drilling. Select gloves that are durable, made from high-quality materials, and provide a good grip. This will not only safeguard your hands against sharp edges or debris but also improve your grip on the drill, ensuring precise control during the drilling process.
Work Area Protection
Ensure that your work area is properly set up and protected to minimize accidents. Use a workbench or sturdy surface to provide a stable drilling platform. Lay down a protective sheet or tarp to catch any debris or fragments that may scatter during the drilling process. This will help maintain a clean and safe working environment.
Proper Clothing
Wear appropriate clothing that covers your body and limbs to protect yourself from potential scratches or injuries. Avoid loose-fitting clothes or dangling accessories that can get caught in the drill or machinery. Opt for long-sleeved shirts, long pants, and closed-toe shoes to provide maximum protection.

Emergency Kit
Lastly, always keep an emergency kit nearby in case of unexpected injuries. The kit should include first aid supplies such as bandages, antiseptic ointment, and any necessary medications. Familiarize yourself with basic first aid procedures to ensure prompt and proper care in case of any mishaps.
By using the proper safety equipment and taking necessary precautions, you can ensure a safer drilling experience when working with rocks. Remember, safety should always be your top priority!
Start Drilling
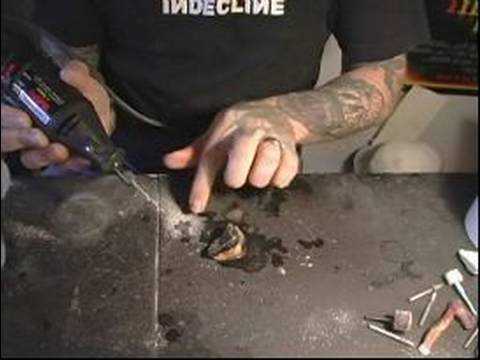
Once you have gathered all your materials and have prepared your work area, you are ready to begin drilling the hole in your rock. Follow these steps to ensure a successful drilling process:
Step 1: Secure the rock
Place the rock securely in a vise or clamp it down onto a stable surface. This will prevent the rock from moving while you are drilling and ensure a more accurate hole.

Step 2: Mark the drilling spot
Use a permanent marker or a pencil to mark the exact spot on the rock where you want the hole to be drilled. This will serve as your guide throughout the drilling process.
Step 3: Choose the appropriate drill bit
Select a diamond-tipped or carbide-tipped drill bit that is suitable for drilling through rocks. The size of the drill bit will depend on the size of the hole you want to create.
Step 4: Prepare the drill
Attach the chosen drill bit to your drill and ensure that it is securely tightened. Make sure the drill is set to the correct speed and adjust as needed. Refer to the manufacturer’s instructions for your specific drill and drill bit.
Step 5: Apply water or lubricant
- Drilling through rocks can create a lot of heat and friction. To minimize these, it is important to keep the drill bit cool. To do this, you can constantly apply water or a lubricant to the drilling area. This will help to lubricate the drill bit and keep it cool as you drill.
- Make sure to wear protective gloves and safety glasses during this step to avoid any contact with the water or lubricant.
Step 6: Start drilling
- Position the drill bit on the marked spot and hold the drill with a firm grip.
- With a steady pressure, begin drilling into the rock. Start at a slow speed and gradually increase the speed as the hole deepens. This will help to prevent the drill bit from getting too hot.
- Continue drilling until you have reached the desired depth.
Step 7: Clean the hole
Once you have finished drilling, remove the debris and dust from the hole. You can use a brush or compressed air to clean out any leftover particles.
Step 8: Test the hole
Before using the hole for any purpose, it is important to test its size and quality. Insert the object or accessory you plan to use in the hole to ensure it fits properly and securely.
Step 9: Practice safety precautions
During the drilling process, always prioritize safety. Wear protective gear, keep your fingers away from the drill bit, and work in a well-ventilated area to avoid inhaling any dust or fumes.
Following these steps will help you successfully drill a hole in a rock and achieve the desired results. Remember to take your time and work carefully to ensure the best outcome.
Apply Water and Lubricant
Applying water and lubricant is an important step when drilling a hole in a rock. This helps to prevent the drill bit from overheating and reduces the risk of the rock cracking or breaking during the drilling process.
Here are the steps to apply water and lubricant:
- Choose the right lubricant: There are various types of lubricants that can be used when drilling a hole in a rock. It’s important to choose a lubricant that is suitable for the type of rock you are drilling into. Some common options include water, cutting oil, or a specialized rock drilling lubricant.
- Prepare the lubricant: If you are using water as a lubricant, fill a spray bottle with clean water. For other types of lubricants, follow the instructions provided by the manufacturer to prepare the lubricant.
- Apply the lubricant: Before you start drilling, spray or apply the lubricant onto the surface of the rock and the area where you will be drilling. Make sure to cover the entire area to ensure proper lubrication.
- Reapply as needed: Depending on the size of the hole you are drilling and the duration of the drilling process, you may need to reapply the lubricant periodically to keep the drill bit and the rock adequately lubricated.
Applying water and lubricant not only helps to keep the temperature down and reduce the risk of cracking or breaking, but it also helps to flush away any debris or dust that may be generated during the drilling process, allowing for a cleaner and smoother hole.
Drill Slowly and Steadily
When drilling a hole in a rock, it’s important to maintain a slow and steady pace. This will help ensure that you are able to control the drilling process and avoid damaging the rock or the drill bit.
1. Choose the right drill bit: Before you begin drilling, it’s important to select the appropriate drill bit for the type of rock you are working with. A masonry drill bit is typically the best option for drilling into rocks. Make sure the drill bit is sharp and in good condition to ensure the best results.
2. Prepare the rock: Before drilling, it can be helpful to mark the spot where you want to drill the hole. You can use a marker or a small dent to create a starting point for the drill bit. This will help guide the drill bit and prevent it from slipping on the rock’s surface.
3. Start drilling: Position the drill bit on the marked spot and apply gentle pressure. Start the drill on a low speed setting and gradually increase the speed as you drill deeper into the rock. Avoid applying too much pressure or forcing the drill bit, as this can cause it to overheat or break.
4. Use water as a lubricant: Drilling into rocks can generate a lot of heat, which can be detrimental to both the drill bit and the rock. To prevent overheating, it’s recommended to use water as a lubricant. You can either spray a small amount of water onto the rock while drilling or periodically dip the drill bit into a container of water.
5. Maintain a steady pace: As you drill, try to maintain a steady and consistent pace. This will help ensure that the hole is drilled evenly and prevent any unnecessary damage to the rock. Avoid rushing or applying too much pressure, as this can lead to mistakes or accidents.
6. Take breaks: Drilling into rocks can be a time-consuming process, especially if you are working with a particularly hard or thick rock. It’s important to take breaks to allow both the drill bit and the rock to cool down. This will help prevent overheating and ensure that the drilling process is as efficient as possible.
7. Clean up and inspect: Once you have successfully drilled the hole, make sure to clean up any debris or dust that may have accumulated during the drilling process. Inspect the hole to ensure that it is the desired size and depth, and make any necessary adjustments if needed.
| Steps | Description |
|---|---|
| 1 | Choose the right drill bit |
| 2 | Prepare the rock |
| 3 | Start drilling |
| 4 | Use water as a lubricant |
| 5 | Maintain a steady pace |
| 6 | Take breaks |
| 7 | Clean up and inspect |
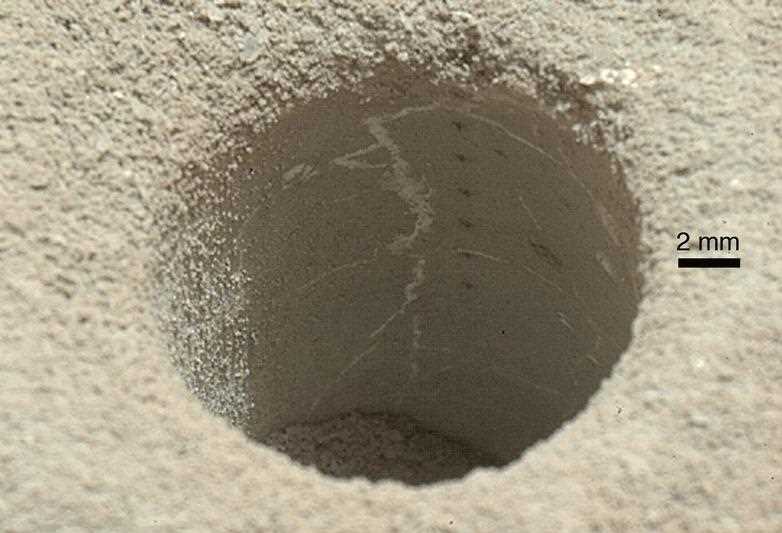
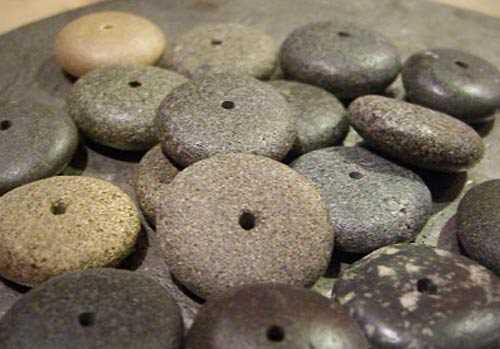
Clean the Hole and Finish
Once you have successfully drilled the hole in the rock, it is important to clean it to remove any debris or dust that may have accumulated during the drilling process. Cleaning the hole will ensure that it is clear and ready for any further use or finishing touches.
To clean the hole, you can use a small brush or compressed air to remove any loose debris. Gently brush or blow away any dust or fragments that may be lingering in the hole. Be careful not to apply too much force, as this could potentially damage the rock or the newly drilled hole.
After cleaning the hole, you can take some time to inspect it and make any necessary adjustments. Check for any rough or uneven edges that may need to be smoothed out. You can use sandpaper or a diamond file to carefully sand down any rough edges, ensuring a smooth and even finish.
If you prefer a more polished look, you can also use a finer grit sandpaper or polishing compound to buff the surface of the hole. This will give it a smoother and shinier appearance.
Once the hole is clean and finished to your liking, you can proceed with any further steps or uses for the drilled hole. Whether you plan to insert a decorative element, use it for jewelry-making, or simply showcase your collection of drilled rocks, taking the time to clean and finish the hole will ensure a professional and polished end result.
FAQ:
What tools do I need to drill a hole in a rock?
To drill a hole in a rock, you will need a power drill, a masonry drill bit, water, safety glasses, and a clamp or vise to secure the rock.
Can I drill a hole in a rock without a power drill?
No, drilling a hole in a rock requires a power drill with enough power to work through the hard surface of the rock.
How do I choose the right masonry drill bit for the rock I am drilling?
When choosing a masonry drill bit, consider the type of rock you are drilling and its hardness. For softer rocks, a carbide or diamond-tipped bit is recommended, while for harder rocks like granite or quartz, a diamond-coated drill bit is necessary.
Do I need to use water while drilling a hole in a rock?
Yes, using water while drilling a hole in a rock is essential. It helps to cool down the drill bit and rock, preventing overheating and extending the life of the bit. It also helps to flush away debris and keep the drill bit lubricated.
How long does it typically take to drill a hole in a rock?
The time it takes to drill a hole in a rock can vary depending on the hardness of the rock and the power of your drill. On average, it may take several minutes to drill a hole in a rock, but harder rocks may require more time and effort.
Video:


Meet Harrison Clayton, a distinguished author and home remodeling enthusiast whose expertise in the realm of renovation is second to none. With a passion for transforming houses into inviting homes, Harrison's writing at https://thehuts-eastbourne.co.uk/ brings a breath of fresh inspiration to the world of home improvement. Whether you're looking to revamp a small corner of your abode or embark on a complete home transformation, Harrison's articles provide the essential expertise and creative flair to turn your visions into reality. So, dive into the captivating world of home remodeling with Harrison Clayton and unlock the full potential of your living space with every word he writes.


