How to Drill a Hole from Basement Ceiling to Floor Above: Step-by-Step Guide
If you’re looking to run electrical wires, plumbing pipes, or any other type of cables or lines from your basement ceiling to the floor above, drilling a hole is often the best solution. This step-by-step guide will walk you through the process of drilling a hole from your basement ceiling to the floor above, ensuring a professional-looking result.
Step 1: Preparation
Before you begin drilling, it’s important to ensure that you have all the necessary materials and tools on hand. You’ll need a drill equipped with a long drill bit, measuring tape, pencil, safety goggles, and a ladder or step stool to reach the ceiling and floor. Double-check that there are no electrical wires or other obstructions in the area where you plan to drill.
Step 2: Mark the Location
Using the measuring tape and pencil, mark the exact spot on the basement ceiling where you want the hole to be. Take into account any obstacles or structural elements that may be present. It’s also a good idea to mark the spot on the floor above to ensure accuracy.

Step 3: Drill the Pilot Hole
Start by drilling a small pilot hole at the marked location. Use slow and steady pressure, ensuring the drill is perpendicular to the surface. This will serve as a guide for the larger hole and prevent the drill bit from slipping or causing damage.
Step 4: Enlarge the Hole
Once the pilot hole is drilled, switch to a larger drill bit and carefully enlarge the hole. Again, maintaining a perpendicular position and using slow, steady pressure is key. Be sure to periodically remove the drill to clear any debris from the hole.
Step 5: Finishing touches

Once the hole is drilled to the desired size, inspect the surrounding area for any damage or splinters. Smooth out any rough edges or splintered wood using sandpaper or a file. You may also want to apply a coat of sealant to protect the wood and prevent moisture or pests from entering.
Remember, safety should always be your top priority when drilling. Wear your safety goggles, work in a well-ventilated area, and take breaks if necessary. If you’re unsure about any step or don’t feel comfortable doing the job yourself, it’s best to consult a professional. With the right tools and proper techniques, you’ll be able to drill a hole from your basement ceiling to the floor above with ease.
Choose the Right Location for the Hole
Before you start drilling a hole from the basement ceiling to the floor above, it is important to choose the right location for the hole. Here are some factors to consider:
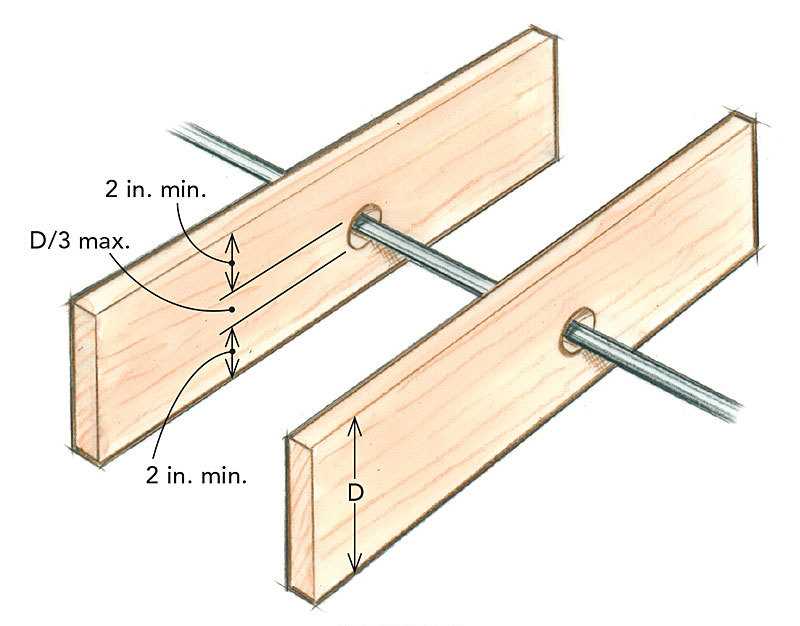
- Structural Integrity: Assess the structural integrity of the area before drilling a hole. Make sure there are no load-bearing beams, electrical wires, or plumbing pipes in the way.
- Access: Consider the accessibility of the area where you want to drill the hole. Ensure that there is enough space to work comfortably and safely.
- Functionality: Think about the purpose of the hole. Determine whether you need to run electrical wires, plumbing pipes, or any other utility through it.
- Aesthetics: Take into account the aesthetic aspect. Consider the visibility of the hole once it is drilled and whether it will impact the overall appearance of the space.
It is recommended to consult with a professional if you are unsure about the location or if you need to drill through any potentially hazardous materials.
Prepare the Tools and Equipment
Before you begin drilling a hole from the basement ceiling to the floor above, it is important to gather the necessary tools and equipment. Having the right tools on hand will make the process easier and safer. Here are the tools you will need:
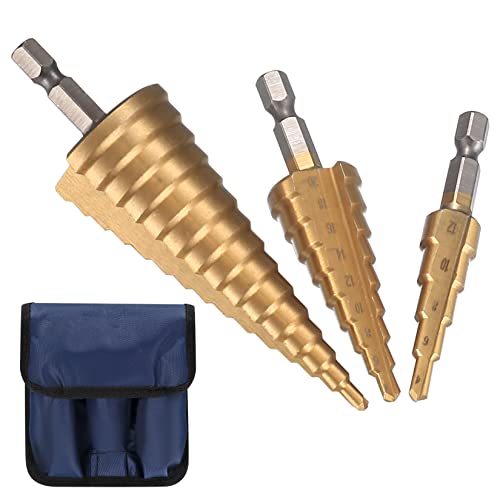
- Drill: You will need a power drill with a long drill bit that is suitable for drilling through the materials in your basement ceiling and the floor above.
- Measuring tape: Use a measuring tape to determine the exact distance between the basement ceiling and the floor above. This will help you choose the right length for the drill bit.
- Protective eyewear: It is important to wear protective eyewear while drilling to prevent any debris from getting into your eyes.
- Dust mask: Drilling can create a lot of dust, so wearing a dust mask will help protect your respiratory system from inhaling any harmful particles.
- Drop cloth or plastic sheeting: Place a drop cloth or plastic sheeting on the floor and furniture in the room above to protect them from any debris or dust that may fall during the drilling process.
- Pencil or marker: Use a pencil or marker to mark the spot on the basement ceiling where you want to drill the hole.
- Sturdy ladder or step stool: Depending on the height of your basement ceiling and the floor above, you may need a sturdy ladder or step stool to reach the drilling area safely.
- Safety gloves: Wear safety gloves to protect your hands from any sharp edges or debris while drilling.
Once you have gathered all the necessary tools and equipment, you will be ready to begin drilling the hole from the basement ceiling to the floor above.

Measure and Mark the Hole
Before drilling the hole, it’s important to take accurate measurements and mark the positions on the ceiling and floor where the hole will be located. This will help ensure that the hole is positioned correctly and will align with any existing electrical or plumbing components.
Here are the steps to measure and mark the hole:
- Determine the location of the hole on the basement ceiling. This will depend on the specific needs, such as the location of the desired outlet or the routing of wiring or plumbing. Use a measuring tape to determine the exact distance from the nearest wall or other reference point.
- Transfer the measurements to the floor above. Use a plumb line or laser level to mark the corresponding spot on the floor. Ensure that the mark is directly above the marked spot on the basement ceiling.
- Double-check the measurements and the alignment of the marks to ensure accuracy. It’s better to be cautious and double-check than to have to make adjustments later.
Once the hole is accurately marked, you can proceed with drilling. Remember to take all necessary safety precautions, such as wearing protective eyewear and using a drill with appropriate bits for the material you are drilling into.
Drill the Pilot Hole
Before drilling the actual hole, it is important to start with a pilot hole. The pilot hole serves as a guide for the larger drill bit and helps prevent any mishaps or mistakes. Here are the steps to drill the pilot hole:
- Choose the right location: Determine the exact spot on the basement ceiling where you want to drill the hole. Make sure it is a convenient location and aligns with the desired location on the floor above.
- Measure and mark: Use a measuring tape to measure the distance between the basement ceiling and the floor above. Mark this measurement on the drill bit with a piece of tape or a marker. This will indicate the depth to which the pilot hole should be drilled.
- Prepare the drill: Attach a small-sized drill bit to your power drill. Make sure the drill bit is sharp and in good condition. Additionally, set the drill to a low speed to ensure better control during the drilling process.
- Protect surrounding areas: Before drilling, cover the surrounding floor and walls with a drop cloth or plastic sheeting to catch any debris or dust that may be generated during the drilling process.
- Start drilling: Position the drill bit over the marked location and apply gentle pressure to start drilling. Keep the drill perpendicular to the basement ceiling to ensure that the pilot hole is straight.
- Monitor the drilling: While drilling, periodically stop to remove any wood chips or debris that may accumulate in the pilot hole. This will help maintain the efficiency of the drill and prevent it from getting clogged.
- Reach the desired depth: Continue drilling until the tape or marker on the drill bit reaches the marked depth. At this point, the pilot hole is complete.
By following these steps, you will successfully drill the pilot hole in the basement ceiling. This pilot hole will serve as a guide for the subsequent drilling of the larger hole to connect the basement ceiling with the floor above.

Enlarge the Hole with a Larger Drill Bit
Once you have created a pilot hole in the basement ceiling, it’s time to enlarge it to the desired size using a larger drill bit. This step is necessary to accommodate the size of the cable or pipe you are planning to pass through the hole.
Follow these steps to enlarge the hole with a larger drill bit:
- Choose a drill bit that is slightly larger than the pilot hole you have already made. Make sure the drill bit is appropriate for the material you are drilling through.
- Insert the larger drill bit into your power drill.
- Position the drill bit at the edge of the pilot hole.
- Apply steady pressure and begin drilling into the ceiling. Be careful not to press too hard, as this can cause the drill to slip and damage the surrounding area.
- Slowly increase the speed of the drill as you continue to drill through the ceiling. This will help prevent the drill bit from getting stuck or overheating.
- Monitor the depth of the hole as you drill to ensure it is large enough for your desired purpose.
- Once you have reached the desired depth, slowly remove the drill from the hole.
It’s important to note that drilling through a ceiling can create a significant amount of dust and debris. To minimize the mess, consider using a drill bit with a built-in dust collection system or have a vacuum nearby to collect the debris as you drill.
Additionally, be cautious of any electrical wiring or plumbing pipes that may be hidden within the ceiling. Before drilling, make sure to identify the location of these utilities and avoid drilling into them.
Following these steps will allow you to effectively enlarge the hole in your basement ceiling, providing you with the necessary access for running cables or pipes between the basement and the floor above.

Check and Clear any Obstructions
Before drilling a hole from the basement ceiling to the floor above, it’s important to check for any obstructions that could hinder the process. Here are some steps to follow:
1. Inspect the Ceiling
Take a thorough look at the area where you plan to drill the hole. Look for any signs of obstructions, such as beams, electrical wiring, plumbing pipes, or HVAC ducts. Obstructions can vary depending on the layout and structure of your home.
Tip: Use a stud finder to locate any hidden obstacles, such as wooden beams or metal supports, that could be present in the ceiling.
2. Measure and Mark the Hole Location
Once you’ve determined that there are no potential obstructions, measure and mark the exact location where you want to drill the hole. Use a pencil or a marker to make a clear, visible mark on the ceiling.
3. Clear the Area
To ensure a clean and safe drilling process, clear the surrounding area of any furniture, equipment, or objects that may obstruct your movement or cause damage. This will also help prevent any dust or debris from settling on your belongings.
4. Protect the Area

Before drilling, it’s a good idea to protect the floor and any nearby surfaces from potential damage. Lay down a plastic sheet or use a drop cloth to catch any debris that may fall during the drilling process.
5. Wear Safety Gear
Whenever drilling, it’s essential to wear appropriate safety gear, including safety glasses or goggles to protect your eyes from flying debris, and ear protection if drilling in a noisy environment.
6. Have a Fire Extinguisher Nearby
As a precautionary measure, keep a fire extinguisher within reach in case of any unexpected events. It’s always better to be prepared in case of emergencies.
By following these steps and ensuring that the area is free from obstructions, you can proceed with confidence to drill a hole from the basement ceiling to the floor above.
Run the Required Wires or Pipes Through the Hole
Once the hole has been drilled from the basement ceiling to the floor above, it’s time to run the required wires or pipes through it. This step is crucial for any electrical or plumbing installation that needs to connect the basement with the floor above.
Here is a step-by-step guide on how to run the required wires or pipes through the hole:
- Prepare the wires or pipes: Before running them through the hole, make sure the wires or pipes are properly prepared. This may involve cutting them to the right length, removing any insulation or protective covering, or attaching connectors if needed.
- Thread the wires or pipes: Carefully thread the wires or pipes through the hole in the basement ceiling. Be cautious not to damage the wires or pipes during this process, as it could impact their functionality.
- Secure and route: Once the wires or pipes have been threaded through the hole, secure them in place using appropriate brackets or clips. Ensure that they are properly routed to reach their intended destination, whether it be an electrical panel or a plumbing fixture.
- Label and organize: It’s essential to label and organize the wires or pipes to avoid confusion or difficulty in the future. Use cable ties or labels to mark each wire or pipe, making it easier to identify their purpose or function.
- Test the connections: After running the wires or pipes through the hole, test their connections to ensure they are functioning correctly. For electrical installations, use a multimeter to check for continuity or resistance in the circuit. For plumbing installations, check for any leaks or water flow issues.
- Close the hole: Finally, once everything has been properly tested and confirmed to be working, close the hole using either caulk, putty, or another appropriate sealing material. This will prevent any drafts or moisture from entering the basement.
Following these steps will help ensure a safe and efficient installation of the required wires or pipes between the basement ceiling and the floor above. Always consult local building codes and regulations and consider hiring a professional if you are unsure about any aspect of the installation process.
Seal and Finish the Hole
After drilling the hole from the basement ceiling to the floor above, it is important to properly seal and finish the hole to ensure a professional-looking and safe result. Follow these steps to seal and finish the hole:
Materials You Will Need:

- Sealant (such as caulk or silicone)
- Putty knife
- Sanding paper or block
- Paint and paintbrush
Step 1: Clean the Hole
Start by cleaning the hole and its surrounding area to remove any dust, debris, or loose materials. Use a vacuum cleaner or a damp cloth to ensure a clean surface for sealing and finishing.
Step 2: Apply Sealant
Apply a bead of sealant, such as caulk or silicone, around the edges of the hole. Make sure to cover any gaps or cracks to prevent air or moisture from seeping through. Use a putty knife to smooth out the sealant and create a neat finish.
Step 3: Allow Sealant to Dry
Follow the instructions on the sealant’s label and allow it to dry completely. This may take a few hours or overnight, depending on the type of sealant used. Avoid touching or disturbing the sealant during this time.
Step 4: Sand the Sealant
Once the sealant is dry, use sanding paper or a sanding block to smooth out any rough edges or excess sealant. Take care not to sand too aggressively to avoid damaging the surrounding area.
Step 5: Paint the Sealant

If desired, you can paint over the sealant to match the surrounding walls or ceiling. Choose a paint color that matches the existing paint, and use a paintbrush to carefully apply a coat of paint over the sealant. Allow the paint to dry before moving on.
Step 6: Clean Up
Finally, clean up any debris, tools, or materials used during the sealing and finishing process. Dispose of any waste according to local regulations. Inspect the finished hole to ensure a proper seal and a clean, professional appearance.
By following these steps, you can effectively seal and finish the hole drilled from the basement ceiling to the floor above. This will help to maintain the integrity of your home’s structure and improve the overall aesthetics of the finished project.
FAQ:
Why would I need to drill a hole from the basement ceiling to the floor above?
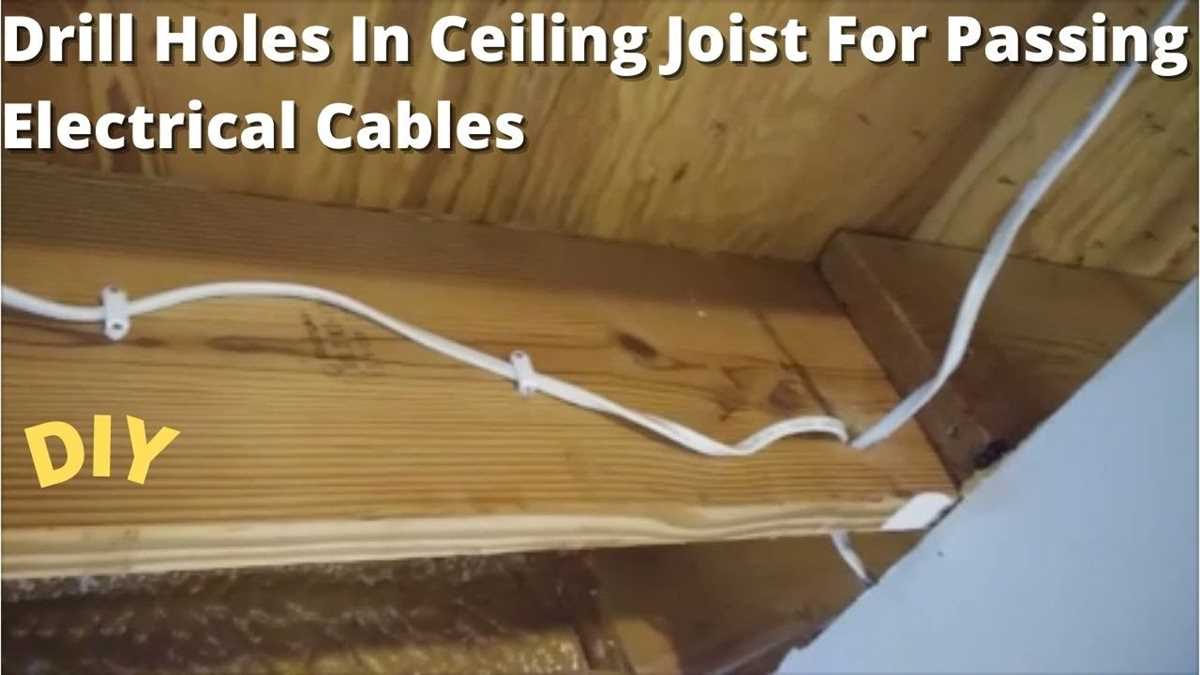
There are several reasons why you might need to drill a hole from the basement ceiling to the floor above. One common reason is to run electrical wires for lighting fixtures in the basement or on the floor above. Another reason is to run plumbing pipes for a bathroom or kitchen renovation. Additionally, you might need to drill a hole for installing a vent or HVAC system.
What tools do I need to drill a hole from the basement ceiling to the floor above?
To drill a hole from the basement ceiling to the floor above, you will need a few basic tools including a drill with a long drill bit, a stud finder, a measuring tape, a pencil or marker, and a stepping ladder or scaffold to reach the ceiling.
How do I locate the spot to drill the hole?
To locate the spot where you need to drill the hole, you should use a stud finder to locate the ceiling joists in the basement and the floor joists in the room above. Once you have located the joists, measure and mark the spot where you want to drill the hole. Make sure to avoid any electrical wires or plumbing pipes that may be in the way.
Should I wear any safety equipment when drilling the hole?
Yes, it is always a good idea to wear safety equipment when drilling a hole. You should wear safety glasses to protect your eyes from any debris that may fly up while drilling. Additionally, you should wear gloves to protect your hands and make sure to work in a well-ventilated area to avoid inhaling any dust or fumes.
What is the best way to drill the hole without causing any damage?
The best way to drill the hole without causing any damage is to start with a small pilot hole. Use a drill with a small drill bit and drill slowly and carefully. Once you have drilled the pilot hole, you can gradually increase the size of the drill bit until you reach the desired hole size. Make sure to control the drill and apply steady pressure to avoid any sudden movements or damage to the surrounding area.
Are there any alternatives to drilling a hole from the basement ceiling to the floor above?
Depending on your specific needs, there might be alternative solutions to drilling a hole. For example, if you need to run electrical wires, you might consider using surface-mounted conduit or wire molding. If you need to run plumbing pipes, you might consider using an alternative route or using flexible pipes that can be snaked through existing openings. It is always best to consult with a professional or a contractor to determine the best solution for your specific situation.
Video:


Meet Harrison Clayton, a distinguished author and home remodeling enthusiast whose expertise in the realm of renovation is second to none. With a passion for transforming houses into inviting homes, Harrison's writing at https://thehuts-eastbourne.co.uk/ brings a breath of fresh inspiration to the world of home improvement. Whether you're looking to revamp a small corner of your abode or embark on a complete home transformation, Harrison's articles provide the essential expertise and creative flair to turn your visions into reality. So, dive into the captivating world of home remodeling with Harrison Clayton and unlock the full potential of your living space with every word he writes.


