How to Drill a 2 Inch Hole in Wood: Step-by-Step Guide

Drilling a 2 inch hole in wood may seem like a daunting task, but with the right tools and technique, it can be easily accomplished. Whether you’re a seasoned woodworker or a beginner DIYer, this step-by-step guide will walk you through the process and ensure your success.
Step 1: Gather the Necessary Tools
Before you begin, make sure you have all the necessary tools on hand. You will need:
- A 2-inch spade bit
- A power drill
- Safety goggles
- A tape measure or ruler
- A pencil or marker
- A clamp or vise
Having these tools ready will allow you to work efficiently and safely throughout the process.
Step 2: Mark Your Drill Point

Using a tape measure or ruler, determine where you want to drill your 2 inch hole in the wood. Mark the spot with a pencil or marker, ensuring it is centered and aligned with your project’s design.
Note: It is important to double-check your measurements and markings to ensure accuracy.
Step 3: Secure the Wood
If possible, secure the wood in place using a clamp or vise. This will prevent any movement or shifting while you drill, ensuring a clean and precise hole. If you don’t have a clamp or vise, make sure the wood is firmly held down on a stable surface.
Step 4: Start Drilling

Put on your safety goggles to protect your eyes from any flying debris. Attach the 2-inch spade bit to your power drill, making sure it is securely fastened. Position the drill bit at the marked spot on the wood and start drilling at a slow speed.
Tip: Applying steady and even pressure will help maintain control and prevent the drill bit from wandering.
Step 5: Drill in Stages
For a 2 inch hole, it is best to drill in stages rather than trying to make the entire hole in one go. Drill about halfway or a little more, then pull the drill bit out and clear any wood chips. This will prevent the bit from getting too hot and ensure a clean hole.
Warning: Take breaks to cool down the bit if it becomes too hot.

Step 6: Finish the Hole
Once you have drilled halfway, reposition the drill bit at the edge of the hole and continue drilling until you reach the other side. Again, make sure to clear any wood chips to maintain the cleanliness of the hole.
Step 7: Inspect and Clean Up
Inspect the hole to ensure it is the desired size and depth. If necessary, use sandpaper or a chisel to smooth out any rough edges. Finally, clean up any remaining wood chips and debris before moving on to your next step in the woodworking project.
Remember: Safety should always be your top priority. Wear safety goggles, avoid loose clothing and jewelry, and follow proper safety procedures when using power tools.
By following these steps and taking your time, you will be able to successfully drill a 2 inch hole in wood. Whether you are building furniture, installing a dowel or simply expanding your woodworking skills, this guide will ensure your success and help you achieve professional-looking results.

Choosing the Right Drill Bit
When it comes to drilling a 2 inch hole in wood, choosing the right drill bit is essential. The type of drill bit you use will depend on the material you are drilling into and the desired result.
1. Spade Bit

A spade bit is a common choice for drilling large holes in wood. It has a flat, paddle-like tip with two sharp edges. The paddle design helps remove wood chips as you drill, allowing for a smooth and clean hole. Spade bits are available in various sizes, including 2 inch.
2. Hole Saw
A hole saw is another type of drill bit suitable for drilling larger holes in wood. It consists of a circular saw blade with teeth on the edge, attached to a guide bit. Hole saws are available in various sizes, including 2 inch. They are commonly used for cutting holes for pipes and cables.
3. Forstner Bit
![Serpentine: Bellydance with Rachel Brice (TWO-DVD SET): Complete belly dancing instructional program, How-to in Rachel's tribal style belly dance, Including full choreographies, Belly dancing classes with yoga [DVD] [ALL REGIONS] [NTSC] [WIDESCREEN]](https://m.media-amazon.com/images/I/517o7ChYnHL._SS520_.jpg)
A Forstner bit is a specialty drill bit designed for drilling clean, flat-bottomed holes. It features a center point and sharp outer edges that cut smoothly through wood. Forstner bits are ideal for drilling precise and clean holes, making them a good choice if you need a professional finish.
4. Spur Point Bit
A spur point bit, also known as a twist drill bit, is a versatile choice suitable for drilling holes in various materials, including wood. It has a pointed tip that helps to guide the bit accurately and prevents it from wandering. The flutes on the bit remove debris as you drill, allowing for efficient drilling.
Factors to Consider
When choosing the right drill bit for drilling a 2 inch hole in wood, consider the following factors:
- Material: Different materials may require different drill bits. Ensure that the drill bit you choose is suitable for wood.
- Size: Ensure that the drill bit is the right size for your desired hole diameter. In this case, make sure it is a 2 inch drill bit.
- Depth: Consider the depth of the hole you need to drill. Some drill bits are better suited for shallow holes, while others can handle deeper holes.
- Finish: Depending on your desired finish, choose a drill bit that will provide the level of smoothness and precision you need.
By considering these factors and selecting the appropriate drill bit, you can ensure a successful drilling process and achieve the desired result when drilling a 2 inch hole in wood.
Measuring and Marking the Hole
Before drilling a 2-inch hole in wood, it’s important to measure and mark the precise location where the hole will be made. Here are the steps to follow:
- Choose the spot where you want the hole to be drilled. It should be clear of any obstructions and easily accessible.
- Measure the diameter of the hole you need to drill. In this case, it’s 2 inches.
- Using a tape measure, measure and mark the center of the hole on the wood. This will ensure that your hole is accurately drilled.
- If necessary, use a ruler or straight edge to draw a line across the wood to connect the center mark with another point on the wood’s surface. This can be helpful for visual reference.
- Double-check your measurements and marks to ensure accuracy. It’s better to be precise from the start than to make mistakes while drilling.
By measuring and marking the hole beforehand, you can ensure that your drilling is precise and that the hole is placed exactly where you want it to be. This step is crucial for achieving professional-looking results.
Securing the Wood

Before drilling a 2 inch hole in wood, it is important to secure the wood properly to prevent it from moving or shifting during the drilling process. This will ensure accurate drilling and reduce the risk of accidents or mistakes.
Here are some steps to follow for securing the wood:
- Choose a sturdy work surface: Place the wood on a stable and flat work surface such as a workbench or sawhorse. This will provide a solid foundation and prevent the wood from moving during drilling.
- Use clamps: If the wood is large or heavy, use clamps to secure it to the work surface. This will provide additional stability and prevent the wood from shifting or vibrating during drilling.
- Mark the drilling area: Use a pencil or marker to mark the exact spot where you want to drill the 2 inch hole. This will help ensure accurate drilling and prevent mistakes.
- Create a drilling guide: For more precise drilling, you can create a drilling guide by attaching a scrap piece of wood or a drilling template to the surface of the wood. This will help guide the drill bit and prevent it from wandering or slipping off the mark.
Note: It is important to always follow the manufacturer’s instructions and safety guidelines when using power tools. Use appropriate safety equipment such as safety glasses and gloves to protect yourself during the drilling process.
Setting the Depth Stop
Setting the depth stop on your drill is an important step to ensure that you drill a clean and accurate 2-inch hole in wood. The depth stop allows you to control the depth of the hole and prevents you from drilling too deep.
Here is a step-by-step guide for setting the depth stop:
- Locate the depth stop on your drill. It is usually a small metal rod or collar located behind the chuck.
- Loosen the depth stop by turning it counterclockwise. This will allow you to adjust the depth setting.
- Measure the desired depth for your hole. In this case, you want a 2-inch hole, so set the depth stop to 2 inches.
- Tighten the depth stop by turning it clockwise. Make sure it is secure and won’t move during the drilling process.
- Double-check the depth setting by placing the drill bit against a ruler or measuring tape. Ensure that the tip of the drill bit is at the desired depth.
Once you have successfully set the depth stop, you are ready to start drilling your 2-inch hole in wood. Remember to use steady pressure and keep the drill bit perpendicular to the surface to achieve the best results.
Starting the Drill
Before you begin drilling, it’s important to gather all the necessary tools and materials:
- A drill with a 2-inch drill bit
- Wood to be drilled
- Measuring tape or ruler
- Marker or pencil
- Protective eyewear and gloves
Once you have everything you need, follow these steps to start drilling a 2-inch hole in wood:
- Prepare the wood: Place the wood that needs to be drilled on a stable surface. Make sure it’s securely clamped or held down to prevent any movement during drilling.
- Measure and mark: Use a measuring tape or ruler to determine the exact location where you want the hole to be drilled. Use a marker or pencil to mark the spot on the wood.
- Set up the drill: Attach the 2-inch drill bit securely to the drill according to the manufacturer’s instructions. Make sure it is tightened properly.
- Adjust the drill speed: Depending on the type of wood you are drilling, adjust the drill speed accordingly. A slower speed is usually recommended for hardwoods, while a faster speed can be used for softer woods.
- Position the drill: Position the drill bit directly above the marked spot on the wood. Hold the drill with a firm grip and make sure it is perpendicular to the wood surface.
- Start drilling: Slowly engage the drill trigger and begin drilling into the wood. Apply steady and consistent pressure, but avoid pushing too hard, as it can cause the drill to get stuck or the wood to splinter.
- Drill to the desired depth: Continue drilling until you reach the desired depth for your 2-inch hole. To prevent the drill bit from getting too hot, periodically withdraw it from the hole to remove wood chips and allow it to cool.
- Remove the drill bit: Once the hole is drilled, turn off the drill and remove the drill bit from the wood. Clean any wood chips or debris from the hole.
By following these steps, you can successfully start drilling a 2-inch hole in wood. Remember to always prioritize safety by wearing protective gear and using caution while operating power tools.
“`html
Drilling the Hole
Step 1: Before drilling the hole, make sure you have marked the exact spot where you want the hole to be. Use a pencil or a marker to make a small dot on the wood surface.
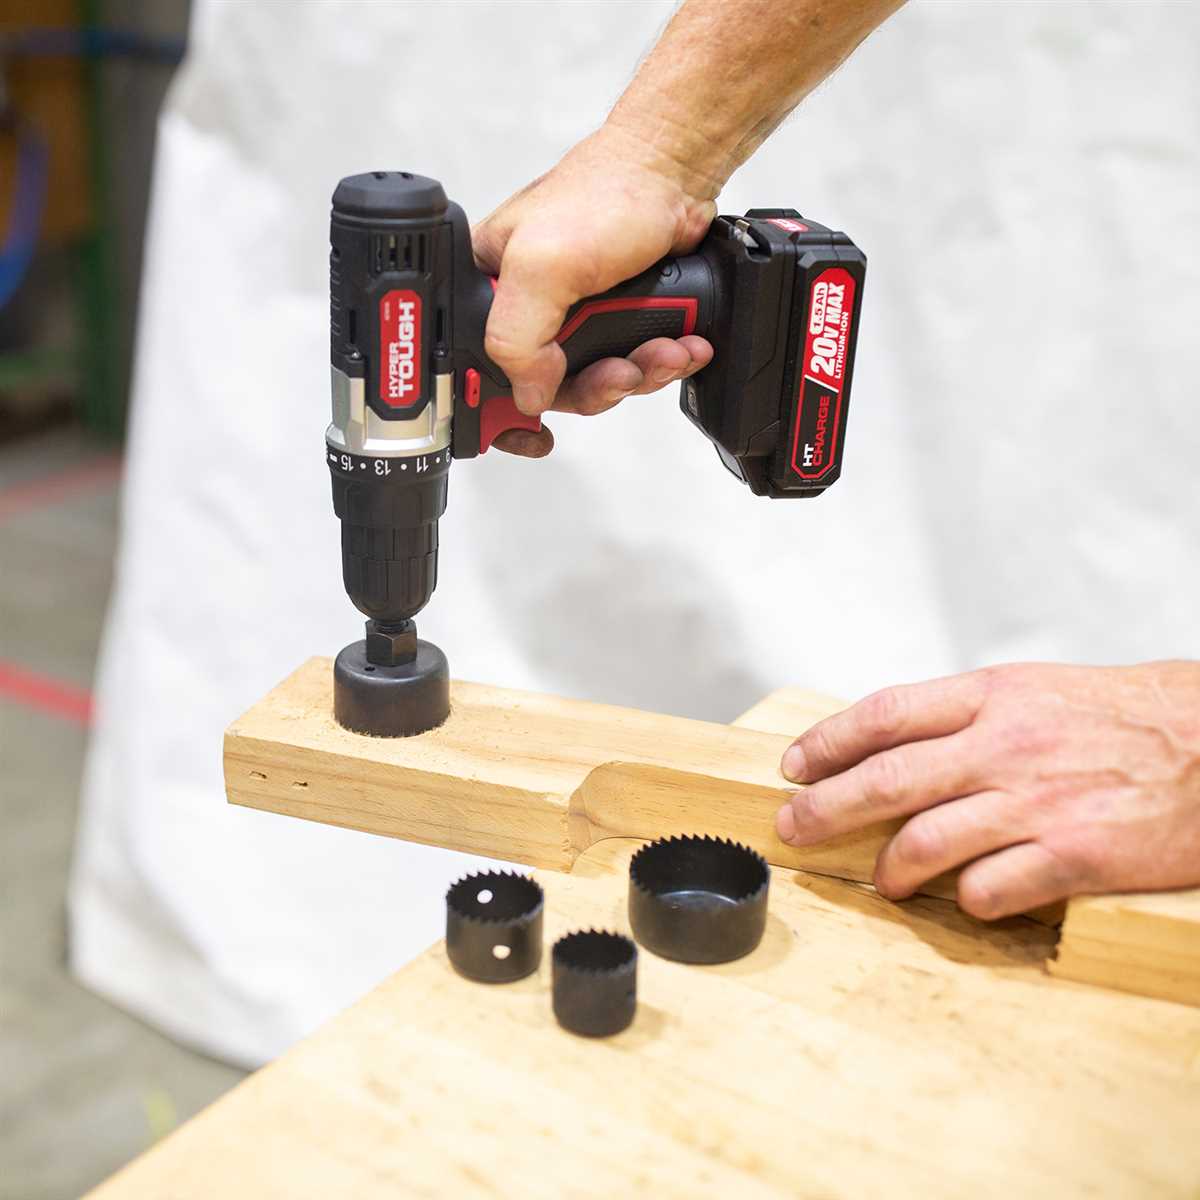
Step 2: Attach the correct size of the hole saw to your drill. In this case, you will need a 2 inch hole saw.
Step 3: Secure the wood that you will be drilling into. You can use clamps or a vise to hold the wood firmly in place. This will prevent the wood from moving or spinning while you drill.
Step 4: Begin drilling the hole on the marked spot. Start the drill at a slow speed to create a pilot hole. This will help guide the hole saw and prevent it from slipping off the mark.
Step 5: Once the pilot hole is created, you can increase the speed of the drill. Apply steady pressure and keep the drill perpendicular to the wood surface. This will ensure an even and clean hole.
Step 6: As you drill, periodically pull the hole saw out of the hole to remove wood chips and sawdust. This will prevent the hole saw from clogging and allow it to cut more efficiently.
Step 7: Continue drilling until the hole saw has cut through the wood completely. You will know the hole is finished when the center bit of the hole saw comes out the other side of the wood.
Step 8: Once the hole is drilled, remove the hole saw from the drill. Use a brush or compressed air to clean out any remaining wood chips or sawdust from the hole.
Step 9: Inspect the hole to ensure it is the correct size and shape. If necessary, use sandpaper or a file to smooth any rough edges.
Step 10: The hole is now ready for use! You can insert a dowel, pipe, or other object into the hole.
“`
Cleaning the Hole
After drilling a 2-inch hole in wood, it’s important to clean out any debris or sawdust that may have accumulated inside the hole. This will ensure that the hole is clean and ready for use.
- Remove the drill bit: Start by removing the drill bit from the hole. This will make it easier to clean out any debris.
- Use a brush or vacuum: Use a brush or vacuum to remove any loose sawdust or debris from the hole. Gently brush or vacuum the inside of the hole to remove all the particles.
- Inspect the hole: Take a closer look at the hole to ensure that it is completely clean. Remove any remaining debris using a brush or vacuum.
- Blow out the hole: If there are still small particles or dust inside the hole, you can use compressed air to blow them out. Hold the compressed air nozzle near the hole and use short bursts of air to remove any remaining debris.
- Wipe the hole: Finally, take a clean cloth or paper towel and lightly wipe the inside of the hole to remove any remaining dust or debris. This will ensure that the hole is completely clean.
By following these steps, you can ensure that the 2-inch hole is properly cleaned out and ready for use. This will not only make it easier to work with, but also help maintain the quality and integrity of the wood.
Finishing and Sanding
Finishing and sanding are important steps in the drilling process to ensure a smooth and polished appearance for your 2-inch hole in wood. Follow these steps to achieve a professional finish:
- Inspect the hole: After drilling the hole, inspect it closely for any rough or uneven edges. Use your fingers to feel for any imperfections.
- Sanding: Start by sanding the edges of the hole with sandpaper. Use a fine-grit sandpaper to gently smooth out any roughness. Sand in a circular motion to ensure an even finish.
- Deburring: If there are any burrs or sharp edges, use a deburring tool or a file to remove them. Be careful not to apply too much pressure, as it may damage the wood.
- Cleaning: Once you have finished sanding and deburring, use a soft cloth or brush to remove any sawdust or debris from the hole. Ensure that the hole is clean and free of any loose particles.
- Sealing: To protect the wood and give it a smooth, polished finish, consider applying a wood sealant or varnish to the surrounding area of the hole. Follow the manufacturer’s instructions for application and drying time.
- Final touch: Once the sealant or varnish has dried, inspect the hole again to ensure that it has a smooth and professional appearance. If necessary, lightly sand any areas that may require touch-ups.
Remember, the key to a perfectly drilled 2-inch hole in wood is patience and attention to detail during the finishing and sanding process. Take your time and enjoy the satisfaction of a well-finished project!
FAQ:
What tools do I need to drill a 2 inch hole in wood?
To drill a 2 inch hole in wood, you will need a 2 inch hole saw, a power drill, a drill bit, a center punch, and a hammer.
Can I use a regular drill bit to drill a 2 inch hole in wood?
No, you cannot use a regular drill bit to drill a 2 inch hole in wood. You will need a 2 inch hole saw, which is specifically designed for creating large holes.
Video:


Meet Harrison Clayton, a distinguished author and home remodeling enthusiast whose expertise in the realm of renovation is second to none. With a passion for transforming houses into inviting homes, Harrison's writing at https://thehuts-eastbourne.co.uk/ brings a breath of fresh inspiration to the world of home improvement. Whether you're looking to revamp a small corner of your abode or embark on a complete home transformation, Harrison's articles provide the essential expertise and creative flair to turn your visions into reality. So, dive into the captivating world of home remodeling with Harrison Clayton and unlock the full potential of your living space with every word he writes.


