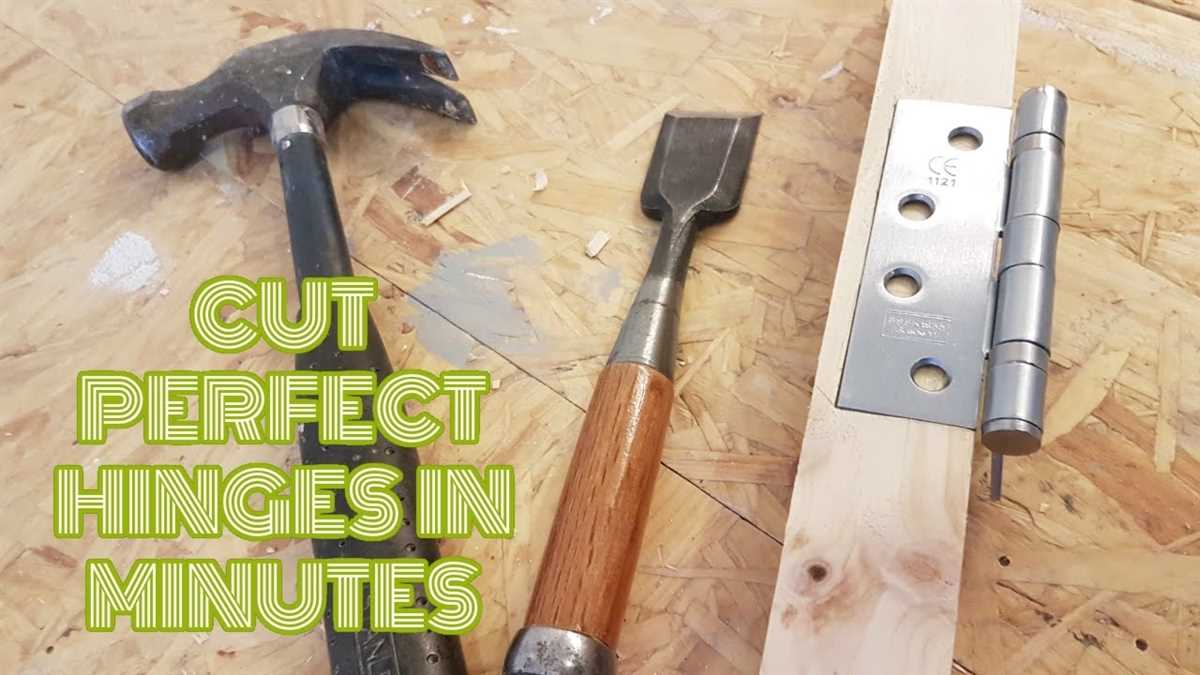
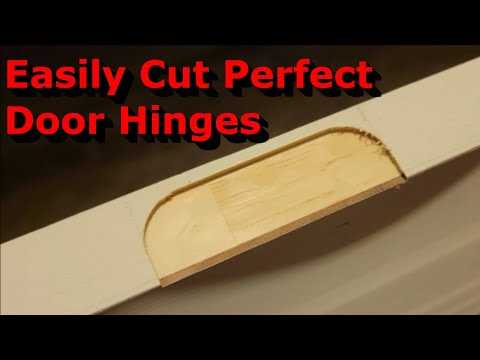
How to Cut Door Hinges with a Drill: Step-by-Step Guide

Installing or replacing door hinges can be a daunting task, especially if you don’t have the right tools or know-how. However, with the help of a drill, you can make the process much easier and more efficient. In this step-by-step guide, we will walk you through the process of cutting door hinges using a drill, ensuring a professional and clean finish.
Step 1: Measure and Mark
Before you start cutting, it’s crucial to measure and mark the position of the hinges on both the door and the door frame. Using a tape measure, determine the desired location for the hinges and make a small mark with a pencil. It’s essential to align the hinges correctly for the door to close and open smoothly.
Step 2: Secure the Door and Frame
Next, you’ll want to secure the door and the door frame to prevent any movement during the cutting process. Place sturdy clamps on both sides of the opening, ensuring that the door remains stable. This will not only make the cutting process safer but also promote accuracy and precision.

Step 3: Attach a Hole Saw to the Drill
Now it’s time to attach a hole saw to your drill. A hole saw is a circular cutting tool that can easily remove a section of material, allowing the hinge to fit flawlessly. Choose a hole saw that matches the size of your hinges, typically 1 ¼ inches for most residential doors. Attach it securely to your drill, following the instructions provided with the saw.
Step 4: Begin Cutting
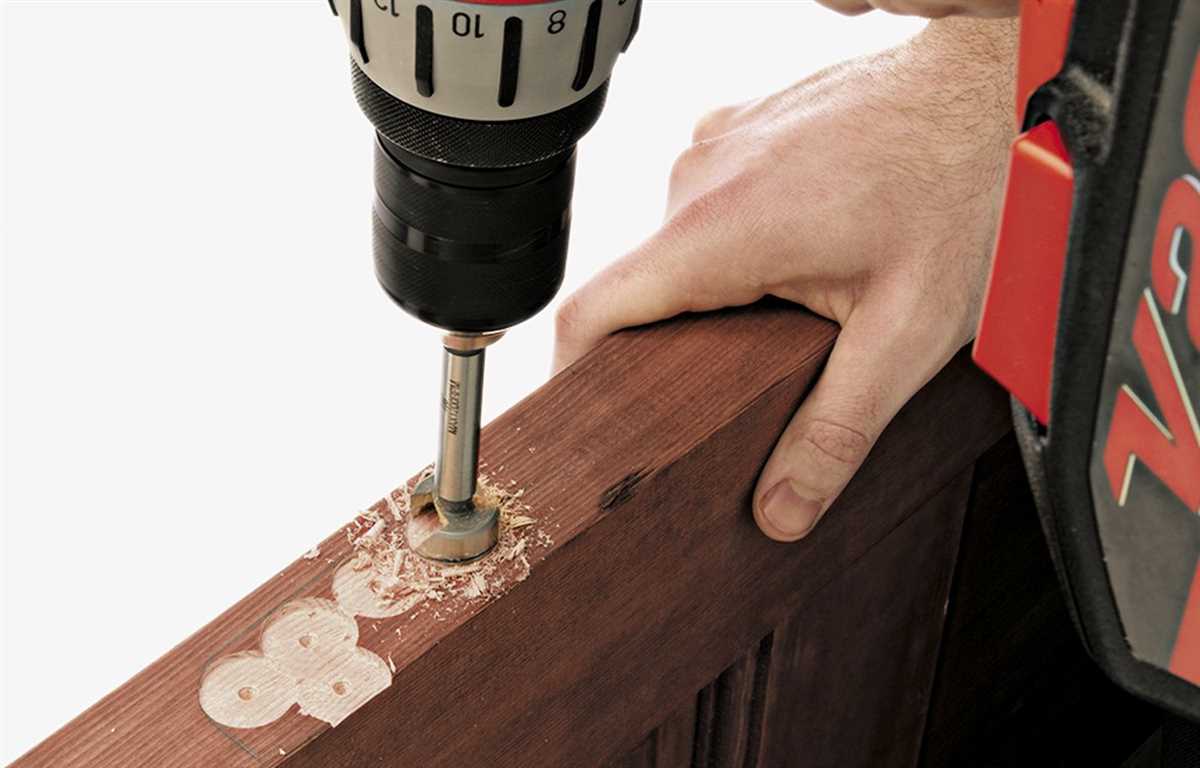
With the hole saw attached to your drill, carefully position it on the marked hinge location. Apply light pressure and, using a slow and steady motion, begin cutting into the door or frame. Allow the saw to do the work; avoid forcing the drill as it may cause damage or splinter the material. Cut through the marked area until you have a clean, circular hole.
Step 5: Test the Fit

After cutting the holes, it’s important to test the fit of the hinges. Place them into the holes on both the door and the frame. Ensure that the hinges align perfectly and that the door opens and closes smoothly. If needed, use a chisel or sandpaper to make slight adjustments for a perfect fit.
By following this step-by-step guide, you can effectively cut door hinges using a drill, making the installation or replacement process much easier. Remember to always prioritize safety and accuracy when working with power tools, and don’t hesitate to seek professional help if needed.
The Importance of Cutting Door Hinges
When installing a door, one of the most important steps is cutting the door hinges. Door hinges are vital for allowing the door to swing open and shut smoothly. Properly cutting the door hinges ensures that the door will fit properly into the frame and function correctly.
1. Correct Alignment
Cutting door hinges allows for proper alignment of the door within the frame. Without proper alignment, the door may not close securely or may not open smoothly. This could result in gaps between the door and the frame, allowing drafts to enter the room and compromising security.
2. Smooth Door Operation
When the door hinges are cut correctly, the door can swing open and shut with ease. This not only enhances the overall appearance of the room, but it also prevents unnecessary stress on the hinges and the door itself. Smooth door operation also reduces squeaking and creaking noises that can be bothersome.

3. Professional Finish
Properly cut door hinges result in a professional and polished finish to the door installation. Well-aligned hinges ensure that the door is flush with the frame, creating a seamless look. This can significantly enhance the aesthetic appeal of the room and provide a professional appearance.
4. Longevity
Cutting door hinges correctly helps to prolong the lifespan of both the hinges and the door. Poorly fitting hinges can cause excessive wear and tear on the door and the frame, leading to premature damage. By ensuring proper alignment and smooth operation, the door hinges can withstand daily use and last longer.
5. Security and Safety
Finally, cutting door hinges is crucial for security and safety purposes. Properly aligned hinges ensure that the door fits securely in the frame, providing a higher level of security against forced entry. Additionally, smooth door operation reduces the risk of accidents and injuries caused by sticking or misaligned doors.
Overall, cutting door hinges correctly is of utmost importance for proper door installation. It ensures correct alignment, smooth operation, a professional finish, longevity, and enhances security and safety. Therefore, it is essential to carefully follow the steps and guidelines for cutting door hinges in order to achieve the best results.

Why Cutting Door Hinges is Necessary
When installing a new door or replacing an old one, cutting door hinges is often necessary. Hinges are crucial components of a door, as they allow it to open and close smoothly. However, if the hinges are not properly cut, the door may not fit and function correctly.
Alignment:
Cutting door hinges is necessary to ensure proper alignment of the door. If the hinges are not cut properly, the door may hang unevenly, causing it to scrape against the frame or floor. This can lead to damage to the door, hinges, or other surrounding surfaces.
Clearance:
Properly cutting door hinges also allows for the right amount of clearance between the door and the frame. If the hinges are not cut correctly, the door may not close fully or may not align with the door frame. This can result in gaps between the door and the frame, reducing security and creating drafts.

Smooth operation:
By cutting door hinges properly, the door will operate smoothly. Hinges that are not cut correctly can cause the door to bind or stick, making it difficult to open or close. This can be frustrating and can also cause damage to the door or hinges over time.
Appearance:
Cutting door hinges also contributes to the overall appearance of the door. When hinges are cut properly, they are flush with the surface of the door, creating a clean and professional look. On the other hand, poorly cut hinges may stick out or be recessed too far, detracting from the aesthetic appeal of the door.
In conclusion, cutting door hinges is necessary for proper alignment, clearance, smooth operation, and appearance of a door. It ensures that the door fits correctly, operates smoothly, and enhances the overall visual appeal of the door installation.
Benefits of Properly Cut Door Hinges
1. Seamless door installation
Properly cut door hinges ensure a seamless installation of the door. When the hinges are cut accurately, the door will fit snugly into the frame without any gaps or misalignment. This can enhance the overall appearance of the door and make it more aesthetically pleasing.
2. Smooth opening and closing
A well-cut door hinge allows for smooth and effortless opening and closing of the door. When the hinge is properly aligned, the door will swing freely without any resistance or dragging. This can greatly improve the functionality of the door and provide convenience to the users.
3. Extended lifespan of the door
By cutting the door hinges correctly, unnecessary stress and strain on the door can be minimized. This can help extend the lifespan of the door by preventing premature wear and tear. When the door is properly aligned with the hinges, it can operate more efficiently and withstand daily use for a longer period of time.
4. Enhanced security
A properly installed door with well-cut hinges can contribute to the overall security of a property. When the door fits tightly into the frame, it reduces the risk of forced entry or unauthorized access. This can provide homeowners with peace of mind and increase the security of their property.
5. Improved energy efficiency
Properly cut door hinges can also help improve the energy efficiency of a building. When the door is aligned correctly, it creates a tight seal that prevents drafts and air leakage. This can help maintain a comfortable indoor temperature and reduce energy consumption, resulting in lower heating and cooling costs.
6. Easier maintenance
Maintaining a door becomes easier when the hinges are properly cut. With accurate alignment, it becomes easier to clean and lubricate the hinges, ensuring smooth operation of the door. Additionally, any adjustments or repairs can be done more efficiently when the hinges are cut correctly, saving time and effort.
7. Professional appearance
Finally, properly cut door hinges contribute to a professional and high-quality appearance. When the hinges are aligned correctly, they are hidden from view when the door is closed, giving it a sleek and clean look. This attention to detail reflects positively on the overall craftsmanship and attention to quality.
In conclusion, properly cut door hinges offer various benefits, including a seamless installation, smooth operation, extended door lifespan, enhanced security, improved energy efficiency, easier maintenance, and a professional appearance. Taking the time to cut door hinges accurately can significantly improve the functionality and aesthetic appeal of any door.
Tools and Materials Needed
- Drill
- Drill bits (pilot and spade bits)
- Chisel
- Hammer
- Tape measure
- Straight edge or ruler
- Marker or pencil
- Masking tape
- Safety glasses
- Dust mask
- Door hinge template (optional)
- Door hinge screws
- Door
- Hinges
- Screws
Before you begin cutting door hinges with a drill, make sure you have all the necessary tools and materials. Having the right equipment on hand will make the process easier and more efficient.
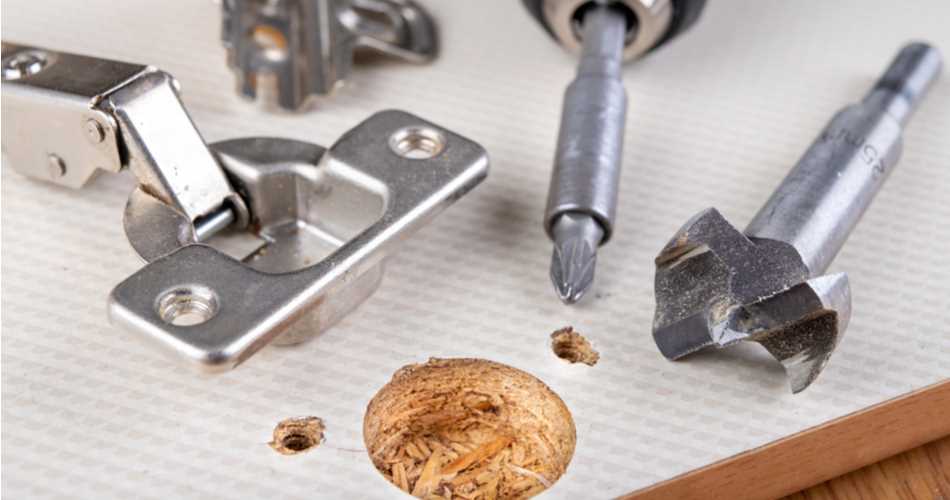
The most important tool you will need is a drill. Look for a drill that is suitable for woodwork and has enough power to handle the job. Additionally, you will need drill bits, specifically pilot and spade bits. The pilot bit will be used to create a starting hole, while the spade bit will be used to cut out the recess for the hinge.
You will also need a chisel and hammer to remove any excess wood and to perfect the hinge recess. A tape measure, straight edge, and marker or pencil are essential for measuring and marking the position of the hinge on the door accurately.
For safety purposes, it is important to wear safety glasses and a dust mask while working with a drill and chisel to protect your eyes and lungs from any flying debris. Masking tape can be used to mark the area you will be working on and prevent any potential splintering.
If you prefer to use a door hinge template for more precise cuts, you will need one as well. Finally, make sure to have door hinge screws, a door, hinges, and screws on hand to complete the installation process.
Essential Tools for Cutting Door Hinges
- Drill: A power drill with a drill bit is essential for cutting door hinges. Make sure it is in good working condition and has enough power to handle the task.
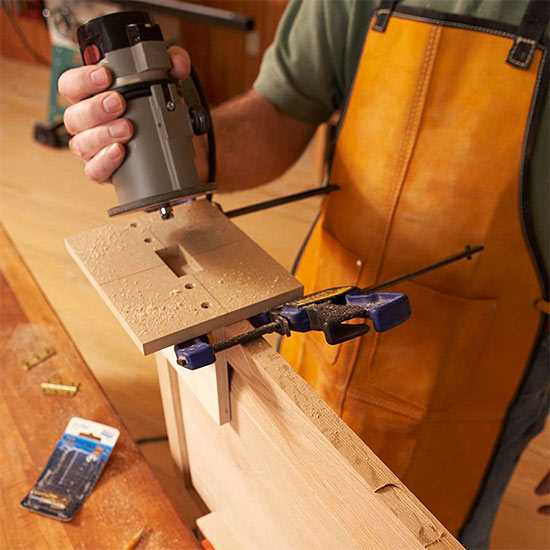
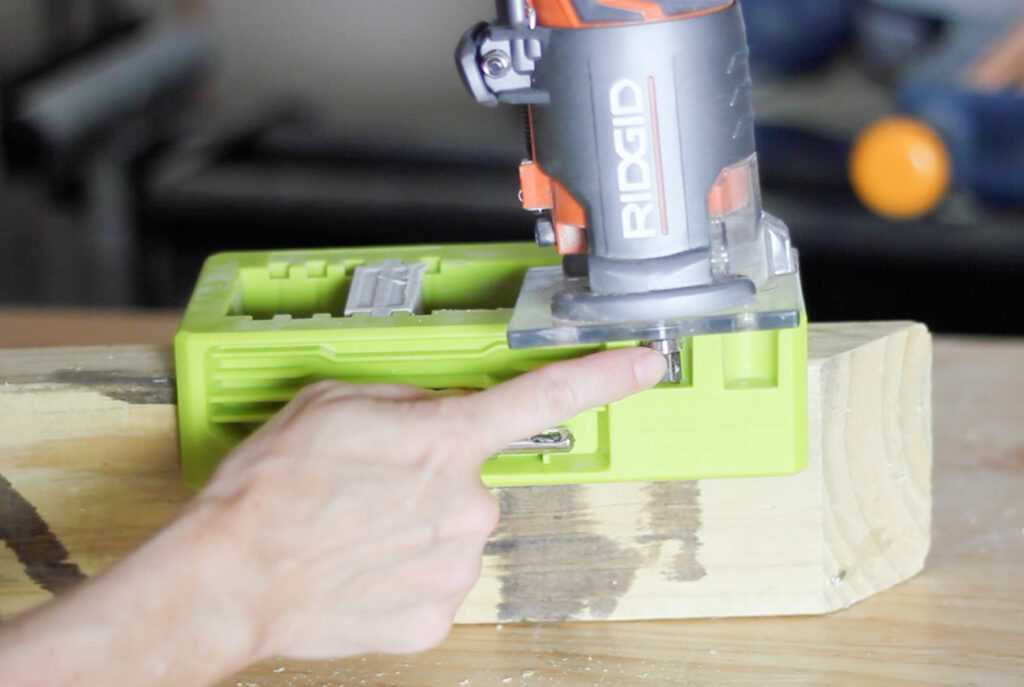
- Hinge Template: A hinge template is a helpful tool that guides the drill bit to create the perfect holes for the hinges. It ensures accuracy and simplifies the cutting process.
- Clamps: Clamps are necessary for securing the template in place and ensuring stability during the cutting process. They help prevent the template from shifting or moving, resulting in accurate cuts.
- Chisel: A chisel is used to remove excess wood after drilling the holes. It helps create clean and precise cuts, allowing the hinges to fit perfectly into the door frame.
- Safety Glasses: Safety glasses are essential to protect your eyes from any flying debris or wood particles that may be generated during the cutting process.
Note: It is always recommended to wear safety gloves and follow safety precautions while using power tools to prevent accidents and injuries.
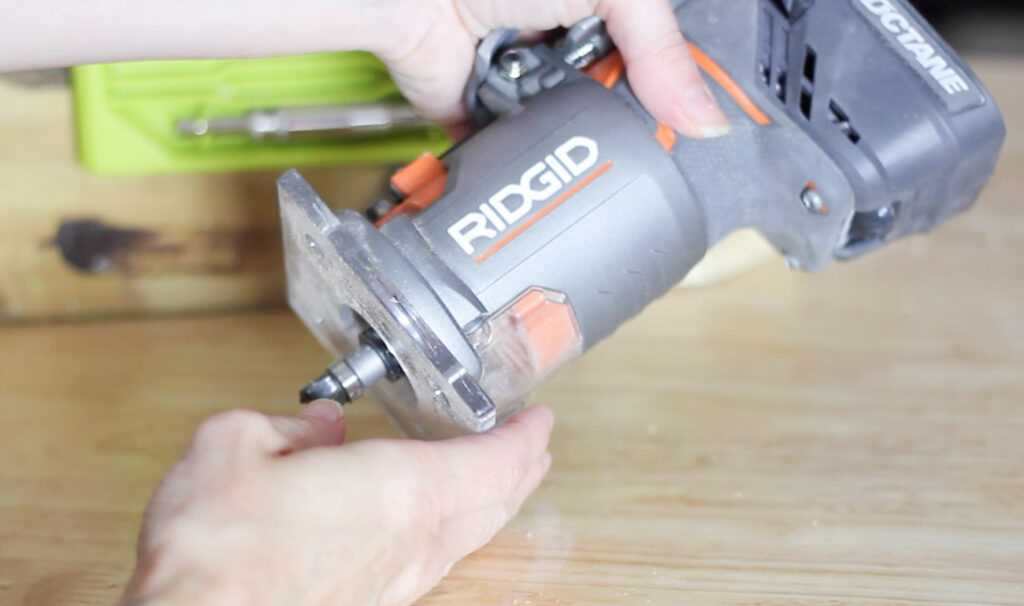
Choosing the Right Type of Drill Bit
When it comes to cutting door hinges with a drill, choosing the right type of drill bit is crucial. A drill bit is the part of the drill that actually cuts through the material, and different drill bits are designed for different purposes.
Here are some factors to consider when choosing the right type of drill bit for cutting door hinges:
1. Material
The material you’re working with will determine the type of drill bit you should use. For cutting door hinges, you’ll typically be working with wood or metal. For wood, a standard twist drill bit or a spade bit will work well. For metal hinges, you’ll need a cobalt or titanium-coated drill bit.
2. Size
The size of the drill bit is also important. It should match the size of the screw holes on the door hinge. Measure the diameter of the existing screw holes or check the manufacturer’s specifications to determine the right size.
3. Shank Type
The shank is the part of the drill bit that fits into the chuck of the drill. Most drill bits have a straight shank, which is compatible with most drill chucks. However, there are also drill bits with hex shanks or SDS shanks, which are designed for specific types of drills.
4. Point Type
The point of the drill bit refers to the shape of the tip. For cutting door hinges, a twist drill bit with a sharp point will work well. This type of drill bit creates a clean, precise hole.
By considering these factors, you’ll be able to choose the right type of drill bit for cutting door hinges. Remember to always wear safety goggles and follow proper safety precautions when using power tools.
Preparing the Door and Hinges
Before you start cutting door hinges with a drill, it’s important to properly prepare the door and hinges. This will ensure a smooth and accurate cutting process.
Gather the necessary tools
- A drill with a hole saw attachment
- Masking tape
- Measuring tape or ruler
- Pencil or marker
- Eye protection
- Dust mask or respirator
- Sandpaper or sanding block
Remove the door from its hinges
Start by removing the door from its hinges. Use a screwdriver or drill to unscrew the hinges from the door frame. Carefully lift the door off the hinges and set it on a stable work surface.
Protect the door surface
Apply masking tape around the area where you will be cutting the door hinges. This will help prevent any accidental scratches or damage to the door surface.
Measure and mark the hinge placement
Using a measuring tape or ruler, determine the desired placement of the hinges on the door. Mark the locations with a pencil or marker, making sure they are evenly spaced and aligned.
Prepare the drill and hole saw
Attach the hole saw to the drill, following the manufacturer’s instructions. Make sure the hole saw size matches the size of your hinges. Adjust the drill speed to a medium setting, ensuring it is not too fast or too slow.
Sand the hinge area
To ensure a clean and precise cut, sand the hinge area on the door using sandpaper or a sanding block. This will help remove any rough edges or splinters that may interfere with the cutting process.
Secure the door for cutting
Place the door on a stable work surface and secure it using clamps or a vice grip. This will prevent any movement or slipping during the cutting process.
Put on safety gear
Prior to starting the cutting process, put on eye protection to shield your eyes from any flying debris. It is also advisable to wear a dust mask or respirator to protect yourself from inhaling any dust or particles.
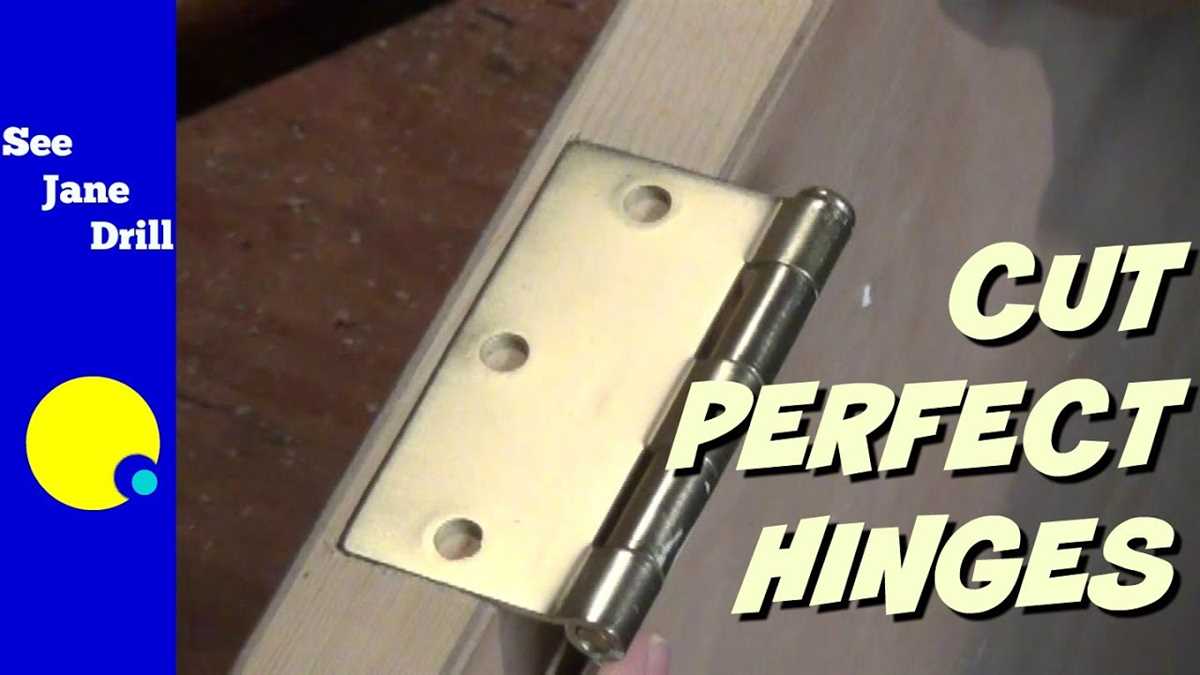
Measuring and Marking the Hinge Placement
Before you start cutting door hinges with a drill, it’s crucial to measure and mark the hinge placement accurately. Here are the steps to follow:
- Begin by placing the door in its desired position, ensuring it is level and properly aligned within the door frame.
- Open the door slightly to provide access to the hinge area.
- Take one of the hinges and hold it against the edge of the door where you want it to be placed. Make sure it is aligned with the top or bottom of the door, depending on your preference.
- Using a pencil or a marker, trace around the hinge’s outline on the door. This will serve as your reference mark for drilling.
- Repeat the process for the remaining hinges, making sure to maintain an equal distance between each hinge for a balanced appearance.
- If you have a three-hinge door, consider placing the middle hinge at the halfway point between the top and bottom hinges.
- Once all the hinge outlines are marked, use a ruler or measuring tape to check and adjust the placement if necessary.
Properly measuring and marking the hinge placement is essential to ensure the door functions correctly and aligns properly with the door frame. Taking the time to measure accurately will save you from potential headaches when it comes time to install the hinges.
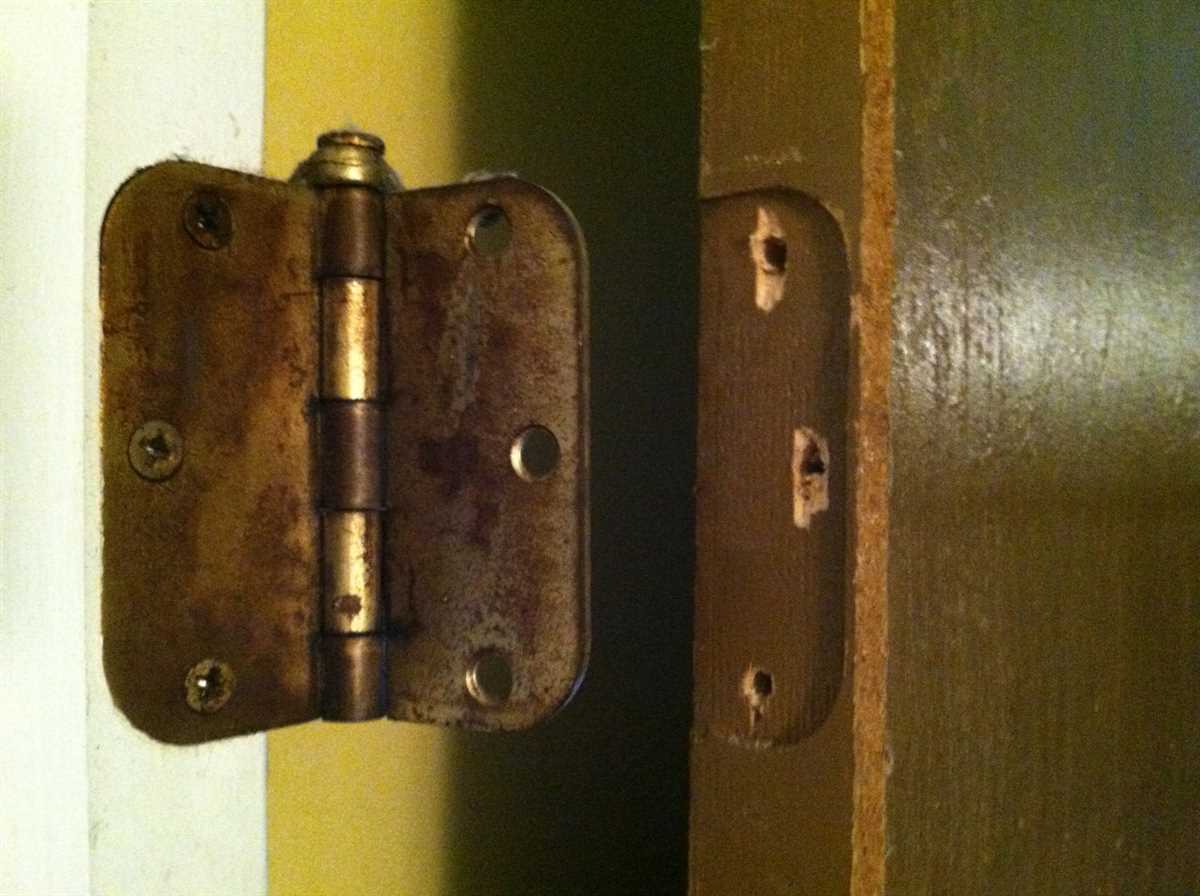
Removing the Door from Its Frame
Before you can start cutting the hinges with a drill, you will need to remove the door from its frame. Here are the steps to follow:
- First, make sure the door is fully open.
- Locate the hinge pins on the door. They are the metal rods that hold the hinge plates together.
- Using a hammer and a nail or a small screwdriver, tap on the bottom of each hinge pin to push it up and out of the hinge plate.
- Once the hinge pins are removed, carefully lift the door off the frame. It may be helpful to have someone assist you with this step, especially if the door is heavy.
- Place the door on a stable surface, such as a workbench or sawhorses, making sure it is supported evenly to prevent any warping or damage.
Now that the door is removed from its frame, you can proceed with cutting the hinges using a drill.
Safety Precautions
- Wear safety goggles or glasses to protect your eyes from any potential flying debris.
- Wear ear protection to guard against the loud noise generated by the power drill.
- Always wear gloves to protect your hands from cuts and scrapes.
- Make sure to work in a well-ventilated area to avoid inhaling any dust or fumes.
- Use clamps or a vise to secure the door hinge firmly in place to prevent any sudden movements.
- Keep your fingers and loose clothing away from the drill bit to prevent accidental injuries.
- Take breaks when needed to avoid fatigue and maintain focus throughout the process.
- Double-check that the power drill is switched off and unplugged before making any adjustments or changes to the hinge cutting setup.
- Follow all manufacturer instructions and guidelines for the power drill and cutting tools being used.
FAQ:
Can I cut door hinges with a drill?
Yes, you can cut door hinges with a drill. In fact, using a drill is one of the easiest and most efficient methods for cutting door hinges.
What tools do I need to cut door hinges with a drill?
To cut door hinges with a drill, you will need a drill, a hinge template, a chisel, a hammer, and screws. You may also need a hand saw, a file, and a measuring tape depending on the type of hinge and door you are working with.
Are there any safety precautions I should take when cutting door hinges with a drill?
Yes, there are several safety precautions you should take when cutting door hinges with a drill. Firstly, always wear safety glasses to protect your eyes from flying debris. Secondly, make sure to secure the door properly before cutting the hinges to avoid any accidents. Lastly, be cautious while operating the drill and follow the manufacturer’s instructions.
Can I cut door hinges without a hinge template?
While it is possible to cut door hinges without a hinge template, using one is highly recommended. A hinge template will ensure that the hinge is properly aligned and cut to the correct depth. Without a template, it can be difficult to achieve a clean and well-fitted hinge cut.
Video:


Meet Harrison Clayton, a distinguished author and home remodeling enthusiast whose expertise in the realm of renovation is second to none. With a passion for transforming houses into inviting homes, Harrison's writing at https://thehuts-eastbourne.co.uk/ brings a breath of fresh inspiration to the world of home improvement. Whether you're looking to revamp a small corner of your abode or embark on a complete home transformation, Harrison's articles provide the essential expertise and creative flair to turn your visions into reality. So, dive into the captivating world of home remodeling with Harrison Clayton and unlock the full potential of your living space with every word he writes.


