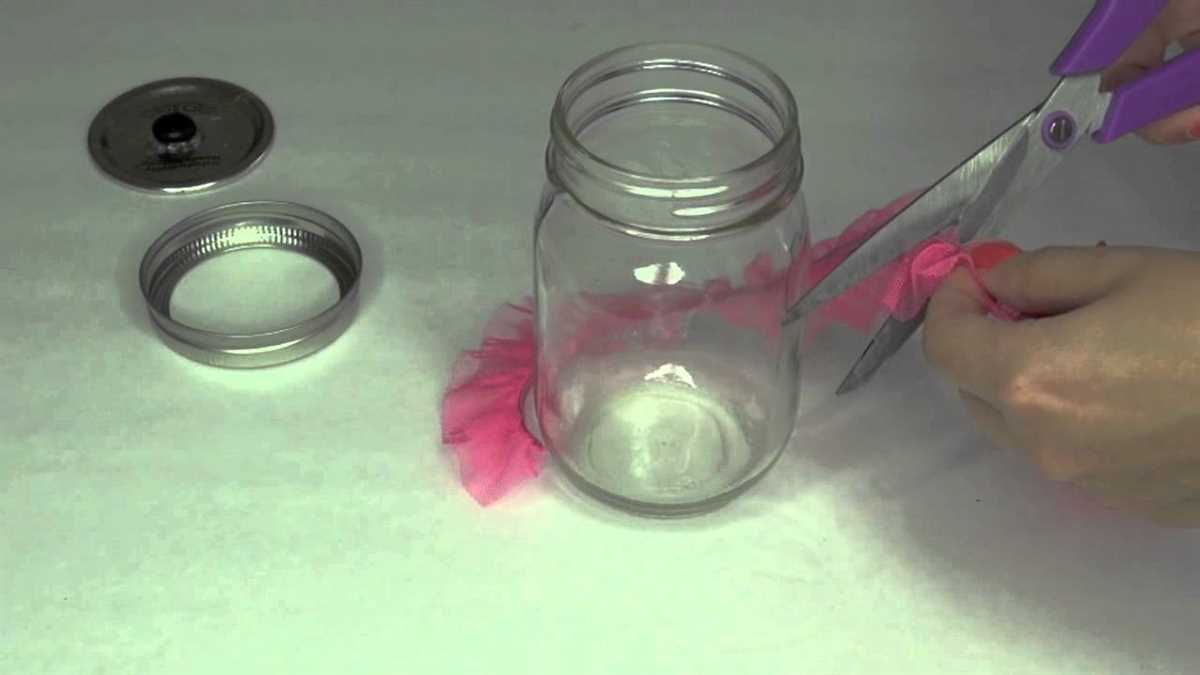
How to Create a Hole in a Mason Jar Lid Without Using a Drill

Creating a hole in a mason jar lid can be a useful skill for various DIY projects, from making homemade candles to creating a unique centerpiece. While a drill is typically the go-to tool for this task, not everyone has access to one. Fortunately, there are alternative methods you can use to create a hole in a mason jar lid without using a drill.
One method is to use a nail and a hammer. Start by placing the lid on a sturdy surface, such as a block of wood. Position the nail at the desired spot where you want the hole to be and gently tap it with the hammer. Gradually increase the force until the nail pierces through the lid. This method requires patience and precision to ensure a clean and even hole.
Another option is to use a heated metal skewer or awl. Heat the metal tool over an open flame until it becomes red-hot. Then, carefully and slowly apply pressure to the lid, rotating the tool in a circular motion. The heat will soften the plastic coating on the lid, allowing the tool to create a hole without much effort. Remember to exercise caution and use heat-resistant gloves when handling the hot metal tool.
NOTE: Both methods mentioned above should be done with caution and in a well-ventilated area. The use of proper safety gear, such as gloves and eye protection, is highly recommended.
Creating a hole in a mason jar lid without using a drill may require some extra patience and care, but it is definitely possible. Whether you are a DIY enthusiast or simply looking for alternative methods, these techniques can help you achieve the desired result without the need for a drill.
Step 1: Gather the Necessary Materials
In order to create a hole in a Mason jar lid without using a drill, you will need to gather the following materials:

- A Mason jar with a metal lid
- A nail
- A hammer
- A wooden block or surface
- Sandpaper (optional)
These materials are readily available and can be found in most households or easily purchased at a local hardware store.
It is important to note that the size of the nail you choose will determine the size of the hole you create in the Mason jar lid. Select a nail that is appropriate for your needs, keeping in mind the size and purpose of the hole you wish to create.
Step 2: Mark the Spot for the Hole
After gathering the necessary materials, the next step is to mark the spot on the mason jar lid where the hole will be created. This will ensure that the hole is placed in the desired location and is centered properly.
Materials Needed:

- Mason jar lid
- Permanent marker
- Ruler or measuring tape
Instructions:
- Clean the mason jar lid to remove any dirt or debris that may interfere with marking the spot.
- Using the ruler or measuring tape, determine the desired location for the hole on the mason jar lid. This will depend on the specific purpose or project you have in mind.
- Once you have chosen the desired location, use the permanent marker to make a small dot or mark on the surface of the mason jar lid.
Note: It is important to be precise and accurate when marking the spot for the hole. Taking the time to double-check the measurements and ensuring the mark is centered will result in a more precise hole.
Once the spot has been marked, you are ready to move on to the next step: creating the hole in the mason jar lid.
Step 3: Heat a Nail or Sharp Object
To create a hole in the mason jar lid without using a drill, you can heat a nail or sharp object to melt through the lid. Here’s how:
- Choose a nail or sharp object that is slightly smaller than the desired hole size.
- Hold the nail or sharp object with a pair of pliers or tongs.
- Using a heat source such as a lighter or a stove burner, heat the tip of the nail or sharp object until it becomes red hot.
- Make sure to heat the entire tip of the nail or sharp object to ensure even melting.
- Once the nail or sharp object is heated, carefully position it on the mason jar lid where you want the hole.
- Apply downward pressure to the nail or sharp object and slowly rotate it in a circular motion to melt through the lid.
- Continue applying pressure and rotating the nail or sharp object until it has melted completely through the lid. Be careful not to apply too much pressure, as this can cause the lid to crack or break.
Note: Heating a nail or sharp object can be dangerous, so it’s important to take appropriate safety precautions. Make sure to work in a well-ventilated area, wear protective gloves, and use caution when handling the heated object.
Step 4: Create the Hole Using Heat and Pressure
Now that you have marked the spot where you want to create the hole on your mason jar lid, it’s time to actually create the hole. In this step, we will be using heat and pressure to melt through the lid and create the desired hole.

Materials You’ll Need:
- Safety gloves
- Pair of pliers
- Hammer
- Nail or screw
- Candle or heat source
Instructions:
- Put on your safety gloves to protect your hands from the hot lid and any potential accidents.
- Using a pair of pliers, hold the nail or screw firmly in place on the marked spot on the lid.
- To create heat, place the lid with the nail/screw over a candle flame or another heat source. Make sure to hold the lid securely with the pliers.
- Apply pressure to the nail/screw using a hammer. Start with light taps and gradually increase the force to create a hole. Be careful not to apply too much pressure or you may crack the lid.
- Continue applying heat and pressure until the nail/screw has created a hole all the way through the lid. The heat will soften the metal, making it easier for the nail/screw to penetrate.
- Once the hole is created, remove the lid from the heat source and let it cool down before handling it.
- Carefully remove the nail/screw from the hole, and you now have a perfectly created hole in your mason jar lid without using a drill!
Remember to exercise caution when working with heat and pressure. Always wear appropriate safety gear and keep a fire extinguisher nearby just in case of any accidents.
Step 5: Allow the Lid to Cool Down
After using the heated nail or screw to create the hole in the mason jar lid, it is important to allow the lid to cool down before proceeding with any further steps. The heating process can cause the metal to become hot and may cause burns if touched immediately after heating.
To ensure the lid has cooled down completely, set it aside in a safe location for at least 10-15 minutes. During this time, avoid touching or handling the lid as it may still be hot.
Allowing the lid to cool down not only ensures your safety but also helps to prevent any damage to the lid or the contents of the mason jar. When the lid has cooled down completely, it will be ready to use for your desired purpose, whether it’s for creating a homemade shaker or a unique decorative piece.

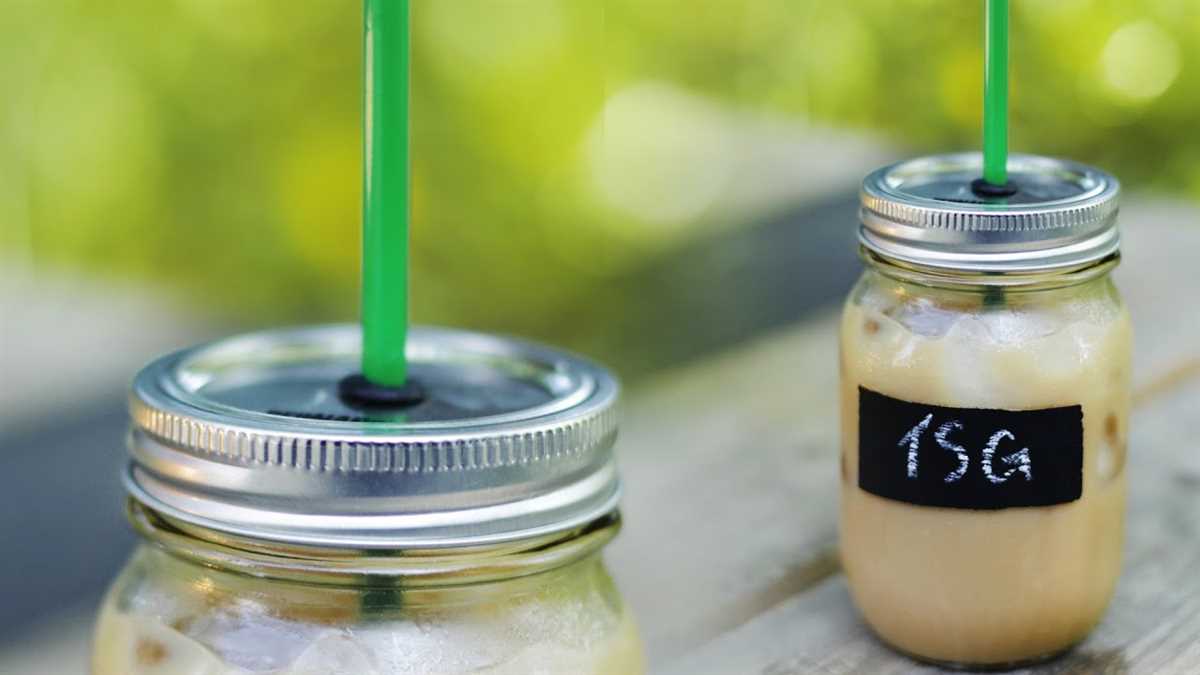
Step 6: Test the Hole for Size and Functionality
Once you have successfully created a hole in the mason jar lid using the chosen method, it is important to test the hole to ensure it is the right size and functions properly for your intended use.
1. Check the size of the hole
First, visually inspect the hole to ensure that it is the desired size. If you need a larger hole, you may need to repeat the process using a larger tool or method. If the hole is too small, you can try enlarging it using a small file or sandpaper.
2. Test the functionality
Next, check if the hole allows the desired substance or object to pass through. For example, if you created the hole to accommodate a straw, test if the straw fits easily and securely into the hole without any restrictions. If the hole is for pouring liquid, fill the mason jar with water and test if the liquid flows freely through the hole.
3. Evaluate the seal
If you are using the mason jar lid to contain a substance, such as food or liquids, it is important to check if the lid provides a tight seal. Place the lid onto the jar and ensure that it fits securely without any gaps or leaks. You may need to tighten the screw band to achieve a proper seal.

4. Make any necessary adjustments
If you find that the hole is too small, too large, or the functionality is not up to your satisfaction, you can make adjustments as needed. Use appropriate tools or methods to resize or fix the hole, such as using a larger drill bit or sealing any gaps with adhesive or silicone.
By thoroughly testing the hole for size and functionality, you can ensure that the mason jar lid is suitable for your intended purpose. Whether you plan to use it for sipping beverages, pouring liquids, or any other purpose, this step will help you determine if the hole meets your requirements.
Step 7: Clean and Sanitize the Lid
After creating the hole in the Mason jar lid, it is important to clean and sanitize the lid before using it. This will help remove any dirt, debris, or bacteria that may be present on the surface.
- Wash the lid: Start by washing the lid with warm soapy water. Use a sponge or cloth to scrub the lid and remove any visible dirt or grime. Rinse the lid thoroughly with hot water to remove any soap residue.
- Sanitize the lid: To sanitize the lid, you can use a solution of bleach and water. Mix 1 tablespoon of bleach with 1 gallon of water. Submerge the lid in this solution and let it soak for at least 2 minutes. This will help kill any bacteria or germs present on the lid.
- Rinse and dry: After sanitizing, rinse the lid thoroughly with hot water to remove any bleach residue. Dry the lid completely using a clean towel or let it air dry.
Once the lid is clean and sanitized, it is ready to be used for your desired purpose. Whether you are using the jar for storage, crafting, or any other application, a clean and sanitized lid is essential to maintain proper hygiene and prevent any contamination.
FAQ:
What can I use instead of a drill to create a hole in a mason jar lid?
If you don’t have a drill, you can use other household tools such as a hammer and nail or a heated metal skewer to create a hole in the mason jar lid.
Can I use a hammer and nail to create a hole in a mason jar lid?
Yes, you can use a hammer and nail to create a hole in a mason jar lid. Just place the lid on a hard surface, position the nail where you want the hole to be, and gently tap the nail with the hammer until it goes through the lid.
Is it possible to create a hole in a mason jar lid without any tools?
Yes, you can create a hole in a mason jar lid without any tools by using a heated metal skewer. Heat the skewer over a flame until it is red hot, then press it against the desired spot on the lid. The heat from the skewer will melt through the lid, creating a hole.
Are there any other creative ways to create a hole in a mason jar lid?
Yes, there are other creative ways to create a hole in a mason jar lid. One option is to use a small electric saw, such as a Dremel, to carefully cut a hole in the lid. Another option is to use a hole punch specifically designed for metal to create a hole in the lid.
Can I use a knife to create a hole in a mason jar lid?
While it is possible to use a knife to create a hole in a mason jar lid, it is not recommended as it can be dangerous. Knives can slip and cause injuries. It is safer to use alternative tools such as a hammer and nail or a heated metal skewer.
What precautions should I take when using alternative tools to create a hole in a mason jar lid?
When using alternative tools such as a hammer and nail or a heated metal skewer to create a hole in a mason jar lid, it is important to wear protective gloves and eye goggles to prevent any injuries. Additionally, make sure to work on a stable surface and take your time to ensure accuracy.
Can I purchase mason jar lids with pre-drilled holes?
Yes, you can purchase mason jar lids with pre-drilled holes. These lids are often available at specialty kitchen stores or online. They come in various sizes and can be a convenient option if you need a specific sized hole or if you don’t have the tools to create a hole yourself.
Video:

How long is 2cm

Meet Harrison Clayton, a distinguished author and home remodeling enthusiast whose expertise in the realm of renovation is second to none. With a passion for transforming houses into inviting homes, Harrison's writing at https://thehuts-eastbourne.co.uk/ brings a breath of fresh inspiration to the world of home improvement. Whether you're looking to revamp a small corner of your abode or embark on a complete home transformation, Harrison's articles provide the essential expertise and creative flair to turn your visions into reality. So, dive into the captivating world of home remodeling with Harrison Clayton and unlock the full potential of your living space with every word he writes.


