How to Change the Screw on a Drill: A Step-by-Step Guide

Changing the screw on a drill is an essential skill that every DIY enthusiast or homeowner should know. Whether you’re replacing a worn-out screw or need a different one for a specific task, knowing how to change the screw on your drill can save you time and frustration. In this step-by-step guide, we will walk you through the process of changing the screw on a drill so you can tackle any project with confidence.
Step 1: Ensure Safety
Before starting any work on your drill, it’s important to prioritize safety. Make sure the drill is turned off and unplugged from any power source. Put on safety goggles to protect your eyes from debris. Additionally, make sure you are working in a well-ventilated area to avoid inhaling any dust or fumes.
Step 2: Remove the Old Screw
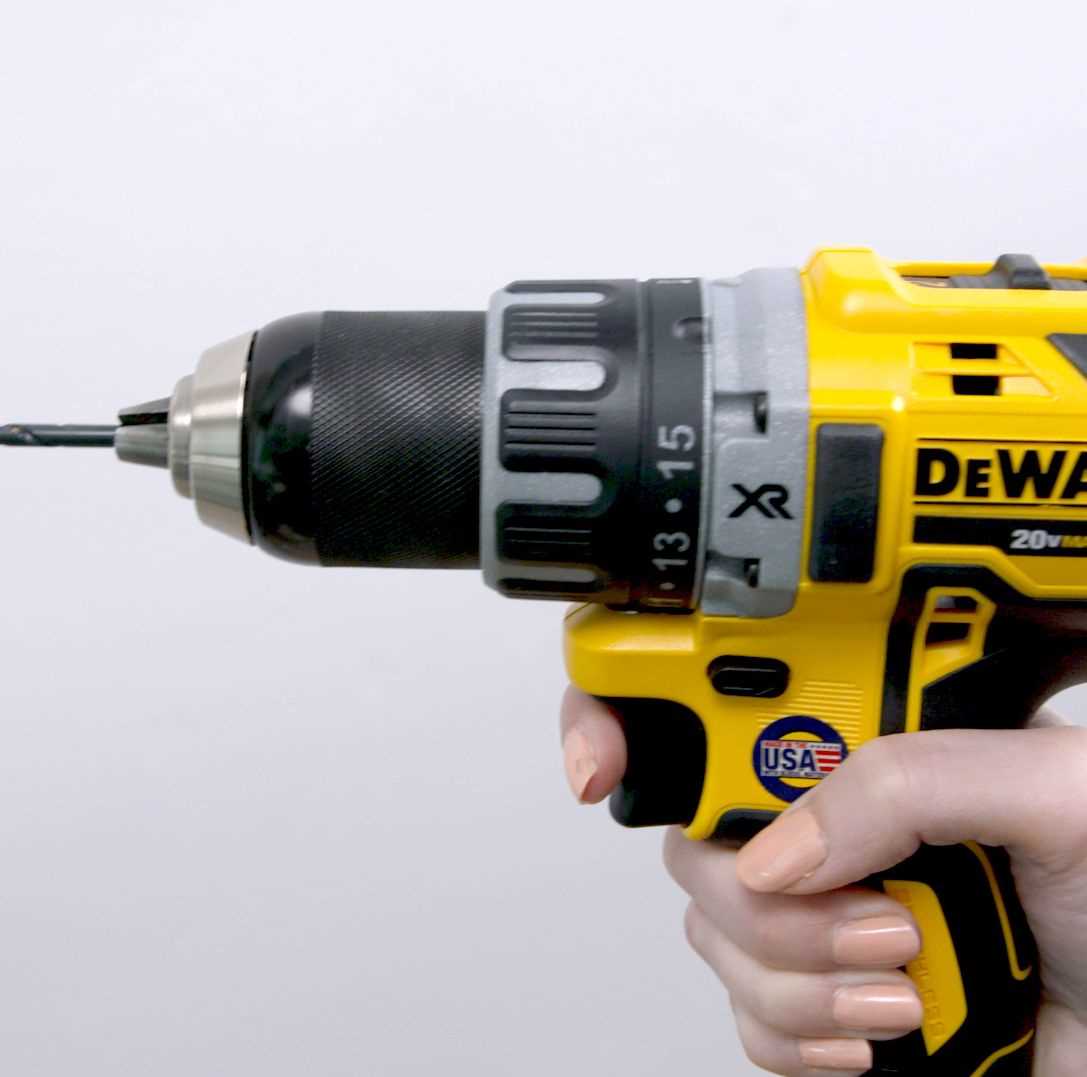
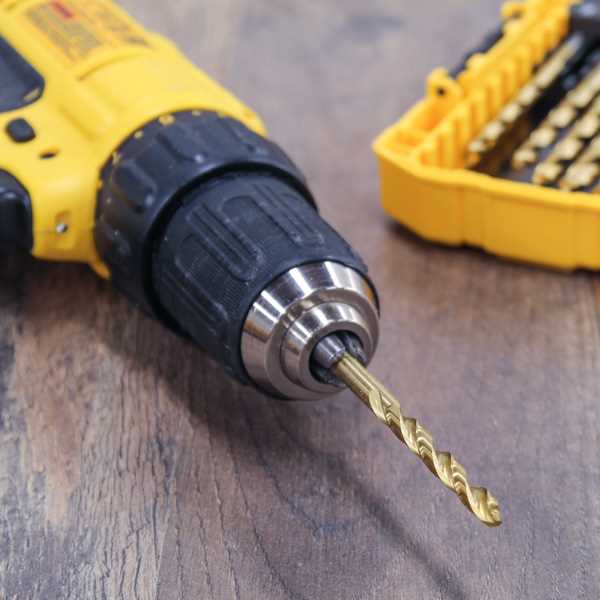
To remove the old screw, locate the chuck on the front of the drill. The chuck is the part that holds the screw in place. Most drills have a keyless chuck, which means you can loosen it by hand. Hold onto the drill’s body for stability and rotate the chuck counterclockwise until the old screw is loose enough to be removed. Once it’s loose, pull it out of the chuck.

Step 3: Select the New Screw
Choosing the right screw for your task is crucial for optimal performance. Consider the type and size of screw you’ll need. Different projects may require different types of screws, such as wood screws, sheet metal screws, or concrete screws. Additionally, ensure the new screw is the correct size and length for your application.
Step 4: Insert and Secure the New Screw
Align the new screw with the chuck opening and insert it into the chuck. Use your hand to tighten the chuck by rotating it clockwise. Ensure the screw is securely fastened but avoid overtightening, as this can damage the screw or the chuck. Test the screw’s stability by gently pulling on it.
Step 5: Test and Adjust
Once the new screw is in place, adjust the drill’s speed and torque settings as needed for your project. Test the drill by running it briefly to ensure the screw is securely fastened and the drill is functioning properly. If necessary, make any adjustments to the settings and repeat the testing process until you are satisfied with the results.
By following these step-by-step instructions, you can easily change the screw on your drill and be ready to tackle any DIY project that comes your way. Remember to always prioritize safety and choose the right screw for the task at hand. With practice, you’ll become more comfortable and efficient in changing screws on your drill.
Gathering the Necessary Tools
Before you begin changing the screw on your drill, it’s important to gather all the necessary tools. Having the right tools on hand will make the process much easier and ensure that you don’t damage your drill or the new screw.
Here are the tools you will need:
- A replacement screw for your drill
- A screwdriver or drill bit that matches the screw
- A small wrench or pliers
- A clean cloth or rag
- Optional: threadlocker or adhesive
Replacement Screw:
Make sure you have a replacement screw that is the same size and type as the one you are removing. If you are unsure, consult the drill’s manual or contact the manufacturer for assistance.
Screwdriver or Drill Bit:
Depending on the type of screw used in your drill, you will need either a screwdriver or a drill bit that matches the screw head. This will allow you to remove the old screw and install the new one.
Small Wrench or Pliers:
Sometimes, the screw may be tightly secured and require additional force to remove. A small wrench or pliers can provide the leverage needed to loosen and remove the screw.
Clean Cloth or Rag:
Having a clean cloth or rag on hand will allow you to wipe away any dirt, debris, or excess grease that may have accumulated around the screw or in the drill’s housing.
Optional: Threadlocker or Adhesive:
If you want to ensure that the new screw stays securely in place, you can use a threadlocker or adhesive. Apply a small amount to the screw before installing it, following the manufacturer’s instructions.
By gathering these tools before you start, you can make sure that you have everything you need to successfully change the screw on your drill without any interruptions or delays.
Turning off the Power
Before you start changing the screw on your drill, it is crucial to turn off the power to ensure your safety. Follow these steps to turn off the power:
- Locate the power switch on your drill. It is usually located on the top or the side of the drill.
- Flip the power switch to the “Off” position. This will ensure that the drill is completely powered off.
- Unplug the drill from the power source. If your drill is cordless, remove the battery to disconnect the power.
Once you have turned off the power and disconnected the drill from the power source, you can safely proceed to change the screw on your drill.
Removing the Current Screw
Before you can change the screw on your drill, you need to remove the current screw that is in place. This involves a few simple steps:
Step 1: Power off the Drill
Before you begin, make sure that the drill is turned off and unplugged from any power source. This is important for your safety.
Step 2: Examine the Screw
Take a moment to examine the current screw on your drill. You will need to know what type of screwdriver or wrench is required to remove it.
Step 3: Select the Correct Tool
Based on your examination, select the appropriate screwdriver or wrench that will fit the screw head. This is crucial in order to avoid damaging the screw or the drill itself.
Step 4: Loosen the Screw
Insert your selected tool into the screw head and turn it counterclockwise to loosen the screw. Apply steady pressure, but be careful not to overtighten or strip the screw. If the screw is stubborn, you can try lightly tapping the tool with a small mallet or using a screw extractor if necessary.
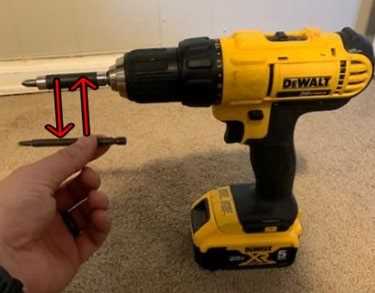
Step 5: Remove the Screw
Once the screw is fully loosened, continue turning it counterclockwise until it is completely removed. Keep a firm hold on the screw to ensure it does not fall into an inaccessible spot or get lost.
By following these steps, you have successfully removed the current screw from your drill. Now you can proceed to the next steps in changing the screw or replacing it with a new one.
Choosing the Correct Replacement Screw
When it comes to changing the screw on your drill, it’s important to choose the correct replacement screw. Using the wrong screw could potentially damage your drill or result in an unsafe operation.
Consider the Size and Type
The first step in choosing the correct replacement screw is to consider the size and type of the screw. Most drills use specific screw sizes and types, so it’s essential to match the replacement screw accordingly.
- Check the manual or manufacturer’s instructions to determine the appropriate screw size and type for your drill.
- If you don’t have access to the manual, you can measure the existing screw or take it to a hardware store for assistance in finding the correct size and type.
Assess the Threads and Head
In addition to the size and type, it’s important to assess the threads and head of the replacement screw. The threads should match the ones on your drill chuck, and the head should be compatible with your drill bit.
- Inspect the existing screw to determine the thread pitch and type. Common thread types include coarse and fine threads.
- Ensure the replacement screw has the same thread pitch and type as the original screw.
- Check the head of the replacement screw to ensure it matches your drill bit. Common head types include Phillips, flat, hex, and square heads.
Quality and Compatibility
When choosing a replacement screw, it’s crucial to consider the quality of the screw and its compatibility with your drill.
- Choose a high-quality replacement screw made from durable materials to ensure longevity and avoid stripping or breaking.
- Consider whether the replacement screw is compatible with your drill’s brand and model.
- Consult with a knowledgeable professional or refer to online resources if you’re uncertain about the quality or compatibility of a replacement screw.
By carefully considering the size, type, threads, head, quality, and compatibility of the replacement screw, you can ensure a successful and safe replacement process for your drill.
Attaching the New Screw
Once you have removed the old screw from your drill, it’s time to attach the new one. Follow these steps:
- Choose the right screw for your drill. Make sure it matches the specifications of your drill, such as the size and thread pattern.
- Insert the new screw into the chuck of your drill. Rotate it counterclockwise to loosen the chuck jaws and create enough space to insert the screw.
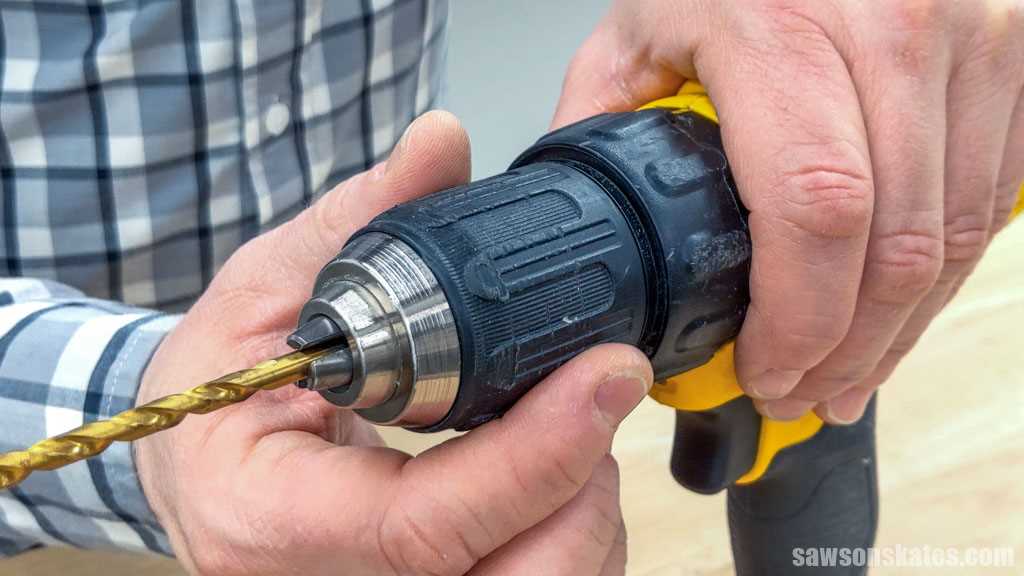
- Align the screw with the chuck jaws and push it all the way in. Make sure it is centered and secure.
- Tighten the chuck jaws by rotating the screw clockwise. Use your hands or a chuck key, depending on the type of chuck on your drill.
- Continue tightening until the screw is securely held in place by the chuck jaws. Avoid overtightening, as it may damage the screw or the chuck.
Once you have attached the new screw, make sure it is secured properly before using your drill. Give it a gentle tug to ensure it doesn’t come loose. If the screw feels loose, repeat the steps above to tighten it further.
Checking the Secureness of the New Screw
After replacing the old screw with a new one, it is essential to check the secureness of the new screw to ensure the drill is ready for use. Follow the steps below to ensure that the new screw is properly secured:
Step 1: Inspect the Screw
Visually inspect the new screw to ensure it is properly aligned and inserted into the designated hole. Verify that the screw is tightly secured and there are no visible gaps or loose ends.
Step 2: Apply Pressure
Apply gentle pressure on the screw using your fingers or a screwdriver. If the screw moves or feels loose, it may indicate that it is not properly secured. Take this as a sign that you need to tighten it further.
Step 3: Tighten the Screw
Using a screwdriver, carefully tighten the screw by turning it clockwise. Ensure that you do not overtighten the screw, as this may cause damage to the drill. Stop tightening when you feel resistance and the screw becomes securely in place.
Step 4: Test the Screw
With the new screw securely fastened, gently wiggle the drill to ensure the screw does not move or feel loose. If the screw remains secure and in place, you can proceed to use the drill. If there is any movement or looseness, repeat step 3 to ensure proper secureness.
By following these steps, you can verify the secureness of the new screw, ensuring the drill is ready for use. It is important to regularly check the screw’s secureness before and after each use to maintain the safety and proper functioning of the drill.
Testing the Drill
Initial Testing
Before you change the screw on your drill, it’s important to test if the drill is functioning properly. Follow these steps to conduct an initial test:
- Ensure that the drill is properly charged or has fresh batteries.
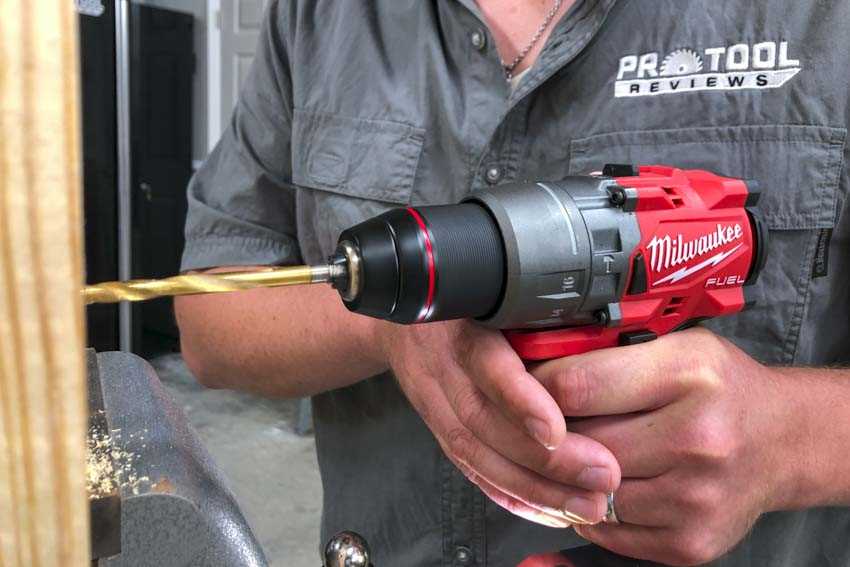
- Attach a drill bit to the chuck securely.
- Turn on the drill using the power switch, usually located near the handle or trigger.
- Activate the drill by pressing the trigger or the designated button. The drill should start rotating smoothly.
- Test the variable speed settings, if available, to ensure that they are functioning properly.
- Observe any unusual noises or vibrations during operation. If you notice anything out of the ordinary, it may be a sign of an issue with the drill.
Testing the New Screw
Once you have successfully tested the drill and determined that it is in good working order, you can proceed to test the new screw. Follow these steps:
- Choose a suitable screw for the desired task. Consider the screw’s length, diameter, and head type.
- Insert the screw into the screwdriver bit or drill bit holder.
- Tighten the chuck around the screw or bit until it is secure.
- Turn on the drill and engage the screw into the desired material. Apply steady pressure and ensure that the screw is being driven in straight.
- Test the drill’s torque by driving the screw into a variety of materials, such as wood or metal. The drill’s torque settings may need to be adjusted accordingly.
- Check the tightness of the screw once it is fully driven in. If necessary, use a manual screwdriver or the drill in reverse mode to tighten or loosen the screw as needed.
Final Testing and Troubleshooting
After successfully driving in the screw, it is important to conduct a final test to ensure that everything is functioning as expected. Perform the following steps:
- Inspect the screw to ensure that it is properly inserted and secure.
- Turn on the drill and engage the screw into the desired material again to confirm its stability.
- Listen for any unusual noises or vibrations during this final test.
- If you encounter any issues, such as stripped screws or difficulty in driving the screw, consider adjusting the drill’s settings or using a different screw.
Remember, it’s always a good idea to read the drill’s instruction manual for any specific testing procedures or troubleshooting tips before using it on a project.
Properly Storing the Original Screw
When changing the screw on a drill, it is important to properly store the original screw to ensure that it doesn’t get lost or damaged. Here are some steps to help you store the screw safely:
- Remove the screw: Use the appropriate screwdriver or tool to carefully remove the original screw from the drill. Be sure to keep a firm grip on the screwdriver and apply even pressure to avoid stripping or damaging the screw.
- Clean the screw: Before storing the screw, it’s a good idea to clean it to remove any dirt, debris, or residue. Use a dry cloth or a brush to gently wipe off any particles. This will help prevent rust or corrosion and ensure that the screw functions properly when it’s reinstalled.
- Choose a storage container: Select a small container or an organizer specifically designed for storing small hardware such as screws. This will help keep the screw organized and prevent it from getting mixed up with other screws or tools.
- Label the container: It’s important to label the container to indicate the type of screw it contains. You can use a label maker or simply write the information on a piece of tape and attach it to the container. This will make it easier to find the screw when you need it in the future.
- Store in a cool, dry place: Find a suitable location to store the container of screws. It’s best to choose a cool, dry place away from direct sunlight or extreme temperatures. This will help prevent any damage to the screw and ensure its longevity.
By following these steps, you can properly store the original screw from your drill and maintain its condition for future use. Remember to handle the screw with care and keep it in a secure location to avoid any loss or damage.
FAQ:
What tools do I need to change the screw on a drill?
To change the screw on a drill, you will need a set of screwdrivers, pliers, and a new screw for replacement.
Can I use any screw to replace the old one on my drill?
No, it is important to use the right size and type of screw to ensure proper function of the drill. Refer to the manufacturer’s instructions or consult a professional if you are unsure.
Is it difficult to change the screw on a drill?
Changing the screw on a drill can be a simple task if you have the right tools and follow the proper steps. With a little patience and care, you should be able to do it successfully.
What should I do if the screw on my drill is stuck?
If the screw on your drill is stuck and difficult to remove, you can try using penetrating oil or WD-40 to loosen it. Applying heat with a hairdryer or a heat gun can also help. If all else fails, consult a professional for assistance.
Do I need to disconnect the drill from power before changing the screw?
Yes, for safety reasons, it is important to always disconnect the drill from power before attempting any maintenance or repairs, including changing the screw.
Can I change the screw on a cordless drill?
Yes, you can change the screw on a cordless drill following the same steps as for a corded drill. Just make sure to remove the battery before starting the process.
Video:


Meet Harrison Clayton, a distinguished author and home remodeling enthusiast whose expertise in the realm of renovation is second to none. With a passion for transforming houses into inviting homes, Harrison's writing at https://thehuts-eastbourne.co.uk/ brings a breath of fresh inspiration to the world of home improvement. Whether you're looking to revamp a small corner of your abode or embark on a complete home transformation, Harrison's articles provide the essential expertise and creative flair to turn your visions into reality. So, dive into the captivating world of home remodeling with Harrison Clayton and unlock the full potential of your living space with every word he writes.


