How to Change the Direction of a Drill: A Step-by-Step Guide

Whether you are a seasoned DIY enthusiast or a beginner, knowing how to change the direction of a drill is an essential skill that can make your projects much easier. Being able to switch between forward and reverse rotations is crucial when drilling holes, driving screws, or removing fasteners. In this step-by-step guide, we will walk you through the process of changing the direction of a drill, so you can tackle your projects with confidence.
Step 1: Find the Direction Switch
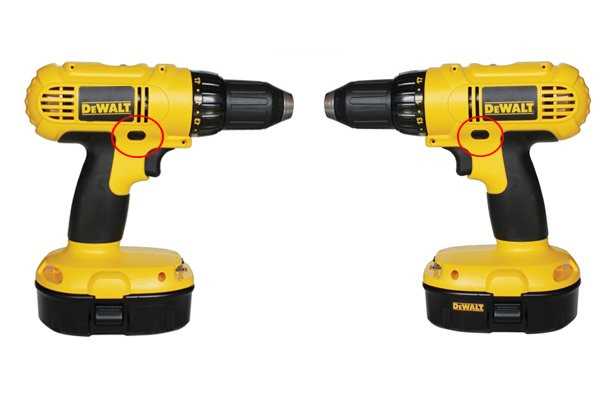
The first step in changing the direction of a drill is to locate the direction switch. This switch is usually located near the trigger or on the top or side of the drill. It is usually marked with arrows indicating the forward and reverse directions. Take a moment to familiarize yourself with the switch and its position on your particular drill model.
Step 2: Position the Drill
Before changing the direction, it is important to ensure that the drill is in a safe and stable position. If you are working on a flat surface, place the drill on a workbench or the ground, making sure it won’t move or roll while you operate the switch. If you are working at an angle or in an awkward position, use a clamp or vise to secure the drill in place.

Step 3: Switch to Reverse
Once you have positioned the drill, it’s time to switch the direction. If you want to change the rotation to reverse, simply slide or toggle the direction switch to the appropriate position. You may hear a small click or feel a slight resistance when the switch locks into place. This indicates that the direction has been changed, and the drill is now ready to operate in reverse.
Step 4: Test the Direction
After switching the direction, it is a good idea to test the drill to make sure it is working properly. Hold the drill with a firm grip, place the bit or screwdriver in the desired location, and squeeze the trigger. The drill should now rotate in the reverse direction. If it doesn’t, double-check the direction switch to ensure it is fully engaged and try again.
Step 5: Switch back to Forward

If you need to switch the drill back to forward rotation, simply repeat the process. Slide or toggle the direction switch to the forward position, making sure it locks into place. Test the drill again by squeezing the trigger and observing the rotation.
Conclusion
Changing the direction of a drill is a simple process that can greatly enhance your ability to tackle a wide range of projects. By following these step-by-step instructions, you can easily switch between forward and reverse rotations, allowing you to drill, drive, and remove fasteners with ease.
Why You Might Need to Change the Direction of a Drill
1. Counter-clockwise Rotation
If you have drilled a hole in the wrong direction or need to remove a screw or bolt, changing the direction of the drill is essential. By setting the drill in reverse or counter-clockwise rotation, it allows you to easily unscrew or remove fasteners that have been tightened.
2. Tightening Fasteners
When assembling furniture or working on any kind of DIY project, you may need to tighten screws, nuts, or bolts. By changing the direction of the drill to the forward or clockwise rotation, you can efficiently and quickly tighten these fasteners without manually turning them.

3. Drilling in Different Materials
Depending on the type of material you are drilling into, you may need to change the direction of the drill. For example, when drilling into metal, a clockwise rotation is usually used, while drilling into wood often requires a counter-clockwise rotation. Changing the direction ensures that the drill bit will create clean and accurate holes without causing damage to the material.
4. Removing Stuck Drill Bits
Sometimes drill bits can get stuck in the chuck or the material you are drilling into. Changing the direction of the drill to reverse allows you to easily remove the stuck drill bit without any additional tools or force. By rotating the bit in the opposite direction, it loosens up any debris or grips that may be causing it to stay in place.
5. Avoiding Accidental Drilling
If you are working in a tight space or need to avoid accidentally drilling through a surface, changing the direction of the drill to reverse can help prevent any mishaps. By setting the drill in reverse, it allows you to back out of a hole or pull the drill bit away from the surface without making any further progress.
6. Switching between Drilling and Driving
If you are working on a project that requires both drilling holes and driving fasteners, you may need to change the direction of the drill multiple times. By conveniently switching between clockwise and counter-clockwise rotations, you can efficiently complete your project without having to switch tools or manually do the work.
|
Direction |
Uses |
|---|---|
|
Counter-clockwise |
|
|
Clockwise |
|

Understanding the Drill Mechanics
Before learning how to change the direction of a drill, it’s important to have a basic understanding of how a drill works. A drill is a power tool that rotates a drill bit at a high speed, allowing it to bore holes into various materials such as wood, metal, or plastic.
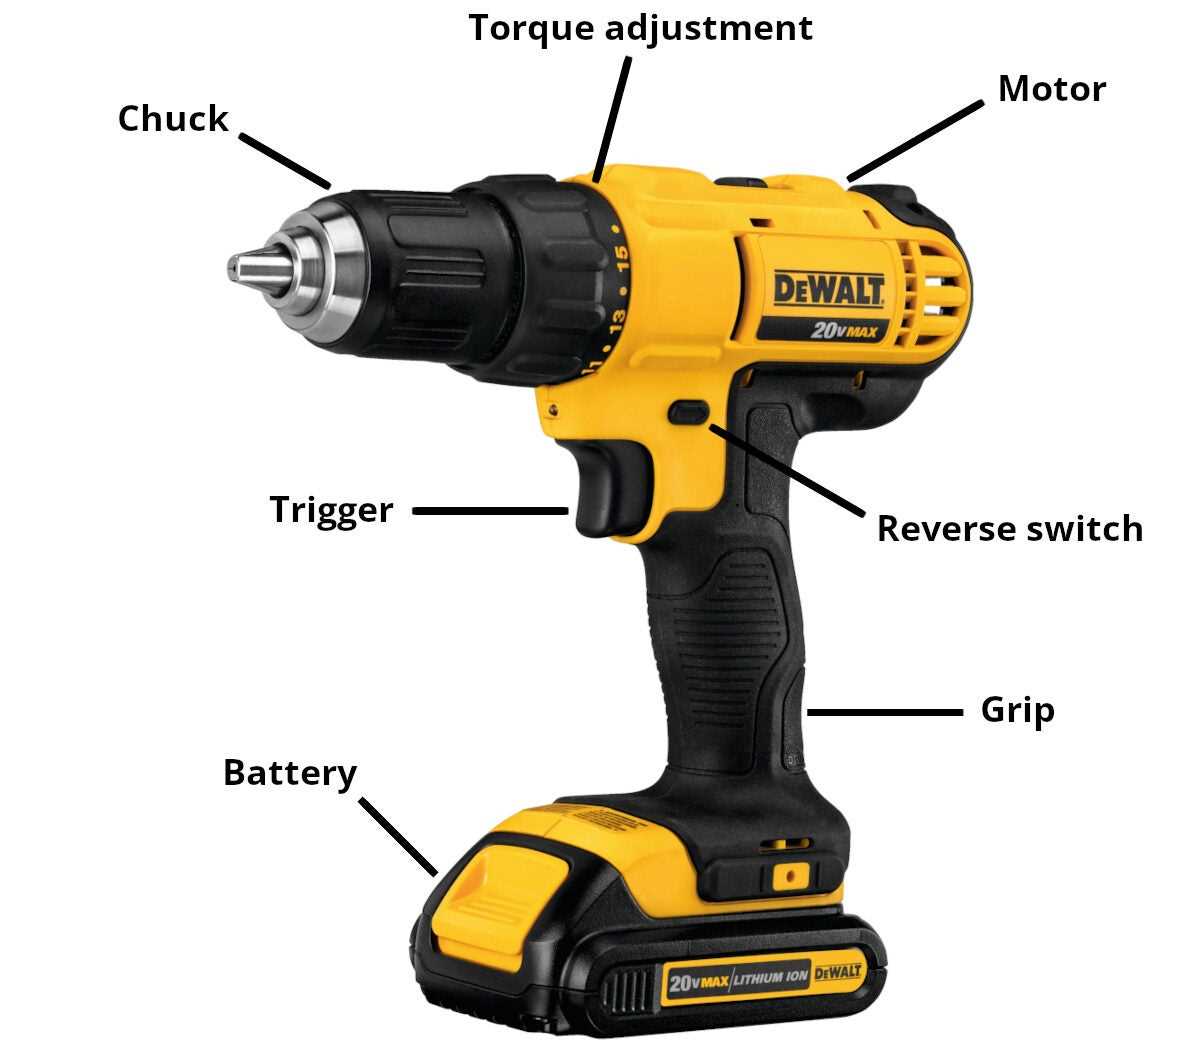
Components of a Drill
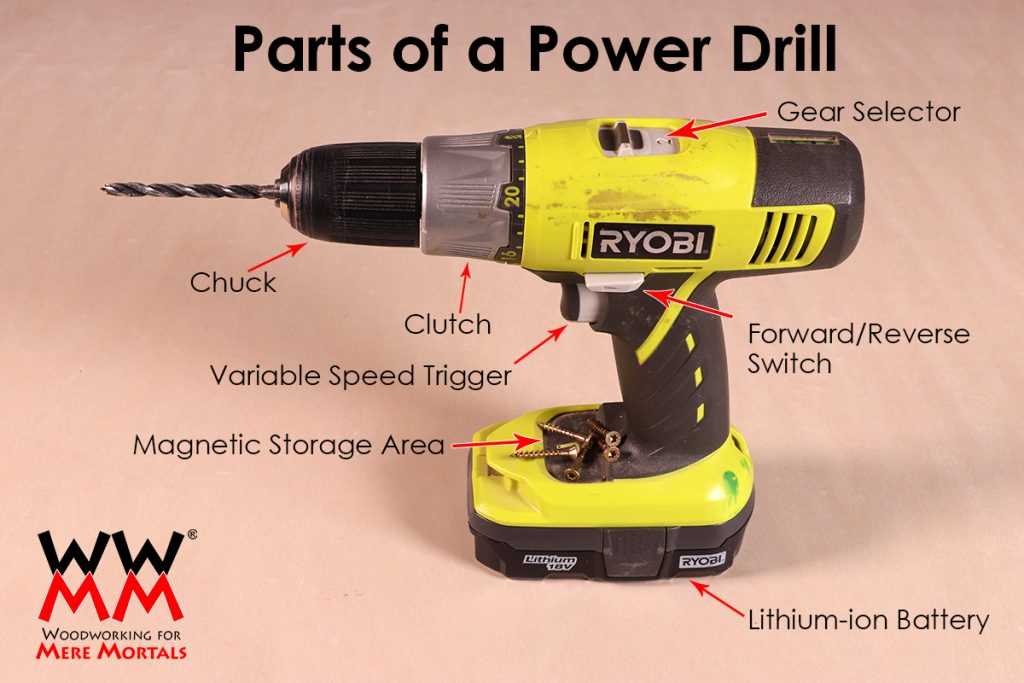
A drill consists of several key components:

- Motor: The motor is the heart of the drill. It provides the power to rotate the drill bit.
- Chuck: The chuck is the part of the drill that holds the drill bit in place. It can be tightened or loosened to secure or release the drill bit.
- Trigger: The trigger is the part of the drill that allows you to control its speed. Pressing the trigger increases the speed, while releasing it decreases the speed.
- Forward/Reverse Switch: The forward/reverse switch is a toggle switch that allows you to change the direction of the drill’s rotation.
Forward and Reverse Rotation
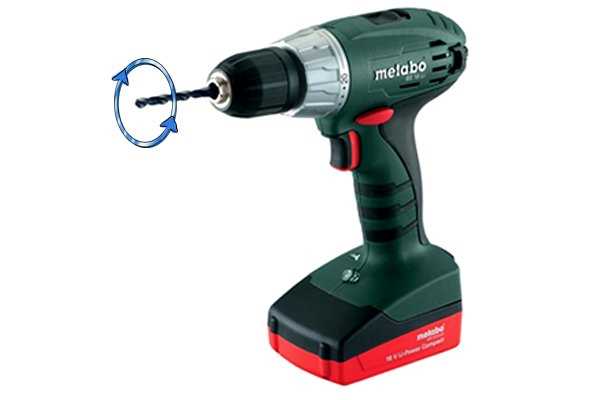
A drill can rotate in two directions: forward and reverse. Forward rotation is the default direction of most drills and is used for drilling holes and driving screws into a material. Reverse rotation, on the other hand, is used to remove screws or back out a drill bit from a hole.
Changing the Direction of a Drill
To change the direction of a drill, follow these steps:
- Locate the forward/reverse switch on the drill. It is usually located near the trigger.
- Push the switch up or down, depending on whether you want the drill to rotate in the forward or reverse direction. Some drills may have an icon indicating the direction of rotation next to the switch.
- Release the switch to lock it in place.
Using the Forward/Reverse Switch Safely
When changing the direction of a drill, it’s important to follow these safety tips:
- Always make sure the drill is turned off and unplugged before changing the direction.
- Avoid changing the direction of the drill while it is in use.
- Take caution when switching the direction of the drill to avoid injury.
By understanding the basic mechanics of a drill, you can confidently change its direction to suit your drilling or screw-driving needs.
How Drills with Forward/Reverse Functionality Work
Drills with forward/reverse functionality are designed to allow users to easily switch between clockwise and counterclockwise rotation. This feature is particularly useful in applications such as driving screws or removing fasteners. Here’s a step-by-step guide on how these drills work:

-
Selecting the Forward or Reverse Direction: To change the direction of the drill, you need to locate the direction selector switch on the handle or body of the drill. This switch typically has two positions: forward and reverse. Slide the switch to the desired direction.
-
Engaging the Direction: Once you have selected the desired direction, press the trigger or power button to engage the drill. This will activate the motor and cause the chuck, which holds the drill bit or screwdriver bit, to rotate in the chosen direction.
-
Controlling the Speed: Most drills with forward/reverse functionality also offer variable speed control. You can adjust the speed based on the task at hand by using the trigger or speed control dial. Pressing the trigger harder generally increases the speed, while releasing it slows down the rotation.
-
Switching between Forward and Reverse: If you need to switch between forward and reverse during operation, simply release the trigger and slide the direction selector switch to the opposite direction. Once the switch is in the new position, press the trigger again to engage the drill in the new direction.
Drills with forward/reverse functionality are versatile tools that make it easy to change the rotation direction for different applications. Whether you need to tighten or loosen screws, drill holes, or perform other tasks, having this capability can greatly enhance the efficiency and convenience of your work.
Different Types of Drills and Their Directional Capabilities
1. Standard Drill
A standard drill is a versatile tool that is commonly used for drilling holes and driving screws. It typically has a forward and reverse switch, allowing you to change the direction of rotation as needed. This makes it easy to drill holes in various materials and remove screws when necessary.
2. Hammer Drill
A hammer drill is specifically designed for drilling into tough materials like concrete and masonry. It combines rotary drilling with a pulsating hammering action to create more impact. Hammer drills usually have a forward and reverse switch, allowing you to change the direction of rotation for both drilling and removing screws.
3. Impact Driver
An impact driver is primarily used for driving screws and tightening fasteners. It uses a combination of rotational force and concussive blows to deliver high torque. Unlike standard drills, impact drivers often have a collet or hex chuck that accepts driver bits instead of drill bits. Most impact drivers have a forward and reverse switch, allowing you to change the direction of rotation for both driving and removing screws.

4. Right Angle Drill
A right angle drill, also known as a corner drill, is designed to reach tight spaces where a standard drill cannot fit. It has a 90-degree angled head that allows you to drill at awkward angles or in confined areas. While right angle drills come in various orientations, most of them have a forward and reverse switch, allowing you to change the direction of rotation as needed.
5. Drill Press
A drill press is a stationary drilling machine that is mounted on a stand or workbench. It is used for precision drilling and is commonly used in woodworking, metalworking, and other manufacturing processes. While drill presses are not typically designed to change the direction of rotation, some models may offer the option to do so by manually adjusting the drive belt or pulleys.
| Drill Type | Primary Use | Directional Capabilities |
|---|---|---|
| Standard Drill | Drilling holes and driving screws | Forward and reverse |
| Hammer Drill | Drilling into concrete and masonry | Forward and reverse |
| Impact Driver | Driving screws and tightening fasteners | Forward and reverse |
| Right Angle Drill | Drilling in tight spaces | Forward and reverse |
| Drill Press | Precision drilling | May vary depending on the model |
Preparing Your Drill for Directional Change
Before you can change the direction of your drill, you’ll need to make a few preparations to ensure a smooth transition. Follow these steps to get your drill ready:
Corded Drill
- Unplug the drill. Safety should always come first, so make sure your drill is disconnected from the power source before making any adjustments.
- Remove the drill bit or accessory. To change the direction of your drill, you’ll need to access the switch or button that controls the rotation. It’s best to remove any attachments to make this process easier.
- Locate the direction control switch. Depending on your drill model, the direction control switch may be located on the top or side of the tool. Look for a switch labeled “forward” and “reverse.”
- Adjust the direction control switch. Carefully move the switch to the desired direction. Make sure it clicks into place to lock the setting securely.
- Attach the drill bit or accessory. Once the direction control switch is set, you can reattach the drill bit or accessory. Make sure it is secured tightly for safe operation.
Cordless Drill
- Turn off the drill. For cordless drills, it’s important to turn off the tool to prevent accidental engagement.
- Remove the drill bit or accessory. Similar to corded drills, removing the attachment will make it easier to access the direction control button.
- Locate the direction control button. Cordless drills typically have a small button on the top or side of the tool that controls the rotation direction.
- Press the direction control button. Press the button and check the indicator or LED light to see if it displays the desired direction.
- Attach the drill bit or accessory. Once you’ve set the desired direction, you can reattach the drill bit or accessory and ensure it is securely fastened.
By following these steps, you’ll be able to prepare your drill for a directional change and proceed with your project safely and efficiently.
Checking the Drill’s Current Direction Setting
Before changing the direction of your drill, it’s important to determine the drill’s current direction setting. This will allow you to know exactly how the drill is currently set and whether you need to change it.
- First, locate the direction switch on your drill. This switch is typically located near the trigger and is labeled with symbols indicating the drill’s forward and reverse directions.
- Next, check the position of the switch. If the switch is set to the forward direction, the drill will rotate in a clockwise direction. If the switch is set to the reverse direction, the drill will rotate counterclockwise.
- If the direction switch is in the neutral position or has a center position, this means that the drill is currently not set to rotate in either direction.
Once you have determined the current direction setting of your drill, you can proceed with changing it if necessary. This will allow you to ensure that the drill rotates in the desired direction for your specific task.
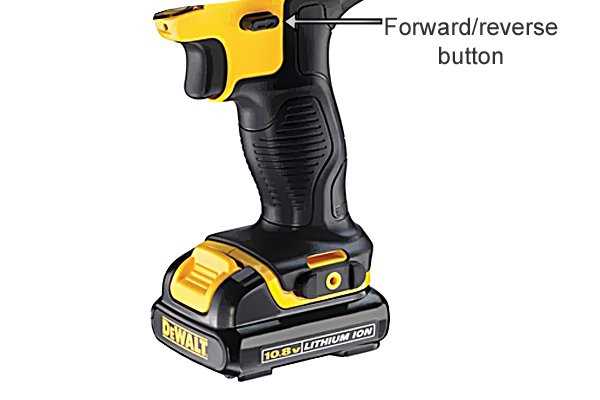
Identifying the Direction Switch
Before you can change the direction of a drill, it’s essential to identify the direction switch. This switch is typically located on the top or side of the drill and is labeled with arrows indicating the different directions: forward and reverse. The direction switch is used to control the rotation of the drill bit.
Here are a few common places where you might find the direction switch:
- On the top handle: Some drills have the direction switch conveniently located on the top handle, making it easy to switch directions with your thumb while holding the tool.
- On the trigger: Other drills have the direction switch integrated into the trigger. To change the direction, you may need to press or slide a button or switch located on the trigger.
- On the body of the drill: In some cases, the direction switch is located on the body of the drill, usually near the motor or the base. This type of switch may require you to use your other hand to change the direction.
It’s important to read the user manual or refer to the manufacturer’s instructions to locate the precise position of the direction switch for your specific drill model.
Once you have identified the direction switch, you can proceed to the next step of changing the direction of your drill.
Changing the Direction of a Corded Drill
Changing the direction of a corded drill is a simple process that can be done by following a few steps. Whether you need to switch from clockwise to counterclockwise or vice versa, this guide will walk you through the process.
Step 1: Prepare the Drill
Before changing the direction of the corded drill, make sure it is unplugged from the power source. This is an important safety precaution to prevent accidental activation of the drill while you are working on it.
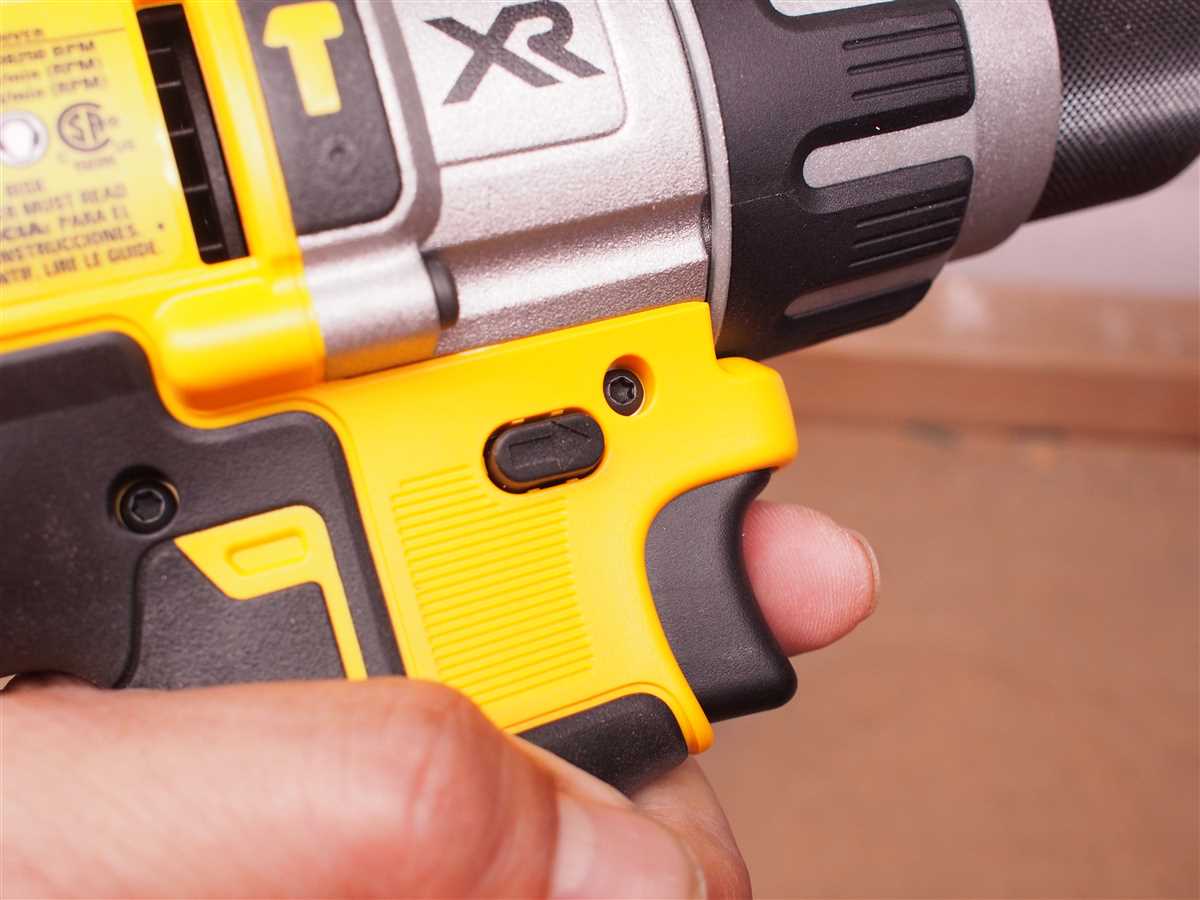
Step 2: Locate the Direction Switch
Next, locate the direction switch on your corded drill. This switch is typically located near the trigger or on the top of the drill body. It will have a forward and reverse symbol indicating the different directions in which the drill can rotate.
Step 3: Adjust the Direction Switch
Once you have located the direction switch, slide or toggle it to the desired position. If you want the drill to rotate clockwise, align the switch with the forward symbol. If you want the drill to rotate counterclockwise, align the switch with the reverse symbol.
Step 4: Test the Direction
After adjusting the direction switch, plug in the corded drill and test the direction by pulling the trigger. The drill should now rotate in the direction that you have set. If the drill is not rotating in the desired direction, unplug it and double-check that the direction switch is correctly aligned.
Step 5: Secure the Direction Switch
Once you have confirmed that the drill is rotating in the desired direction, you can secure the direction switch in place. Some corded drills have a lock or detent feature that ensures the switch remains in the selected position. If your drill has this feature, engage the lock to prevent the switch from accidentally moving during use.
Step 6: Unplug the Drill
After securing the direction switch, unplug the corded drill from the power source. This will prevent any risk of accidental activation while you are handling the drill or changing drill bits.
By following these steps, you can easily change the direction of a corded drill and ensure it rotates in the desired direction for your specific project or task.
Turning the Drill Off and Disconnecting It from Power Source
Before changing the direction of a drill, it is crucial to turn it off and disconnect it from the power source to ensure safety. Follow these steps to turn off and disconnect a drill from the power source:
- Identify the power switch: Look for the power switch on the drill. It is typically located near the handle or the trigger.
- Switch off the power: Slide or flip the power switch to the “off” position. Make sure the drill is completely powered off before proceeding.
- Unplug the power cord: If your drill is corded, unplug the power cord from the electrical outlet. This will ensure that there is no electricity flowing to the drill.
- Remove the battery: If your drill is cordless, remove the battery pack from the drill. This will disconnect the drill from its power source.
- Inspect the drill: Take a moment to visually inspect the drill and power cord (if applicable) for any signs of damage or wear. Replace any damaged components before using the drill.
Following these steps will help prevent any accidental starts or injuries while changing the direction of your drill.
Locating and Operating the Direction Switch
Before changing the direction of your drill, you need to locate the direction switch. This switch is typically located on the top or side of the drill, near the trigger or handle. It is often labeled with arrows indicating both the forward and reverse directions.
Once you have located the direction switch, you can proceed to change the direction of your drill by following these steps:
- Ensure that your drill is turned off and disconnected from any power source to prevent accidental injury.
- Identify the current direction of your drill by checking the position of the switch or by manually rotating the chuck.
- Use your thumb or fingers to slide or toggle the direction switch to the opposite position. If the switch slides, you may need to push it to the left or right. If the switch toggles, you may need to push it up or down.
- Confirm that the direction of your drill has changed by visually inspecting the switch or rotating the chuck in the new direction.
It is important to note that not all drills have a direction switch. Some drills may only operate in a single direction, typically forward. If your drill does not have a direction switch, it is unable to change the direction of rotation.
Keep in mind that changing the direction of your drill may require some practice and adjustment, especially if you are not familiar with operating drills. Always refer to the drill’s user manual for specific instructions and safety guidelines.
Now that you know how to locate and operate the direction switch, you can easily change the direction of your drill to suit your needs.
FAQ:
Can I change the direction of a cordless drill?
Yes, most cordless drills have a switch that allows you to change the direction of the drill bit. This feature is useful for tasks such as removing screws or drilling in reverse.
How do I change the direction of a drill?
To change the direction of a drill, locate the direction switch on the drill. It is usually located near the trigger. Move the switch to the desired direction, either forward or reverse. Once you have set the direction, you can start drilling or driving screws in the selected direction.
What should I do if the drill does not change direction?
If the drill does not change direction when you move the switch, there may be a couple of reasons for this. First, check if the drill has power and is properly charged. If the battery is low, the drill may not have enough power to change the direction. Secondly, verify if the switch is working properly and not jammed. If it is jammed, try cleaning or lubricating it to fix the issue. If the problem persists, it is recommended to contact the manufacturer or take the drill to a repair shop for further assistance.
Is it safe to change the direction of a drill while it is still running?
No, it is not safe to change the direction of a drill while it is still running. Always make sure to turn off the drill and wait for it to come to a complete stop before changing the direction. Changing the direction while the drill is running can not only damage the drill but also pose a safety risk to the user.
Can I change the direction of a drill bit while it is in the material?
No, it is not recommended to change the direction of a drill bit while it is in the material. Changing the direction of the drill bit while it is in the material can cause the bit to get stuck or break, and may result in damage to the material or injury to the user. It is best to remove the drill bit from the material, change the direction, and then continue with the drilling process.
Video:


Meet Harrison Clayton, a distinguished author and home remodeling enthusiast whose expertise in the realm of renovation is second to none. With a passion for transforming houses into inviting homes, Harrison's writing at https://thehuts-eastbourne.co.uk/ brings a breath of fresh inspiration to the world of home improvement. Whether you're looking to revamp a small corner of your abode or embark on a complete home transformation, Harrison's articles provide the essential expertise and creative flair to turn your visions into reality. So, dive into the captivating world of home remodeling with Harrison Clayton and unlock the full potential of your living space with every word he writes.


