How to Change Drill Bit on a Ryobi: Step-by-Step Guide

Whether you’re a DIY enthusiast or a professional contractor, knowing how to change a drill bit is an essential skill. In this step-by-step guide, we will walk you through the process of changing a drill bit on a Ryobi, one of the most popular and versatile power tool brands.
Step 1: Before you begin, make sure the Ryobi drill is turned off and unplugged from the power source to avoid any accidental injury.
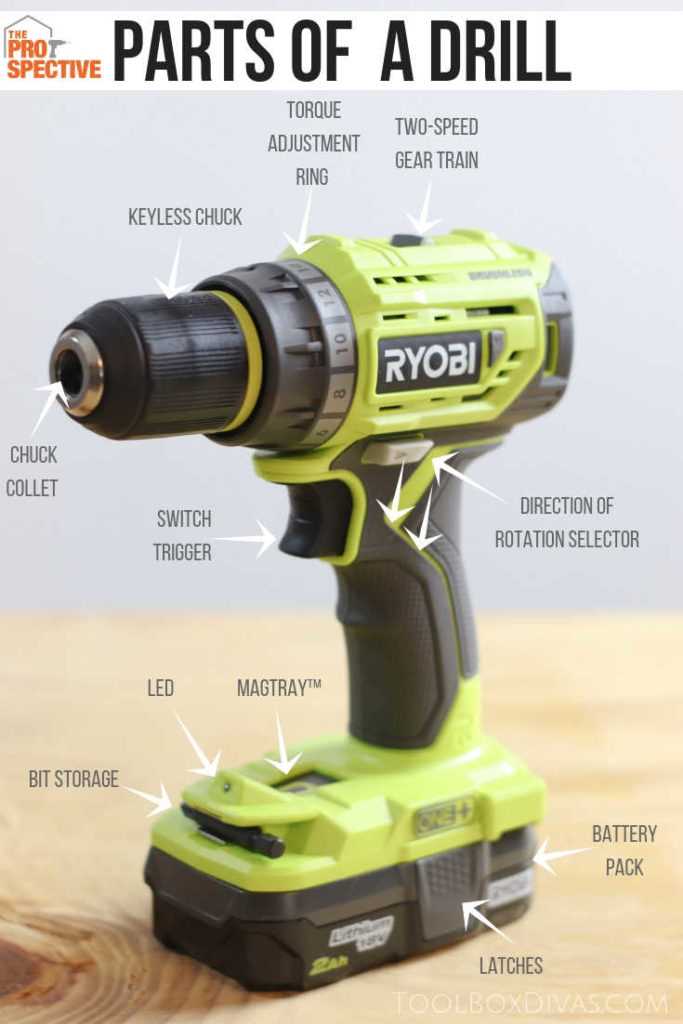
Step 2: Locate the chuck, which is the part of the drill that holds the drill bit in place. The chuck can usually be found at the front end of the drill and is surrounded by three jaws that grip the drill bit.
Step 3: Using your dominant hand, firmly grasp the drill bit and twist it counterclockwise to loosen it from the chuck. It’s important to apply steady pressure to ensure that the drill bit releases smoothly and doesn’t get stuck.
Step 4: Once the drill bit is loosened, remove it from the chuck by pulling it straight out. Make sure to set it aside in a safe place where it won’t roll away or get lost.

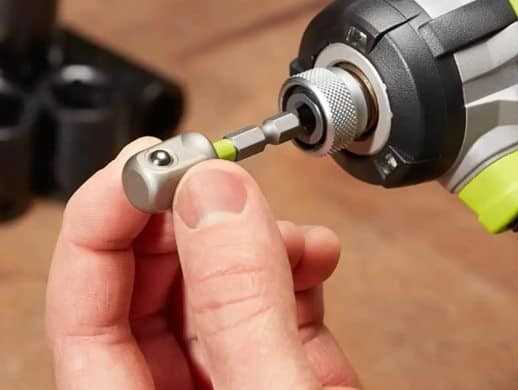
Step 5: Select the new drill bit that you want to use and line up the shank, which is the straight part of the drill bit, with the jaws of the chuck.
Step 6: With the new drill bit lined up, use your dominant hand to twist it clockwise into the chuck. Apply firm pressure to ensure that the drill bit is securely in place.
Step 7: Once the new drill bit is tightened, give it a gentle tug to make sure it’s properly seated in the chuck. You should feel some resistance if it’s secure.
Step 8: Finally, double-check that the drill bit is securely in place by giving it a few small twists in both directions. If there’s any wobbling or movement, repeat the tightening process until the drill bit is firmly locked in the chuck.
Pro tip: If you often work with different drill bit sizes and materials, it can be helpful to keep a drill bit organizer or case on hand to keep them organized and easily accessible.
Now that you know how to change a drill bit on a Ryobi, you can confidently tackle a variety of projects with ease. Remember to always follow safety guidelines and use the appropriate drill bits for the task at hand. Happy drilling!

Gather the Necessary Tools
Before you begin changing the drill bit on your Ryobi drill, you’ll need to gather the following tools:
- Ryobi drill
- New drill bit
- Drill chuck key
Make sure you have these tools readily available before you start the process. Having everything prepared will make the process smoother and more efficient.
Power off the Drill
Before attempting to change the drill bit on your Ryobi drill, it’s crucial to ensure that the power is turned off. This is essential for your safety as well as the proper functioning of the drill.

To power off the drill:
- Locate the power switch on the drill. It is usually located near the handle or trigger.
- Flip the power switch to the “off” position. This will cut off the power supply to the drill.
- Double-check that the drill is completely powered off by pressing the trigger. If the drill does not start, this confirms that it is safely turned off.
Once you have ensured that the drill is powered off, you can proceed with the next steps to change the drill bit on your Ryobi drill.
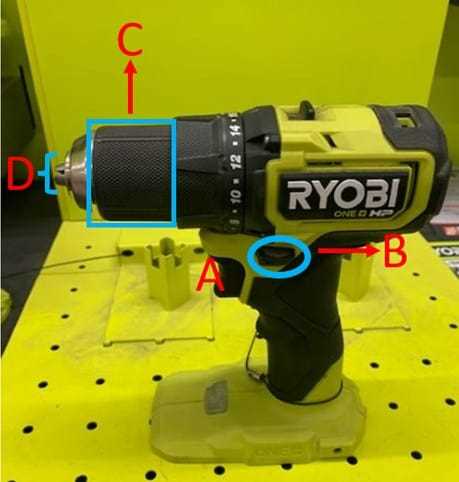
Locate the Chuck
Before changing the drill bit on a Ryobi, it is important to locate the chuck. The chuck is the section of the drill that holds and secures the drill bit in place. It is usually located at the front of the drill, near the tip.
To find the chuck, follow these steps:

- Ensure that the drill is turned off and unplugged, or that the battery is removed.
- Hold the drill in a comfortable position, with the front of the drill facing towards you.
- Look at the front of the drill and locate the cylindrical section that extends past the main body. This is the chuck.
- Take note of any markings or labels on the chuck that indicate the chuck size or specifications.
Once you have located the chuck, you can proceed to the next step in changing the drill bit on your Ryobi.
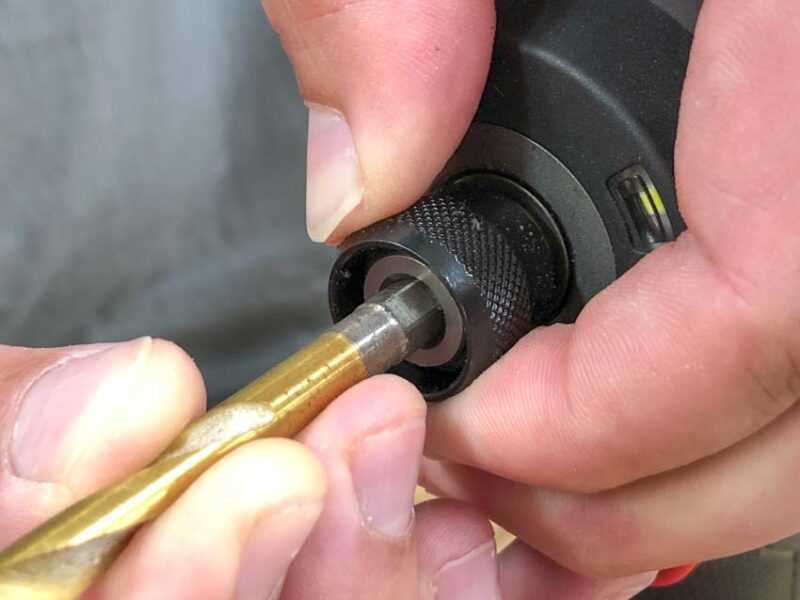
Open the Chuck
Before you can change the drill bit on your Ryobi drill, you need to open the chuck. The chuck is the part of the drill that holds the bit in place.
To open the chuck, follow these steps:
- Hold the drill with one hand and locate the chuck key, which is a small tool that usually comes with the drill.
- Insert the chuck key into one of the holes on the side of the chuck. There are usually three holes to choose from.
- Turn the chuck key counterclockwise to loosen the chuck.
- Keep turning the chuck key until the chuck is wide enough to fit the new drill bit.
Once the chuck is open, you can proceed to the next step of changing the drill bit on your Ryobi drill.

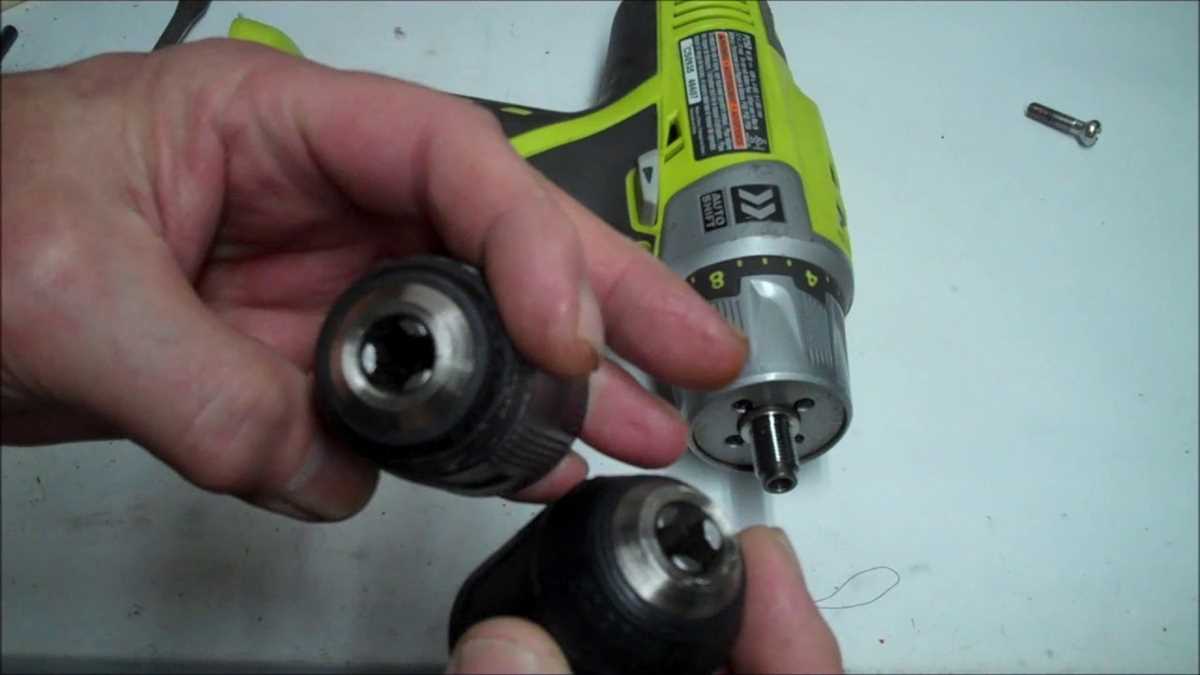
Remove the Old Drill Bit
Before you can change the drill bit on your Ryobi drill, you’ll need to remove the old one. Follow these steps to safely remove the old drill bit:
- Ensure that your Ryobi drill is turned off and unplugged from any power source.
- Locate the chuck at the front of the drill. This is the part that holds the drill bit in place.
- If your drill has a keyless chuck, grip the chuck with one hand while turning the drill’s body counterclockwise with the other hand. This will loosen the chuck and allow you to remove the old drill bit.
- If your drill has a key in the chuck, use the key to loosen the chuck by inserting it into the holes on the chuck and turning it counterclockwise.
- Continue turning the chuck until it is loose enough to remove the old drill bit.
- Once the chuck is loose, remove the old drill bit by pulling it straight out of the chuck.
Now that you have successfully removed the old drill bit, you can move on to the next step of replacing it with a new one.
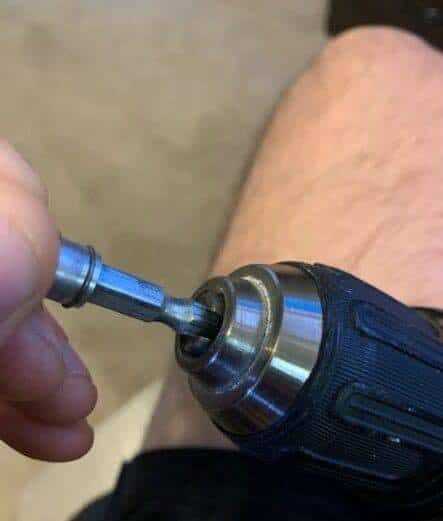
Insert the New Drill Bit
To insert the new drill bit into your Ryobi drill, follow these steps:
- Make sure your drill is turned off and unplugged.
- Find the chuck on the front of the drill. The chuck is the part that holds the drill bit in place.
- Rotate the chuck counterclockwise to open it. You may need to use both hands to grip the chuck for this step.
- Insert the new drill bit into the chuck. Make sure the drill bit is straight and fully inserted into the chuck.
- Tighten the chuck by rotating it clockwise. Again, you may need to use both hands to grip the chuck for this step.
- Double-check that the drill bit is securely held in place by giving it a gentle tug.
Once you have inserted the new drill bit, you can now use your Ryobi drill for your desired task. Remember to always follow safety precautions and wear protective gear when operating power tools.
Tighten the Chuck
Once you have inserted the desired drill bit into the chuck, you need to tighten the chuck to secure the bit in place. Follow these steps to tighten the chuck on your Ryobi drill:
- Hold the drill with one hand and locate the chuck key.
- Insert the chuck key into one of the holes on the chuck.
- Rotate the chuck key in a clockwise direction to tighten the chuck.
- Continue rotating the chuck key until the chuck is fully tightened and the drill bit is secured.
It is important to ensure that the chuck is properly tightened to prevent the drill bit from slipping or becoming loose while in use. This will help to maintain accuracy and safety during drilling operations.
Test the Drill Bit
Once you have successfully changed the drill bit on your Ryobi drill, it is crucial to test the new bit before using it for any projects. Testing the drill bit helps ensure that it is properly attached and ready for use.
Here are the steps to test the drill bit on your Ryobi:
- Power on the drill: Turn on the power button of your Ryobi drill by pressing the switch located on the handle.
- Select the appropriate speed: Depending on the material you plan to drill into, adjust the drill speed setting to the appropriate level. For softer materials, like wood, a lower speed is recommended, while higher speeds are suitable for harder materials, such as metal.
- Secure the workpiece: Place the workpiece securely in a vise or clamp it down to prevent it from moving during drilling.
- Position the drill bit: Align the drill bit with the desired drilling spot on the workpiece.
- Apply gentle pressure: Begin drilling by applying gentle, steady pressure on the drill, ensuring the bit stays aligned and straight.
- Observe the drilling: Pay close attention to the drilling process. If you notice any wobbling or vibrations, stop immediately and recheck the bit attachment. Wobbling or vibrations indicate a loose or improperly secured drill bit.
- Assess the drilling results: Once you have completed drilling, inspect the hole for any irregularities, such as rough edges or chips. These issues may indicate a dull or damaged drill bit.
By following these steps, you can effectively test the drill bit on your Ryobi drill and ensure its proper functionality. Remember to always prioritize safety while handling power tools and wear appropriate protective gear.
FAQ:
Can you explain the process of changing a drill bit on a Ryobi?
Sure! To change the drill bit on a Ryobi drill, you need to first switch off the drill and disconnect it from the power source. Then, locate and press the chuck’s release button to loosen the jaws of the chuck. Once the jaws are loose, remove the old drill bit and insert the new one into the chuck. Finally, use the chuck key or your hand to tighten the jaws of the chuck around the new drill bit.
Is it necessary to disconnect the drill from the power source before changing the drill bit?
Absolutely! Disconnecting the drill from the power source is a crucial step to ensure your safety during the process of changing a drill bit. It eliminates the risk of accidentally starting the drill and prevents any potential injuries.
What should I do if the chuck’s release button is not working?
If the chuck’s release button is not working, it could be due to a jam or mechanical issue. In such cases, you can try tapping gently on the release button to dislodge any debris or use a pair of pliers to rotate the chuck counterclockwise and loosen the jaws. If the issue persists, it’s recommended to consult the Ryobi drill’s user manual or reach out to the manufacturer’s customer support for further assistance.
Do I need any special tools to change the drill bit on a Ryobi?
No, you don’t need any special tools to change the drill bit on a Ryobi. All you need is the chuck key that comes with the drill. However, if you don’t have the chuck key, you can also use your hand to tighten or loosen the jaws of the chuck. Just be careful to avoid any injuries while doing so.
Video:


Meet Harrison Clayton, a distinguished author and home remodeling enthusiast whose expertise in the realm of renovation is second to none. With a passion for transforming houses into inviting homes, Harrison's writing at https://thehuts-eastbourne.co.uk/ brings a breath of fresh inspiration to the world of home improvement. Whether you're looking to revamp a small corner of your abode or embark on a complete home transformation, Harrison's articles provide the essential expertise and creative flair to turn your visions into reality. So, dive into the captivating world of home remodeling with Harrison Clayton and unlock the full potential of your living space with every word he writes.


