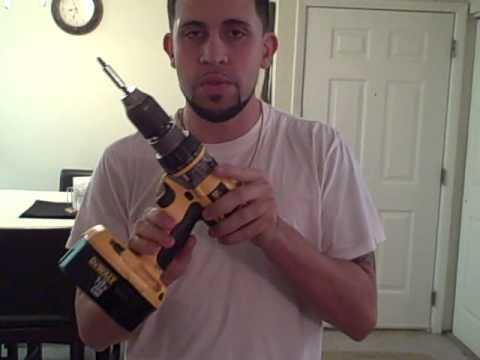
How to Change Bit on Dewalt Cordless Drill

Dewalt cordless drills are widely used by both professionals and DIY enthusiasts for their power and durability. One of the most common tasks when using a cordless drill is changing the drill bit. Whether you need to switch from a drill bit to a screwdriver bit or replace a worn-out bit, knowing how to properly change the bit is essential.
To change the bit on a Dewalt cordless drill, follow these simple steps:
- First, turn off the drill and disconnect the battery to ensure your safety.
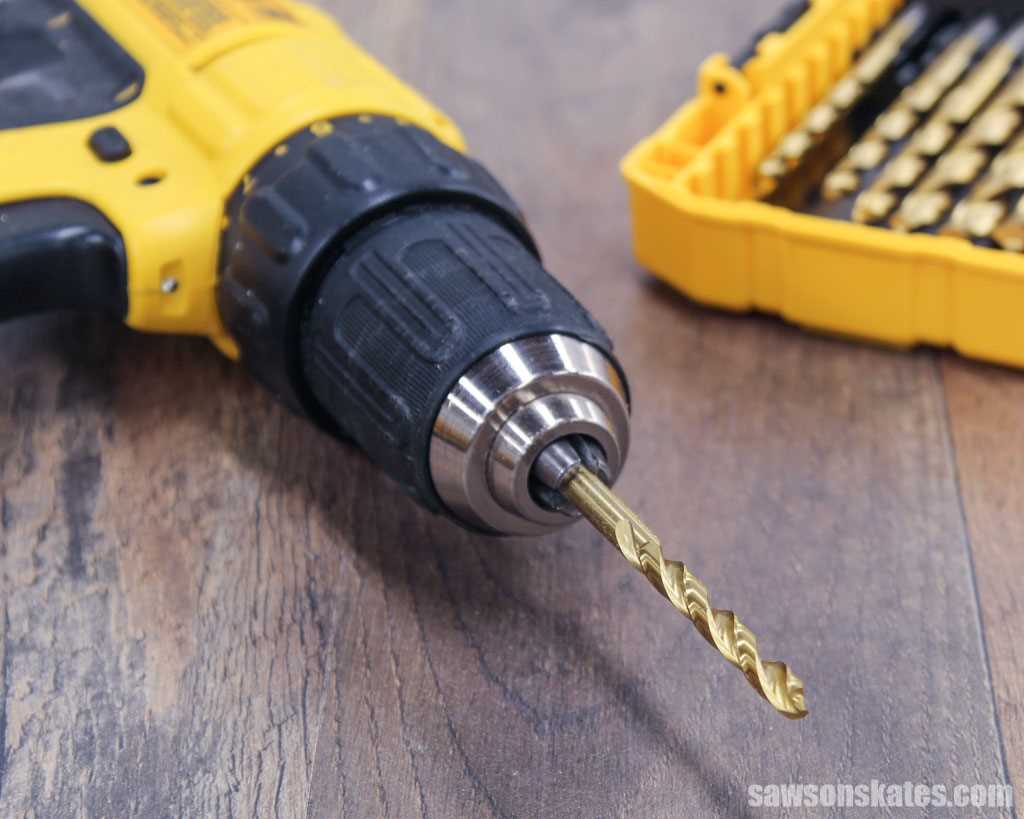
- Locate the chuck on the front of the drill. The chuck is the part that holds the bit in place.
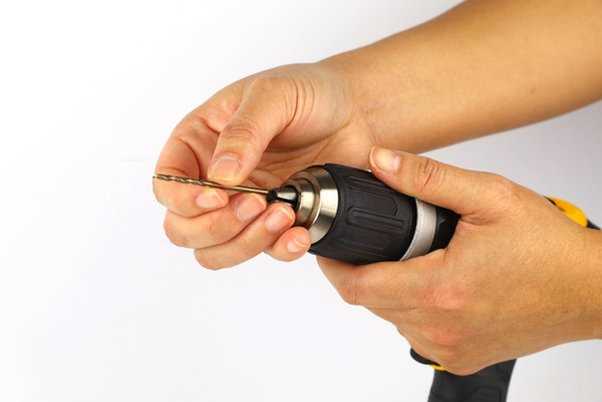
- If the chuck is in the closed position, use your hand to twist it counterclockwise to open it. If the chuck is already open, you can skip this step.
- Insert the new bit into the chuck, making sure it is straight and aligned with the drill body.
- Use your hand to twist the chuck clockwise to tighten it and secure the bit in place. Make sure it is tight enough to prevent the bit from slipping during use, but be careful not to overtighten.
- Reconnect the battery and turn on the drill to test the new bit.
Changing the bit on a Dewalt cordless drill is a quick and easy process that can be done in a matter of seconds. By following these steps, you can ensure that your drill is always equipped with the right bit for the task at hand. Remember to always prioritize your safety and disconnect the battery before making any changes to the drill.
Pro Tip: It’s a good idea to keep a variety of drill bits and screwdriver bits on hand to be prepared for any type of project. Organize them in a dedicated case or container for easy access and storage.
Now that you know how to change the bit on your Dewalt cordless drill, you can confidently tackle any drilling or driving task with ease and efficiency.
Overview of Dewalt Cordless Drill
The Dewalt cordless drill is a versatile and powerful tool that is used in a variety of construction and home improvement projects. It is designed to provide maximum performance and durability, making it the go-to choice for many professionals and DIY enthusiasts.

Key Features:
- Battery-Powered: The Dewalt cordless drill runs on a rechargeable battery, allowing for greater mobility and convenience compared to corded drills.
- Variable Speed: This drill offers variable speed settings, allowing the user to adjust the drill’s speed to match the requirements of the task at hand.
- Chuck Size: The chuck of the Dewalt cordless drill is typically 1/2 inch, which allows for compatibility with a wide range of drill bits.
- Clutch Settings: The drill features multiple clutch settings, which enable the user to adjust the torque delivered by the drill, preventing overdriving or stripping screws and ensuring precise drilling.
Benefits of Dewalt Cordless Drill:
- Portability: The cordless nature of the drill makes it easy to carry and use in various locations without the need for a power outlet. This is especially beneficial for outdoor projects or in situations where access to electricity is limited.
- Convenience: With no cord to restrict movement, the Dewalt cordless drill offers added flexibility and maneuverability, making it easier to work in tight spaces or at awkward angles.
- Power and Performance: Despite being battery-powered, Dewalt cordless drills are known for their impressive power and performance capabilities, allowing for efficient drilling and driving in a variety of materials.
- Durability: Dewalt tools are known for their rugged construction and long-lasting durability. The cordless drill is designed to withstand heavy use and is built to last, even in challenging working conditions.
Conclusion:
The Dewalt cordless drill is a reliable and versatile tool that offers a range of features and benefits for both professionals and DIY enthusiasts. Its portability, convenience, power, and durability make it a popular choice for various drilling and driving tasks. Whether you are a construction professional or a homeowner working on home improvement projects, the Dewalt cordless drill is a tool you can rely on to get the job done efficiently and effectively.
Step-by-Step Guide to Changing Bits
Step 1: Prepare your Dewalt Cordless Drill
Before you begin changing the bit on your Dewalt cordless drill, make sure the drill is turned off and unplugged from any power source. This will ensure your safety during the process.
Step 2: Release the Chuck on the Drill
The chuck is the part of the drill that holds the bit in place. To release the chuck, rotate it counterclockwise. This will loosen the chuck and allow you to remove the current bit.
Step 3: Remove the Current Bit
With the chuck loosened, pull out the current bit from the drill. You may need to give it a gentle twist or pull to fully remove it.

Step 4: Select a New Bit
Choose the new bit that you want to use for your drilling task. Make sure it is compatible with your Dewalt cordless drill.
Step 5: Insert the New Bit
- Hold the new bit by its shank, which is the non-cutting end of the bit.
- Align the flat sides of the shank with the jaws of the chuck.
- Insert the bit into the chuck and ensure it goes in as far as it can.
- Tighten the chuck by rotating it clockwise until it is securely holding the new bit.
Step 6: Test the Bit
Once the new bit is securely in place, you can test it by gently tapping the tip on a hard surface. This will ensure that the bit is properly attached and will not come loose during use.
Step 7: Ready to Use
Your Dewalt cordless drill is now ready to be used with the new bit. Remember to always wear appropriate safety gear and follow the manufacturer’s instructions for your specific drilling task. Happy drilling!
Tools You’ll Need
- New drill bit: Make sure you have a replacement drill bit that is compatible with your Dewalt cordless drill. Check the drill’s user manual or consult with a professional if you’re unsure.
- Protective gloves and eyewear: Always prioritize your safety when working with power tools. Wear gloves to protect your hands from sharp edges and eyewear to shield your eyes from flying debris.
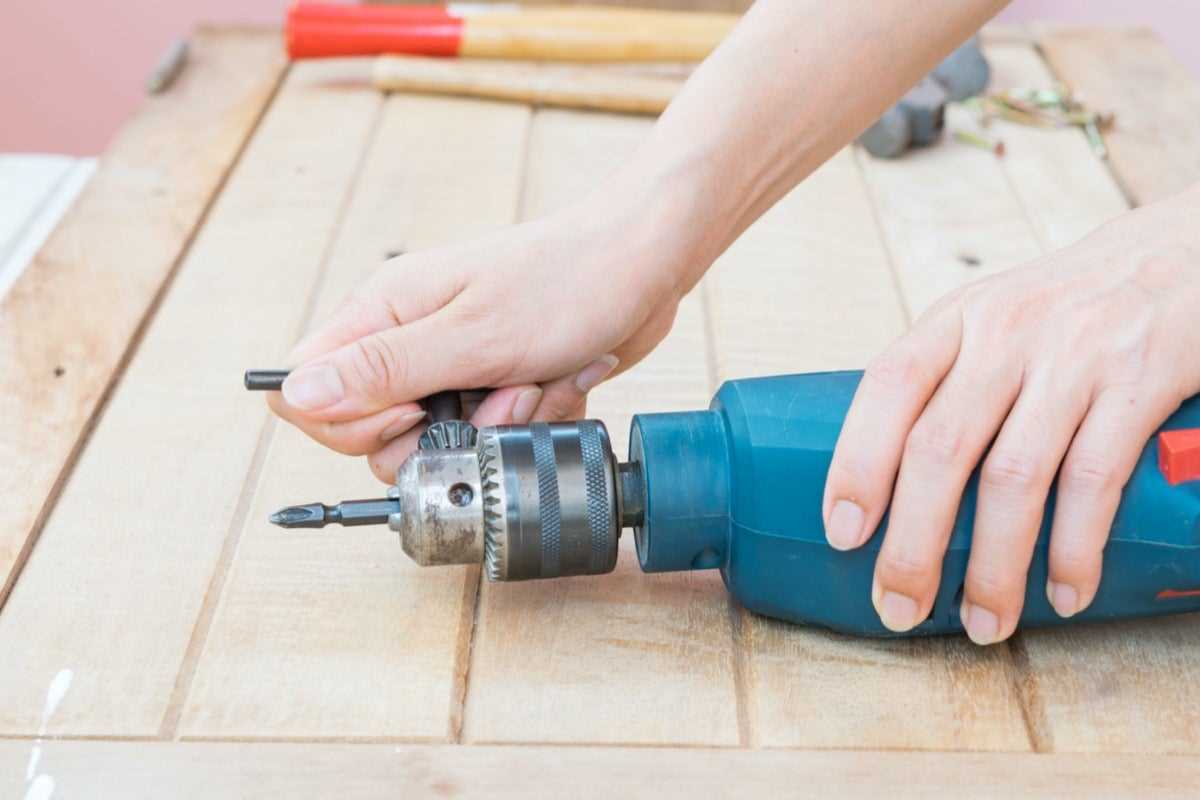
- Adjustable wrench or chuck key: Depending on the type of chuck on your drill, you may need either an adjustable wrench or a specific chuck key to loosen and remove the old drill bit.
- Clean cloth or rag: Having a clean cloth or rag on hand will allow you to wipe away any dirt or debris from the chuck and drill bit.
- Dust mask (optional): If you anticipate working in a dusty environment or generating a significant amount of debris, wearing a dust mask can help protect your respiratory system.
Preparing the Drill
Step 1: Gather the necessary tools
Before starting the task, ensure you have all the necessary tools at hand. You will need:

- Replacement drill bit
- Allen wrench or key
- Protective gloves and eyewear
Step 2: Power off the drill
Before changing the drill bit, it is essential to turn off the power to ensure your safety. Locate the power button or switch on the drill handle and slide or press it to the “off” position.
Step 3: Remove the battery

Next, remove the battery from the drill to prevent any accidental power-on. Locate the battery pack on the back of the drill and press the release button, usually located near the bottom of the handle, to disengage the battery.
Step 4: Inspect the chuck
Take a moment to inspect the chuck of the drill. Look for any dirt, debris, or damage that may hinder the proper functioning of the chuck. Use a clean cloth to wipe away any dirt or debris if necessary.
Step 5: Secure the drill
To prevent the drill from moving or rolling while you change the drill bit, secure it on a stable work surface. If available, use a vise or a clamp to hold the drill firmly. Alternatively, you can also use a non-skid mat or grip pads to stabilize the drill.

Removing the Old Bit
To change the bit on your Dewalt cordless drill, you’ll first need to remove the old bit. Follow these steps to safely remove the old bit:
- Turn off the drill: Before attempting to remove the old bit, make sure the drill is turned off and the battery is disconnected.
- Locate the chuck: The chuck is the part of the drill that holds the bit. It is a cylindrical piece near the front of the drill.
- Identify the chuck type: Dewalt cordless drills usually come with either a keyless chuck or a keyed chuck. The method for removing the bit may vary depending on the type of chuck.
- Release the bit: If you have a keyless chuck, hold the drill firmly and rotate the chuck counterclockwise to loosen it. Continue rotating until the old bit is released from the chuck. If you have a keyed chuck, locate the chuck key and insert it into the small hole on the side of the chuck. Turn the key clockwise to loosen the chuck, then pull the old bit out.
- Inspect the chuck: Once the old bit is removed, take a moment to inspect the chuck and clean out any debris or dust that may have accumulated.
Now that you have successfully removed the old bit from your Dewalt cordless drill, you can proceed to install a new bit. Refer to the manufacturer’s instructions or follow the steps in the next section to learn how to insert a new bit into your drill.
Choosing a New Bit
When it comes to choosing a new bit for your Dewalt cordless drill, there are several factors to consider. The right bit can make a big difference in the effectiveness and efficiency of your drilling project. Here are some tips to help you choose the best bit for your needs:
Consider the Material
The first thing to consider is the type of material you will be drilling into. Different materials require different types of bits. For example, if you will be drilling into wood, a standard twist bit will work well. However, if you will be drilling into metal or concrete, you will need a specific bit designed for those materials. Make sure to choose a bit that is compatible with the material you will be drilling into to ensure the best results.
Choose the Right Size
Another important factor to consider is the size of the hole you need to drill. Bits come in a variety of sizes, so it’s important to choose a bit that matches the diameter of the hole you need to create. You can usually find the size of the bit marked on the shank or packaging. Choosing the right size bit will help you achieve the desired hole diameter and prevent damage to your drill or the material you are drilling into.
![WHJJK [2 in 1] Headphone Adapter for iPhone to 3.5mm AUX Audio Jack Dual Adaptor Dongle Splitter Earphone Adapter Converter Compatible with iPhone 12/11/XR/X/8/7, Supports All iOS](https://m.media-amazon.com/images/I/41TT5C89smL._SS520_.jpg)
Consider the Type of Drill
It’s also important to consider the type of drill you have. Dewalt cordless drills can accept a wide range of bits, but some models may have limitations. Make sure to check the manual or product specifications to ensure that the bit you choose is compatible with your specific drill model. Additionally, be mindful of the drill’s chuck size and choose a bit with a shank that fits securely into the chuck for optimal performance.
Look for High-Quality Bits
Purchasing high-quality bits is essential for achieving the best results and prolonging the life of your drill. Look for bits made from high-speed steel (HSS) or carbide materials, as they tend to be more durable and provide better drilling performance. It’s worth investing in a set of various bits, as different projects may require different types and sizes. This will give you the versatility to tackle a wide range of drilling tasks.
Consider the Task at Hand
Lastly, consider the specific task you will be performing. For example, if you will be drilling pilot holes for screws, a countersink bit may be useful. If you need to create a clean, precise hole, a brad point bit or a forstner bit might be the best choice. Understanding the requirements of your task will help you choose the most suitable bit.
By considering these factors and choosing the right bit for your Dewalt cordless drill, you can ensure that your drilling projects are successful and efficient.
Inserting the New Bit
Once you have removed the old bit from your Dewalt cordless drill, it’s time to insert the new bit. Follow these steps to ensure a proper installation:
- Select the appropriate bit: Choose a new bit that is compatible with your drilling needs. Different bits are designed for different materials, so make sure to choose one that will work best for your project.
- Align the bit with the drill: Hold the drill firmly in one hand and align the end of the new bit with the chuck of the drill.
- Insert the bit into the chuck: Push the bit into the chuck while ensuring it is aligned straight. Apply gentle pressure until the bit is fully inserted.
- Tighten the chuck: Hold the chuck firmly with one hand, and with the other hand, rotate the chuck clockwise to tighten it around the bit. Make sure the bit is securely held in place.
- Test the bit: Once the bit is securely inserted, give it a slight tug to ensure it is properly locked in place. It should not come loose or wobble.
Now that you have successfully inserted the new bit, you are ready to use your Dewalt cordless drill for your drilling or driving needs.
Testing the Drill
1. Power Test
Before starting any drilling operation, it is important to test the power of the drill to ensure that it is functioning properly. To do this, follow these steps:
- Insert a fully charged battery into the drill.
- Turn on the drill by pressing the power button.
- Hold the drill firmly and engage the trigger to check if the motor spins. You should hear a whirring sound and see the drill bit spinning.
- If the drill does not power on or if the motor does not spin, check the battery charge level or consult the drill’s user manual for troubleshooting steps.
2. Forward and Reverse Test
Another important aspect to test is the drill’s ability to rotate the drill bit in both the forward and reverse directions. Follow these steps to perform this test:
- Make sure the drill is turned off.
- Set the drill to the forward direction by adjusting the direction switch located near the trigger.
- Engage the trigger and observe the direction of rotation of the drill bit. It should rotate in a clockwise direction when viewed from the front of the drill.
- Release the trigger and set the direction switch to the reverse position.
- Engage the trigger again and observe the direction of rotation. The drill bit should now rotate counterclockwise.
3. Torque Setting Test
Dewalt cordless drills often come with adjustable torque settings, which allow you to control the amount of force applied to the drill bit. To test the torque settings, follow these steps:
- Set the torque setting to the lowest level by adjusting the collar located just behind the chuck.
- Place the drill bit against a piece of scrap material and engage the trigger.
- Observe the drill bit as it begins to rotate. If the torque setting is too low, the drill bit may slip or stall. Increase the torque setting gradually until the drill bit can drive into the material without slipping.
- Repeat the test with different torque settings to find the most suitable setting for your drilling needs. Remember to adjust the torque setting for different materials or tasks to avoid damaging the workpiece.
Testing the drill before each use is essential to ensure its proper functioning and to avoid any accidents during drilling operations. By following the steps outlined above, you can be confident that your Dewalt cordless drill is ready for use.
Maintenance and Care Tips
Cleaning
To keep your Dewalt cordless drill in optimal condition, it is important to regularly clean it. After each use, wipe down the exterior of the drill with a clean, damp cloth to remove any dirt or dust. Pay attention to the ventilation slots to ensure they are clear and free from debris. Additionally, remove any accumulated dust or debris from the chuck and bit using a small brush or toothbrush.
Lubrication
Proper lubrication is crucial for the smooth operation of your Dewalt cordless drill. Apply a few drops of lubricating oil to the chuck at regular intervals to keep it running smoothly. Make sure to rotate the chuck to distribute the oil evenly. Avoid over-lubricating as it can attract more dust and debris.
Battery Maintenance
Take care of the battery to prolong its lifespan and ensure optimal performance. Avoid completely draining the battery before charging it. Instead, recharge it when it reaches around 20-30% capacity. Store the battery in a cool, dry place when not in use. If you anticipate a long period of inactivity, charge the battery fully before storing it.
Bit Inspection
Regularly inspect the drill bit for any signs of wear or damage. If you notice any chips, cracks, or dullness, replace the bit immediately. Using a damaged or dull bit can reduce the drill’s effectiveness and potentially lead to accidents.
Storage
When storing your Dewalt cordless drill, make sure to keep it in a clean, dry place. Avoid exposing it to extreme temperatures or humidity, as this can damage the internal components. Store the drill and its accessories in a dedicated case or toolbox to protect them from dust and potential damage.
Regular Inspection
Perform regular inspections of your Dewalt cordless drill to ensure everything is working properly. Check for any loose screws, bolts, or other fasteners and tighten them if necessary. Keep an eye on the motor and other moving parts for any unusual sounds or vibrations, as these can indicate a problem that requires attention.
Follow the Manufacturer’s Guidelines
Lastly, it is important to follow the manufacturer’s guidelines and instructions for maintenance and care. Read the user manual thoroughly to learn about specific maintenance requirements for your Dewalt cordless drill. Following the recommended guidelines will help keep your drill in top condition and ensure its longevity.
FAQ:
What type of bits can I use with my Dewalt cordless drill?
You can use a wide variety of bits with your Dewalt cordless drill, including drill bits, screwdriver bits, spade bits, hole saws, and more. Dewalt drills typically have a standard chuck that can accommodate bits with a 1/2-inch or 3/8-inch shank. Make sure to use the appropriate bit for the task you are performing, and always follow the manufacturer’s guidelines.
Can I change the bit on my Dewalt cordless drill without any tools?
Yes, you can change the bit on your Dewalt cordless drill without any additional tools. Dewalt drills are designed with a keyless chuck, which means you can tighten and loosen the chuck by hand. Simply rotate the chuck counterclockwise to loosen it, remove the old bit, insert the new bit, and tighten the chuck by rotating it clockwise until it is secure. It’s that easy!
Video:


Meet Harrison Clayton, a distinguished author and home remodeling enthusiast whose expertise in the realm of renovation is second to none. With a passion for transforming houses into inviting homes, Harrison's writing at https://thehuts-eastbourne.co.uk/ brings a breath of fresh inspiration to the world of home improvement. Whether you're looking to revamp a small corner of your abode or embark on a complete home transformation, Harrison's articles provide the essential expertise and creative flair to turn your visions into reality. So, dive into the captivating world of home remodeling with Harrison Clayton and unlock the full potential of your living space with every word he writes.


