How to Build a DIY Wood Lathe Using a Drill

If you’ve ever wanted to try your hand at woodturning but don’t want to invest in an expensive lathe, a DIY wood lathe made with a drill may be the perfect solution. With just a few simple materials and some basic woodworking skills, you can create your own lathe that will allow you to turn wood into beautiful crafted pieces.
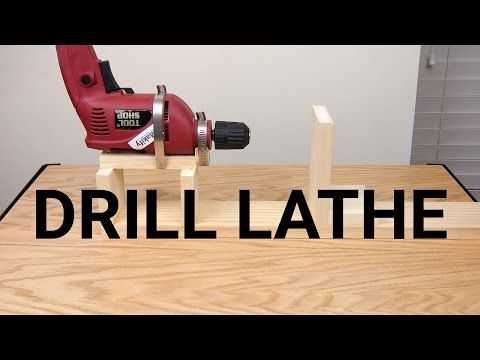
A drill-powered wood lathe works by attaching the drill to a sturdy base, which holds the piece of wood that you want to turn. As the drill spins, it rotates the wood, allowing you to shape it with various tools. This DIY lathe is perfect for making small bowls, spindles, and other decorative items.
To build a DIY wood lathe using a drill, you will need a few basic tools and materials, such as a drill, a sturdy base, a rod, and some woodworking tools. It’s important to choose a drill with enough power to rotate the wood smoothly and evenly. The base should be made of a strong material, such as plywood, and securely hold the drill in place.
Once you have gathered all the necessary materials, you can start building your DIY wood lathe. First, attach the drill to the base using clamps or screws, ensuring that it is secure and stable. Next, attach the rod to the drill chuck and secure it tightly. This rod will act as the axis for the piece of wood that you will be turning.
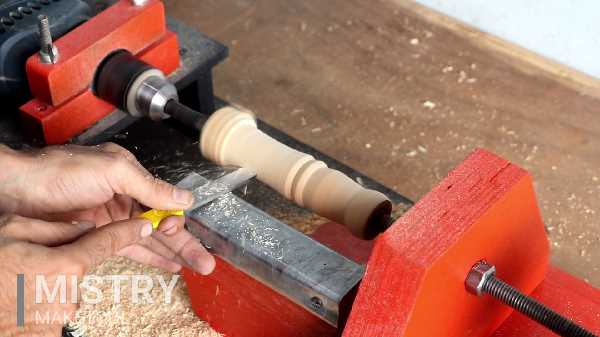
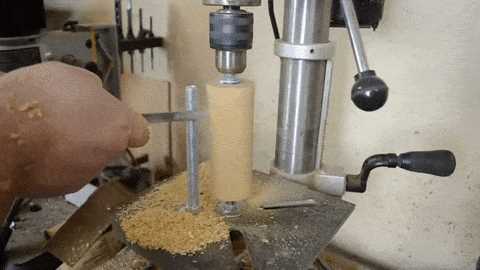
After assembling the lathe, you can start turning wood by securing a piece of wood to the rod. Use the drill to rotate the wood at a moderate speed, and carefully shape the wood using chisels, gouges, or other woodturning tools. Remember to always wear safety goggles and use caution when working with power tools.

Building your own DIY wood lathe using a drill is a rewarding project that allows you to explore the world of woodturning without breaking the bank. Whether you’re a beginner or an experienced woodworker, this DIY lathe is a versatile tool that can help you create unique and beautiful wooden creations.
What is a DIY Wood Lathe?
A DIY wood lathe is a tool used for shaping wood. It allows you to spin and shape wood in order to create intricate designs and smooth finishes. A wood lathe typically consists of a rotating spindle, a tool rest, and various cutting tools.
Building a DIY wood lathe is a cost-effective and customizable alternative to purchasing a commercial wood lathe. It allows you to create a lathe that meets your specific needs and budget, using materials that are easily accessible.
There are many different designs and variations of DIY wood lathes, but they all share the same basic principle of rotation and shaping. Some DIY wood lathes are powered by a drill or a motor, while others are operated manually.
Benefits of Building a DIY Wood Lathe
There are several benefits to building a DIY wood lathe:
- Cost-effective: Building your own wood lathe can be much cheaper than buying a commercial one. You can save money by using materials that you already have or by sourcing affordable materials from your local hardware store.
- Customizability: Building your own wood lathe allows you to customize it to your specific needs and preferences. You can choose the size, shape, and features that will work best for the projects you have in mind.
- Learning experience: Building a DIY wood lathe can be a great learning experience. It can teach you about the mechanics of a lathe, woodworking techniques, and problem-solving skills.
- Flexibility: A DIY wood lathe can be easily modified or upgraded as your skills and needs evolve. You can add or remove features, change the size or shape, or even build additional attachments for specific tasks.
Overall, building a DIY wood lathe can be a rewarding and practical project for woodworkers of all skill levels. It allows you to explore your creativity, save money, and gain a deeper understanding of the lathe and woodworking processes.

The Benefits of Building a DIY Wood Lathe
Building a DIY wood lathe using a drill can offer several benefits for woodworkers. Whether you are a beginner or an experienced craftsman, creating your own lathe can provide you with unique advantages. Here are some of the benefits you can enjoy by building a DIY wood lathe:
1. Cost Savings
One of the primary benefits of building your own wood lathe is the cost savings. Purchasing a pre-built lathe can be quite expensive, especially if you are looking for a high-quality machine. By building your own, you can save a significant amount of money and still achieve great results.
2. Customization
When you build your own wood lathe, you have the freedom to customize it according to your specific needs and preferences. You can choose the size, design, and features that best suit your woodworking projects. This level of customization allows you to create a lathe that is tailored to your unique requirements.
3. Learning Experience
Building a DIY wood lathe can be a valuable learning experience. It provides an opportunity to understand the inner workings of the machine and gain knowledge about woodworking tools and techniques. This hands-on experience can enhance your overall woodworking skills and give you a deeper understanding of the craft.
4. Accessibility
Sometimes, it can be challenging to find a wood lathe that meets your specific needs or is available for purchase in your area. By building your own lathe, you can ensure that you have access to the equipment you need without relying on the availability and stock of commercial options.

5. Flexibility
Building your own wood lathe allows you to have greater flexibility in terms of the materials you can use and the projects you can undertake. You can experiment with various types of wood and explore different turning techniques without limitations imposed by a pre-built machine.
6. Sense of Accomplishment
Finally, building a DIY wood lathe can give you a great sense of accomplishment. Completing a project like this can be incredibly satisfying and rewarding. Seeing your own creation come to life and using it for your woodworking projects can provide a unique sense of pride and satisfaction.
In conclusion, building a DIY wood lathe has numerous benefits. From cost savings to customization and learning opportunities, creating your own lathe can be a rewarding experience for any woodworker. It offers the chance to explore your creativity, enhance your skills, and have a machine that perfectly suits your needs.

Gather the Necessary Tools and Materials
Before you start building your DIY wood lathe using a drill, make sure you have all the necessary tools and materials on hand. Having everything ready will help you work efficiently and ensure that you have everything you need to complete the project.
Tools
- Drill
- Drill press (optional but recommended)
- Jigsaw
- Screwdriver
- Wrenches
- Clamps
- Sandpaper
- Measuring tape
- Pencil
Materials
- 1-inch thick wooden board
- 3/8-inch threaded rod
- Nuts and washers
- Bolts
- Plywood
- MDF (Medium-Density Fiberboard)
- Wood screws
- Wood glue
- Wood filler
- Paint or sealant (optional)
Optional Accessories
- Pen turning mandrel
- Chisels
- Cutting tools
- Lathe tools
- Faceplate
- Live center
Having all the necessary tools and materials will make the process of building your DIY wood lathe using a drill much smoother. Make sure to gather everything before you start so you don’t have to interrupt your work to search for missing items.
Tools Needed for Building a DIY Wood Lathe
List of tools required to build a DIY wood lathe:
- Drill press or hand drill
- Jigsaw or bandsaw
- Power drill and drill bits
- Tape measure
- Sawhorses or workbench
- Clamps
- Screwdriver set
- Chisels
- Sanding tools (sandpaper, sanding block)
- File set
- Wrench set
- Level
- Wood glue
- Nails or screws
These tools are essential for building a DIY wood lathe. Make sure you have them all on hand before starting the project.
Additionally, you may also find the following tools helpful:

- Angle grinder
- Rasp
- Wood lathe chucks
- Lathe tools
Keep in mind that the specific tools you need may vary depending on the design and complexity of the wood lathe you are building. It’s always a good idea to consult the project plans or instructions for a complete list of required tools.
Materials Required for Building a DIY Wood Lathe
- A basic drill
- A sturdy workbench or table
- A piece of plywood or MDF, at least 2 feet by 2 feet in size
- Four wooden blocks, approximately 4 inches tall
- A long, threaded rod, approximately 1 inch in diameter
- Two nuts and washers to fit the threaded rod
- Two pillow block bearings
- Two pieces of angle iron, approximately 1 foot long
- A metal rod or pipe, approximately 8-10 inches long
- Two small pulleys
- A v-belt or drive belt
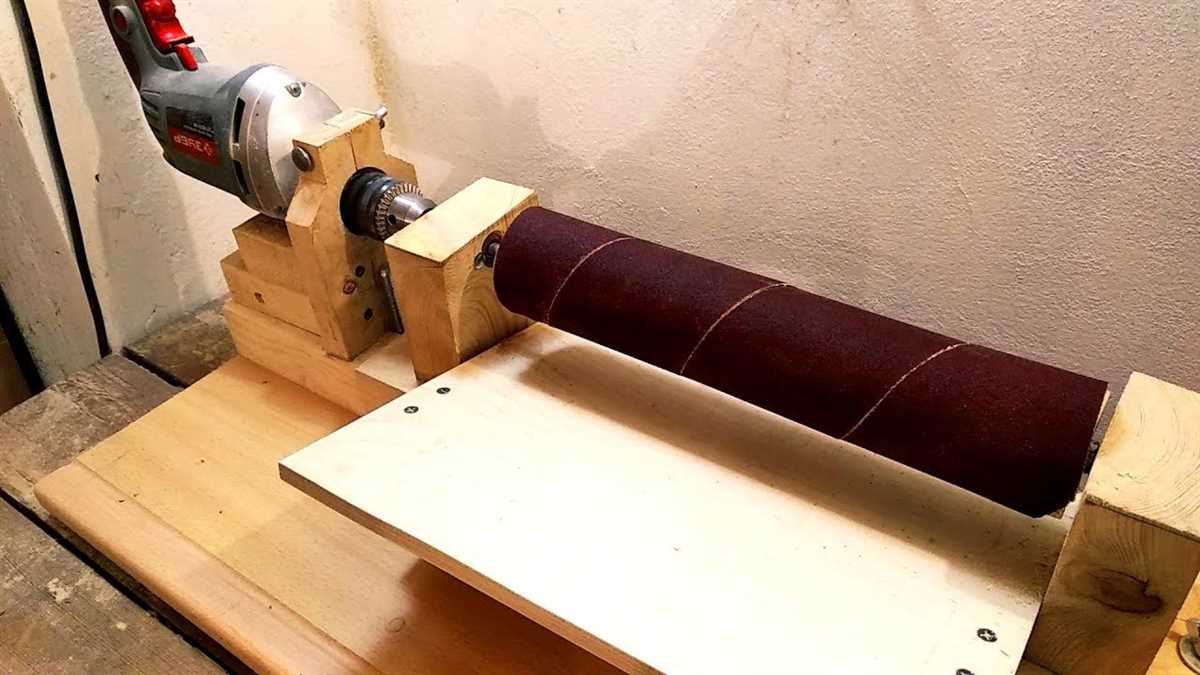
- A piece of sandpaper or sanding disc
- A chisel or gouge for woodturning
- A faceplate or chuck for holding the wood
These are the basic materials you will need to build a DIY wood lathe using a drill. Some additional tools and supplies may be required depending on the specific design you choose.
Prepare the Work Area
Clean and Clear the Space
Before starting the construction of your DIY wood lathe, it’s important to prepare your work area. Begin by cleaning the space and removing any clutter or debris. This will create a safe and organized environment for your project.
Gather Necessary Tools and Materials
Next, gather all the necessary tools and materials that you will need for building your wood lathe. This may include a drill, screws, plywood, metal rods, bearings, and other hardware. Having everything readily available will help streamline the construction process.
Create a Stable Workbench

It’s essential to have a stable and sturdy workbench to support your wood lathe. If you already have a workbench, ensure that it is in good condition and can handle the weight and vibrations of the lathe. If needed, reinforce the workbench or build a new one to provide a solid foundation.
Set Up Proper Lighting
Proper lighting is crucial for working safely and accurately. Make sure your work area is well-lit so that you can see your materials, tools, and measurements clearly. Consider adding additional lighting fixtures or using portable work lights to improve visibility.
Arrange Storage for Tools and Supplies
Keep your tools and supplies organized and easily accessible by setting up storage solutions in your work area. This could include shelves, cabinets, or toolboxes. Having a designated place for everything will save you time and reduce the chances of misplacing or losing important items.
Clear the Surrounding Area
Make sure there is enough space around your work area to move freely and safely. Remove any obstacles or other objects that may cause accidents or hinder your work. By clearing the surrounding area, you will create a safer and more efficient workspace.

Clearing the Space for Building a DIY Wood Lathe
Before you start building your DIY wood lathe using a drill, it’s important to clear the space where you’ll be working. This will help you have a safe and organized work environment to complete your project. Here are some steps to follow:
1. Choose a Well-Ventilated Area:
The first thing you need to do is select a well-ventilated area for building your DIY wood lathe. Working with wood and power tools can create a lot of dust and fumes, so make sure there is proper ventilation to keep the air clean and safe to breathe.
2. Remove Debris and Clutter:
Clear the area of any debris, clutter, or objects that may hinder your work. This includes moving away any furniture, boxes, or tools that are not necessary for the project. Having a clean and clutter-free workspace will help you focus and prevent accidents.
3. Organize your Tools:
Make sure all your tools and materials are organized and easily accessible. This will save you time and effort when you need to use them. Use toolboxes, shelves, or pegboards to store your tools neatly and keep them within reach.
4. Create a Work Table:
Set up a sturdy and stable work table that is large enough to accommodate your project materials. A workbench or a solid table will provide a stable surface for assembling your DIY wood lathe. Make sure the table is at a comfortable height to work on and has enough space for your tools.
5. Clear the Surrounding Area:
Clear a space around your work table to allow for movement and easy access to your project. This includes removing any obstacles, such as cords, rugs, or other items that could cause trips or falls. Keeping a clear and open area will ensure your safety while working.
6. Provide Adequate Lighting:
Ensure that your workspace has sufficient lighting for you to see clearly. Good lighting is essential for working with precision and avoiding mistakes. You can use a combination of natural and artificial light sources to illuminate your work area properly.
7. Consider Safety Precautions:
Finally, it’s crucial to take necessary safety precautions before starting your project. This includes wearing appropriate protective gear, such as safety goggles, ear protection, and gloves. Make sure you are familiar with the operation and safety guidelines of your power tools.
By following these steps and clearing the space for building your DIY wood lathe, you’ll create a safe and efficient workspace for your project. With a well-organized and clutter-free area, you’ll be able to focus on the task at hand and enjoy the process of building your own wood lathe.
Creating a Stable Base for the DIY Wood Lathe
When building a DIY wood lathe using a drill, it is important to create a stable base that can support the weight of the materials and withstand the vibrations produced during operation. A stable base is crucial for safety and accurate woodworking.
Materials Needed
- 4×4 lumber
- Plywood
- Wood screws
- Drill
- Table saw or circular saw
Instructions
1. Measure and Cut the 4×4 Lumber
Begin by measuring and cutting the 4×4 lumber into four equal pieces, each approximately the same length. These pieces will serve as the legs of the lathe base.
2. Create a Rectangular Frame
Using the 4×4 lumber pieces, build a rectangular frame by attaching the pieces together at the corners using wood screws. Make sure the frame is square by measuring the diagonals and adjusting as necessary.
3. Add Cross Braces
To further strengthen the base, add cross braces between the legs of the frame. Cut additional pieces of 4×4 lumber and attach them horizontally between the legs of the frame using wood screws. These braces will provide additional stability and prevent the legs from wobbling.
4. Attach Plywood Top
Measure and cut a piece of plywood that will fit securely on top of the rectangular frame. Attach the plywood to the frame using wood screws, ensuring that it is securely fastened.
5. Secure the Drill and Mounting Plate
Position the drill on the plywood top, ensuring that it is centered and aligned with the mounting plate. Secure the drill to the plywood using the appropriate screws or clamps, following the manufacturer’s instructions.
6. Level and Stabilize
Once the drill and mounting plate are secured, check to ensure that the lathe base is level. Adjust the legs as necessary to achieve a level surface. Additionally, consider placing the lathe on a sturdy workbench or using anti-vibration pads to further stabilize the base and minimize vibrations.
By following these steps, you can create a stable base for your DIY wood lathe that will provide the necessary support and stability for safe and accurate woodworking.
Assemble the Components
Once you have gathered all the necessary materials and tools, you can start assembling the components of your DIY wood lathe. Follow these step-by-step instructions:
- Attach the plywood base: Place the plywood base on a flat surface. Use screws to secure the wooden blocks to the corners of the base, providing stability.
- Attach the drill: Place the drill in the center of the plywood base with the chuck facing upwards. Secure the drill to the base using screws or clamps.
- Install the pulleys and belts: Attach a pulley to the drill chuck and secure it tightly. Install the second pulley on the shaft of the wood piece that will serve as the lathe bed. Connect the pulleys with a belt, ensuring that it is tight and has good tension.
- Mount the tool rest: Attach the tool rest to the lathe bed, positioning it at a comfortable height and distance from the wood piece. Make sure it is securely fastened and provides stability while working.
- Adjust the tension: Check the tension of the belt and make any necessary adjustments. The belt should be taut and not slip during operation. Use the tension adjustment mechanism of your drill or pulley system to achieve the desired tension.
- Test the lathe: Before starting any woodworking projects, test the lathe by turning on the drill. Make sure the components rotate smoothly and there are no vibrations or wobbling. Adjust and tighten any loose connections if necessary.
Once you have successfully assembled the components of your DIY wood lathe, you are ready to start your woodworking projects. Remember to always follow safety precautions and wear appropriate protective gear while operating the lathe.
Attaching the Drill to the Base
Once you have built the base of your DIY wood lathe, it’s time to attach the drill that will power the lathe. Attaching the drill securely to the base is essential for safe and effective operation.
Follow these steps to attach the drill to the base:
- Position the drill on the base in a way that aligns the drill chuck with the center of the base. This will ensure that your workpiece will spin evenly when mounted on the lathe.
- Use clamps or screws to secure the drill to the base. Make sure the drill is stable and doesn’t wobble. This will prevent unnecessary movement and ensure a smooth turning process.
- Check that the drill is level with the base. Adjust the position if necessary, using shims or other materials to achieve a level surface.
- Ensure that the drill is securely fastened to the base. Test its stability by gently nudging the drill from different directions. If it feels loose, tighten the clamps or screws until it is firmly attached.
It’s important to note that the base should be sturdy enough to handle the vibrations and torque generated by the drill. Using a thick and stable material, such as plywood or solid wood, will help to absorb some of the vibrations.
Before proceeding with your woodturning projects, test the drill to ensure it operates smoothly and without any issues. Double-check all the connections and make sure everything is securely in place.
Now that you have successfully attached the drill to the base of your DIY wood lathe, you are ready to start turning wood and creating beautiful projects!
FAQ:
What is a wood lathe and what is it used for?
A wood lathe is a machine used for shaping wood by rotating it rapidly along its axis while cutting tools are applied to it. It is commonly used for creating symmetrical objects such as bowls, spindles, and furniture legs.
Is it possible to build a DIY wood lathe using a drill?
Yes, it is possible to build a DIY wood lathe using a drill. In fact, many woodworking enthusiasts have successfully built their own wood lathes using a drill as the power source.
What tools and materials are needed to build a DIY wood lathe using a drill?
To build a DIY wood lathe using a drill, you will need a few basic tools and materials including a drill, chisels, a sturdy workbench or table, a piece of plywood or MDF for the lathe base, bearings or bushings to support the spindle, a workpiece drive center, a tailstock center, and some screws and hardware for assembly.
Is building a DIY wood lathe using a drill difficult?
Building a DIY wood lathe using a drill can be a challenging project, especially if you have limited woodworking experience. However, with the right tools, materials, and instructions, it is definitely possible to create a functional wood lathe for your woodworking projects.
What are the advantages of building a DIY wood lathe?
There are several advantages of building a DIY wood lathe. Firstly, it can be a more cost-effective option compared to buying a commercially-made wood lathe. Additionally, building your own lathe allows you to customize it to your specific needs and preferences. It can also be a rewarding project that helps you develop your woodworking skills.
Are there any safety precautions to consider when building and using a DIY wood lathe?
Yes, safety should always be a top priority when building and using a DIY wood lathe. It is important to wear appropriate safety gear such as safety glasses and ear protection. Additionally, make sure to read and follow the manufacturer’s instructions for any power tools used in the construction process. When using the wood lathe, be cautious of sharp cutting tools and always keep your hands and fingers clear of the rotating workpiece.
Can a DIY wood lathe built with a drill handle larger projects?
The size of projects a DIY wood lathe built with a drill can handle will largely depend on the specifications of the drill used. Generally, a more powerful drill with higher torque will be able to handle larger and heavier workpieces. However, it is important to ensure that the lathe is properly constructed and securely mounted to the workbench or table to handle the additional weight and forces involved in turning larger projects.
Video:


Meet Harrison Clayton, a distinguished author and home remodeling enthusiast whose expertise in the realm of renovation is second to none. With a passion for transforming houses into inviting homes, Harrison's writing at https://thehuts-eastbourne.co.uk/ brings a breath of fresh inspiration to the world of home improvement. Whether you're looking to revamp a small corner of your abode or embark on a complete home transformation, Harrison's articles provide the essential expertise and creative flair to turn your visions into reality. So, dive into the captivating world of home remodeling with Harrison Clayton and unlock the full potential of your living space with every word he writes.


