How to Attach a Hole Saw to a Drill

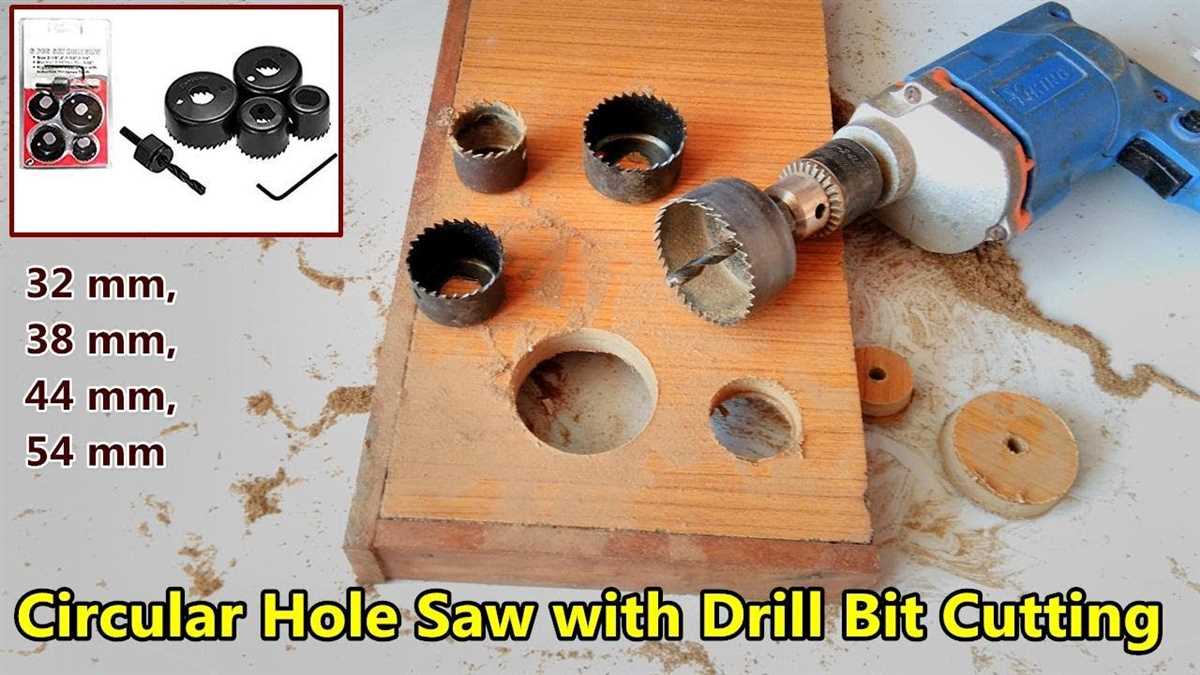
A hole saw is a must-have tool for anyone who regularly works with wood or metal. It allows you to cut clean, precise holes of various sizes without exerting much effort. Whether you’re installing a new door knob or creating holes for plumbing or electrical work, a hole saw is an indispensable tool.
Attaching a hole saw to a drill may seem like a simple task, and it is, but it’s important to do it correctly to ensure safe and efficient operation. In this article, we’ll guide you through the process of attaching a hole saw to a drill step by step, so you can confidently tackle any project that comes your way.
Step 1: Choose the right hole saw
Before you begin, make sure you have the correct hole saw for the job. Hole saws come in various sizes and materials, so choose one that matches the size of the hole you need to create and the material you’ll be working with. Also, check if the hole saw is compatible with your drill, as not all hole saws fit all drills.
Gather the Necessary Tools and Materials
Before you can attach a hole saw to a drill, you will need to gather several tools and materials. Having everything prepared beforehand will make the process smoother and more efficient. Here is a list of the items you will need:

- Drill: A power drill is essential for attaching a hole saw. Make sure your drill is in good working condition with a fully charged battery or a power source nearby.
- Hole saw: Choose a hole saw that matches the size of the hole you want to create. Hole saws come in various sizes, so select one that will suit your needs.
- Drill bit: Depending on the type of hole saw you are using, you may need a pilot drill bit. This small drill bit will create a guide hole for the hole saw to follow. Check the instructions for your specific hole saw to determine if a pilot drill bit is required.
- Workpiece: The material you will be drilling into is also important to consider. Make sure you have a suitable workpiece secured in place, whether it be wood, metal, or another material.
- Safety equipment: Whenever working with power tools, it is crucial to prioritize safety. Wear safety glasses to protect your eyes from any flying debris. Additionally, consider using ear protection if the noise from the drill is loud.
- Clamps or vice grip: To hold the workpiece securely in place while drilling, it may be necessary to use clamps or a vice grip. These tools will prevent the workpiece from moving or rotating during the drilling process.
Once you have gathered all the necessary tools and materials, you are ready to proceed with attaching the hole saw to your drill.
Choose the Right Hole Saw
Choosing the right hole saw for your project is essential to ensure clean, precise cuts. There are several factors to consider when selecting a hole saw:
- Diameter: The diameter of the hole saw should match the size of the hole you need to cut. Measure the diameter of the object you want to create a hole in and choose a hole saw with a matching diameter.
- Material: Different types of hole saws are designed for cutting through different materials. Some common materials include wood, metal, plastic, and ceramic. Make sure to choose a hole saw that is specifically designed for the material you are working with.
- Depth: Consider the depth of the hole you need to cut. Some hole saws are adjustable and can cut holes of varying depths, while others have a fixed depth. Choose a hole saw that can accommodate the depth of your project.
It is also important to consider the manufacturer’s recommendations and reviews from other users when choosing a hole saw. Look for a hole saw that is durable, sharp, and provides clean cuts. A good quality hole saw will help you achieve professional results and save you time and effort.
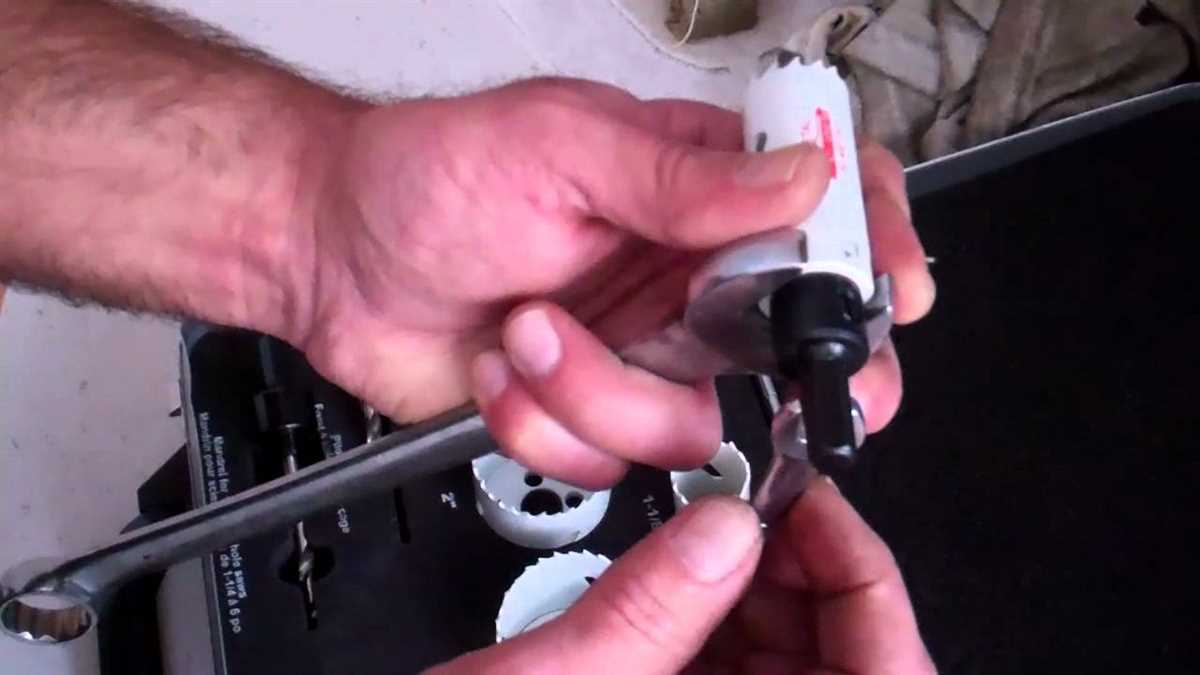
Insert the Pilot Bit into the Hole Saw
Attaching the pilot bit to the hole saw is a crucial step in ensuring proper alignment and stability during the drilling process. The pilot bit serves as a guide for the hole saw and helps to create a clean and precise hole.

To insert the pilot bit into the hole saw:
- Locate the hole saw’s pilot bit, which is a small cylindrical-shaped tool.
- Align the pilot bit with the center of the hole saw.
- Insert the pilot bit into the hole saw’s arbor, the central component of the hole saw.
- Make sure the pilot bit is fully inserted and seated securely in the arbor.
It is important to ensure that the pilot bit is securely attached to the hole saw before beginning any drilling. A loose or improperly attached pilot bit can cause the hole saw to wobble or become misaligned during drilling, resulting in an inaccurate or messy hole.
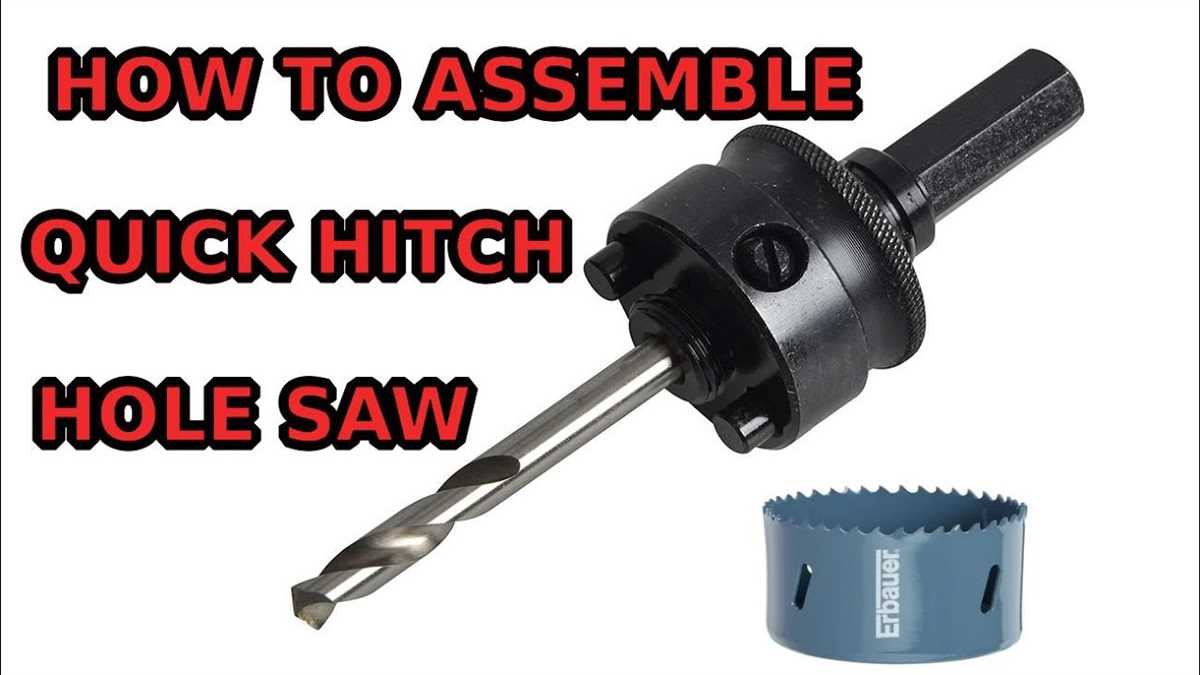
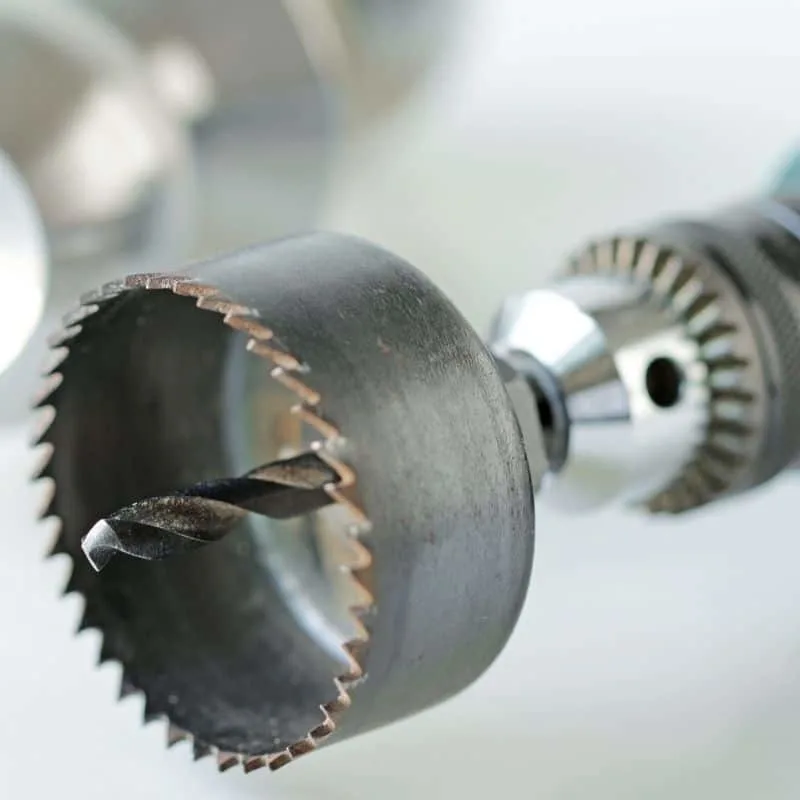
Secure the Hole Saw onto the Drill

Once you have selected the appropriate size of hole saw for your project and have prepared the drill, you are ready to secure the hole saw onto the drill. Follow these steps to ensure a secure attachment:
- Insert the hole saw into the drill chuck: Open the drill chuck by turning its collar counterclockwise. Insert the shank of the hole saw into the drill chuck and tighten the chuck by turning its collar clockwise. Make sure to tighten it securely to prevent any wobbling during the drilling process.
- Verify the hole saw is centered: Once the hole saw is attached to the drill, turn on the drill and observe if the hole saw spins smoothly. If you notice any wobbling or vibrations, stop the drill and readjust the hole saw. A centered hole saw will ensure clean and accurate cuts.
- Engage the drill’s safety features: Before beginning the drilling process, it is important to engage any safety features on your drill. This may include a safety lock or a two-handed startup mechanism. Ensure that you are familiar with the drill’s safety features and use them accordingly.
By following these steps, you can securely attach the hole saw onto the drill and be ready to start drilling your desired holes. Remember to always wear appropriate safety gear, such as safety glasses and gloves, and to follow the manufacturer’s instructions for both the hole saw and the drill.

Adjust the Depth Guide (if applicable)
If your drill has a depth guide, you may need to adjust it before attaching the hole saw. The depth guide allows you to control the depth of the hole you are drilling. Here are the steps to adjust the depth guide:
- Locate the depth guide on your drill. It is usually a rod or a screw located near the chuck.
- Loosen the depth guide by turning it counterclockwise.
- Move the depth guide up or down to the desired depth. Most depth guides have markings that indicate the depth in inches or millimeters.
- Tighten the depth guide by turning it clockwise. Make sure it is securely tightened so that it won’t move during drilling.
Adjusting the depth guide is important in order to achieve the desired depth of your hole. It can also help prevent drilling too deep and damaging the material you are working with.
Mark the Desired Location for the Hole
To begin attaching a hole saw to a drill, first, determine the desired location for the hole. Use a tape measure or ruler to measure and mark the spot where you want the hole to be. Take into account any specific dimensions or requirements for the project you are working on.
Once you have identified the location, use a pencil or marker to make a clear and visible mark on the surface. This will help guide the drill and ensure that the hole is created in the correct place.

If you are working with wood or other materials that may splinter or chip, it may be helpful to use masking tape or painter’s tape to create a barrier around the marked area. This can help prevent damage to the surrounding surface and create a cleaner hole.
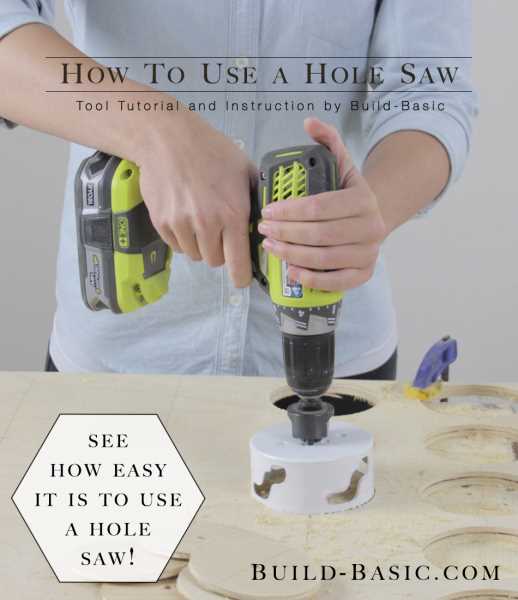
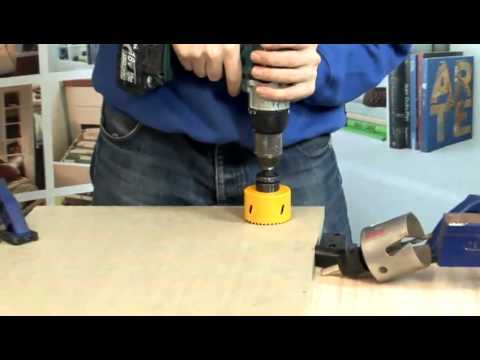
Start Drilling with the Hole Saw
Once you have attached the hole saw securely to your drill, you are ready to start drilling. Follow these steps to begin drilling with the hole saw:
- Prepare the Workpiece: Before you start drilling, make sure the workpiece is securely clamped or held in place to prevent it from moving or spinning during the drilling process.
- Position the Drill: Hold the drill with both hands and position it perpendicular to the workpiece. Make sure you have a stable and comfortable stance.
- Start the Drill: Press the trigger or switch to start the drill. Begin drilling at a slow speed to avoid any sudden movements or jerks.
- Apply Steady Pressure: Apply steady and even pressure on the drill as you begin drilling. Let the teeth of the hole saw do the work, without forcing or pushing too hard.
- Use a Coolant (optional): If you’re drilling through metal or other hard materials, using a coolant can help lubricate and cool down the hole saw, reducing the risk of overheating or premature wear.
- Monitor Progress: Keep an eye on the progress of the hole as you drill, making sure it stays on track and doesn’t veer off course. Adjust the angle and pressure if necessary.
- Clear Debris: Periodically stop drilling to clear away any debris or dust that may accumulate in the hole or around the teeth of the hole saw. This will help maintain the cutting efficiency.
Remember to work slowly and carefully, allowing the hole saw to do its job without rushing or forcing it. When you are done drilling the desired hole, release the trigger or switch to turn off the drill.
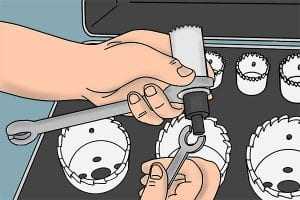
Remove the Hole Saw from the Drill
Step 1: Disconnect the Drill

Before removing the hole saw from the drill, ensure that the drill is switched off and unplugged from the power source. This is essential for your safety while working.
Step 2: Unscrew the Arbor
Hold the drill firmly with one hand and use the other hand to twist the arbor counterclockwise. The arbor is the threaded piece that attaches the hole saw to the drill. Continue unscrewing until the arbor is completely detached from the drill.
Step 3: Release the Hole Saw
Once the arbor is removed, the hole saw should easily slide off the drill bit. Carefully pull the hole saw away from the drill, ensuring not to force it off. If the hole saw is stuck, wiggle it gently while pulling to release it from the drill bit.
Step 4: Clean the Drill
After removing the hole saw, it is a good practice to clean the drill and the arbor to remove any debris or material buildup. Use a cloth or brush to wipe away any dust or particles that may have accumulated during use.
By following these steps, you can safely and effectively remove the hole saw from the drill, allowing you to proceed with your tasks or change to a different tool or attachment as needed.
FAQ:
What is a hole saw and what is it used for?
A hole saw is a cylindrical saw with a serrated edge used for cutting holes in various materials, such as wood, metal, and plastic. It attaches to a drill and is commonly used in construction and woodworking projects.
How do I attach a hole saw to a drill?
To attach a hole saw to a drill, first, ensure that the drill is turned off and unplugged. Then, insert the pilot bit into the center of the hole saw and tighten the set screw with a screwdriver. Finally, insert the hole saw into the drill chuck and tighten it securely.
Are there different sizes of hole saws available?
Yes, there are a variety of sizes available for hole saws. The size of the hole saw you choose depends on the diameter of the hole you want to cut. Common sizes range from 3/4 inch to 6 inches in diameter.
What safety precautions should I take when using a hole saw?
When using a hole saw, it is important to wear safety goggles to protect your eyes from flying debris. Additionally, make sure to secure the material you are cutting and keep your hands a safe distance away from the saw. It is also a good idea to follow the manufacturer’s instructions and use appropriate safety gear, such as gloves, when necessary.
Can I use a hole saw on any type of material?
A hole saw can be used on a variety of materials, including wood, metal, plastic, and even ceramic tiles. However, the effectiveness and ease of cutting may vary depending on the material. It is always a good idea to choose a hole saw specifically designed for the material you are working with.
Video:

Meet Harrison Clayton, a distinguished author and home remodeling enthusiast whose expertise in the realm of renovation is second to none. With a passion for transforming houses into inviting homes, Harrison's writing at https://thehuts-eastbourne.co.uk/ brings a breath of fresh inspiration to the world of home improvement. Whether you're looking to revamp a small corner of your abode or embark on a complete home transformation, Harrison's articles provide the essential expertise and creative flair to turn your visions into reality. So, dive into the captivating world of home remodeling with Harrison Clayton and unlock the full potential of your living space with every word he writes.


