How Long Does It Take to Drill a Bowling Ball?

Drilling a bowling ball is an essential step in the process of preparing it for use. The drilling process involves creating finger holes in the ball to allow the bowler to properly grip and control it. However, the time it takes to drill a bowling ball can vary depending on a few factors.
The first factor that affects the drilling time is the skill and experience of the person performing the drilling. An experienced driller who has done it many times before will be able to complete the process more quickly and efficiently. On the other hand, a beginner or someone without much experience may take longer to complete the drilling process.
Another factor that can impact the drilling time is the complexity of the drilling pattern. Some bowlers prefer a simple drilling pattern with just a few finger holes, while others may opt for a more complex pattern with additional grip options. The more complex the drilling pattern, the longer it will take to complete.
Additionally, the type of equipment used can also affect the drilling time. Modern drilling machines equipped with advanced technology and features can streamline the process and make it faster. On the other hand, using older or less advanced equipment may slow down the drilling process.
In conclusion, the time it takes to drill a bowling ball can vary depending on the skill and experience of the driller, the complexity of the drilling pattern, and the type of equipment used. It is best to consult with a professional driller who can assess your needs and provide an estimate of the drilling time for your specific ball.
The Process of Drilling a Bowling Ball
Drilling a bowling ball is a crucial step in customizing it to fit the bowler’s hand and playing style. The process involves carefully removing material from the ball to create the desired grip and ball reaction. Let’s take a closer look at the steps involved in drilling a bowling ball.

1. Layout and Marking
Before starting the drilling process, bowlers need to determine the layout of the finger and thumb holes on the ball. This layout is based on the bowler’s measurements, playing style, and preferences. Using a template or marking tool, the layout is marked on the ball’s surface for reference during drilling.
2. Measuring and Drilling the Finger Holes
The finger holes are typically drilled first. To ensure proper fit and comfort, the bowler’s finger measurements are taken carefully. Using a specialized drill bit, the finger holes are drilled according to the marked layout. The depth and angle of the holes can vary depending on the bowler’s grip preference.
3. Measuring and Drilling the Thumb Hole
Once the finger holes are drilled, the thumb hole is measured and drilled. The thumb hole’s size and shape can be customized to provide optimal control and release for the bowler. Similar to the finger holes, the depth and angle of the thumb hole can be adjusted to match the bowler’s preferences and playing style.
4. Finishing Touches
After drilling the finger and thumb holes, the ball is carefully inspected for any imperfections or sharp edges. These are smoothed out using sandpaper or a specialized ball spinner machine. The ball’s surface may also be polished or textured to enhance its performance on the lane.

In conclusion, drilling a bowling ball involves a series of precise steps to create the right fit and ball reaction for the bowler. The process is customized to each individual’s measurements and playing style, ensuring optimal comfort and performance on the lane.
Choosing the Right Equipment
When it comes to drilling a bowling ball, it is important to choose the right equipment. This includes selecting the appropriate drill bits, measuring tools, and a reliable drilling machine. Making the right choices will ensure that the drilling process goes smoothly and accurately.
Drill Bits
- There are different types of drill bits available for bowling ball drilling, including solid bits and bits with interchangeable heads.
- It is essential to select a drill bit that matches the desired hole size and shape.
- Consider the materials the drill bit is made of, such as high-speed steel or carbide, to ensure durability and longevity.
- Consult a professional or refer to the manufacturer’s guidelines for recommended drill bit sizes and types based on the specific bowling ball material.
Measuring Tools
- A variety of measuring tools are necessary to accurately mark the drilling points on the bowling ball.
- A ball spinner or ball jig is commonly used to rotate the ball for precise measurement and marking.
- A caliper is used to measure the ball’s diameter and make precise calculations for hole placement.
- Proper measuring tools will ensure accurate drilling and prevent any mistakes or errors.
Drilling Machine
- A drilling machine designed specifically for bowling ball drilling is essential for a successful drilling process.
- Choose a machine that is sturdy, reliable, and has adjustable settings to accommodate different drilling techniques.
- Consider the size and weight of the machine to ensure it fits comfortably in the drilling area.
- Look for a machine that is easy to operate and provides accurate measurements and adjustments.
When choosing the right equipment for drilling a bowling ball, it is important to consider factors such as drill bits, measuring tools, and the drilling machine itself. By selecting the appropriate equipment, bowlers can ensure precise and accurate drilling, helping them achieve their desired ball performance on the lanes.
Measuring the Ball
Before drilling a bowling ball, it is important to measure the ball and gather information about its specifications. This helps determine the optimal drilling layout and ensures a proper fit for the bowler’s hand.

Weight: The weight of a bowling ball is typically measured in pounds. It is important to know the weight of the ball, as it affects the ball’s trajectory and the bowler’s ability to control it. Most bowling balls range from 10 to 16 pounds.
Diameter: The diameter of a bowling ball is measured in inches. It is the distance across the widest part of the ball. The standard diameter for a bowling ball is 8.5 inches. However, some balls may have larger or smaller diameters depending on the manufacturer and the specific model.
Finger Span: The finger span is the distance between the thumb and finger holes of the bowling ball. It is an important measurement as it determines how comfortable the ball is to grip and release. The finger span can vary depending on the bowler’s hand size and personal preference.
Top Weight: Top weight is the amount of weight located above the finger holes of the bowling ball. It is usually measured in ounces. Top weight can affect the ball’s reaction on the lane, and bowlers may have a preference for more or less top weight depending on their playing style.
Balance Hole: Some bowlers may choose to have a balance hole drilled in their bowling ball to adjust the ball’s dynamics. The location and size of the balance hole are determined based on the ball’s specifications and the bowler’s desired reaction on the lane.

Manufacturer Specifications: In addition to the measurements mentioned above, it is important to refer to the manufacturer’s specifications for the specific bowling ball model. These specifications may include information about the ball’s core design, coverstock material, and recommended drilling layouts.
By accurately measuring the ball and understanding its specifications, bowlers can work with a professional driller to customize the drilling layout to suit their style of play, resulting in optimal performance on the lanes.
Marking the Holes
Once the layout has been determined, the next step in drilling a bowling ball is marking the holes. This is a crucial process as it ensures the holes are positioned correctly for the bowler’s hand.
There are several key measurements that need to be taken into account when marking the holes:
- PAP (Positive Axis Point): The first step is to locate the Positive Axis Point or PAP. This is a specific point on the ball’s surface that identifies the bowler’s axis of rotation. It is determined by either measuring the bowler’s track or using a PAP tool. Once the PAP is located, it is marked on the ball.
- Finger Spans: The next step is to measure the span between the bowler’s fingers. This is done by placing the fingers on the layout paper and marking the distance between them. The span is then transferred to the ball by measuring from the PAP to the center of the finger holes.
- Thumb Hole: The position of the thumb hole is determined by the bowler’s preference and comfort. It is typically placed slightly to the side of the PAP and slightly above the finger holes. The size of the thumb hole is also important and should be a comfortable fit for the bowler’s thumb. The thumb hole is marked on the ball.
Once all the necessary measurements have been taken, the hole positions are marked on the ball using a marking tool. The ball is rotated while the tool is used to make a small indentation or mark at each hole position.

It’s important to note that marking the holes is a precise process that requires skill and accuracy. Any mistakes in positioning the holes can affect the bowler’s grip and ball reaction.
Drilling Techniques
When it comes to drilling a bowling ball, there are several different techniques that can be used. The right drilling technique will depend on a variety of factors, including the bowler’s style, preference, and desired ball reaction. Here are some common drilling techniques used by professional bowlers:
1. Pin Placement
The pin placement refers to the placement of the top weight hole (also known as the pin) on the ball. The pin can be placed in different positions relative to the bowler’s positive axis point (PAP) to achieve different ball reactions. For example, a pin placed below the fingers will typically provide more length and a sharper backend reaction, while a pin placed above the fingers will provide an earlier roll and smoother transition.
2. Finger and Thumb Layout
The finger and thumb layout refers to the position and angle of the finger and thumb holes in relation to the bowler’s PAP. This layout can greatly influence the ball’s motion. For example, a layout with the fingers positioned to the right of the thumb (for right-handed bowlers) will generally result in an earlier roll and smoother hook, while a layout with the fingers positioned to the left of the thumb will provide a quicker response and more hook potential.
3. Weight Block Positioning
The weight block positioning involves drilling the finger and thumb holes around the weight block in the bowling ball. The weight block is a core inside the ball that affects the ball’s dynamics. By drilling the holes in specific locations and angles relative to the weight block, the ball’s motion can be altered. For example, drilling the holes on the sides of the weight block can create a stronger backend reaction, while drilling them further away can create a smoother roll.

4. Surface Adjustments
Surface adjustments can also be made to the bowling ball after it has been drilled. This can involve adding texture to the ball’s surface through sanding or polishing. By altering the ball’s surface, bowlers can fine-tune the ball’s reaction on different lane conditions. For example, a rougher surface can provide more traction on oily lanes, while a smoother surface can provide more length on dry lanes.
5. Lane Pattern Analysis
Before drilling a bowling ball, it’s important to analyze the lane pattern that will be encountered. Different lane patterns require different drilling techniques to optimize ball reaction. Factors such as oil volume, length, and distribution across the lane can significantly impact how the ball will perform. By understanding the lane pattern, bowlers can make informed decisions about the drilling technique that will best suit their needs.
| Technique | Advantages | Disadvantages |
|---|---|---|
| Pin Placement |
|
|
| Finger and Thumb Layout |
|
|
| Weight Block Positioning |
|
|
| Surface Adjustments |
|
|
| Lane Pattern Analysis |
|
|
Finishing the Holes
Once the initial drilling process is complete, the next step in bowling ball customization is finishing the holes. This involves fine-tuning the size and shape of the finger and thumb holes to ensure a perfect fit for the bowler.
Measuring and Marking
The first step in finishing the holes is measuring and marking their placement. The holes must be positioned in the correct spots to accommodate the bowler’s hand and provide optimal control and release. To do this, a professional operator will use a measuring tool, such as a fitting ball or a digital caliper, to measure the bowler’s span and pitch.

The span is the distance between the finger holes and thumb hole, while the pitch refers to the angle at which the finger and thumb holes are drilled. These measurements are critical in ensuring a comfortable grip and wrist position for the bowler.
Once the measurements are taken, the operator will mark the desired hole locations on the surface of the bowling ball using a marker or tape. This provides a guide for the drilling process.
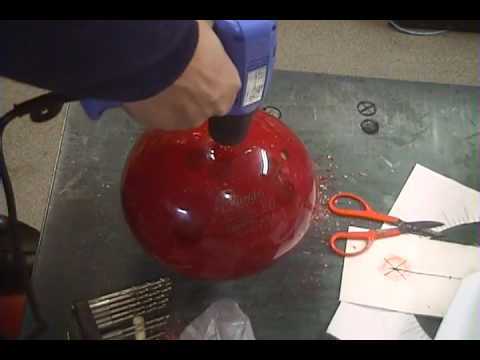
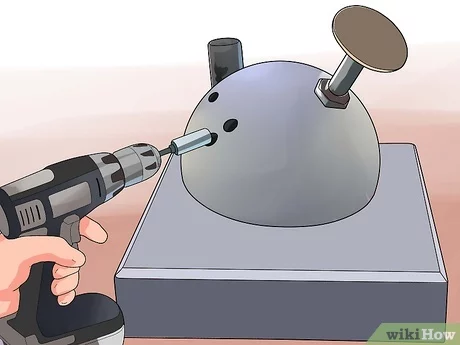
Drilling the Holes
The actual drilling of the finger and thumb holes is done using a drilling machine equipped with specialized drill bits. The operator will select the appropriate size drill bits based on the bowler’s specifications and desired hole size.
Using the marked locations as a guide, the operator will carefully position the bowling ball on the drilling machine. The machine is equipped with clamps or jigs to securely hold the ball in place during the drilling process.
The operator will then use the drilling machine to gradually and precisely drill the finger and thumb holes. The speed and pressure of the drilling process must be properly controlled to prevent damaging the bowling ball.
Smoothing and Polishing
Once the finger and thumb holes are drilled, the operator will use sanding or filing tools to smooth the edges and remove any rough or sharp edges. This is done to ensure a comfortable fit and minimize the risk of injury.
After smoothing, the holes may be polished using a polishing compound or buffing wheel to give them a smooth and shiny finish.
Final Inspection
Once the holes are finished, the bowling ball undergoes a final inspection to ensure that all specifications have been met. This may involve checking the hole size, position, and overall balance of the ball.
If any adjustments are needed, the operator will make the necessary modifications before the ball is considered complete and ready for use.
Testing and Adjusting
Once the bowling ball is drilled, it is important to test and adjust the ball to ensure it meets the individual player’s specifications and preferences. This process involves analyzing the ball’s performance and making any necessary adjustments.
There are several factors that can be assessed during testing, including the ball’s hook potential, track flare, and roll pattern. These factors can be measured using specialized equipment and techniques.
Hook Potential
Hook potential refers to the ball’s ability to curve as it travels down the lane. This is determined by the ball’s core design, coverstock, and drilling layout. Testing the hook potential can involve throwing the ball on different lane conditions and observing how it reacts.
Track Flare
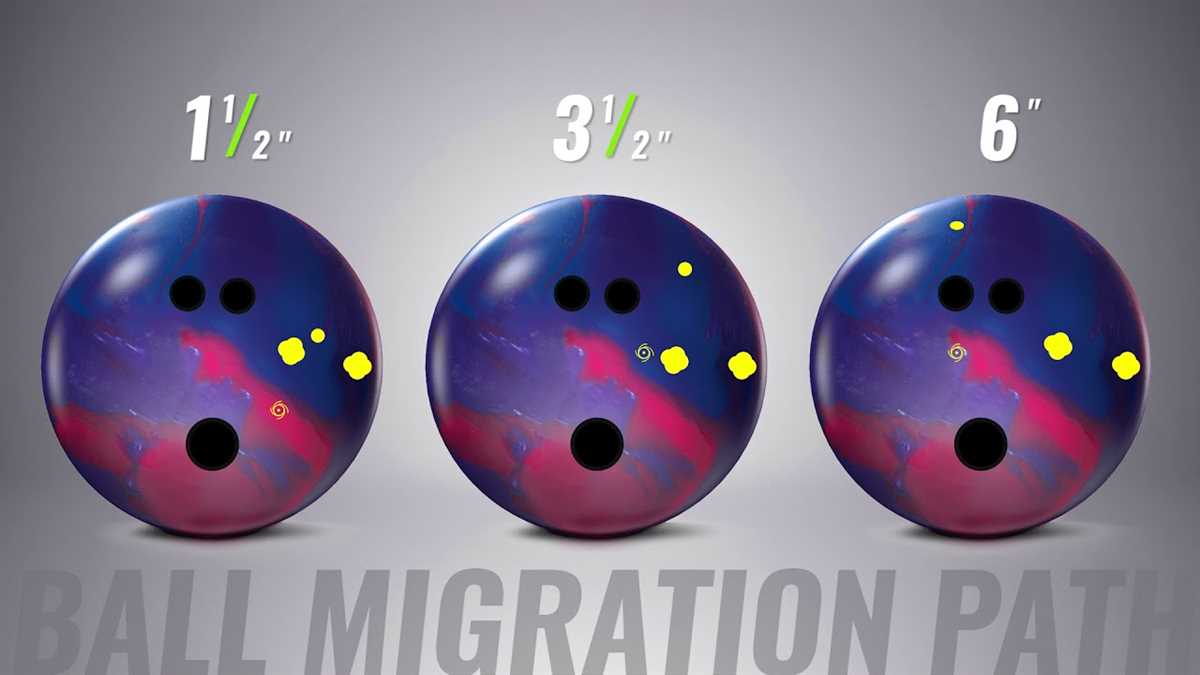
Track flare is the visible oil rings left on the ball’s surface during play. It can indicate the ball’s rotation and axis tilt. By analyzing the track flare, adjustments can be made to enhance the ball’s performance and improve its overall hook potential.
Roll Pattern
The roll pattern refers to the path the ball takes as it rolls down the lane. It can be affected by factors such as the ball’s core, coverstock, and the drilling layout. Analyzing the roll pattern can help determine whether adjustments need to be made to optimize the ball’s performance.
Based on the results of these testing procedures, adjustments can be made to the ball’s surface, weight block, or drilling layout. These adjustments can include sanding or polishing the ball, adding or removing weight from the block, or changing the ball’s layout. The goal is to achieve the desired ball reaction and performance for the individual player.
It is important to note that testing and adjusting a bowling ball is an ongoing process. As the player’s skills and preferences evolve, further adjustments may be necessary to maintain optimal performance. Additionally, as lane conditions change, the ball may need to be retested and adjusted accordingly.
Polishing the Ball
Once the ball has been drilled to the desired specifications, the next step in the process is polishing. Polishing the ball helps to smooth out any imperfections left from the drilling process and gives the ball a shiny and smooth finish. It also helps to increase the ball’s reaction on the lane and improve its performance.
Polishing is typically done using a polishing compound and a polishing machine. The polishing compound is applied to the surface of the ball, and then the machine is used to rotate the ball at a high speed while applying pressure. This helps to evenly distribute the compound and remove any scratches or rough spots.
There are several different types of polishing compounds available, each designed for different types of balls and desired finishes. Some compounds are designed to create a high-gloss finish, while others are designed to provide a more textured surface for increased grip on the lane.
After the polishing process, the ball is thoroughly cleaned to remove any residual compound and then inspected for any final adjustments or touch-ups that may be needed. The ball is then ready to be used on the lanes.
It is important to note that the polishing process should only be done by experienced professionals who have a thorough understanding of the ball’s construction and the polishing techniques. Improper polishing can cause damage to the ball and negatively affect its performance.
The Final Result
After going through the drilling process, you will finally have a fully drilled and customized bowling ball. The final result is a ball that is tailored to your specifications and playing style.
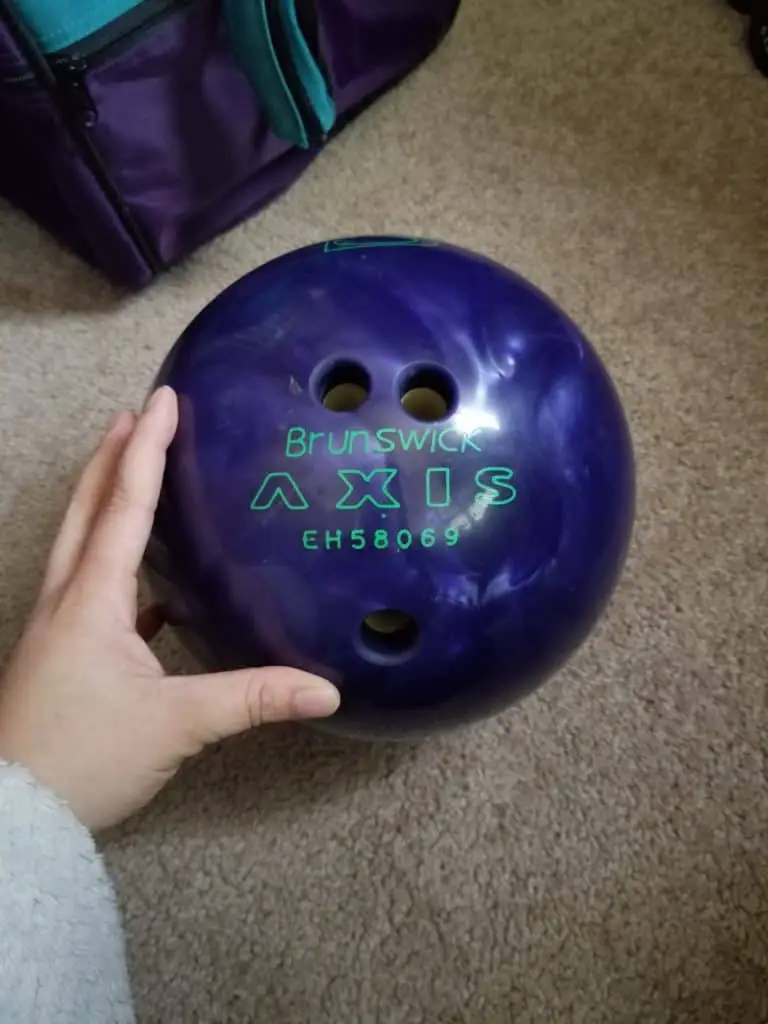
Custom Fit
One of the main benefits of drilling a bowling ball is that it allows for a custom fit. The holes in the ball are drilled to match the size and shape of your fingers, ensuring a comfortable and secure grip.
Having a ball that fits your hand properly can make a big difference in your performance. It allows for better control and accuracy, as you can maintain a consistent grip throughout your swing.
Specified Layout
When drilling a bowling ball, you can also specify the layout of the holes. This refers to the position and angles at which the holes are drilled relative to the ball’s core.
The layout of the holes can affect the ball’s performance on the lane. Different layouts can offer different ball motions, such as more hook or less hook. By customizing the layout, you can tailor the ball’s reaction to your playing style and lane conditions.
Improved Performance
By customizing the fit and layout of your bowling ball, you can potentially improve your performance on the lanes. The customized fit allows for better control, while the specified layout can enhance the ball’s overall performance.
With a properly drilled and customized ball, you may experience increased hook potential, better pin carry, and improved overall scoring. It can also help reduce the risk of injuries or discomfort caused by using a ball that doesn’t fit properly.
Summary
- Drilling a bowling ball results in a custom fit for your hand.
- The layout of the holes can be specified to customize the ball’s performance.
- A properly drilled and customized ball can lead to improved performance on the lanes.
Whether you’re a recreational bowler or a competitive player, having a properly drilled and customized bowling ball can make a significant difference in your game. So, take the time to work with a professional driller and enjoy the benefits of a ball that suits your individual needs. Happy bowling!
FAQ:
How long does it typically take to drill a bowling ball?
On average, it takes about 30 minutes to an hour to drill a bowling ball. The exact time can vary depending on the skill level of the driller and the complexity of the drilling pattern.
Can I drill a bowling ball myself?
While it is technically possible to drill a bowling ball yourself, it is not recommended unless you have proper training and experience. Drilling a bowling ball requires precise measurements and knowledge of the player’s style and preferences. It is best to have a professional driller handle the task.
What factors can affect the drilling time of a bowling ball?
Several factors can affect the drilling time of a bowling ball, such as the skill level of the driller, the complexity of the drilling pattern, the number of holes needed, and the type of equipment used. Additionally, the condition of the bowling ball and the specific requirements of the player can also impact the drilling time.
Is there any special equipment required to drill a bowling ball?
Yes, there is special equipment required to drill a bowling ball. A drilling machine and various drill bits are needed to create the holes in the ball. Additionally, a measurement system, such as a ball fitting system, is often used to accurately measure the player’s hand and determine the optimal hole placement.
Video:


Meet Harrison Clayton, a distinguished author and home remodeling enthusiast whose expertise in the realm of renovation is second to none. With a passion for transforming houses into inviting homes, Harrison's writing at https://thehuts-eastbourne.co.uk/ brings a breath of fresh inspiration to the world of home improvement. Whether you're looking to revamp a small corner of your abode or embark on a complete home transformation, Harrison's articles provide the essential expertise and creative flair to turn your visions into reality. So, dive into the captivating world of home remodeling with Harrison Clayton and unlock the full potential of your living space with every word he writes.


