Guide to Measuring a Drill Press: Tips and Techniques

When it comes to woodworking and metalworking projects, having precise measurements is crucial. This is especially true when using a drill press, as accuracy is key to ensuring the success of your project. In this guide, we will walk you through the necessary steps to measure your drill press with tips and techniques that will help you achieve the precision you need.
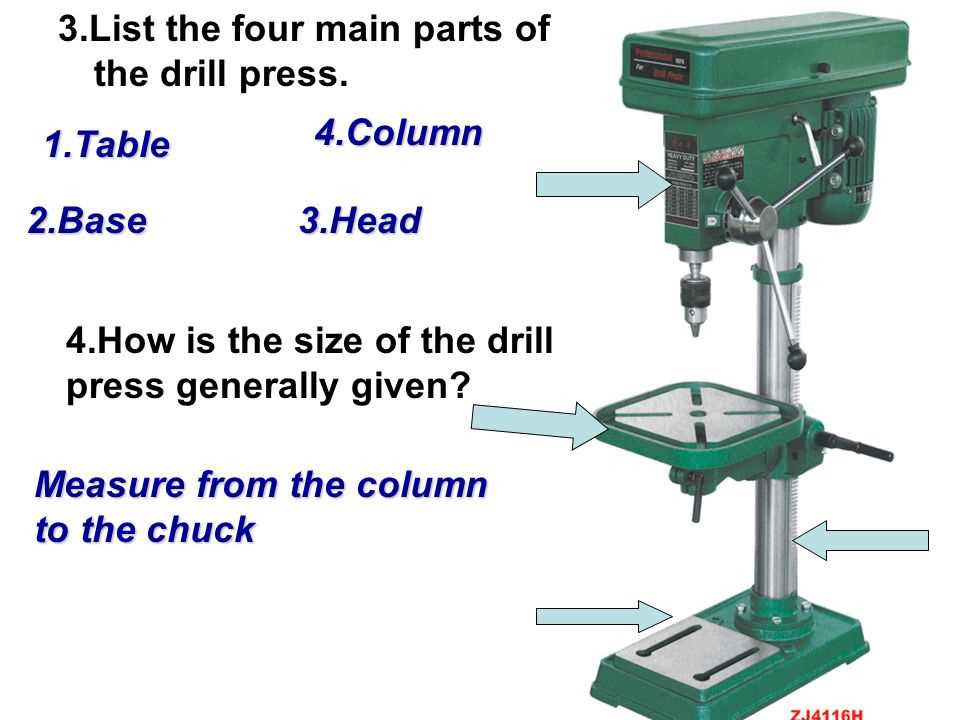
Before diving into the measuring process, it is important to understand the components of a drill press. The drill press consists of a base, a column, an adjustable table, and a drill head. Each of these parts plays a crucial role in the overall performance and accuracy of the machine. By understanding how these components work together, you will be better equipped to measure and adjust your drill press.
One of the first measurements you should take on your drill press is the drill head alignment. This refers to the angle at which the drill bit meets the workpiece. To measure the alignment, you can use a square or a protractor. Simply place the square or protractor against the side of the drill bit and adjust the drill head until it aligns with the desired angle. This step is important as it ensures that your holes will be drilled straight and perpendicular to the work surface.
Another important measurement to consider is the distance from the center of the drill press chuck to the front edge of the drill press table. This measurement is crucial when positioning your workpiece for drilling. By knowing this distance, you can accurately mark the position of the hole on your workpiece. Additionally, this measurement is important for determining the maximum depth that your drill press can accommodate.
By following these tips and techniques for measuring your drill press, you will be able to achieve the accuracy and precision necessary for successful woodworking and metalworking projects. Remember to always refer to the manufacturer’s instructions for your specific drill press model, as measurements and adjustments may vary. With proper measuring and adjustment, your drill press can become a reliable tool that delivers consistent and precise results every time you use it.

Understanding the Basics of Drill Press Measurement

When it comes to using a drill press, accurate measurements are essential to ensure precision and desired results. Understanding the basics of drill press measurement is crucial for any woodworker or metalworker. This article will cover some key concepts and techniques for measuring a drill press accurately.
Measuring the Depth of a Hole
One of the most commonly measured dimensions on a drill press is the depth of a hole. To measure the depth, you will need a depth gauge or a ruler with a depth stop. Here’s how you can do it:
- Place the depth gauge or ruler against the side of the drill bit.
- Lower the drill press table until the tip of the drill bit touches the surface.
- Slide the depth gauge or ruler along the drill bit until it reaches the desired depth.
- Lock the depth gauge or ruler in place.
Measuring the Distance from the Edge
Another important measurement on a drill press is the distance from the edge of a workpiece. This measurement is crucial when you need to drill holes at precise locations. Here’s how you can measure it:
- Place the edge of the workpiece against the fence or a reference point.
- Move the table or adjust the position of the workpiece until the drill bit is aligned with the desired location.
- Measure the distance from the edge of the workpiece to the drill bit using a ruler or a tape measure.
Measuring the Speed
Drill presses come with different speed settings, and it’s important to measure and set the speed correctly for different materials and drill bit sizes. Here’s how you can measure the speed of a drill press:

- Identify the speed setting on the drill press.
- Refer to the manufacturer’s guidelines or a speed chart to determine the appropriate speed for the material and drill bit size.
- Set the drill press to the recommended speed using the speed control or pulley adjustment system.
Conclusion
Accurate measurement is crucial when working with a drill press to ensure precise drilling and desired results. Understanding the basics of drill press measurement, including measuring the depth of a hole, the distance from the edge, and the speed, will help you achieve better accuracy and efficiency in your woodworking or metalworking projects.
Why Accurate Measurements are Important for Drill Presses
A drill press is a precision tool that is used to create accurate holes in various materials. To ensure the desired hole size and placement, accurate measurements are crucial. Here are some reasons why accurate measurements are important for drill presses:
1. Hole Size
Accurate measurements are essential for determining the exact size of the hole that needs to be drilled. Whether you are working on a woodworking project or metalworking project, the hole size plays a vital role in the overall functionality and aesthetics of the final product.
Using precise measurements allows you to choose the right drill bit size and adjust the depth of the drill press accordingly. With accurate measurements, you can achieve the desired hole size without any guesswork or trial and error.
2. Hole Placement
In addition to size, accurate measurements are necessary for determining the correct placement of the hole. Whether you need to drill holes in a straight line or create a pattern of holes, accurate measurements ensure that the holes are evenly spaced and aligned perfectly.
By using measurements such as centerline distances or coordinates, you can mark the drilling points precisely and accurately on your workpiece. This allows you to achieve a clean and professional finish and avoid costly mistakes or rework.
3. Efficiency and Productivity
Accurate measurements save time and increase the overall efficiency and productivity of your drilling operations. By knowing the exact hole size and placement, you can set up your drill press quickly and accurately, reducing the setup time.
Additionally, accurate measurements also help in determining the appropriate cutting speed and feed rate for the drill press. This allows you to optimize the drilling process and achieve faster and more consistent results.
4. Safety
Accurate measurements are essential for ensuring the safety of the operator and the workpiece. By accurately measuring the hole size and placement, you can prevent any potential accidents or mishaps during the drilling process.
Without accurate measurements, there is a risk of drilling oversized or misaligned holes, which can compromise the structural integrity of the workpiece. Accurate measurements help in avoiding such issues and creating a safe working environment.
In conclusion, accurate measurements are crucial for drill presses to achieve the desired hole size and placement, enhance efficiency and productivity, and ensure the safety of the operator and the workpiece. By paying attention to precise measurements, you can maximize the performance and versatility of your drill press.
Essential Tools for Measuring a Drill Press
Measuring a drill press accurately is crucial for ensuring precise drilling and achieving accurate results. To perform these measurements, you will need a few essential tools that will help you in the process. Here are some of the key tools you should have:
1. Calipers
Calipers are extremely useful for measuring the diameter of the drill bit, the depth of the hole, and the distance between holes. They come in various types, including Vernier, digital, and dial calipers. Choose the one that best suits your needs and preference.
2. Depth Gauge
A depth gauge is essential for measuring the depth of the hole drilled. It allows you to set the desired drilling depth accurately and prevent over-drilling or under-drilling. Some drill presses come with a built-in depth gauge, while others require an external depth gauge attachment.
3. Measuring Tape
A measuring tape is necessary for measuring the distance between the drill press table and the drill bit. This measurement is crucial for ensuring proper alignment and drilling accuracy. A tape measure with both imperial and metric units will give you more flexibility.

4. Protractor
A protractor is useful for measuring the angle of tilt or inclination of the drilling surface. This measurement is important when drilling holes at specific angles or when drilling on an angled workpiece. A digital or magnetic protractor may provide more accurate readings.
5. Square
A square is handy for checking the perpendicularity of the drill press table and the drill bit. It helps ensure that the holes are drilled straight and perpendicular to the workpiece. You can use either a combination square or a machinist square for this purpose.
6. Drill Bits
Having a complete set of drill bits is essential for measuring the drill press’s capacity and versatility. Different drill bits are used for specific applications, such as metal drilling, wood drilling, or hole enlargement. Make sure to have a variety of drill bits in different sizes to accommodate your drilling needs.
7. Feeler Gauges
Feeler gauges are useful for measuring the gap or clearance between the drill press components and the workpiece. They help ensure that the drill bit is properly aligned and positioned before drilling. Feeler gauges come in various thicknesses, allowing you to find the right fit for your specific requirements.
8. Spirit Level
A spirit level is crucial for checking the overall stability and balance of the drill press. It ensures that the drill press is properly leveled, preventing any inaccuracies in the drilling process. A bubble or digital spirit level can help you achieve precise leveling.
With these essential tools in your arsenal, you’ll be able to measure your drill press accurately and make necessary adjustments for optimal performance. Remember to always follow the manufacturer’s instructions and safety guidelines when using these tools and operating the drill press.
Measuring Tape and Ruler
Measuring tape and ruler are essential tools for accurately measuring various components of a drill press. They help in determining the dimensions and distances to ensure precise drilling operations. Here are some tips and techniques for using a measuring tape and ruler:
- Choosing the Right Measuring Tool: When selecting a measuring tape or ruler, opt for one that is long enough to measure the entire length or height of the drill press. A tape or ruler with imperial and metric measurements is ideal for versatility.
- Measuring the Height: To measure the height of the drill press, position the measuring tape or ruler vertically against the base of the machine and extend it towards the top. Take note of the measurement displayed at the top edge of the drill press.
- Measuring the Depth: To measure the depth of the drill press, position the measuring tape or ruler horizontally from the front edge of the machine to the back. Measure from the tip of the drill chuck to the rear column of the press.
- Measuring the Table Size: To measure the size of the drill press table, use a ruler or measuring tape. Measure the length and width of the table surface, taking note of the measurements in inches or centimeters.
- Measuring Drill Bit Diameter: To measure the diameter of a drill bit, use a ruler or caliper. Place the ruler or caliper across the widest part of the drill bit and read the measurement displayed on the tool.
- Measuring Hole Depth: When measuring the depth of a drilled hole, use a ruler or measuring tape. Insert the measuring tool into the hole until it reaches the bottom, and take note of the measurement displayed.
By using a measuring tape and ruler properly, you can accurately measure various components of a drill press and ensure precise drilling operations.
Dial Indicators and Micrometers
Dial indicators and micrometers are two common tools used to measure the precision and accuracy of a drill press. These tools provide detailed measurements and can help ensure that the drill press is operating correctly and producing accurate results.
Dial Indicators
- A dial indicator is a precision measuring tool that provides highly accurate measurements. It typically consists of a needle-like dial or an electronic display that measures the distance between two points.
- Dial indicators are often used to measure the runout or concentricity of a drill press. Runout refers to the amount of wobble or vibration in the drill press spindle, while concentricity refers to the alignment of the drill press spindle with the workpiece.
- To use a dial indicator, it is typically attached to the drill press spindle or the drill chuck. The indicator is then zeroed and the spindle or chuck is rotated. The dial indicator provides a measurement of any movement or deviation in the spindle or chuck, allowing for adjustments to be made as necessary.
Micrometers
- A micrometer is another precision measuring tool that is commonly used to measure the diameter of a drill bit or the depth of a hole drilled by the drill press.
- Micrometers consist of a frame, an anvil, a spindle, and a measuring scale. The anvil is placed against the object being measured, and the spindle is tightened until it makes contact with the object. The measurement is then read from the scale.
- Micrometers are available in various types, including outside micrometers, inside micrometers, and depth micrometers. Each type is designed for specific measurement purposes.
When using a dial indicator or a micrometer, it is important to follow the manufacturer’s instructions and handle the tools with care. Regular calibration and maintenance of these tools are also essential to ensure accurate measurements. By using these tools effectively, you can enhance the precision and performance of your drill press.
Depth Stop Gauge
A depth stop gauge is a useful accessory for a drill press that helps you accurately measure and control the depth of your drilling operations. It is especially helpful when you need to drill consistently deep holes or when you need to drill to a specific depth for a particular project.
Here are some tips and techniques for using a depth stop gauge:
1. Installing the Depth Stop Gauge
First, you need to install the depth stop gauge on your drill press. Most drill presses have a slot or hole on the side of the drill press column where you can attach the depth stop gauge. Follow the instructions provided with your drill press or depth stop gauge to ensure proper installation.
2. Setting the Desired Depth
Once the depth stop gauge is installed, you can set the desired drilling depth. The gauge usually has a ruler-like scale that allows you to measure the depth in inches or millimeters. Use the scale to set the depth according to your project requirements.
3. Locking the Depth Stop Gauge
After setting the desired depth, you need to lock the depth stop gauge in place. Most gauges have a locking mechanism that keeps the gauge from moving during drilling. Double-check that the gauge is securely locked before you start drilling.
4. Testing the Depth
Before drilling into your workpiece, it’s a good idea to test the depth by manually lowering the drill bit and gauging how far it goes. This will help you ensure that the depth stop gauge is accurately set to your desired depth.
5. Drilling with the Depth Stop Gauge
Once you have verified the depth, you can start drilling using the depth stop gauge. Position your workpiece under the drill press and align the drill bit with the desired drilling location. Lower the drill bit until it makes contact with the workpiece and then proceed with the drilling operation. The depth stop gauge will prevent the drill bit from going any deeper than the set depth.
6. Checking the Depth During Drilling
As you drill, periodically check the depth to ensure that you are drilling to the correct depth. The depth stop gauge should make it easy to see if you’re on track or need to adjust the depth setting.
7. Removing the Depth Stop Gauge
Once you have completed your drilling operations, you can remove the depth stop gauge from your drill press. Follow the instructions provided with your gauge to safely detach it from the drill press.
Using a depth stop gauge can greatly improve the accuracy and consistency of your drilling operations. It allows you to drill to precise depths, ensuring that your projects turn out exactly as planned. Whether you’re a professional woodworker or a DIY enthusiast, a depth stop gauge is a tool worth adding to your drill press setup.
Step-by-Step Guide to Measuring a Drill Press
1. Gather your tools
Before you begin measuring your drill press, gather the following tools:
- Tape measure
- Calipers
- Straight edge
2. Measure the overall height
Start by measuring the overall height of your drill press. Use the tape measure to measure from the base of the press to the top of the drill head.
3. Measure the throat depth
The throat depth is the distance from the center of the drill bit to the closest point on the drill press column. Use the calipers to measure this distance accurately.
4. Measure the spindle travel
The spindle travel is the distance the drill bit can travel up and down. Lower the drill head to its lowest position, then measure the distance from the base of the drill press to the top of the drill bit.
5. Measure the table size
Measure the dimensions of the table on your drill press. Use the tape measure to measure the length and width of the table.
6. Check for runout
Runout refers to any wobbling or movement of the spindle as it rotates. Use a dial indicator or a straight edge to check for runout. Place the straight edge against the side of the drill bit and slowly rotate the spindle. Any movement or gap between the straight edge and the drill bit indicates runout.
7. Record your measurements
Write down all of your measurements for future reference. This will help you keep track of the capabilities and specifications of your drill press.
8. Use your measurements
With your measurements in hand, you can now use them to determine the suitability of your drill press for specific projects. For example, if you need a drill press with a large throat depth for drilling deep holes, you can refer to your measurements to ensure your drill press meets the requirements.
9. Maintain and update your measurements
Regularly check and update your measurements as needed. Over time, the accuracy and capabilities of your drill press may change, so it’s important to keep your measurements up to date.
Conclusion
Measuring a drill press is a simple yet vital task for any woodworker or metalworker. By following this step-by-step guide, you can accurately measure the specifications of your drill press and use this information to guide your work and projects.
Preparing the Drill Press for Measurement
Before you can start measuring a drill press, it is important to ensure that the machine is set up properly. Here are some steps to follow to prepare the drill press for measurement:
- Check the stability: Make sure that the drill press is securely fastened to the workbench or floor. This will ensure that the machine does not move while you are taking measurements, which can affect the accuracy of your results.
- Adjust the table height: Set the drill press table at a comfortable working height. This will help you maintain a stable stance while taking measurements and prevent any unnecessary strain on your body.
- Inspect the chuck and spindle: Ensure that the chuck is securely attached to the spindle, and there is no wobbling or play. This is important for precise drilling and accurate measurements.
- Clear the workspace: Remove any debris, tools, or other objects from the drill press area. This will prevent any interference during the measurement process and ensure a safe working environment.
- Prepare measuring tools: Gather all the necessary measuring tools, such as a tape measure, calipers, or micrometers. Ensure that they are clean and in good working condition.
- Review the drill press manual: Familiarize yourself with the manufacturer’s instructions and guidelines for measuring the drill press. This will help you understand any specific requirements or limitations for your particular machine.
By following these steps and properly preparing the drill press for measurement, you can ensure accurate and reliable results for your drilling projects.
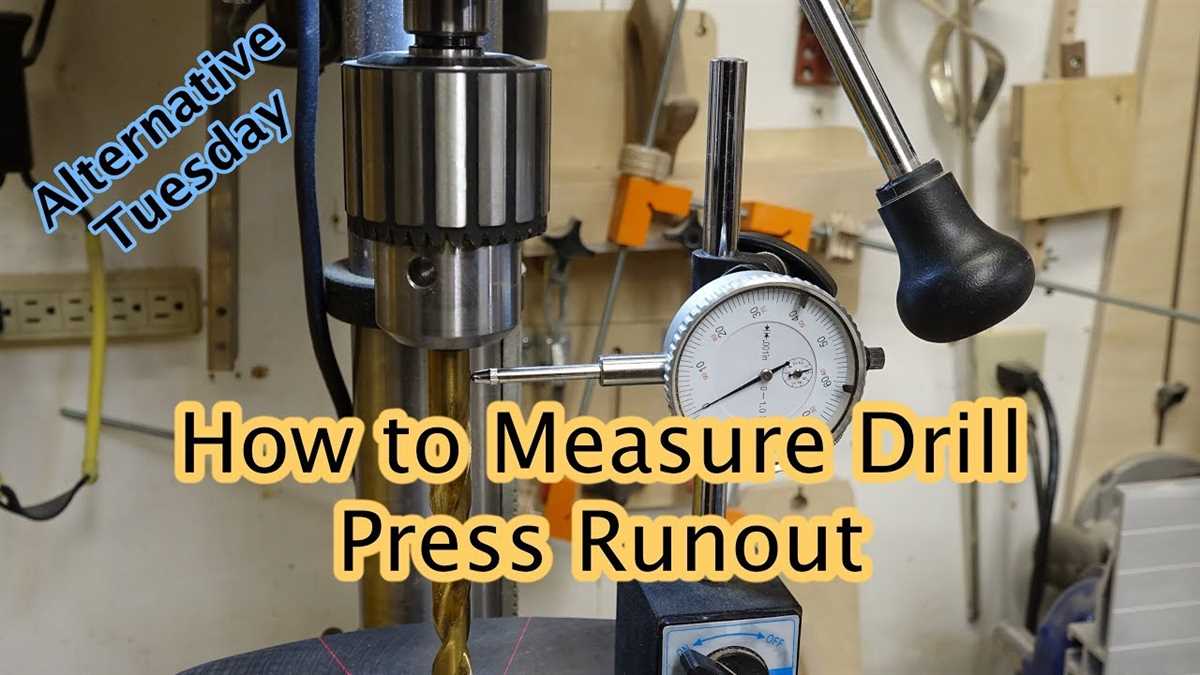
Measuring the Spindle Runout
The spindle runout is an important factor to consider when measuring the accuracy of a drill press. It refers to the amount of deviation or wobbling that occurs in the spindle as it rotates. Measuring spindle runout can help identify any issues with the drill press’s alignment or balance.
Tools Needed
- Dial indicator
- Magnetic base attachment
- Wrench or spanner
Steps to Measure Spindle Runout
- Prepare the drill press: Ensure the drill press is turned off and unplugged. Clear the work area and ensure there are no obstructions.
- Mount the dial indicator: Attach the magnetic base of the dial indicator to the drill press’s table or column. Ensure the indicator’s tip is positioned close to the spindle.
- Zero the dial indicator: Gently press the tip of the indicator against the side of the spindle and set the indicator’s needle to zero.
- Rotate the spindle: Using a wrench or spanner, rotate the spindle by hand. Observe the movement of the dial indicator as the spindle rotates.
- Take measurements: As the spindle rotates, note the highest and lowest readings on the dial indicator. The difference between these two readings is the spindle runout.
- Repeat the process: To ensure accuracy, repeat the measurement process at multiple points along the spindle.
Interpreting the Results
After measuring the spindle runout, compare the results to the manufacturer’s specifications. If the runout exceeds the recommended tolerances, it may indicate a problem with the drill press’s spindle or bearings. In such cases, it is advisable to consult the drill press’s user manual or contact the manufacturer for further guidance.
Maintenance and Adjustment
If the spindle runout is within acceptable limits, regular maintenance can help ensure optimal performance. This includes lubricating the spindle and bearings as per the manufacturer’s recommendations, as well as inspecting and replacing any worn or damaged parts. If necessary, consult the drill press’s user manual for instructions on aligning or adjusting the spindle to minimize runout.
Checking the Table Squareness
One important aspect of a drill press is the squareness of its table. This refers to how perpendicular the table surface is to the drill bit. If the table is not square, it can lead to inaccurate drilling and alignment issues. Here are some steps to check the table squareness:
- Ensure the drill press is turned off and unplugged. Safety is always a priority when working with power tools. Make sure the drill press is not in use and disconnected from the power source before proceeding.
- Place a small square against the table surface. Take a small square tool with a straight edge and hold it against the table surface, touching both the front and side edges at the same time.
- Adjust the table height if necessary. If the square does not touch both edges simultaneously, it indicates that the table is not square. In this case, adjust the table height by loosening the lock knob and raising or lowering the table until the square is aligned with both edges.
- Retighten the lock knob. Once the table is adjusted to be square, tighten the lock knob to secure the position. This will ensure that the table remains square during use.
- Repeat the process. Check the table squareness from different angles and positions to confirm that it is square. It is recommended to repeat this process periodically to ensure the table remains square over time and with use.
By regularly checking the table squareness of your drill press, you can ensure accurate drilling, better alignment, and improved overall performance. This simple step can make a significant difference in the quality of your drilling projects.
FAQ:
What is a drill press?
A drill press is a machine tool that is used for drilling holes in various materials, such as wood, metal, or plastic. It consists of a base, a column, a worktable, a drill head, and a motor.
Why do I need to measure a drill press?
Measuring a drill press is important to ensure accuracy and precision in drilling operations. It helps to determine the height, depth, and angles of the drill press, which are crucial for achieving the desired drilling results.
What are the tips for measuring a drill press?
There are several tips for measuring a drill press. First, make sure to use a reliable measuring tool, such as a caliper or a height gauge. Second, follow the manufacturer’s instructions and safety guidelines for measuring the drill press. Third, take accurate measurements by taking multiple readings and averaging them. Finally, record the measurements for future reference.
How do I measure the height of a drill press?
To measure the height of a drill press, you can use a height gauge or a caliper. Place the gauge or caliper on the worktable and adjust it to the desired height. Then, lock the gauge or caliper in place and take the measurement. Repeat the process multiple times to ensure accuracy.
Can I measure the depth of a drill press?
Yes, you can measure the depth of a drill press. To do this, you can use a depth gauge or a caliper. Align the gauge or caliper with the drill bit and adjust it to the desired depth. Then, lock it in place and take the measurement. Repeat the process for different depths.
Video:


Meet Harrison Clayton, a distinguished author and home remodeling enthusiast whose expertise in the realm of renovation is second to none. With a passion for transforming houses into inviting homes, Harrison's writing at https://thehuts-eastbourne.co.uk/ brings a breath of fresh inspiration to the world of home improvement. Whether you're looking to revamp a small corner of your abode or embark on a complete home transformation, Harrison's articles provide the essential expertise and creative flair to turn your visions into reality. So, dive into the captivating world of home remodeling with Harrison Clayton and unlock the full potential of your living space with every word he writes.


