Guide to Drilling Holes in Glass Insulators: Step-by-Step Instructions

Glass insulators are a popular choice for antique collectors and DIY enthusiasts due to their unique aesthetics and historical significance. However, drilling holes in glass insulators can be a daunting task if you don’t know what you’re doing. In this step-by-step guide, we will walk you through the process of drilling holes in glass insulators, ensuring that you can complete the task safely and efficiently.
Step 1: Gather the necessary tools and materials
Before you begin drilling, make sure you have all the required tools and materials on hand. You will need safety goggles, an electric drill with a glass-cutting drill bit, a small container of water, masking tape, and a clamp or vise to hold the insulator securely in place.
Step 2: Mark the drilling location
Using a measuring tape or ruler, carefully mark the spot where you want to drill the hole on the glass insulator. Keep in mind that glass is fragile, so it’s important to choose a location that is away from any edges or weak points. Once you have determined the ideal drilling spot, use masking tape to create a guide that will help prevent the drill bit from slipping or scratching the glass.

Step 3: Prepare the drilling area
Place the glass insulator securely in a clamp or vise so that it doesn’t move during the drilling process. It’s vital to have a stable and secure setup to prevent any accidents. Fill the small container with water and keep it nearby to cool the drill bit and prevent the glass from cracking due to excessive heat.
Step 4: Start drilling
Caution: Please note that drilling glass requires patience, precision, and caution. Start drilling at a slow speed, applying gentle pressure on the drill. Use a technique called “pecking” or short, intermittent bursts of drilling to avoid overheating the glass. Dip the drill bit into the water frequently to keep it cool. Take breaks if necessary to prevent the glass from cracking due to heat.
Step 5: Finish drilling and clean the hole

Once you have drilled through the glass insulator, slowly remove the drill bit and inspect the hole. If the edges are rough or jagged, use emery cloth or a diamond file to smooth them out. Be gentle and take your time to avoid causing any damage to the glass. Afterward, clean the hole and the insulator with a mild glass cleaner to remove any residue or debris from the drilling process.
Remember, drilling holes in glass insulators requires patience, practice, and precision. Always wear safety goggles and take the necessary precautions to avoid accidents. Follow these step-by-step instructions, and with practice, you’ll be able to achieve professional results in no time.
Choosing the Right Tools
Before drilling holes in glass insulators, it is important to choose the right tools that will help you achieve clean and accurate results. Here are some essential tools you will need:
- Glass Drill Bit: Look for a high-quality glass drill bit that is specifically designed for drilling into glass or tile surfaces. These drill bits have a carbide or diamond tip, which helps to create clean and precise holes in glass.
- Power Drill: A power drill is necessary to provide the required speed and power for drilling through glass. Make sure to choose a drill with adjustable speed settings for better control.
- Clamp or Vice: Use a clamp or vice to hold the glass insulator securely in place while drilling. This will prevent it from slipping or moving during the drilling process.
- Lubricant: Applying a lubricant, such as water or glass-cutting oil, to the drill bit and the drilling area will help reduce friction and keep the glass from cracking or shattering.
- Safety Equipment: Always wear safety goggles to protect your eyes from any glass shards or debris that may be generated during the drilling process. Additionally, it is a good idea to wear work gloves to protect your hands.
By using the right tools and taking necessary safety precautions, you can successfully drill holes in glass insulators without damaging them and achieve the desired results.
Preparing the Glass Insulator
Before you start drilling holes in your glass insulator, it’s important to properly prepare it. This will help ensure that you have a clean and smooth surface to work with, reducing the risk of cracks or damage during the drilling process.

Materials Needed
- Glass insulator(s)
- Soft cloth
- Glass cleaner or soapy water
- Masking tape
- Marker or pen
- Protective gloves
- Safety glasses
Cleaning the Insulator
Start by cleaning the surface of the glass insulator. Use a soft cloth and glass cleaner or soapy water to remove any dirt, dust, or residue. This will ensure that the drilling process goes smoothly and that there are no particles that could interfere with the drill bit.
Marking the Hole Locations
Once the insulator is clean, use a marker or pen to mark the locations where you want to drill your holes. Take into consideration the design or pattern of the insulator as well as any specific placement requirements you may have. Use masking tape to create a guide if needed.
Wearing Protective Gear

Before proceeding with the drilling process, it’s important to wear protective gear. Put on a pair of protective gloves to protect your hands and safety glasses to shield your eyes from any flying debris.
Securing the Insulator
When drilling holes in glass, it’s important to secure the glass to prevent it from moving or cracking during the drilling process. Place the insulator on a stable surface or use clamps to secure it in place. Make sure it is stable and won’t shift while drilling.
Now that you have properly prepared the glass insulator, you are ready to move on to the next step of the drilling process.
Marking the Hole Placement
Before you start drilling holes in your glass insulators, it’s important to mark the exact placement of the holes. This will ensure that the holes are evenly spaced and aligned correctly.
Here are the steps to mark the hole placement:
- Gather your materials: You will need a marker or a piece of tape and a ruler or measuring tape.
- Choose the desired hole placement: Decide where you want to drill the holes in the glass insulator. Consider the design and size of your project to determine the appropriate hole placement.
- Mark the first hole: Measure and mark the location of the first hole using your ruler or measuring tape. Use the marker to make a small dot or place a piece of tape at the designated spot.
- Mark the remaining holes: Use the same measurement from the first hole to mark the placement of the remaining holes. This will ensure that the holes are evenly spaced.
- Double-check the hole placement: Take a step back and review the marked spots. Make sure the holes are aligned and evenly spaced. Adjust the markings if necessary.
By following these steps and taking the time to mark the hole placement accurately, you can ensure that your glass insulator project will turn out well. It’s important to be precise and take your time during this step to avoid any mistakes or misalignment when drilling the holes.
Creating a Starter Hole
What is a Starter Hole?
A starter hole is a small hole that is created before drilling the main hole in the glass insulator. It serves as a guide for the drill bit, ensuring accurate and controlled drilling.
Materials Needed:

- Glass insulator
- Drill
- Glass drill bit
- Masking tape or painter’s tape
- Marker or pen
- Safety glasses
Steps to Create a Starter Hole:
- Put on safety glasses to protect your eyes during the drilling process.
- Mark the desired location for the main hole on the glass insulator using a marker or pen.
- Cover the marked area with a piece of masking tape or painter’s tape. This will help prevent the drill bit from slipping and reduce the risk of cracking or chipping the glass.
- Select a small glass drill bit that is suitable for creating a starter hole. The size of the drill bit will depend on the size of the main hole you intend to drill.
- Place the drill bit at a 90-degree angle to the marked area on the glass insulator.
- Apply gentle and even pressure to the drill as you begin drilling the starter hole. Start at a slow speed to prevent the glass from cracking or shattering.
- Continue drilling until the starter hole is complete. It should be a small, shallow hole that serves as a guide for the main drilling process.
- Remove the masking tape or painter’s tape from the glass insulator.
Tips:
- Use a slow speed and apply light pressure when drilling the starter hole to avoid damaging the glass insulator.
- Drilling glass can create heat, so periodically spraying water on the drill bit and the glass surface can help cool down the area.
- Ensure that the glass insulator is properly secured and stable before starting the drilling process.
By following these steps, you will be able to create a starter hole in a glass insulator, which will serve as a guide for drilling the main hole. Remember to always wear safety glasses and take necessary precautions when working with glass and power tools.
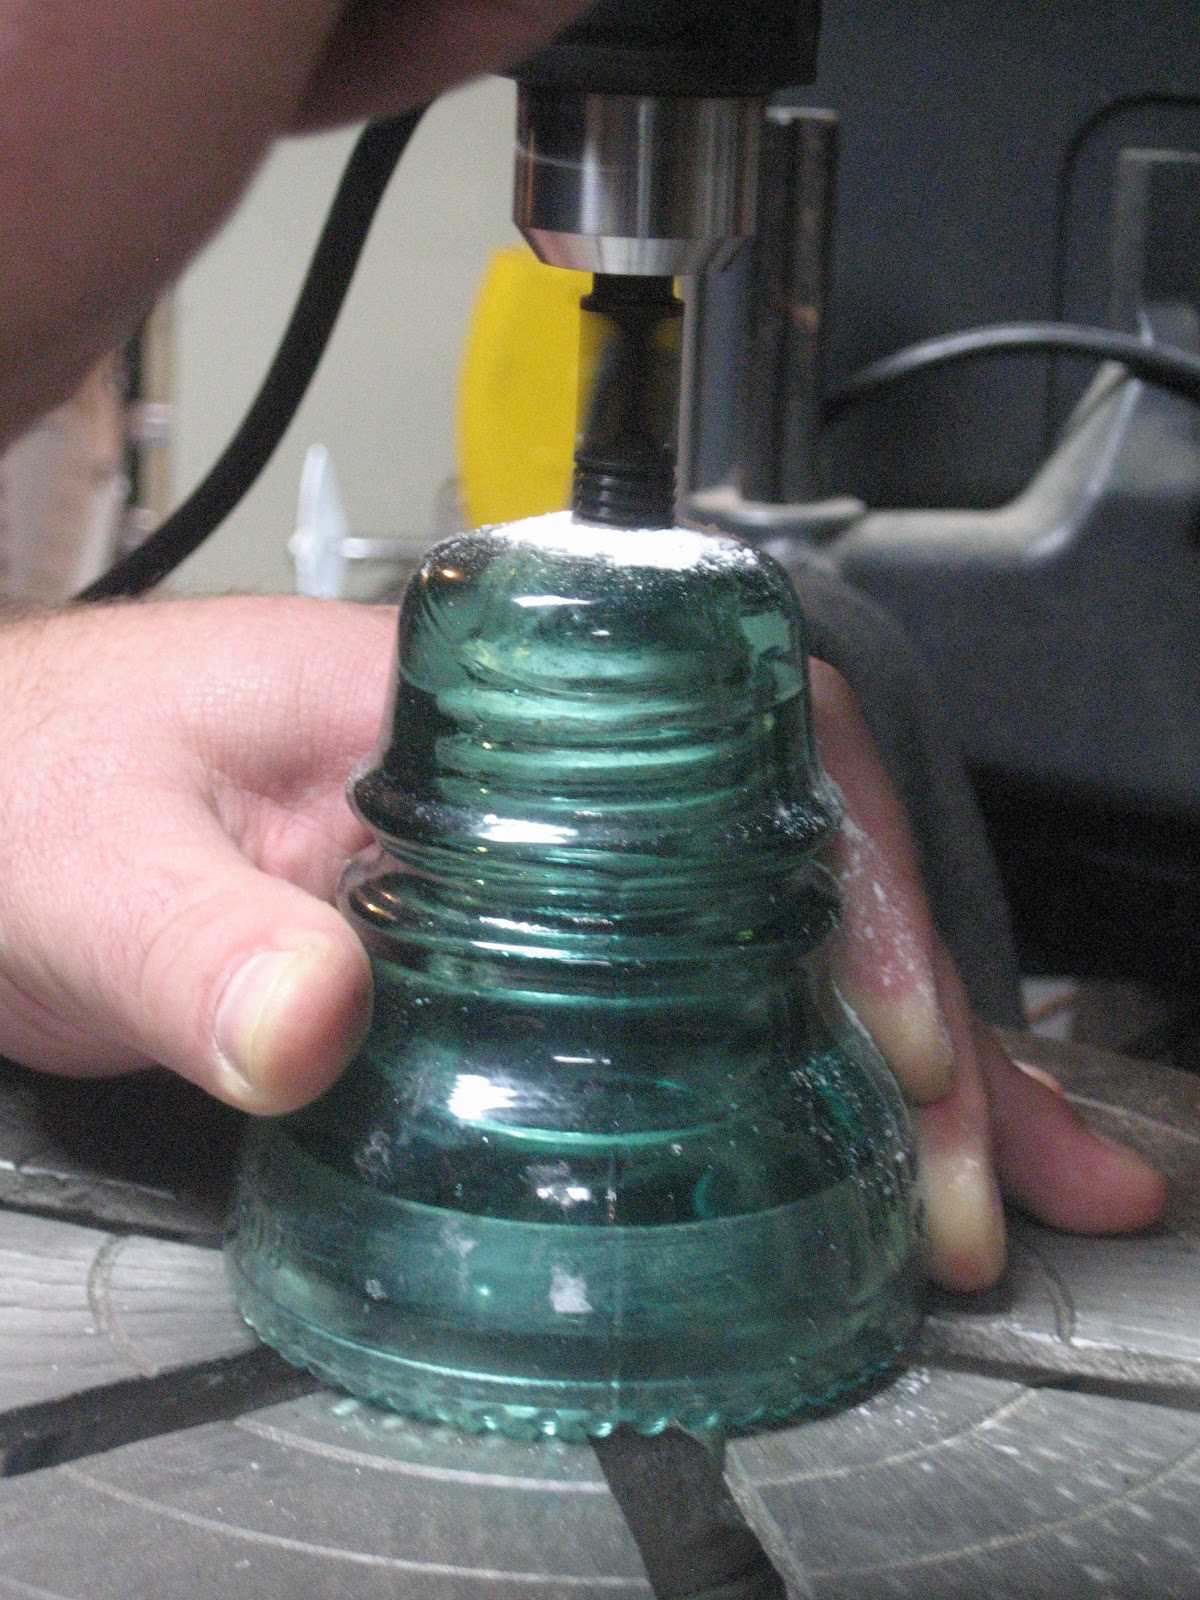
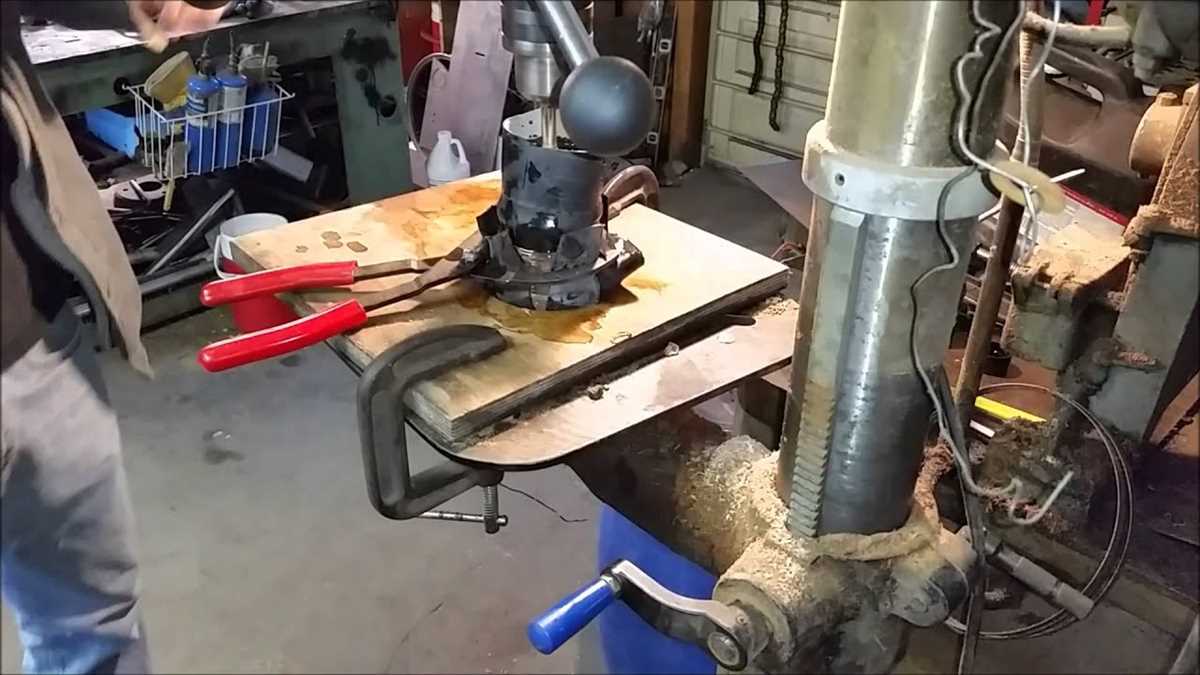
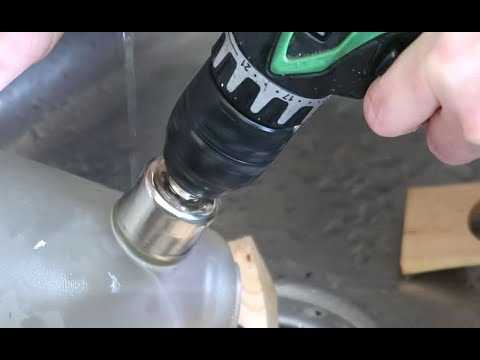
Drilling the Hole
Now comes the most crucial step in the process: drilling the hole in the glass insulator. Follow these step-by-step instructions to ensure a successful outcome:
- Start by gathering all the necessary equipment: a drill with a diamond glass cutting bit, safety goggles, a wet/dry diamond sanding pad, and a spray bottle filled with water.
- Put on your safety goggles to protect your eyes from any flying glass shards.
- Next, set up your work area by placing a couple of towels or a rubber mat on a stable surface. This will prevent the glass insulator from sliding and breaking during the drilling process.
- Determine the location where you want to drill the hole on the glass insulator. Mark the spot with a permanent marker to ensure accuracy.
- Fill the spray bottle with water and lightly mist the marked spot on the glass insulator. This will help keep the glass and drill bit cool during the drilling process.
- Position the glass insulator on the towels or rubber mat, making sure it is stable and won’t roll or move while drilling.
- Start drilling with a slow and steady motion. Apply consistent pressure to the drill, but avoid excessive force that may crack the glass. Remember to keep the bit and glass wet by periodically spraying water on the drilling area.
- After a few seconds of drilling, pause and check the progress. Remove any glass shards or dust from the hole using a wet/dry diamond sanding pad.
- Continue drilling until you have achieved the desired hole size. Take breaks if necessary to allow the drill bit and glass to cool down.
- Once the hole is drilled, use the wet/dry diamond sanding pad to smooth the edges of the hole and remove any sharp points.
Remember to handle the glass insulator with care throughout the drilling process to avoid any accidents or injuries. Additionally, always follow proper safety procedures and use appropriate protective gear when working with power tools.
Cooling the Glass Insulator
After drilling the hole in the glass insulator, it is important to cool it down properly in order to prevent cracks and damage. Here are some steps you can take to cool the glass insulator:
- Let it cool naturally: Allow the glass insulator to cool down on its own before handling it. This will help prevent any sudden changes in temperature that could cause the glass to crack.
- Place it in a container of water: Fill a container with cool water and gently place the glass insulator in it. Make sure the water completely covers the insulator to ensure an even cooling process.
- Add ice cubes: If you want to speed up the cooling process, you can add a few ice cubes to the water. This will help lower the temperature of the water and cool the glass insulator more quickly.
- Let it soak: Leave the glass insulator in the container of water for at least 15-30 minutes to allow it to cool down completely. This will help ensure that the glass is properly cooled and less likely to crack.
- Gently pat dry: Once the glass insulator has cooled down, carefully remove it from the water and pat it dry with a soft cloth or towel. Avoid any sudden movements or impacts that could cause the glass to break.
Following these steps will help ensure that your glass insulator is properly cooled and ready for use.
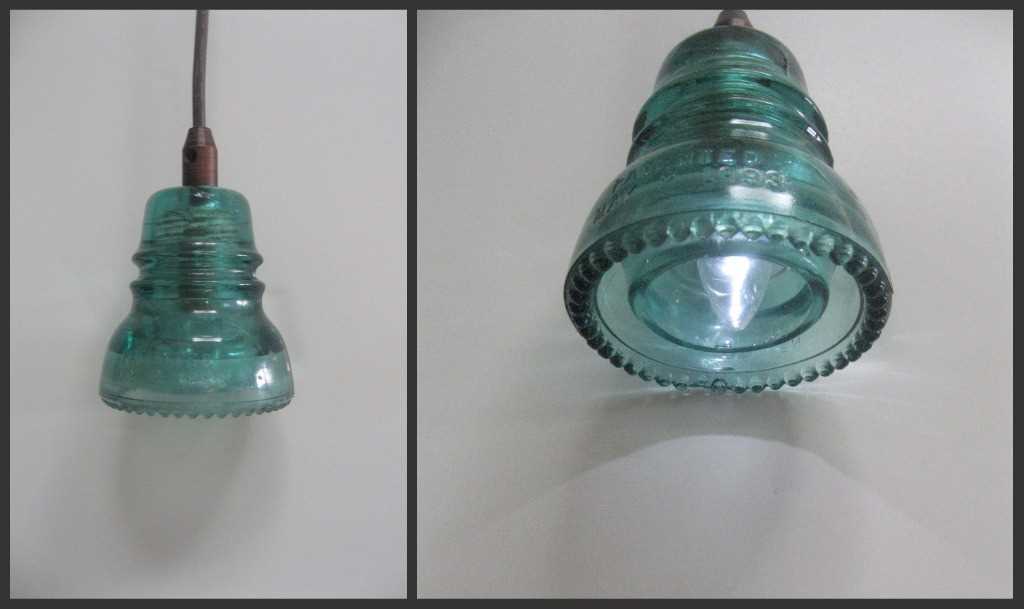
Finishing Touches
Once you have successfully drilled holes in your glass insulators, it’s time to add the finishing touches to your project. Here are a few steps you can follow to complete the process:
1. Cleaning the Insulator
Before applying any finishes or decorations, it’s essential to clean the glass insulator thoroughly. Use a mild glass cleaner or warm soapy water to remove any dust or debris from the surface of the insulator. Rinse it well and allow it to dry completely.
2. Applying a Finish
There are various finishes you can use to enhance the appearance of your glass insulator. Some popular options include:
- Transparent Paint: You can use transparent paint in your desired color to give the insulator a stained glass effect. Apply the paint evenly on the surface using a small brush or sponge, and let it dry completely.
- Metallic Spray Paint: If you prefer a shiny, metallic look, you can use metallic spray paint. Choose a color that matches your decor and apply thin, even coats to the insulator. Allow it to dry between each coat.
- Glass Stains: Glass stains are another option that can provide a unique and vibrant finish to your insulator. Apply the stains according to the manufacturer’s instructions and let them dry completely.
3. Adding Decorations
Once the finish is dry, you can add decorations to further personalize your glass insulator. Consider the following ideas:
- Twine or Ribbon: Wrap twine or ribbon around the neck of the insulator to create a rustic or decorative look. Tie it in a bow or knot for added flair.
- Beads or Charms: Thread beads or charms onto a wire or string and attach them to the holes in the insulator. This can add a touch of elegance or color to your finished project.
- Painted Designs: If you’re feeling artistic, you can paint designs directly onto the surface of the insulator using fine-tip brushes and glass paints.
4. Displaying Your Project
Once your glass insulator is finished, it’s time to find the perfect spot to display it. You can place it on a shelf, mantel, or table. Consider using a small stand or mounting it on a wooden base for stability. Your finished project will not only be a unique piece of decor but also a conversation starter.
Remember to handle your glass insulator with care to avoid any accidental breakage or damage. With these finishing touches, you can create a beautiful and personalized glass insulator that showcases your creativity and style.
Final Thoughts
In conclusion, drilling holes in glass insulators can be a challenging task, but with the right tools and techniques, it is definitely achievable. Here are some key takeaways to keep in mind:
- Always wear protective eyewear and gloves when working with glass insulators.
- Choose the right drill bit for the job – a diamond drill bit is recommended for drilling glass.
- Use water or a lubricating oil to keep the drill bit cool and prevent cracking.
- Make sure to apply gentle and consistent pressure while drilling, but avoid pushing too hard.
- Take your time and be patient – drilling glass requires precision and careful handling.
- Consider practicing on scrap glass before attempting to drill a hole in a valuable glass insulator.
- Remember to clean the insulator and remove any debris after drilling the hole.
With these tips in mind, you should be well-equipped to drill holes in glass insulators for your DIY projects. Remember to always prioritize safety and take your time to achieve the best results. Happy drilling!
FAQ:
What materials do I need for drilling holes in glass insulators?
To drill holes in glass insulators, you will need the following materials: a glass insulator, a drill press, a glass drilling bit, water, safety goggles, and gloves.
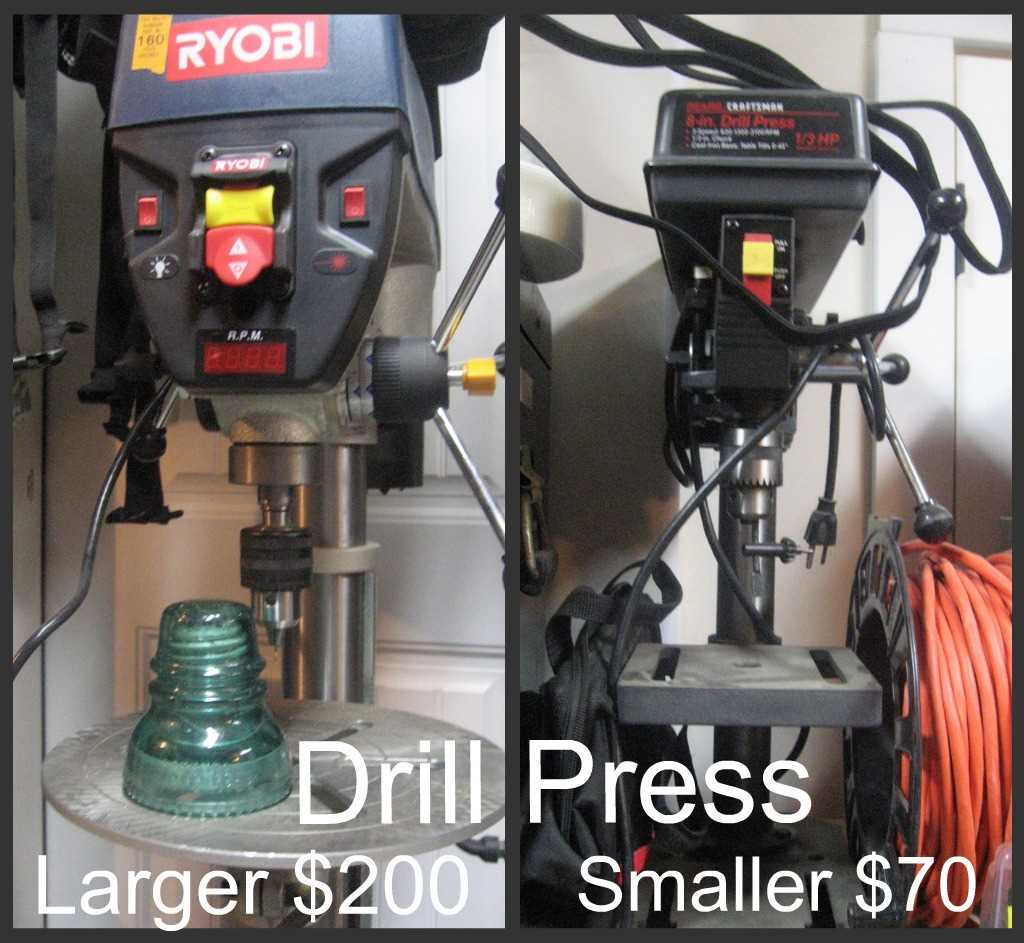
Can I use a hand drill instead of a drill press for drilling holes in glass insulators?
While it is possible to use a hand drill for this task, it is generally recommended to use a drill press. A drill press provides more accuracy and control, which is important when drilling into glass. If you do decide to use a hand drill, make sure to use a steady hand and go slow to prevent any accidents or damage to the glass.
How do I drill a hole in a glass insulator?
To drill a hole in a glass insulator, start by wearing safety goggles and gloves for protection. Fill a basin or container with water and place the insulator in it, ensuring that it is fully submerged. This will help to keep the glass cool and prevent it from cracking. Using a drill press with a glass drilling bit, position the insulator under the drill bit. Start the drill press at a slow speed and gradually increase the speed as you apply steady downward pressure on the insulator. Continue drilling until you have achieved the desired hole size. Remember to keep the glass lubricated with water throughout the drilling process.
Video:


Meet Harrison Clayton, a distinguished author and home remodeling enthusiast whose expertise in the realm of renovation is second to none. With a passion for transforming houses into inviting homes, Harrison's writing at https://thehuts-eastbourne.co.uk/ brings a breath of fresh inspiration to the world of home improvement. Whether you're looking to revamp a small corner of your abode or embark on a complete home transformation, Harrison's articles provide the essential expertise and creative flair to turn your visions into reality. So, dive into the captivating world of home remodeling with Harrison Clayton and unlock the full potential of your living space with every word he writes.


