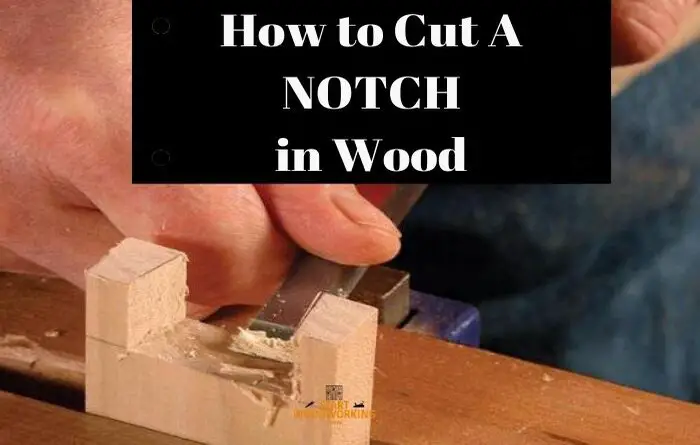
Guide on Notching Wood with a Drill

Notching wood is a technique commonly used in woodworking to create joints, that allow pieces of wood to fit together snugly and securely. One tool that can be used to create these notches is a drill. Using a drill for notching wood can be a time-saving and efficient method, especially for those who do not have access to more specialized tools.
Notching wood with a drill requires a few key steps to ensure success. First, it is important to choose the correct drill bit size for the desired notch. A bit that is too large or too small may result in an ill-fitting joint. It is also important to mark the desired notch location on the wood, using a pencil or other marking tool.
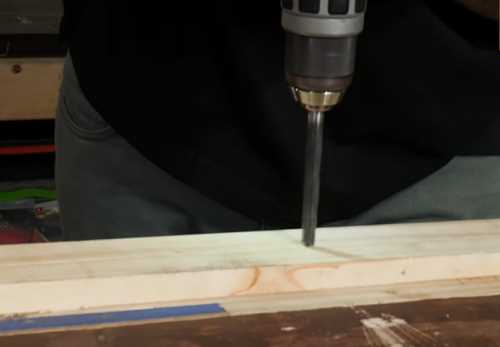
Once the marking is complete, the drill can be used to begin creating the notch. It is important to hold the drill steady and apply consistent pressure while drilling. Slow and steady is the key to prevent splintering or damage to the wood. It may be helpful to use a clamp or other stabilizing device to hold the wood in place during the drilling process.
After drilling the initial hole, the notch can be expanded by making repeated cuts along the marked line. These cuts can be made with the drill, using a back and forth motion, or with a chisel for more precision. The notch should be periodically checked for size and fit, and adjustments can be made as needed.
In conclusion, notching wood with a drill is a useful technique that can be used to create strong and secure joints. By following the correct steps and using the proper tools, anyone can successfully notch wood with a drill. Whether you are a beginner or an experienced woodworker, this method is worth trying.
What is Notching Wood?

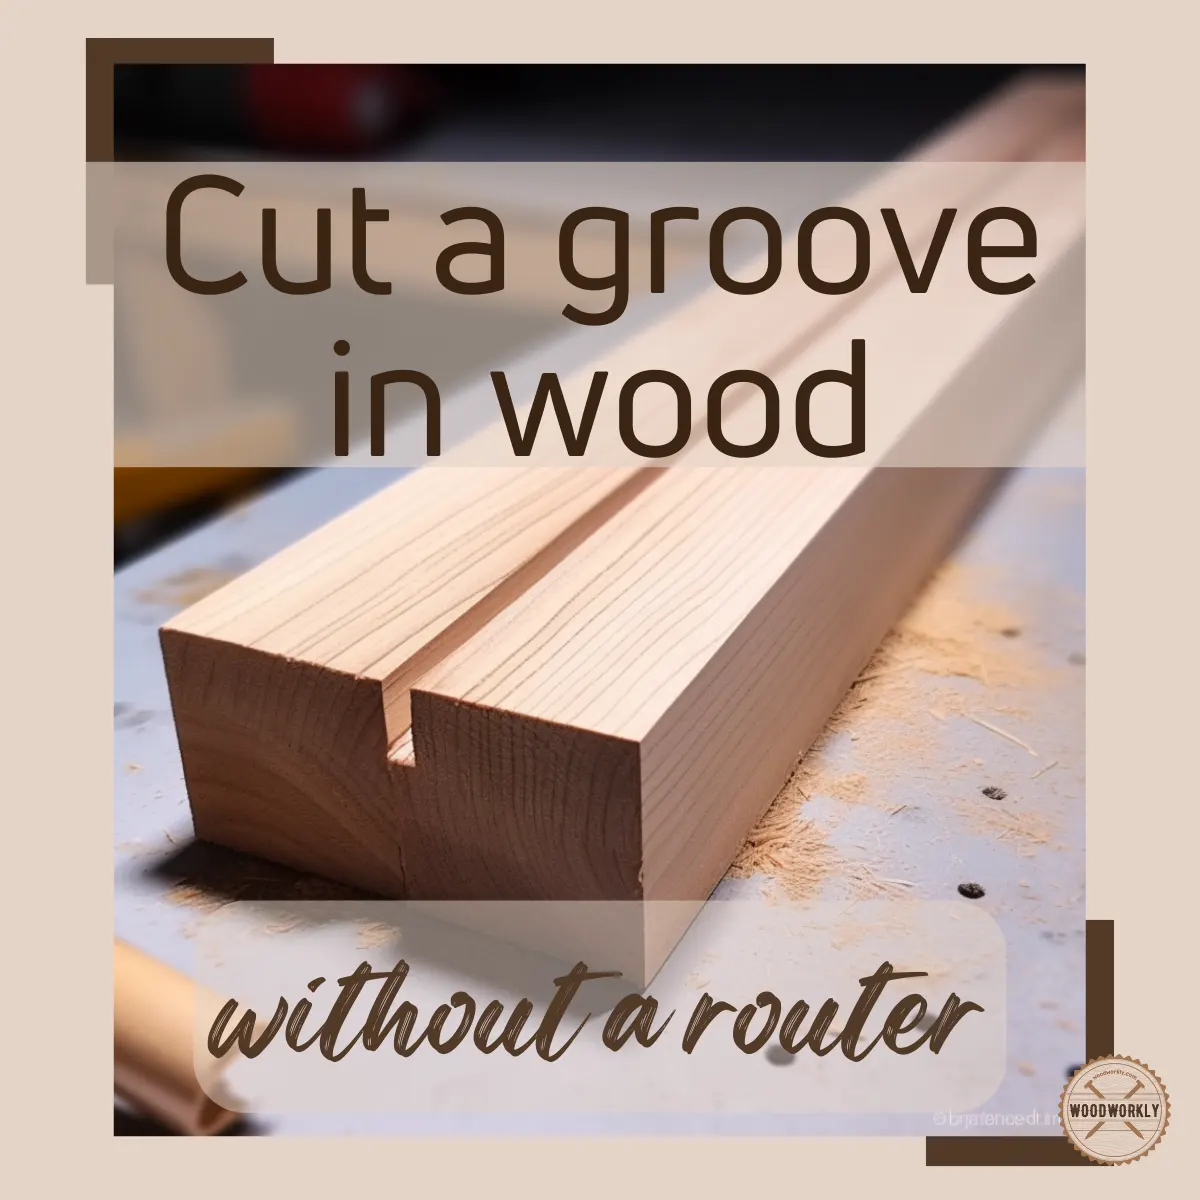
Notching wood is a technique used in woodworking to create a groove or indentation in a piece of wood. This can be done by making a series of cuts with a saw, chisel, or drill, depending on the desired result. Notching is commonly used to create joints, connections, or decorative features in wooden structures.
Purpose of Notching
The purpose of notching wood is to create a secure and stable joint between two or more pieces of wood. By removing material from the wood, notching allows the pieces to fit together tightly, increasing their strength and preventing movement or separation. Depending on the type of joint being created, the notch may be simple and basic, or more complex and decorative.
Types of Notching
There are several types of notching techniques that can be used in woodworking:
- Rabbet Notch: This type of notch involves cutting a rectangular groove along the edge or end of a piece of wood. It is commonly used to create a joint for attaching shelves, panels, or drawers.
- Dovetail Notch: Dovetail notches have a distinctive shape that resembles a dove’s tail. They are commonly used in joinery and cabinetry to create strong and decorative joints.
- Half-lap Notch: In a half-lap notch, half of the thickness of each piece of wood is removed so that they can overlap and interlock. This type of notch is often used in constructing frames or beams.
- Mortise and Tenon Notch: Mortise and tenon is a traditional joining method where a rectangular hole (mortise) is cut into one piece of wood and a projecting piece (tenon) is inserted into it. This creates a strong and durable joint.
Tools for Notching Wood
The tools required for notching wood may vary depending on the specific technique and the complexity of the project. Common tools used for notching include:

- Saw: A handsaw or table saw can be used to make the initial cuts for creating notches.
- Chisel: A chisel is commonly used to refine and clean up the notched areas after making rough cuts.
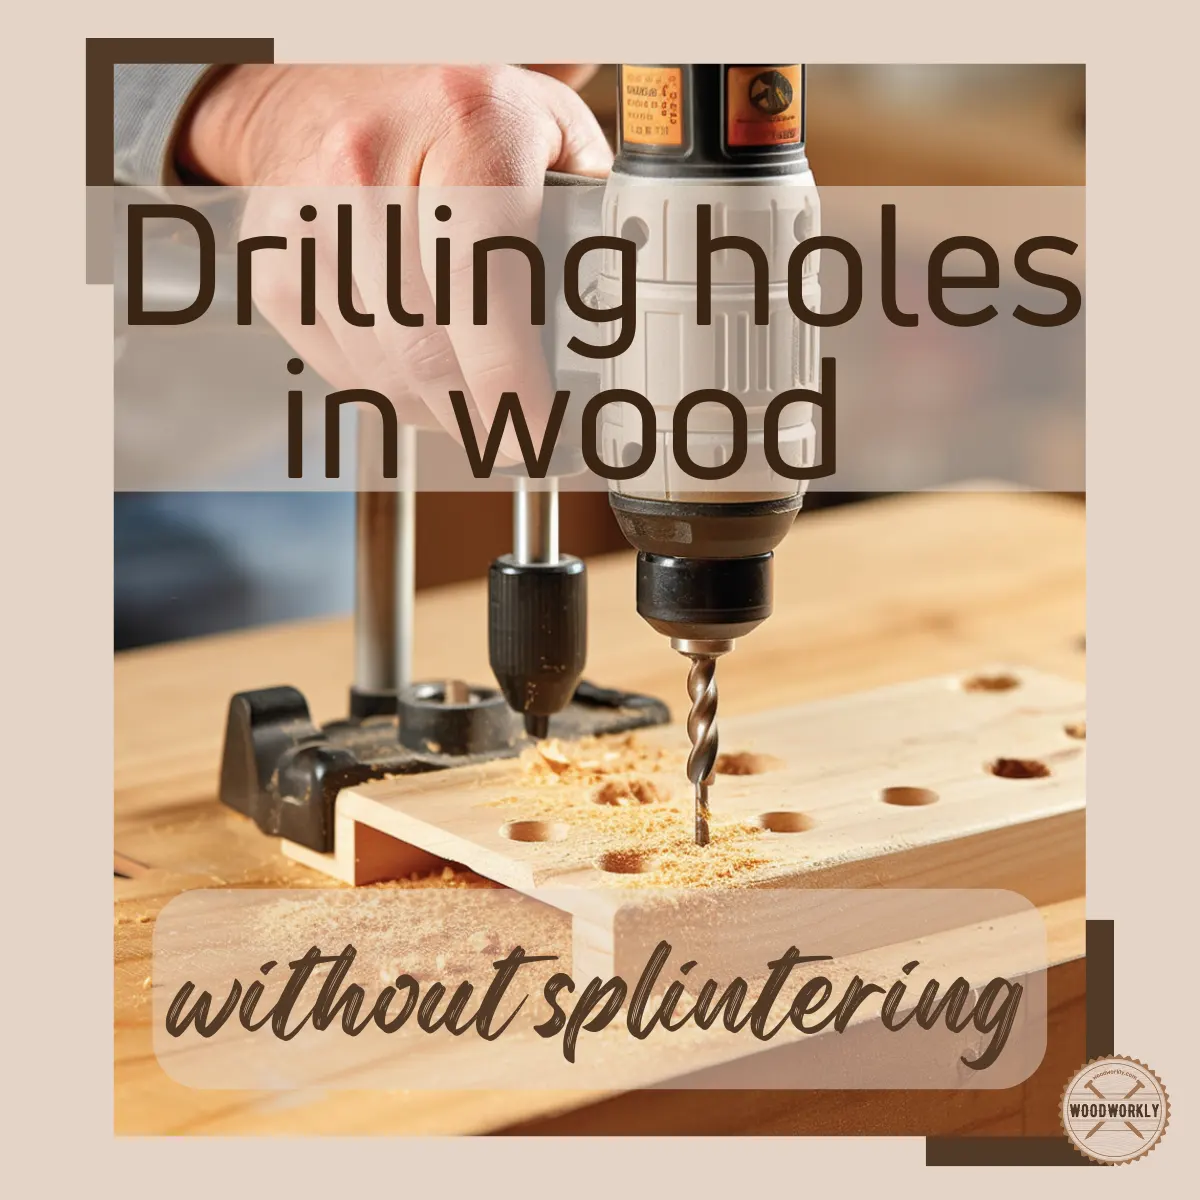
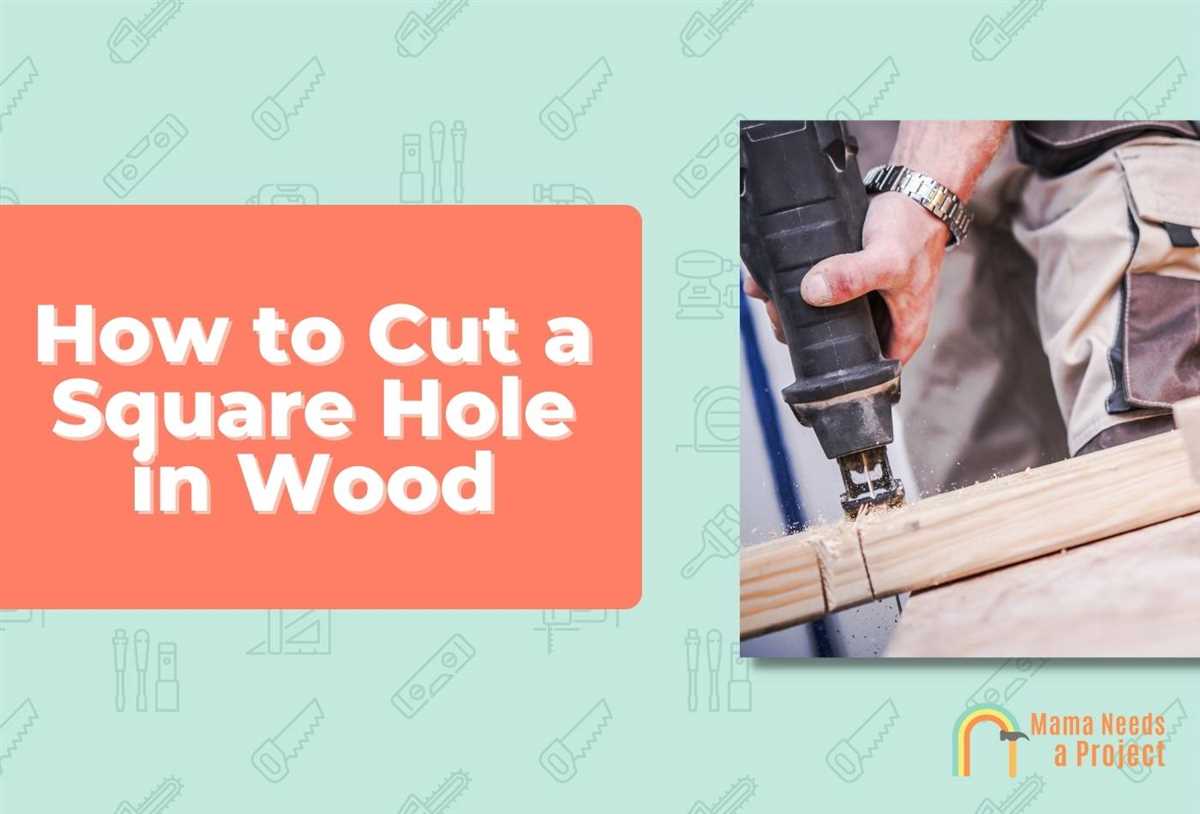
- Drill: A drill with various drill bits can be used to remove material and create rounded or curved notches.
- Router: A router with appropriate bits can be used for precision and decorative notching.
Overall, notching wood is an essential technique in woodworking that allows for strong and secure connections between pieces of wood. Whether for joints, connections, or decorative purposes, notching provides versatility and strength in wooden structures.
Notching Wood with a Drill: A Step-by-Step Guide
Step 1: Gather Materials
Before you begin notching wood with a drill, make sure you have all the necessary materials:
- Wooden board or plank
- Drill
- Drill bits
- Measuring tape
- Pencil
- Clamps (optional)
Step 2: Measure and Mark
Using a measuring tape, determine the desired location and size of the notch on the wooden board. Mark the measurements lightly with a pencil.
Step 3: Secure the Wood
If necessary, use clamps to secure the wooden board in place. This will prevent it from moving during the drilling process.
Step 4: Select the Drill Bit
Choose the appropriate drill bit for the size and shape of the notch you want to create. For straight notches, a standard twist drill bit will work fine. For more intricate notches, you may need a specialized bit.

Step 5: Begin Drilling
Hold the drill firmly and position the drill bit at one end of the marked notch. Start the drill at a low speed and gradually increase it as you drill into the wood. Apply steady pressure and ensure the drill is perpendicular to the wood surface.
Step 6: Drill Along the Marked Line
Continue drilling along the marked line, following the shape and dimensions of the notch. Take your time and make sure to keep the drill bit within the marked area.
Step 7: Remove Excess Wood
Once you have drilled along the entire marked line, you should have a recessed notch in the wood. Carefully remove any excess wood particles or debris from the notch using a brush or vacuum.
Step 8: Smooth the Edges
Use sandpaper or a file to smooth the edges of the notch, ensuring that it is clean and free from any rough or jagged edges.
Step 9: Test Fit and Fine-tune
Test the fit of the notched wood by placing it in the intended location or test it with the component it is meant to fit with. If needed, make any necessary adjustments or modifications to ensure a proper fit.
Step 10: Finish the Wood (optional)
If desired, you can finish the wood by sanding, staining, or painting it to match your desired aesthetic.
Congratulations! You have successfully notched wood with a drill. Remember to always exercise caution and follow safety guidelines when using power tools.
The Benefits of Notching Wood
-
Easier Assembly: Notching wood makes it easier to assemble pieces together. By creating notches, you can ensure a snug fit, which allows for a more secure and stable structure. This can be particularly beneficial when building furniture, cabinets, or other wooden structures that require precise joints.
-
Improved Strength: Notching wood can significantly improve the overall strength of a joint. By removing a portion of the wood to create the notch, you are effectively increasing the surface area of the joint, providing more contact points for glue or fasteners. This, in turn, enhances the overall strength and durability of the joint, making it less prone to failure or separation over time.
-
Cleaner Finish: Notching wood can also help achieve a cleaner and more professional finish. By creating precise notches, you can hide the end grains of the wood, which are often unsightly and difficult to work with. This can result in a more aesthetically pleasing appearance, especially when working on visible joints or edges.
-
Increased Flexibility: Notching wood allows for increased flexibility in design and construction. By creating notches, you can easily join wood pieces at different angles or orientations, allowing for more complex and innovative designs. This can be particularly useful when building custom furniture or intricate wooden structures.
-
Reduced Material Waste: Notching wood can help reduce material waste. By creating notches, you can ensure a more efficient use of wood, as you can use shorter pieces with notches to create longer joints. This can be beneficial when working with expensive or limited resources, helping to minimize costs and environmental impact.
Overall, notching wood provides several benefits, including easier assembly, improved strength, cleaner finish, increased flexibility in design, and reduced material waste. By using this technique, you can enhance the quality and durability of your woodworking projects, while also achieving a more professional and aesthetically pleasing result.
Choosing the Right Drill for Notching Wood
When it comes to notching wood, the right drill can make all the difference. There are several factors to consider when choosing a drill for this task, including power, speed, and versatility.
Power

The power of the drill is crucial when it comes to notching wood. You’ll want a drill that has enough power to easily cut through the wood without bogging down. Look for a corded electric drill or a cordless drill with a high voltage rating for maximum power.
Speed
Speed is another important factor to consider. For notching wood, you’ll want a drill with variable speed settings. This will allow you to adjust the speed to match the type of wood you’re working with and the depth of the notch you need to make. A drill with a speed range of 0-3000 RPM is usually sufficient for most wood notching tasks.
Versatility
Depending on your specific needs, you may also want to consider the versatility of the drill. Some drills come with additional features and attachments that can be useful for notching wood, such as a depth stop or a guide fence. These features can help ensure accurate and precise notches.
Other Considerations
In addition to power, speed, and versatility, there are a few other factors to keep in mind when choosing a drill for notching wood. These include the size and weight of the drill, as well as the comfort of the grip. A compact and lightweight drill is generally more maneuverable and easier to control, especially when working in tight spaces.
Lastly, don’t forget about safety. Always wear appropriate safety gear, such as goggles and gloves, when using a drill to notch wood. And be sure to follow the manufacturer’s instructions and guidelines for safe operation.
By considering these factors and choosing the right drill for notching wood, you’ll be able to make clean and precise notches with ease.
Understanding the Different Notching Techniques
When it comes to notching wood with a drill, there are several techniques that can be used to achieve the desired result. Each technique has its own advantages and disadvantages, so it is important to understand them before deciding which one to use.
1. Straight Notching
Straight notching is the most basic technique and involves cutting a straight notch into the wood. This technique is often used when creating joints or connections between two pieces of wood. Straight notching can be easily done using a drill and a chisel. It is important to make precise measurements and use a guide to ensure a straight and accurate cut.
2. L-Shaped Notching

L-shaped notching is a technique that involves cutting a notch in the shape of the letter L. This technique is commonly used when creating corners or joints in woodwork. L-shaped notching provides a strong and secure connection between two pieces of wood, making it a popular choice for constructing frames and furniture.
3. Dovetail Notching
Dovetail notching is a more advanced technique that involves cutting a notch in the shape of a dovetail joint. This technique is often used in woodworking projects that require a strong and durable connection between two pieces of wood. Dovetail notching provides increased stability and prevents the wood from separating over time.
4. Curved Notching
Curved notching is a technique that involves cutting a notch in a curved or rounded shape. This technique is commonly used when constructing furniture or decorative woodwork. Curved notching adds an aesthetic element to the woodwork and can create interesting and unique designs.
5. Round Notching
Round notching is a technique that involves cutting a round notch into the wood. This technique is often used when creating decorative elements or circular connections in woodwork. Round notching can be easily done using a drill with a hole saw attachment or a woodworking router.
It is important to choose the right notching technique based on the specific requirements of your woodworking project. Consider factors such as the type of joint or connection needed, the desired strength and stability, and the overall aesthetic appeal of the finished piece. By understanding the different notching techniques and their applications, you can ensure the success of your woodworking projects.
Safety Precautions for Notching Wood with a Drill
1. Wear Protective Gear
Before you start notching wood with a drill, it is important to ensure that you are wearing the appropriate protective gear. This includes safety glasses to protect your eyes from flying wood particles, and gloves to protect your hands from potential injuries. Additionally, consider wearing a dust mask to prevent inhaling wood dust.
2. Inspect the Drill and Work Area
Prior to beginning your wood notching project, inspect the drill and work area to ensure that everything is in proper working order. Check the drill for any loose or damaged parts, and make sure the drill bit is secure. Inspect the work area for any potential hazards or obstacles that may cause accidents or injuries.
3. Secure the Wood
Make sure the wood you are notching is securely fastened or clamped down before you start drilling. This will prevent the wood from moving or slipping during the notching process, reducing the risk of accidents or mistakes.
4. Check the Depth
Before you start drilling, check the depth at which you need to make the notch. Set the drill depth guide or mark the drilling depth on the drill bit with tape. This will help you ensure that you do not drill too deep or too shallow, avoiding any structural or functional issues with the wood.
5. Use the Correct Drill Bit
It is crucial to use the appropriate drill bit for the type of wood you are notching. Using the wrong drill bit can lead to ineffective or dangerous results. Refer to the wood manufacturer’s recommendations or consult a professional to determine the correct drill bit size and type for the job.
6. Maintain a Firm Grip
When using a drill to notch wood, maintain a firm grip on the drill at all times. This will help you maintain control over the drilling process and prevent any unexpected movement or accidents.
7. Drill at a Controlled Speed
Drill at a controlled and consistent speed to ensure accuracy and avoid any issues. Attempting to rush the process or applying excessive force can lead to mistakes or accidents.
8. Remove Sawdust Regularly
As you are drilling the notch, make sure to remove sawdust regularly to maintain visibility and prevent the drill from becoming clogged. Use a brush or blow away the sawdust with a gentle burst of air to keep the work area clean and safe.
9. Avoid Overheating
Continuous drilling can cause the drill bit and wood to heat up. To avoid overheating, take breaks periodically to allow the bit and wood to cool down. This will help prevent damage to the wood and reduce the risk of injury.
10. Keep Children and Pets Away
When working with power tools such as drills, it is important to keep children and pets away from the work area. Store your tools and equipment in a safe place where they cannot be accessed by curious little hands or paws.
Following these safety precautions will help ensure a safe working environment and minimize the risk of accidents or injuries while notching wood with a drill.
Common Mistakes to Avoid when Notching Wood
- Poor Planning: Failing to adequately plan your notching cuts can lead to mistakes and wasted wood. Before you start notching, take the time to measure and mark your cuts accurately.
- Inadequate Support: Not providing adequate support for the wood being notched can result in wood splitting or breaking. Make sure to use clamps or a vice to secure the wood firmly in place before making any cuts.
- Using the Wrong Drill Bit: Using the wrong size or type of drill bit can lead to messy and imprecise cuts. Choose a drill bit that is appropriate for the size and depth of the notch you need to make.
- Not Using a Guide: Attempting to notch wood freehand without a guide can result in crooked or uneven cuts. Consider using a straight edge or a marking tool to guide your drill and ensure straight and accurate cuts.
- Not Wearing Safety Gear: Failing to wear appropriate safety gear, such as safety glasses or gloves, can put you at risk of injury. Always prioritize your safety and wear the necessary protective equipment when working with power tools.
- Not Checking Depth: Not checking the depth of your notch cuts can result in cuts that are too shallow or too deep. Use a depth stop or regularly check the depth of your drill bit to ensure consistent and accurate notches.
- Rushing: Trying to rush the notching process can lead to sloppy and imprecise cuts. Take your time and work slowly and carefully to achieve clean and accurate notches.
Tips and Tricks for a Perfect Notch
1. Measure and Mark Carefully
Before you begin notching, take the time to measure and mark your wood accurately. Use a measuring tape or ruler to ensure precise measurements, and use a pencil or marker to make clear marks on the surface of the wood.
2. Use the Right Drill Bit
Choosing the right drill bit is crucial for achieving a perfect notch. Use a drill bit that matches the width and depth of the notch you need. For smaller notches, a narrow drill bit will work, while larger notches require a wider bit.
3. Start with Shallow Cuts
When drilling the notch, it’s best to start with shallow cuts. This allows you to gradually deepen the notch and ensures you don’t remove too much wood at once. Take your time and be patient to avoid any mistakes.
4. Use a Drill Guide
If you want to create a precise and straight notch, consider using a drill guide. A drill guide helps you maintain a consistent angle and depth while drilling, resulting in a more accurate notch.
5. Secure the Wood Properly
Before you start drilling, make sure the wood is securely clamped or held in place. This prevents the wood from moving or shifting during the drilling process, which can lead to uneven or messy notches.
6. Take Breaks and Clean Your Drill Bit
Drilling can generate heat, which can cause your drill bit to become dull or clogged with debris. To prevent this, take breaks during the drilling process and clean your drill bit periodically. This ensures the drill bit stays sharp and allows for cleaner and smoother notches.
7. Practice on Scrap Wood
If you’re new to notching wood with a drill, it’s a good idea to practice on scrap wood first. This allows you to familiarize yourself with the drilling process and perfect your technique before working on your desired piece of wood.
8. Sand and Finish the Notch
Once you’ve completed the notch, it’s important to sand and finish the area for a polished look. Use sandpaper to smooth any rough edges or surfaces, and apply a finish or sealant to protect the wood and enhance its appearance.
9. Safety First
Always prioritize safety when working with power tools. Wear protective goggles to shield your eyes from flying debris, and consider using a dust mask or respirator when drilling to protect yourself from wood dust.
10. Seek Professional Help if Needed
If you’re unsure about your abilities or lack experience in notching wood with a drill, it’s best to seek professional help. A skilled woodworker or carpenter can assist you in achieving the perfect notch and ensure the safety and quality of your project.
By following these tips and tricks, you’ll be well on your way to creating perfect notches in your wood projects. Remember to take your time, work carefully, and prioritize safety throughout the entire process.
FAQ:
What is notching wood with a drill?
Notching wood with a drill is a technique used to create a groove or indentation in a wooden material using a drill. This process can be done by using different types of drill bits and can be used for various woodworking projects.
What are the tools needed for notching wood with a drill?
To notch wood with a drill, you will need a drill machine, drill bits of various sizes, a pencil or marker for marking the wood, a ruler or measuring tape for measurements, and safety goggles for eye protection.
What are the common uses of notching wood with a drill?
Notching wood with a drill can be used for various purposes in woodworking projects. Some common uses include creating slots for joinery, inserting hardware or screws, creating decorative grooves or designs, and making notches for shelves or supports in furniture or cabinetry.
Video:


Meet Harrison Clayton, a distinguished author and home remodeling enthusiast whose expertise in the realm of renovation is second to none. With a passion for transforming houses into inviting homes, Harrison's writing at https://thehuts-eastbourne.co.uk/ brings a breath of fresh inspiration to the world of home improvement. Whether you're looking to revamp a small corner of your abode or embark on a complete home transformation, Harrison's articles provide the essential expertise and creative flair to turn your visions into reality. So, dive into the captivating world of home remodeling with Harrison Clayton and unlock the full potential of your living space with every word he writes.


