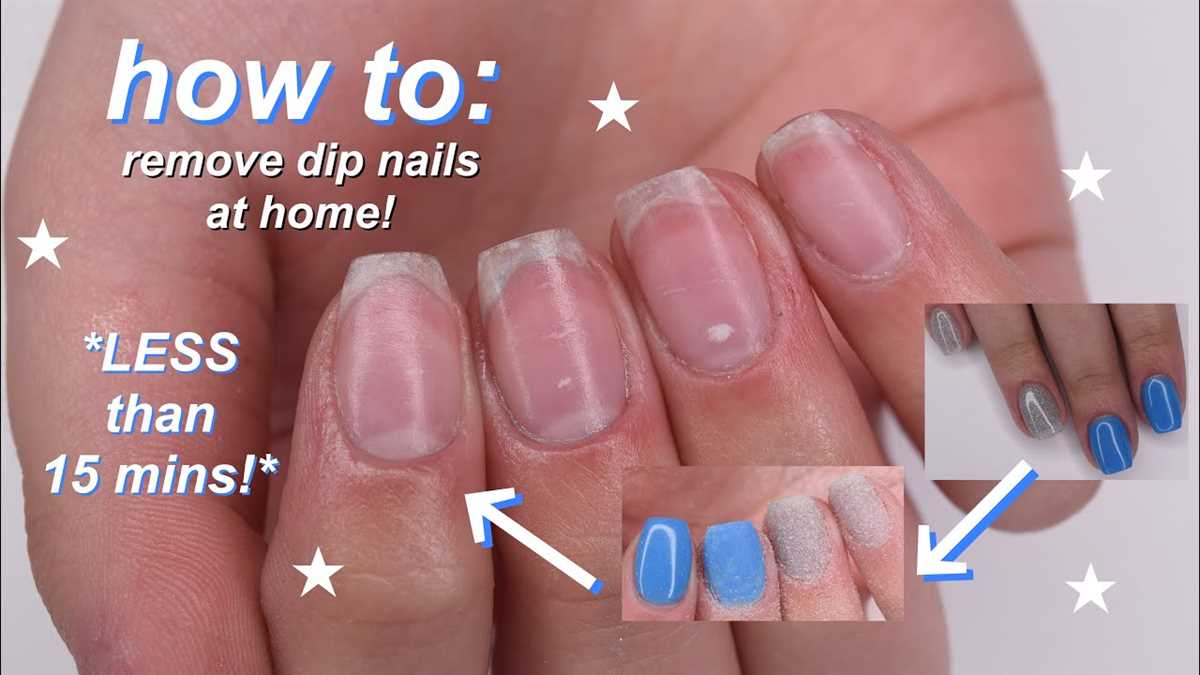
Efficient Ways to Remove Dip Nails with a Drill

Removing dip nails can be a tedious and time-consuming process, especially if you don’t have the right tools. One of the most efficient ways to remove dip nails is by using a drill. A drill can quickly and effectively remove the dip powder without causing damage to the natural nail.
Before you begin, it’s important to gather all the necessary tools and materials. You will need a nail drill, a fine-grit drill bit, acetone, cotton balls, aluminum foil, and a cuticle pusher. It’s also recommended to use a hand file with a grit of 180 to smooth out any remaining dip powder after the removal process.
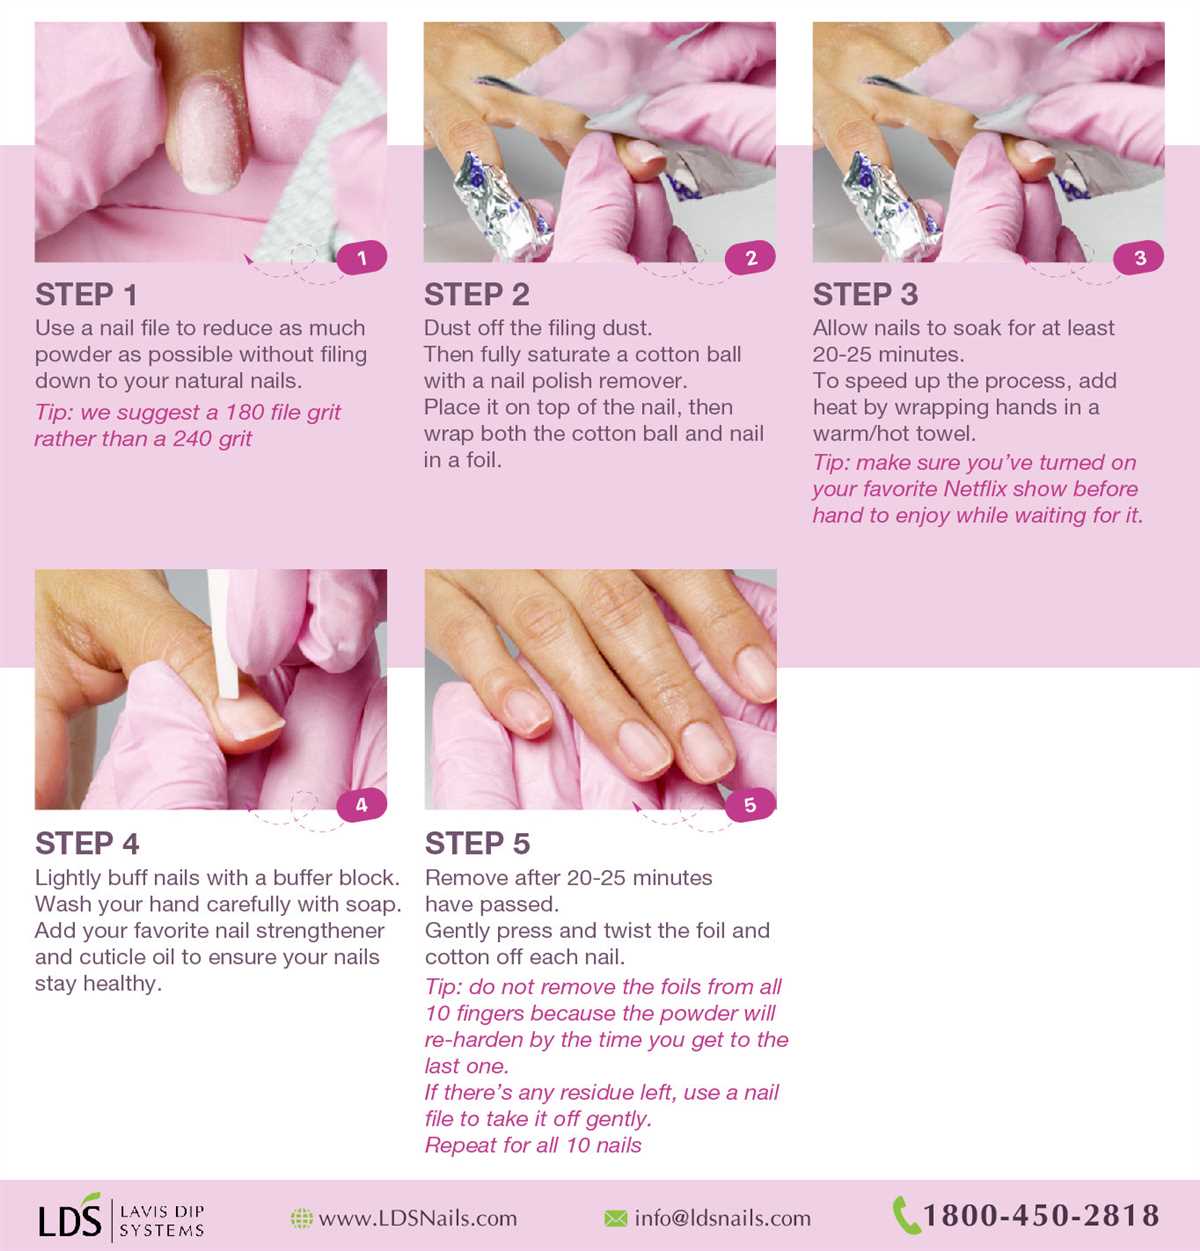
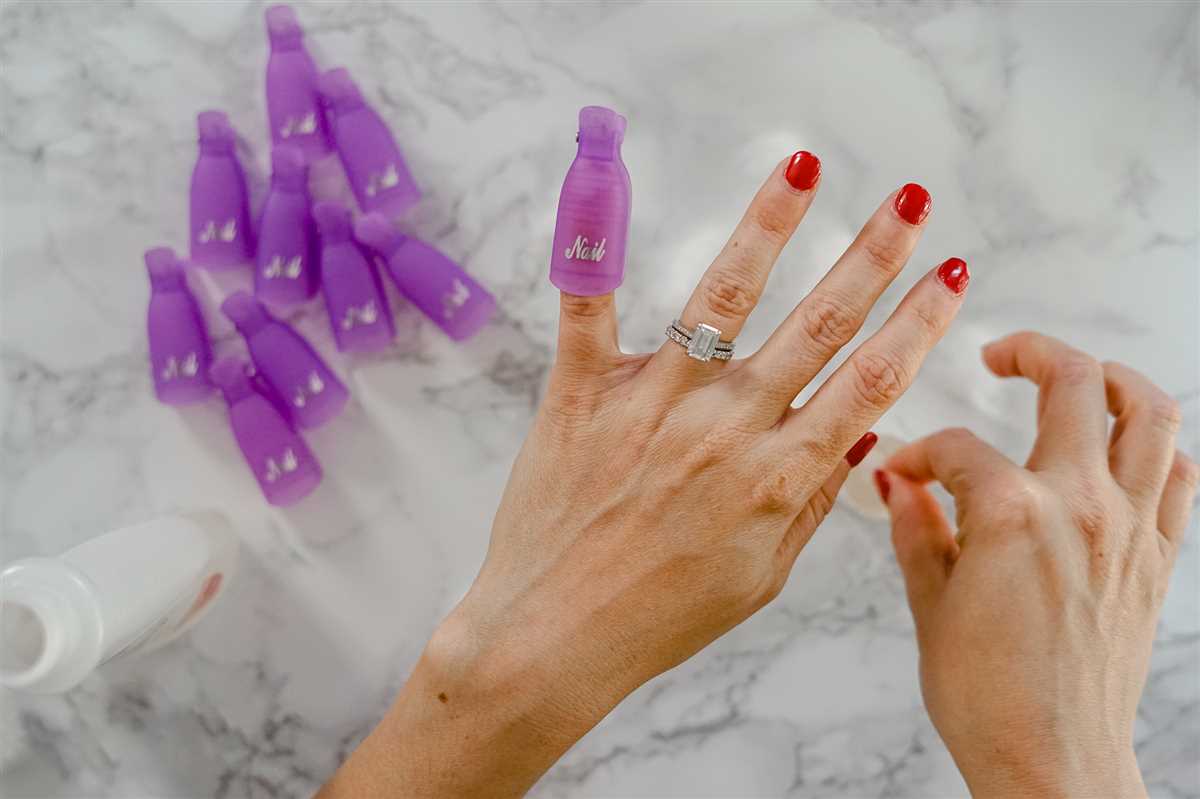
To start the removal process, you will need to first file down the top layer of the dip powder using a hand file. This helps to break the seal and speeds up the removal process. Next, soak a cotton ball in acetone and place it on top of the nail. Secure it with aluminum foil to create a seal and allow the acetone to soak into the dip powder.
Leave the cotton ball and foil wraps on for about 10-15 minutes to allow the acetone to dissolve the dip powder. You can use this time to work on the other nails. After the soaking time, carefully remove the foil wraps and cotton balls. The dip powder should be soft and easy to remove with a cuticle pusher or a drill. Gently scrape off the dip powder until all the product is removed.
Once all the dip powder is removed, use a hand file with a grit of 180 to gently file the nail surface. This will smooth out any remaining dip powder and prepare the nail for the next application. Be careful not to file too hard or too aggressively, as this can damage the natural nail.

In conclusion, using a drill is an efficient and effective way to remove dip nails. By following the proper steps and using the right tools, you can quickly and safely remove the dip powder without causing damage to the natural nail. Remember to always take your time and be gentle during the removal process to ensure the best results.
Removing Dip Nails with a Drill: A Quick Guide
Step 1: Set Up Your Workspace
Before you begin removing dip nails with a drill, it’s important to set up your workspace properly. Here’s what you’ll need:
- A well-lit area
- Protective eyewear
- A drill with a suitable bit for dip nail removal
- A disposable bag or towel to catch debris
- Acetone or nail polish remover
- Cotton pads or balls
Step 2: Prepare Your Nails
Start by trimming your dip nails as short as possible using nail clippers. This will make the removal process easier and quicker. Next, file the surface of each nail to remove the shiny topcoat and expose the dip powder layers.
Note: Be careful not to file too aggressively or damage your natural nails.

Step 3: Attach the Right Drill Bit
Choose a drill bit suitable for dip nail removal. A medium to coarse bit with a rounded or cylindrical shape is often recommended. Attach the bit securely to your drill, following the manufacturer’s instructions.
Step 4: Start Drilling
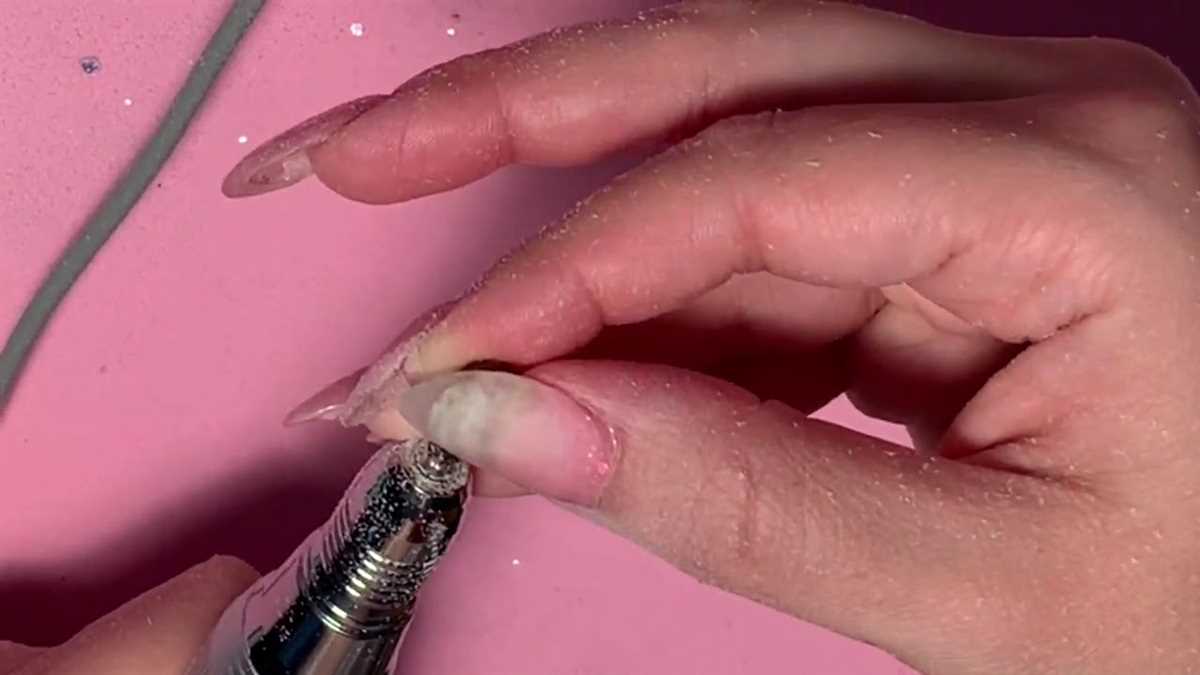
Turn on your drill and hold it at a low to medium speed. Gently touch the drill bit to the surface of your dip nail and start drilling in a back-and-forth or circular motion. Gradually work your way along the nail until the dip powder is completely removed.
Note: Take breaks if needed to prevent overheating and damage to your nails.
Step 5: Remove Residual Dip Powder
Once the dip powder is removed, there may still be some residual powder left on your nails. Soak a cotton pad or ball in acetone or nail polish remover and gently wipe each nail to remove any remaining dip powder.
Step 6: Moisturize and Protect
After removing the dip nails, it’s important to moisturize and protect your natural nails. Apply a nourishing cuticle oil or moisturizer to restore hydration and prevent dryness. Consider applying a clear strengthening base coat to protect your nails as they recover.

Congratulations! You’ve successfully removed your dip nails using a drill. Remember to take your time and be gentle to minimize any potential damage to your natural nails. If you’re unsure or uncomfortable using a drill, it’s best to seek professional assistance.
Step-by-Step Process for Efficient Removal
Removing dip nails with a drill can be a quick and efficient process if done correctly. Follow these steps to ensure a smooth removal:
- Gather the necessary tools: Before you start, make sure you have all the tools needed for dip nail removal. This includes a nail drill with the appropriate bits, acetone, aluminum foil, cotton balls, cuticle pusher, and a nail file.
- Prepare the nails: Use a nail file to gently remove the shiny topcoat from each nail. This will help the acetone penetrate the layers of dip nail powder more easily.
- Soak cotton balls: Soak cotton balls in acetone and place them on each nail. Make sure the cotton balls are saturated enough to stay in place and cover the entire nail.
- Wrap nails in aluminum foil: Wrap each finger tightly with a piece of aluminum foil to secure the acetone-soaked cotton ball in place. This will create a more effective soaking environment.
- Let the nails soak: Allow the nails to soak for at least 10-15 minutes. The acetone will break down the dip nail powder, making it easier to remove.
- Remove the foil and cotton balls: Gently remove the aluminum foil and cotton balls from each finger. The dip nail powder should be visibly softened and ready for removal.
- Use a nail drill: Attach the appropriate bit to your nail drill and carefully remove the softened dip nail powder. Start at the cuticle area and work your way to the tip of the nail. Be sure to apply light pressure and avoid drilling into the natural nail.
- Shape and smooth the nails: Once the dip nail powder is removed, use the nail drill or a nail file to shape and smooth the nails to your desired length and shape.
- Moisturize and protect: After all the dip nail powder is removed, apply cuticle oil and a moisturizing nail treatment to nourish and protect your natural nails.
Following this step-by-step process will help you efficiently remove dip nails using a drill, ensuring a clean and professional result. Remember to always exercise caution when using a drill and seek professional help if needed.
Choosing the Right Drill Bit for Dip Nail Removal
When it comes to removing dip nails with a drill, one of the most important considerations is choosing the right drill bit. The type of drill bit you use can make a big difference in how effectively and efficiently you are able to remove the dip nails. Here are a few factors to consider when selecting a drill bit for dip nail removal:
1. Size and Shape

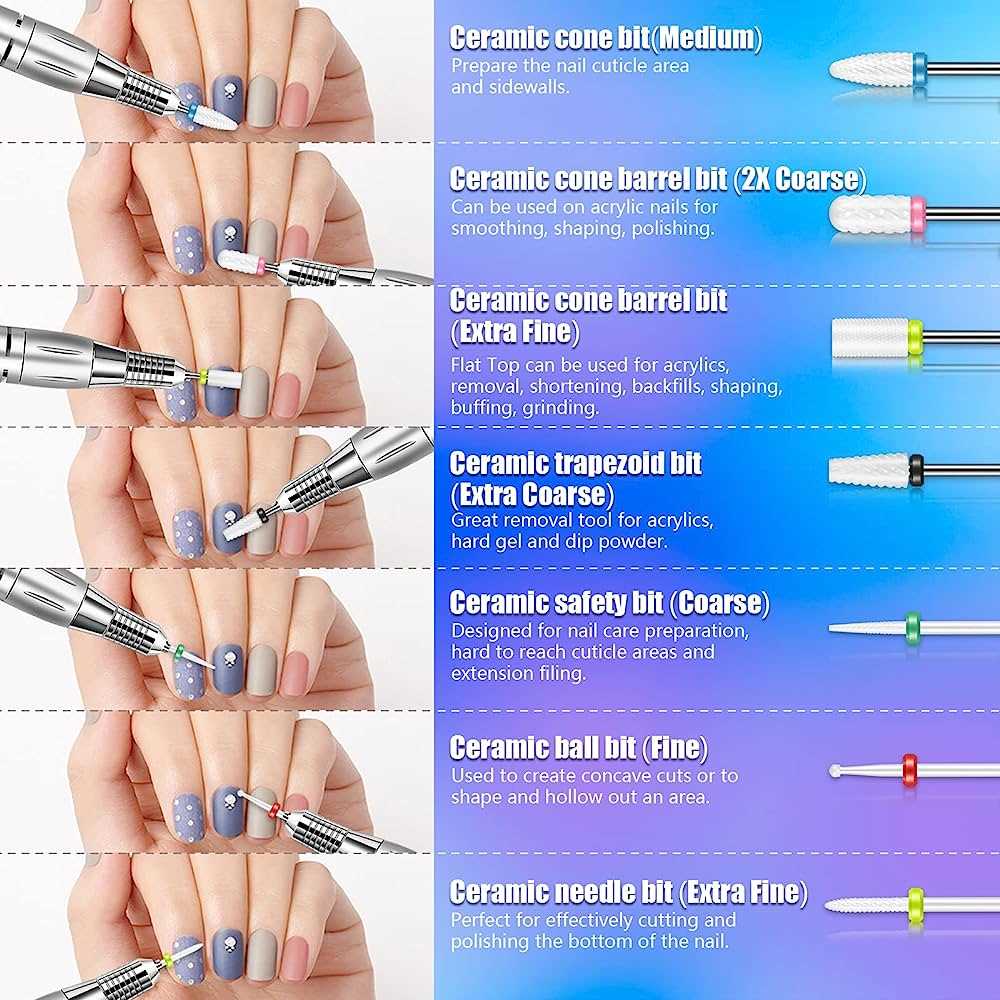
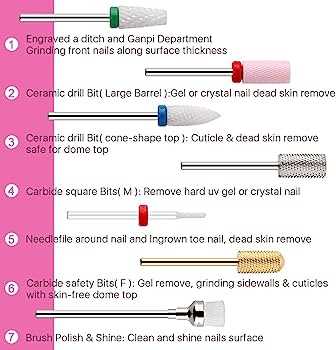
The size and shape of the drill bit are crucial for removing dip nails without damaging the natural nail bed. Look for a drill bit that is small enough to fit around the edges of the dip nails, but still large enough to remove the product effectively. A tapered or cylindrical shape is often a good choice, as it allows for precise and controlled removal.
2. Material
Drill bits for dip nail removal are typically made from carbide or ceramic materials. Carbide drill bits are known for their durability and long-lasting performance. They are able to effectively remove even the toughest dip nails. Ceramic drill bits, on the other hand, are gentler on the natural nail bed and are less likely to cause damage or discomfort during the removal process. Consider your own preferences and the condition of your nails when choosing between these two options.
3. Grit Level
The grit level of the drill bit refers to the coarseness of the abrasive surface. Higher grit levels (e.g. 180 or above) are typically used for removing dip nails, as they are more effective at breaking down the product. However, using a lower grit level (e.g. 80 or 120) may be necessary for more stubborn dip nails. It’s a good idea to have a variety of grit levels available so that you can adjust accordingly based on the condition and thickness of the dip nails.
4. Compatibility
Lastly, it’s important to ensure that the drill bit you choose is compatible with your drill machine. Most drill bits have a standard size and shape that fits most drills, but it’s always a good idea to double-check before making a purchase. Using a drill bit that is not compatible with your machine can result in poor performance and potential damage to the nails.

By considering these factors and choosing the right drill bit for dip nail removal, you can make the process easier and more efficient. Remember to take your time and work carefully to minimize any potential damage to your natural nails.
Preparing Your Nails and Tools for the Removal
Before you begin the process of removing your dip nails with a drill, it’s important to properly prepare your nails and gather the necessary tools. Taking the time to do this will help ensure a more efficient and successful removal process.
1. Gather your tools
Make sure you have all the tools you’ll need for the removal process. This may include:
- A electric nail drill with appropriate attachments
- Disposable nail files
- Acetone or nail polish remover
- Cotton balls or pads
- Aluminum foil
- Cuticle pusher or orange stick
- Nail buffer
- Cuticle oil or moisturizer
2. Clean your work area
Ensure that your work area is clean and free from any debris or clutter. This will provide you with a clean and organized space to work in, making the removal process easier and more efficient.
3. Protect your skin
Dip nails removal can be a messy process, so it’s important to protect your skin from any potential damage or irritation. Apply a barrier cream or lotion around your nails to create a protective barrier.
4. Remove any polish
If you have any polish or nail art on your dip nails, remove it using nail polish remover and cotton balls or pads. This will allow you to clearly see the dip powder and make the removal process easier.
5. File the top layer of your dip nails
Use a disposable nail file to gently file away the top layer of your dip nails. Be careful not to file too aggressively, as this can damage your natural nails. The purpose of this step is to break the seal and allow the acetone to penetrate and dissolve the dip powder more effectively.
Safety Tips to Consider when Using a Drill
1. Wear Protective Gear
Before using a drill, make sure to wear the appropriate protective gear. This includes safety goggles to protect your eyes from flying debris, gloves to protect your hands, and a dust mask to shield yourself from inhaling harmful dust particles.
2. Familiarize Yourself with the Drill
Read the instruction manual that comes with the drill and become familiar with its various components and functions. Understanding how to properly operate the drill will help reduce the chances of accidents or injuries.
3. Use the Right Drill Bit
When using a drill for nail removal, it is important to use the right drill bit for the task. Make sure to select a drill bit that is designed for nail removal to ensure efficient and safe use.
4. Start at a Low Speed
When beginning to use the drill, start at a low speed to get a feel for how the drill operates. Gradually increase the speed as needed, but never go beyond the recommended speed limit for the drill.
5. Secure the Workpiece
Ensure that the workpiece is properly secured before starting to drill. This will prevent it from moving or spinning unexpectedly, which can cause accidents or damage.
6. Maintain Proper Body Positioning
Stand or sit in a stable position with proper posture when using a drill. This will help maintain balance and prevent unnecessary strain or discomfort.
7. Keep Fingers and Clothing Clear
Avoid wearing loose clothing or accessories that may get caught in the drill. Also, keep your hands and fingers clear of the drilling area to prevent accidental injuries.
8. Use a Drill Press or Clamp for Stability
If possible, use a drill press or a clamp to secure the drill in place. This will provide stability and accuracy during the drilling process, reducing the risk of slips or mistakes.
9. Keep the Drill and Work Area Clean
Regularly clean the drill and work area to remove any debris or dust that may accumulate. A clean drill and work area will help maintain optimal performance and reduce the risk of accidents.
10. Disconnect Power Before Making Adjustments
Before making any adjustments to the drill, such as changing the drill bit or adjusting the depth, make sure to disconnect the power source. This will prevent accidental activation and potential injuries.
11. Seek Professional Help if Needed
If you are unsure about how to properly use a drill or if you encounter any issues or problems, do not hesitate to seek professional help. It is better to be safe and get assistance rather than risking accidents or damage.
Conclusion
By following these safety tips, you can ensure safe and efficient use of a drill for nail removal. Remember to always prioritize safety and take necessary precautions to minimize the risk of accidents or injuries.
Techniques for Drilling Dip Nails Safely
- Prepare the drill: Before you start drilling your dip nails, ensure that you have the right drill bit for the job. Choose a medium grit sanding band or a carbide bit specifically designed for dipping powder removal. Attach the drill bit securely to the drill and adjust the speed to a low or medium setting to avoid causing damage to your natural nails.
- Protect your skin and surrounding area: To prevent any accidental injuries or mess, it’s important to protect your skin and the surrounding area. Apply a petroleum jelly or a nail barrier cream to the skin around your nails as a protective layer. You can also use a small piece of tape to cover the skin if you prefer.
- Start with gentle pressure: When using the drill, start with gentle pressure to avoid filing too much of the dip nail at once. Slowly work your way around the nail, focusing on the areas where the dip powder is thickest. Use circular or back-and-forth motions, applying light pressure to gradually remove the dip powder until you reach the natural nail.
- Take breaks: Drilling dip nails can be a time-consuming process, so it’s important to take breaks to prevent overheating the nail or causing discomfort. Pause every few seconds to give your nails a chance to cool down. This will also help minimize the risk of filing too much of your natural nail by accident.
- Finish with a hand file: Once you have removed most of the dip powder with the drill, you can switch to a hand file to smooth out any remaining rough edges or ridges. Use a gentle filing motion and be careful not to file too aggressively, as this can weaken your natural nails.
We recommend consulting with a professional nail technician if you’re unsure about using a drill on your dip nails. They can provide guidance on proper technique and ensure your nails stay healthy throughout the removal process.
Aftercare Tips for Healthy Nail Recovery
After removing dip nails with a drill, it’s important to take proper care of your natural nails to promote healthy nail recovery. Follow these tips to ensure that your nails stay strong and healthy:
1. Keep your nails clean and dry
After the removal process, make sure to thoroughly clean your nails to get rid of any residue from the dip nail products. Use a gentle nail brush and warm water to clean the surface of your nails.
Additionally, it is crucial to keep your nails dry as excess moisture can lead to fungal infections. Avoid prolonged exposure to water and moisture, and always dry your nails thoroughly after washing.
2. Moisturize your nails and cuticles
Hydrating your nails and cuticles is essential for their overall health. Apply a nourishing cuticle oil or a hydrating nail serum to your nails and cuticles on a regular basis. This will help prevent dryness, cracking, and peeling.
Pay particular attention to your cuticles, as they play a vital role in nail health. Gently push back your cuticles using a cuticle pusher to promote healthy nail growth.
3. Avoid using harsh nail products
Give your nails a break from nail polish, gel manicures, and other harsh nail products for a while. Let your nails breathe and recover naturally.
If you do decide to apply nail polish, opt for a breathable formula that allows air and moisture to pass through to the nail bed.
4. Be gentle with your nails
Avoid using your nails as tools to open packages or perform other tasks that can put stress on them. This can cause them to weaken and break.
Use gloves when doing household chores, especially those that involve contact with water or harsh chemicals. These substances can damage your nails and hinder the recovery process.
5. Maintain a healthy lifestyle
Your overall health greatly impacts the health of your nails. Ensure that you eat a balanced diet rich in vitamins and minerals, as these contribute to strong nails. Drink plenty of water to stay hydrated, as this is crucial for nail health as well.
Incorporate regular exercise into your routine to stimulate circulation, which helps promote healthy nail growth.
6. Keep an eye out for any abnormalities
Monitor the condition of your nails regularly. Look out for any signs of infection, such as redness, swelling, pain, or pus. If you notice any abnormalities, consult a professional nail technician or a dermatologist for further guidance.
It’s also important to give your nails time to recover and grow naturally. Avoid applying another set of dip nails or acrylics immediately after the removal process. Give your natural nails a chance to regain their strength.
By following these aftercare tips, you can promote healthy nail recovery and maintain the overall health of your nails.
Alternatives to Using a Drill for Dip Nail Removal
While using a drill can be an efficient way to remove dip nails, some people prefer to avoid drills due to the potential damage they can cause to the natural nails. Fortunately, there are alternative methods you can try that are less aggressive but still effective in removing dip nails.
1. Soaking Method
One popular alternative to using a drill is the soaking method. To remove dip nails using this method, follow these steps:
- Fill a bowl or basin with warm water and add some gentle nail polish remover or acetone to it.
- Soak your nails in the solution for about 10 to 15 minutes.
- Gently scrape off the softened dip nails using a cuticle pusher or a manicure stick.
- Repeat the soaking process if needed until all the dip nails are removed.
This method may take a bit longer compared to using a drill, but it is considered safer for your natural nails.
2. Foil Method
Another alternative method for dip nail removal is the foil method. Here’s how you can do it:
- Soak small pieces of cotton balls or cotton pads in acetone.
- Place the soaked cotton on top of each nail.
- Wrap each finger with aluminum foil to hold the cotton in place.
- Leave the foil wraps on for about 15 to 20 minutes to allow the acetone to break down the dip nails.
- After the designated time, remove the foil wraps and gently scrape off the dip nails using a cuticle pusher or a manicure stick.
The foil method helps to speed up the removal process by allowing the acetone to penetrate the dip nails more effectively.
3. Manual Filing
If you prefer a more hands-on approach, you can remove dip nails using a manual filing method. Here’s what to do:
- Start by using a coarse nail file to file down the top layer of the dip nails.
- Continue filing gently until you reach the base coat of the dip nails.
- Once the base coat is exposed, switch to a finer nail file to smoothen and even out the surface.
- Afterward, you can buff the nails to further enhance the smoothness.
This method requires some patience and time, but it is a non-invasive option that doesn’t require the use of any chemicals.
4. Professional Removal
If you’re unsure about doing it yourself or if you have delicate or damaged nails, it’s best to seek professional assistance. Professional nail technicians have the skills and experience to safely remove dip nails without causing damage to your natural nails.
Ultimately, the choice of method for dip nail removal depends on your preferences and the condition of your nails. It’s essential to prioritize the health and safety of your natural nails to avoid any potential problems or damage.
FAQ:
What is a dip nail?
A dip nail, also known as a powder nail, is a type of nail enhancement where the nail is coated with a special powder and sealed with a clear topcoat.
What are some efficient ways to remove dip nails with a drill?
Some efficient ways to remove dip nails with a drill include using a coarse-grit drill bit to file away the top layer of the dip powder, then using a medium-grit drill bit to gently file down the remaining layers.
Can dip nails be removed without using a drill?
Yes, dip nails can be removed without using a drill. One efficient way is to soak the nails in acetone for about 10-15 minutes, then gently buff off the softened dip powder.
Is it necessary to use a drill to remove dip nails?
No, using a drill is not necessary to remove dip nails. While it can be a quicker and more efficient method, dip nails can also be safely removed using other methods such as soaking the nails in acetone or using a nail file.
Video:


Meet Harrison Clayton, a distinguished author and home remodeling enthusiast whose expertise in the realm of renovation is second to none. With a passion for transforming houses into inviting homes, Harrison's writing at https://thehuts-eastbourne.co.uk/ brings a breath of fresh inspiration to the world of home improvement. Whether you're looking to revamp a small corner of your abode or embark on a complete home transformation, Harrison's articles provide the essential expertise and creative flair to turn your visions into reality. So, dive into the captivating world of home remodeling with Harrison Clayton and unlock the full potential of your living space with every word he writes.


