Effective Ways to Troubleshoot and Repair a Non-Charging Drill Battery

Drill batteries are an essential component of any power tool, allowing for hours of reliable use. However, sometimes you may encounter a situation where your drill battery is not charging. This can be frustrating, especially when you have an important project to complete. Fortunately, there are several effective ways to troubleshoot and repair a non-charging drill battery.
Firstly, it is important to check the connections on the battery and charger. Over time, the contacts may become dirty or corroded, preventing a proper charge from being established. Use a clean, dry cloth to wipe the contacts on both the battery and charger, ensuring that they are free of dirt or debris. If there is corrosion present, use a small brush and a mixture of baking soda and water to gently clean the contacts. Rinse and dry thoroughly before reattaching the battery to the charger.
Another potential issue could be a faulty charger. If you have access to another compatible charger, try using it to charge the battery. If the battery charges successfully, then the original charger is likely the problem. In this case, you may need to replace the charger or have it repaired by a professional. It is also worth checking the power outlet to make sure it is functioning correctly, as an outlet with a faulty connection can also prevent proper charging.
If none of the above solutions resolve the issue, it is possible that the battery itself is the problem. Over time, batteries can lose their ability to hold a charge or develop internal faults. In this case, you may need to replace the battery with a new one. Consult the manufacturer’s guidelines or contact customer support to find the correct replacement battery for your specific drill model.
By following these troubleshooting steps, you can effectively diagnose and repair a non-charging drill battery. Remember to always prioritize safety when working with power tools and consult the manufacturer’s instructions for specific guidelines on battery maintenance and repair.
Common Reasons Why Drill Batteries Stop Charging
- Faulty Charging Connector: One of the common reasons why drill batteries stop charging is a faulty charging connector. The charging connector may become loose or damaged over time, preventing a proper connection between the battery and the charger.
- Defective Battery Cells: Another common reason for a drill battery not charging is the presence of defective battery cells. Battery cells can degrade over time due to heavy use or extended periods of inactivity. These defective cells can prevent the battery from holding a charge or recharging properly.
- Overheating: Excessive heat can also cause drill batteries to stop charging. When a battery overheats, it can cause the internal components to malfunction, leading to charging issues. Overheating can be caused by using the drill for extended periods without allowing it to cool down or by exposing the battery to high temperatures.
- Charger Malfunction: A malfunctioning charger can also be a reason why the drill battery stops charging. If the charger is not providing the correct voltage or current, it can prevent the battery from charging properly. It is essential to check the charger for any signs of damage or to use a different charger to troubleshoot the issue.
- Battery Age: The age of the battery can also affect its charging capabilities. Over time, the capacity of the battery can diminish, making it harder for it to hold a charge. If the battery is old, it may be time to consider replacing it with a new one.
When troubleshooting a non-charging drill battery, it is essential to check for these common reasons and take appropriate steps to address the issue. Whether it is repairing a faulty charging connector, replacing defective battery cells, or getting a new battery, understanding the possible causes can help in finding the most effective solution.
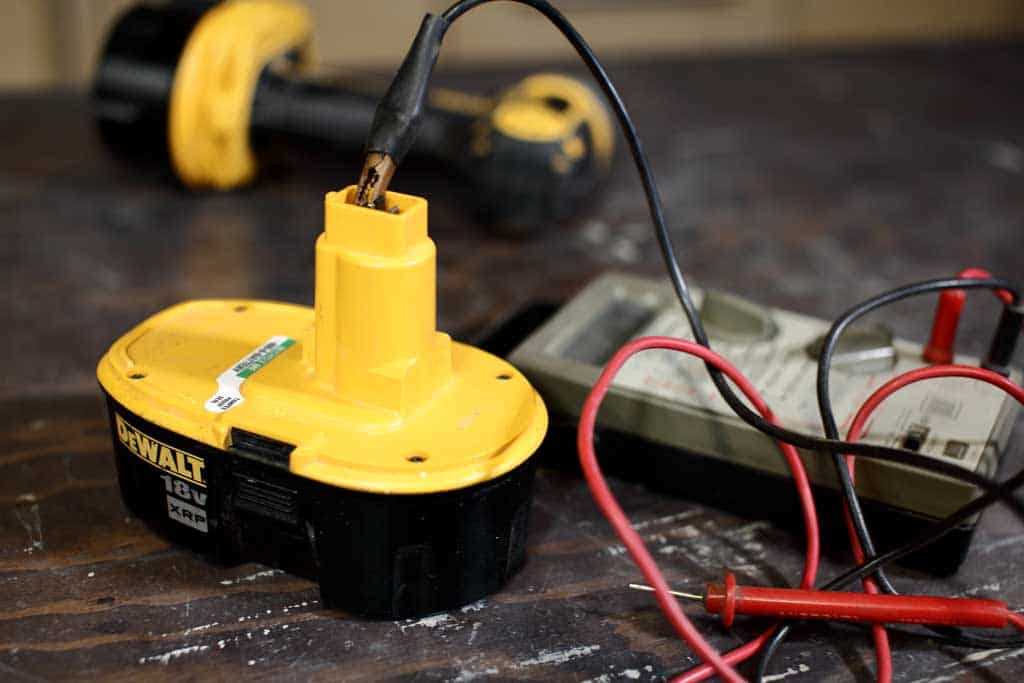
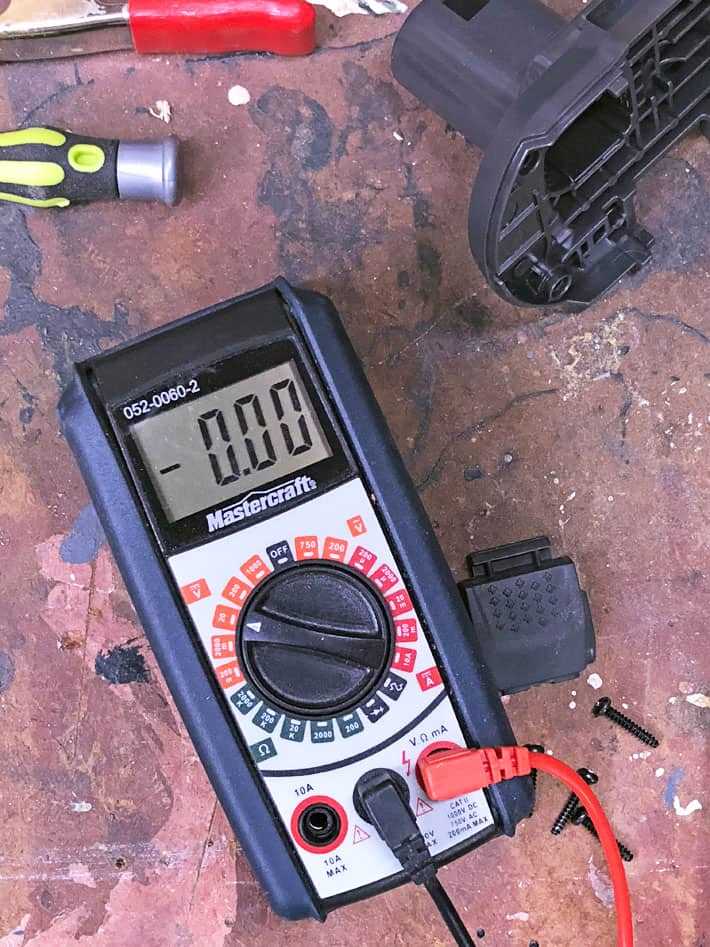
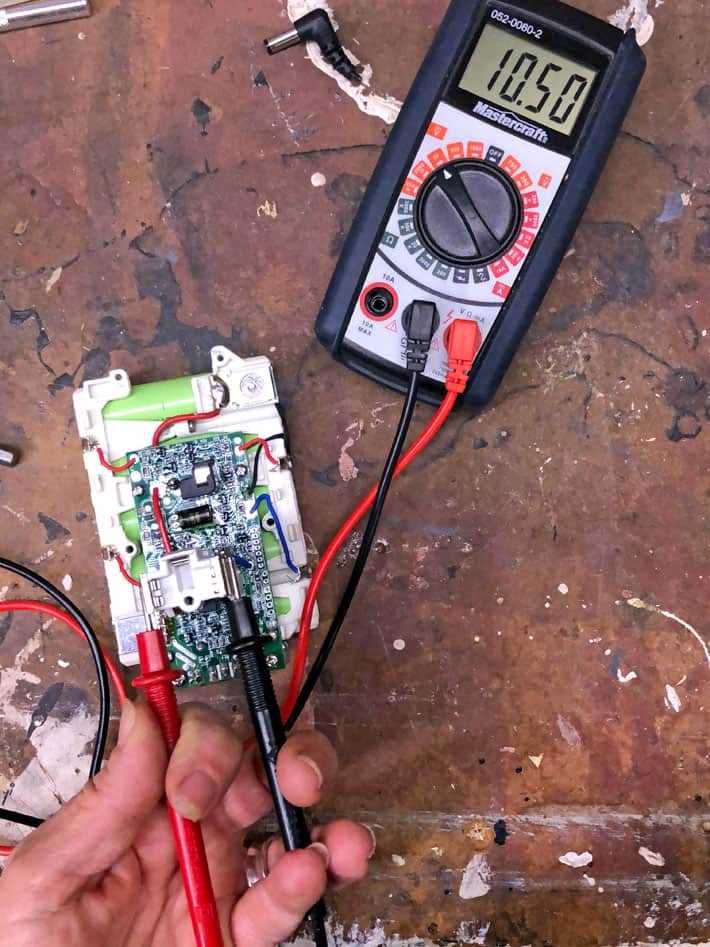
Testing the Battery Voltage
Before proceeding with any repairs or troubleshooting, it is important to check the battery voltage to determine if it is the cause of the issue. Testing the voltage will provide valuable information about the overall health of the battery and whether it needs to be replaced or repaired.
To test the battery voltage, you will need a digital multimeter or a voltage tester. Here are the steps to follow:

- Turn off the drill and remove the battery: Ensure that the drill is powered off and remove the battery from the drill.
- Set the multimeter: If you are using a digital multimeter, set it to the DC voltage setting within the appropriate range. If you are using a voltage tester, ensure it is set to the appropriate voltage range.
- Connect the test leads: Connect the red test lead to the positive terminal of the battery and the black test lead to the negative terminal of the battery.
- Read the voltage: Turn on the multimeter or voltage tester and read the voltage displayed. A fully charged battery should read approximately the rated voltage, which is usually printed on the battery itself. For example, if the battery is rated for 18 volts, a fully charged battery should read around 18 volts.
If the battery voltage is significantly lower than the rated voltage, it may indicate that the battery is depleted and needs to be recharged. In this case, try charging the battery and retest the voltage. If the voltage remains low after charging, it may be a sign of a faulty battery that needs to be replaced.
On the other hand, if the battery voltage is close to or within the acceptable range, it may indicate that the battery is not the cause of the non-charging issue. In this case, further troubleshooting will be required to identify and fix the underlying problem.
Testing the battery voltage is an important initial step in troubleshooting a non-charging drill battery. It helps to determine whether the battery is the culprit and guides the next steps in the repair process.
How to Replace the Charger
Replacing the charger of your non-charging drill battery can be a relatively simple process. Here are the steps to follow:

- Ensure that the drill is not connected to any power source and that the battery is removed.
- Inspect the charger for any visible damage such as frayed wires or broken components. If you notice any issues, it is recommended to replace the charger entirely.
- Identify the type of charger required for your specific drill battery model. This information can usually be found in the drill’s user manual or on the drill manufacturer’s website.
- Purchase a compatible charger either directly from the drill manufacturer or from a reputable retailer.
- Once you have the new charger, carefully disconnect the old charger from the drill, taking note of the specific connections.
- Connect the new charger to the drill, ensuring that the connections match the previous configuration.
- Double-check that the charger is securely attached to the drill and that all connections are tight.
- Plug the charger into a power outlet and let it charge the battery for the recommended time specified by the drill manufacturer.
- Monitor the charging process and make sure that the battery is charging properly. If you still encounter issues, it may be necessary to troubleshoot further or contact customer support for assistance.
By following these steps and replacing the charger with a compatible one, you should be able to resolve the non-charging issue with your drill battery.
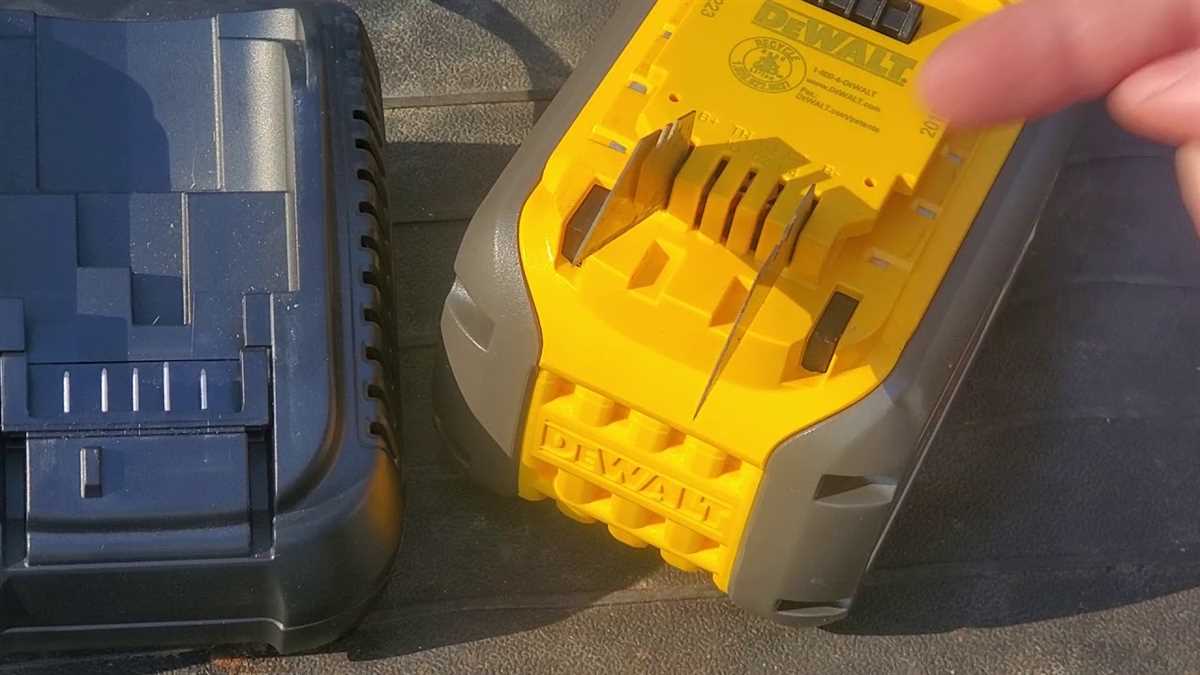
Cleaning the Battery Contacts
One common reason for a drill battery not charging is dirty or corroded battery contacts. Over time, dirt and debris can accumulate on the contacts, preventing a proper connection between the battery and the charger. Cleaning the battery contacts can help restore reliable charging and extend the lifespan of the battery.
Materials Needed:
- Clean cloth or paper towel
- Isopropyl alcohol
- Cotton swabs or toothbrush
Steps to Clean the Battery Contacts:

- Make sure the drill is turned off and the battery is removed.
- Use a clean cloth or paper towel to wipe away any loose dirt or debris from the battery and the battery contacts on the drill.
- Moisten a cotton swab or toothbrush with isopropyl alcohol.
- Gently scrub the battery contacts with the moistened cotton swab or toothbrush. Be careful not to apply too much pressure or damage the contacts.
- If there is stubborn dirt or corrosion, you can dip the cotton swab or toothbrush in isopropyl alcohol and scrub again.
- After cleaning, use a dry cloth or paper towel to wipe away any excess moisture.
- Reinsert the battery into the drill and ensure it is securely connected.
- Plug the charger into a power outlet and insert the battery into the charger.
- Allow the battery to charge fully before using it again.
Note: Before cleaning the battery contacts, always refer to the manufacturer’s instructions or guidelines provided with the drill and battery. Some manufacturers may recommend specific cleaning methods or materials to avoid damaging the contacts or voiding the warranty.
Regularly cleaning the battery contacts can help prevent charging issues and maximize the performance of your drill battery. If cleaning the contacts does not resolve the problem, further troubleshooting or battery replacement may be required.
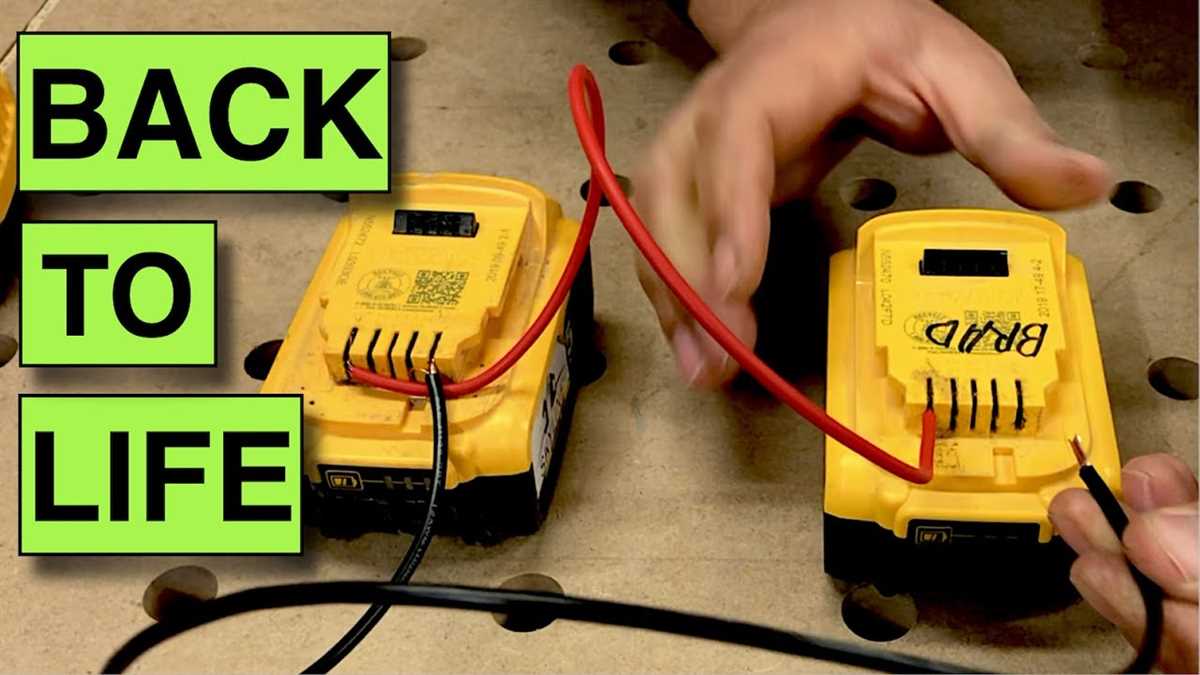
Reconditioning the Battery
If your drill battery is not holding a charge, reconditioning it may revive its performance. Reconditioning a battery involves charging and discharging it multiple times to help restore its capacity.
Here is a step-by-step guide on reconditioning your drill battery:

- Inspect the battery: Before reconditioning the battery, check for any signs of damage, leaks, or corrosion. If you notice any issues, it is recommended to replace the battery instead of reconditioning it.
- Discharge the battery: Connect the drill battery to the drill and turn it on until the battery is completely drained. This process helps remove any residual charge in the battery.
- Charge the battery: Place the battery in the charger and connect it to a power source. Allow the battery to charge fully, ensuring that it reaches its maximum capacity.
- Discharge the battery again: Repeat the process of using the drill until the battery is fully drained. This step helps to further condition the battery and improve its overall performance.
- Repeat the charging and discharging cycle: Repeat the process of charging and discharging the battery multiple times. Each cycle helps to recondition the battery and potentially improve its capacity to hold a charge.
- Store the battery: If you are not planning to use the drill battery immediately, store it in a cool and dry place. Avoid exposing the battery to extreme temperatures or moisture, as this can affect its performance.
Note: Reconditioning a battery does not guarantee that it will be fully restored to its original capacity. However, it can help improve its performance and extend its lifespan.
If reconditioning your battery does not solve the charging issue, it may be time to consider replacing the battery or seeking professional help.
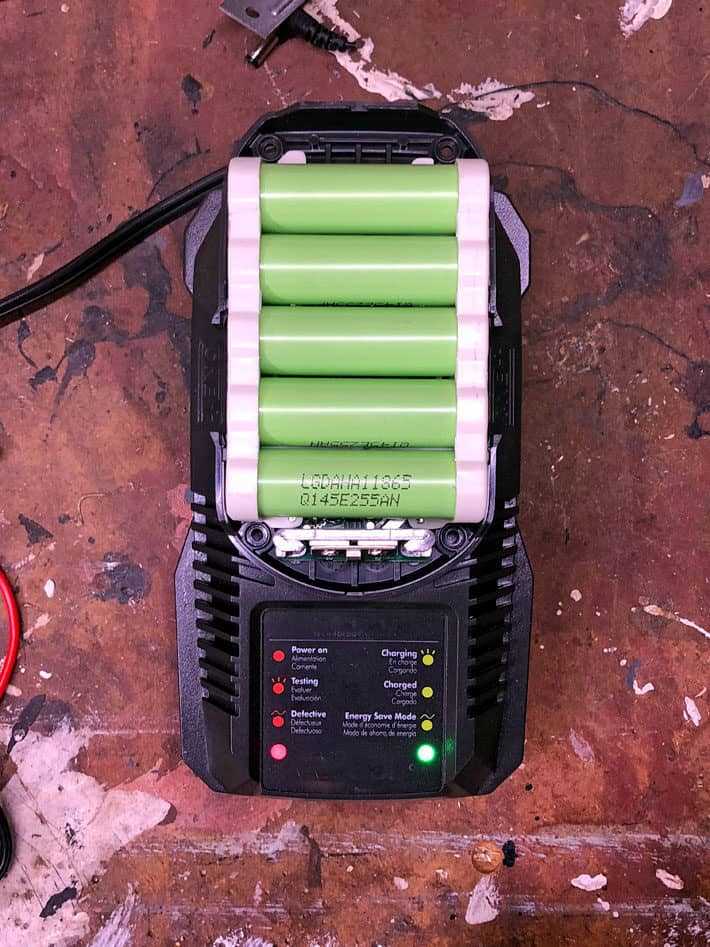
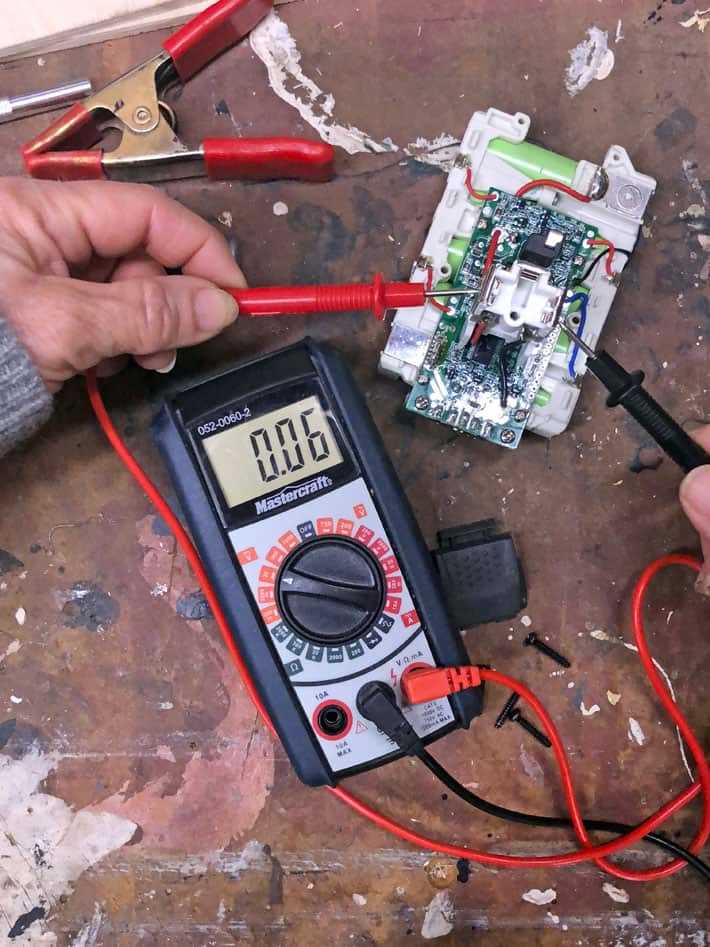
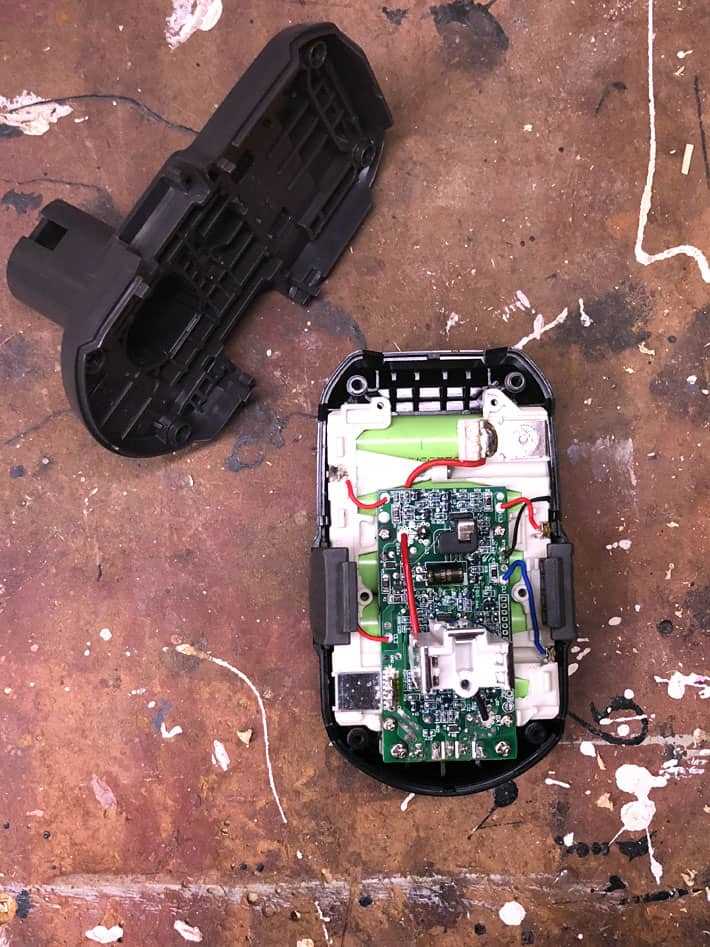
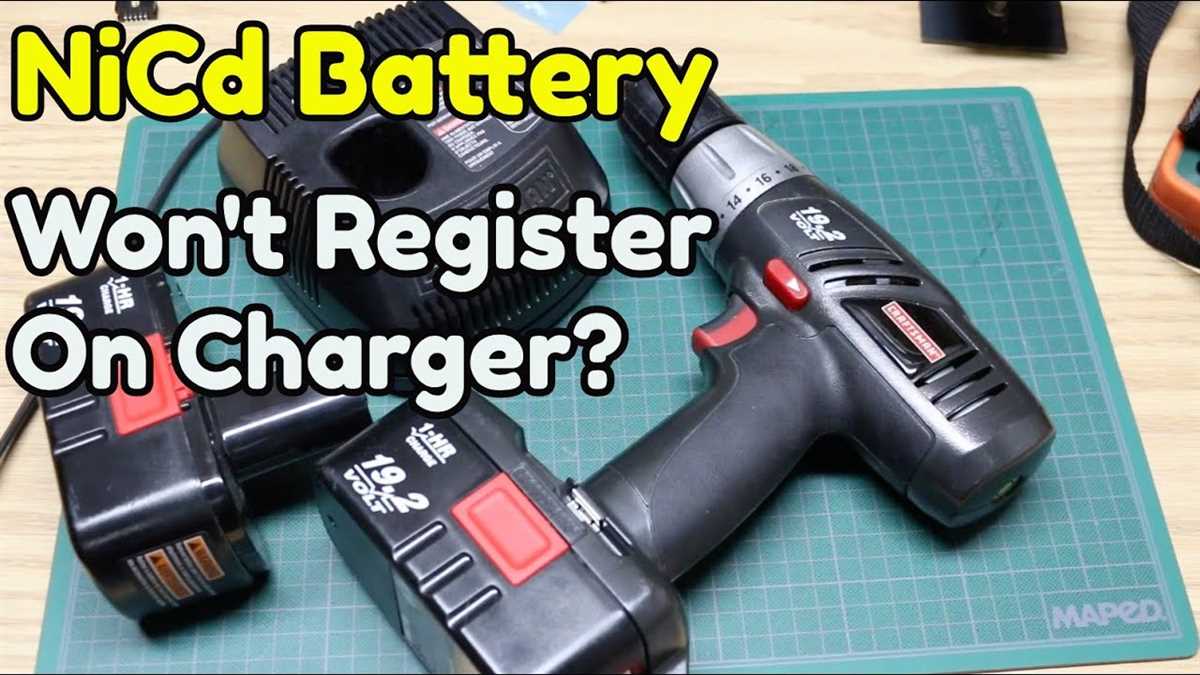
Checking the Battery Cells
To troubleshoot and repair a non-charging drill battery, one important step is to check the battery cells. The cells are the individual components inside the battery pack that hold the electrical charge. If a cell is damaged or not functioning properly, it can prevent the battery from charging.
Here are the steps to check the battery cells:
-
Remove the battery pack from the drill.
-
Inspect the exterior of the battery pack for any signs of physical damage such as cracks or leaks. If you notice any damage, it may indicate a faulty cell.
-
Using a screwdriver or a similar tool, carefully open the battery pack. Be cautious not to damage any internal components.
-
Once the battery pack is open, locate the individual battery cells. They are usually connected in a series with metal tabs.
-
Inspect each battery cell for any signs of damage, such as leaking or bulging. A damaged cell should be replaced.
-
Using a multimeter set to measure voltage, test the voltage of each battery cell. A fully charged cell should typically have a voltage of around 3.7 volts.
-
If any of the battery cells have a significantly lower voltage or no voltage at all, it indicates a faulty cell that needs to be replaced.
Replacing the faulty battery cell can sometimes solve the non-charging issue. However, it’s important to note that battery cell replacement requires advanced knowledge and skills in electronics. If you’re not confident in doing this yourself, it’s recommended to seek professional assistance or consider purchasing a new battery pack.
Checking the Battery Connectors
One common issue that can cause a non-charging drill battery is a problem with the battery connectors. The battery connectors are the metal pieces on the battery and the drill that make contact and allow for the flow of electricity.
To check the battery connectors, you will need to remove the battery from the drill. Once the battery is removed, inspect the connectors on both the battery and the drill. Look for any signs of damage or corrosion, such as rust or bent pins.
- If you notice any corrosion on the connectors, you can clean them using a small wire brush or a piece of sandpaper. Gently scrub away the corrosion until the connectors are clean and shiny.
- If the connectors are bent, you can carefully straighten them using a pair of pliers. Be gentle and take your time to avoid causing any further damage.
After cleaning or straightening the battery connectors, reinsert the battery into the drill and make sure it is securely in place. Try charging the battery again to see if the issue has been resolved.
If the battery connectors are still not making a good connection, you may need to replace them. Contact the manufacturer or a professional repair technician for assistance with replacing the battery connectors.
Getting Professional Help for Battery Repair
If you have tried all the DIY methods to troubleshoot and repair your non-charging drill battery but still haven’t had any success, it may be time to consider getting professional help. Battery repair professionals have the knowledge and experience to diagnose and fix battery issues that may be beyond your expertise.
Benefits of Professional Help
- Expertise: Battery repair professionals have extensive knowledge of different types of batteries and their specific issues. They can accurately diagnose the problem and provide the most effective solution.
- Access to Specialized Tools and Equipment: Professional repair technicians have access to specialized tools and equipment that may be necessary to repair your battery. These tools are often expensive and not commonly available for individual use.
- Warranty: Many battery repair professionals offer warranty on their services. This means that if the battery fails again within a certain period, they will repair it free of charge. This gives you peace of mind and protects your investment.
- Time and Effort Saving: By opting for professional help, you can save yourself the time and effort of troubleshooting and attempting complex repairs on your own. This allows you to focus on other tasks and ensures that the repair is done correctly the first time.
Choosing a Professional Battery Repair Service
When selecting a professional battery repair service, consider the following:
- Experience and Reputation: Look for a service with a good track record and positive reviews from previous customers. Experience in working with different types of batteries is also important.
- Certifications and Training: Check if the technicians are certified and have received proper training in battery repair. This ensures that they have the necessary skills and knowledge to handle your specific battery model.
- Price: Get quotes from multiple repair services to compare prices. However, keep in mind that the cheapest option may not always be the best. Consider the quality of the service and the warranty offered.
- Turnaround Time: Inquire about the estimated turnaround time for the repair. You may need your drill battery back in a specific timeframe, so it’s important to choose a service that can accommodate your needs.
Conclusion
If all else fails, seeking professional help for your non-charging drill battery is a wise decision. The expertise, specialized tools, warranty, and time-saving benefits offered by professional repair services can ensure that your battery is fixed correctly and efficiently. Take the time to research and select a reputable service that meets your needs and budget.
FAQ:
My drill battery is not charging, what could be the problem?
There could be several reasons why your drill battery is not charging. It could be due to a faulty charger, a damaged battery, or a problem with the charging port on the drill itself. To troubleshoot the issue, you can try using a different charger or battery to see if that solves the problem. If not, you may need to take your drill to a professional for further repair.
What should I do if my drill battery is not holding a charge?
If your drill battery is not holding a charge, it could be a sign that the battery is old and needs to be replaced. However, before purchasing a new battery, you can try reconditioning the existing one. This involves fully discharging the battery, then charging it completely. You can repeat this process a few times to see if it helps improve the battery’s performance. If not, it is likely time to invest in a new battery.
My drill battery is not charging, but the charger seems to be working fine. What should I do?
If the charger is working fine but your drill battery is not charging, the issue may lie with the battery itself. It could be that the battery cells are worn out or damaged, preventing it from holding a charge. In this case, you will need to replace the battery with a new one. Make sure to buy a battery that is compatible with your drill model to ensure proper function.
How do I know if my drill battery is completely dead?
If your drill battery is completely dead, it will not hold a charge at all. When you insert it into the charger, there will be no lights or indicators showing that it is charging. Additionally, the drill will not function when the battery is inserted. To confirm if your battery is dead, you can try using it in a different charger or drill to see if it gives any signs of life. If not, it is likely time to replace the battery.
Can I fix a non-charging drill battery myself or do I need professional help?
Depending on the issue causing the non-charging drill battery, you may be able to fix it yourself or require professional help. If the problem is with the charger, you can try using a different charger to see if that solves the issue. If the battery is faulty, you can try reconditioning it or replacing it with a new one. However, if the problem lies with the charging port on the drill itself, it is best to seek professional help as trying to fix it yourself may cause further damage.
Why is my drill battery charging slowly?
Several factors can cause a drill battery to charge slowly. It could be due to a faulty charger, a weak power source, or a problem with the battery itself. To troubleshoot the issue, try using a different charger or plugging the charger into a different power outlet to see if that speeds up the charging process. If not, it is possible that the battery is old and needs to be replaced.
How long should it take for a drill battery to fully charge?
The time it takes for a drill battery to fully charge can vary depending on the battery capacity and the charger’s output. On average, it can take anywhere from 1 to 4 hours to fully charge a drill battery. However, it is important to refer to the battery’s manual or the manufacturer’s instructions for specific charging times. Overcharging the battery can damage it, so it is crucial to follow the recommended charging time.
Video:


Harrison Clayton
Meet Harrison Clayton, a distinguished author and home remodeling enthusiast whose expertise in the realm of renovation is second to none. With a passion for transforming houses into inviting homes, Harrison's writing at https://thehuts-eastbourne.co.uk/ brings a breath of fresh inspiration to the world of home improvement. Whether you're looking to revamp a small corner of your abode or embark on a complete home transformation, Harrison's articles provide the essential expertise and creative flair to turn your visions into reality. So, dive into the captivating world of home remodeling with Harrison Clayton and unlock the full potential of your living space with every word he writes.