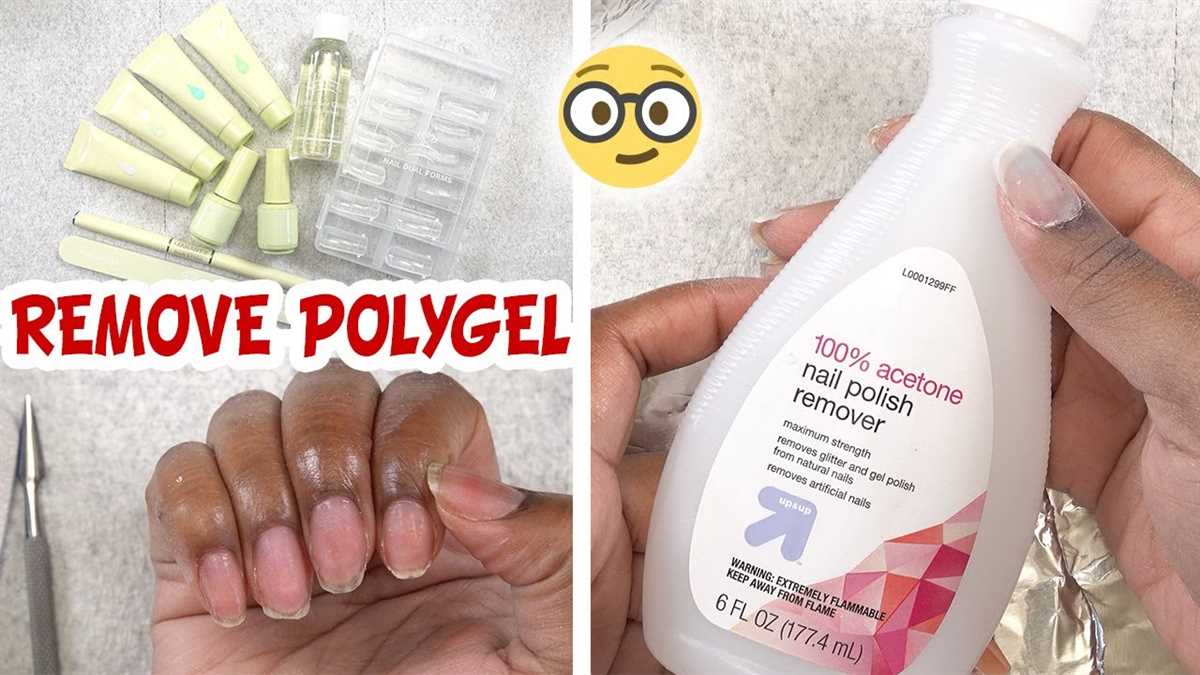
Easy Ways to Remove Polygel Nails Without a Drill

Are you tired of the hassle and damage caused by drilling off your polygel nails? Look no further! We’ve compiled a list of easy and effective methods to remove polygel nails without a drill. Say goodbye to expensive salon visits and hello to a pain-free removal process.
Method 1: Soaking in Acetone
One of the most popular and effective ways to remove polygel nails is by soaking them in acetone. Start by filing the top layer of the polygel to break the seal. Then, soak a cotton ball in acetone and place it on top of the nail. Secure it in place with a piece of foil and let it sit for 15-20 minutes. After that, gently remove the cotton ball and foil and use a cuticle pusher or an orange stick to gently push off the softened polygel.
Method 2: Warm Water Soak
If you prefer a non-chemical approach, you can try a warm water soak to remove your polygel nails. Begin by filling a bowl with warm water and adding a few drops of mild soap. Soak your nails in the warm soapy water for 15-20 minutes. The warm water will help to soften the polygel, making it easier to remove. After the soak, use a cuticle pusher or an orange stick to gently push off the softened polygel.

Method 3: Dental Floss Technique
For a quick and easy removal method, you can use dental floss to remove your polygel nails. Start by lifting the edge of the polygel nail using a cuticle pusher or an orange stick. Then, slide a piece of dental floss under the lifted edge and gently saw back and forth to loosen the polygel. Be careful not to pull too hard, as this may cause discomfort or damage to your natural nails. Continue this process until the entire polygel nail is removed.
Note: It is important to take your time and be gentle when removing polygel nails to avoid damaging your natural nails. After removing the polygel, be sure to moisturize and nourish your nails to restore their health and strength.
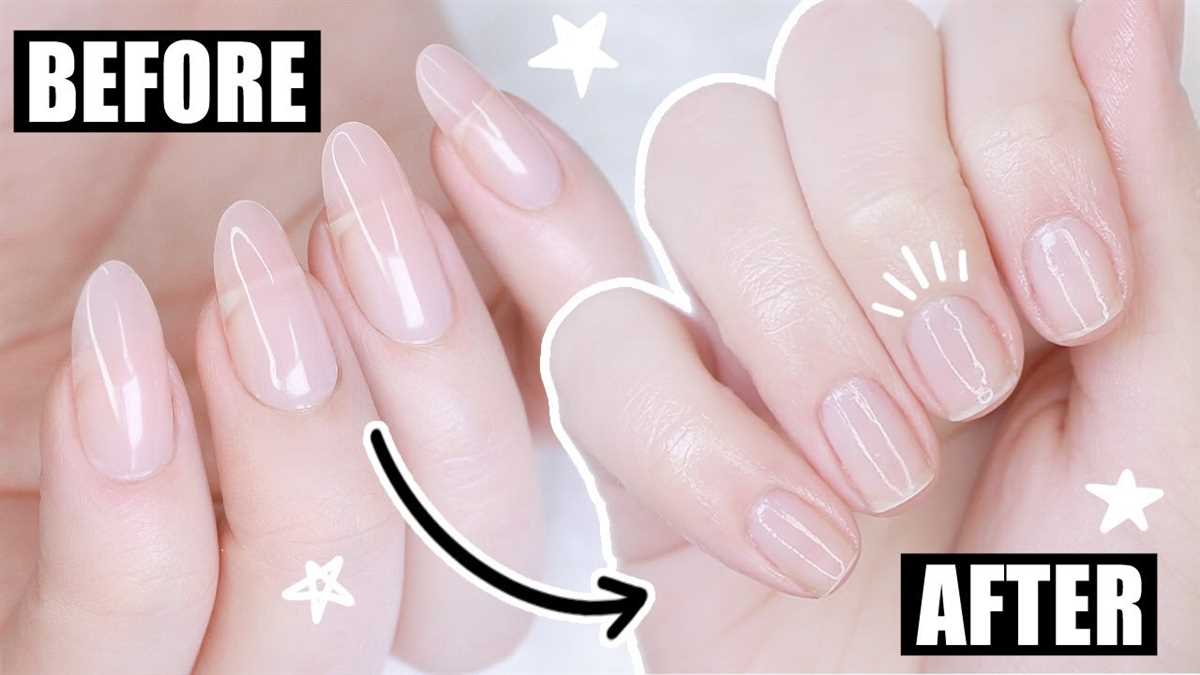
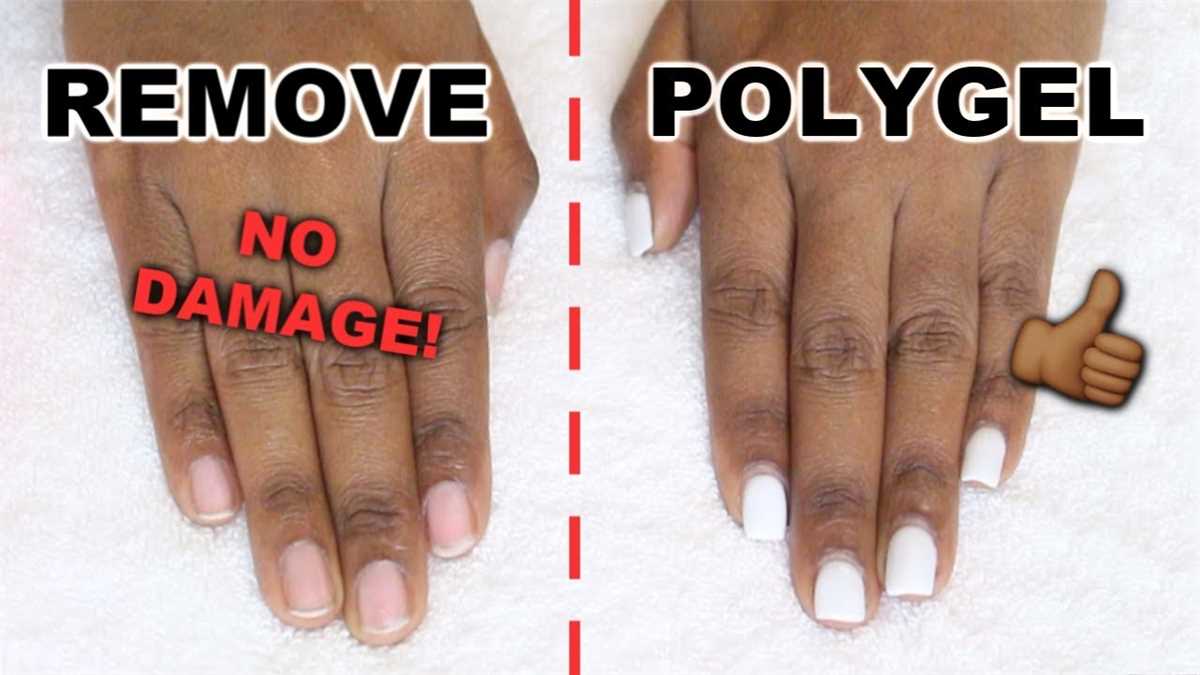
With these easy and effective methods, you can now confidently remove your polygel nails without the use of a drill. Say goodbye to the hassle and hello to a pain-free removal process. Remember to always take your time and be gentle to protect the health of your natural nails. Happy removing!
Why You Should Remove Polygel Nails
Polygel nails have become a popular trend in the world of nail art. They offer a long-lasting and durable alternative to traditional gel or acrylic nails. However, there are several reasons why you may want to remove your polygel nails.
1. Nail Health
One of the main reasons to remove polygel nails is to maintain the health of your natural nails. While polygel nails are designed to be gentler on the nails compared to other artificial nail products, they can still cause damage if not properly cared for. The weight of the polygel and the chemicals used to adhere it can weaken and thin the natural nails over time.

2. Nail Growth
Removing polygel nails allows your natural nails to grow freely. While wearing polygel nails, your natural nails are unable to breathe or receive the necessary nutrients to promote healthy growth. By removing the polygel nails, you give your nails a chance to grow and strengthen.
3. Maintenance and Fill-Ins
Polygel nails require regular maintenance and fill-ins to keep them looking their best. This can be time-consuming and costly, especially if you prefer to have them done professionally. By removing your polygel nails, you can save both time and money by opting for a simpler and more low-maintenance nail routine.
4. Change of Style
If you’re ready for a change of style or want to experiment with different nail designs, removing polygel nails is necessary. Unlike regular nail polish, polygel nails cannot be easily removed or changed on a whim. By removing the polygel nails, you have the freedom to switch up your nail style as often as you like.
5. Damage or Lifting
Sometimes, polygel nails can become damaged or start to lift from the natural nail. This can cause discomfort and increases the risk of water and bacteria getting trapped between the polygel and natural nail, leading to infection. In such cases, it is best to remove the polygel nails to prevent any further damage or complications.

Conclusion
While polygel nails offer many benefits, there are also valid reasons to remove them. Whether it’s for nail health, growth, maintenance, style change, or addressing damage, taking proper care of your natural nails should be a priority. If you decide to remove your polygel nails, there are various methods available that allow you to do so without a drill.
Protect Nail Health
When removing polygel nails, it’s important to take steps to protect the health of your natural nails. Here are some tips to keep in mind:
1. Use Acetone
Acetone is a common ingredient in nail polish removers and can help break down the polygel. Soak a cotton ball in acetone and place it over your nail. Secure it with a piece of aluminum foil or a nail clip to keep it in place. Let it sit for about 15 minutes to allow the polygel to soften.
2. Gently File the Surface
Once the polygel has softened, use a gentle nail file to lightly file the surface of the nail. This will help remove any remaining polygel and make the removal process easier.
3. Be Patient
It’s important to be patient during the removal process. Rushing or forcing the polygel off can cause damage to your natural nails. Instead, take your time and be gentle to avoid any unnecessary harm.

4. Moisturize Your Nails
After removing the polygel, it’s essential to replenish moisture in your nails. Apply a nourishing cuticle oil or a moisturizing nail cream to keep your nails hydrated and healthy.
5. Give Your Nails a Break
After wearing polygel nails, give your natural nails a break to recover and grow. Avoid applying any new enhancements or products immediately after removal. Let your nails breathe and regain their strength.
6. Maintain Good Nail Care
Make sure to maintain good nail care practices to keep your nails healthy. Trim them regularly, keep them clean, and avoid using harsh chemicals or tools on your nails. This will help prevent damage and maintain their overall health.
By following these tips, you can remove your polygel nails without a drill while keeping your natural nails healthy and strong.

Prevent Damage
- Before removing your polygel nails, it’s important to prepare them properly to minimize damage to your natural nails.
- Start by trimming your nails as short as possible without causing any pain or discomfort.
- Use a gentle nail file or buffer to remove the top layer of the polygel, being careful not to file down to your natural nail.
- Soak your nails in warm, soapy water for 10-15 minutes to soften the polygel.
- After soaking, dry your nails thoroughly with a clean towel.
Tip: Applying cuticle oil or petroleum jelly to the skin around your nails before soaking can help protect your skin from drying out.
Once your nails are properly prepared, you can use one of the following methods to remove the polygel:
- Method 1: Acetone Soak
- Fill a small bowl with acetone and soak your nails in it for 10-15 minutes.
- After soaking, use a cuticle pusher or an orange stick to gently scrape off the softened polygel.
- If there are any stubborn areas, you can soak your nails for a few more minutes and then repeat the scraping process.
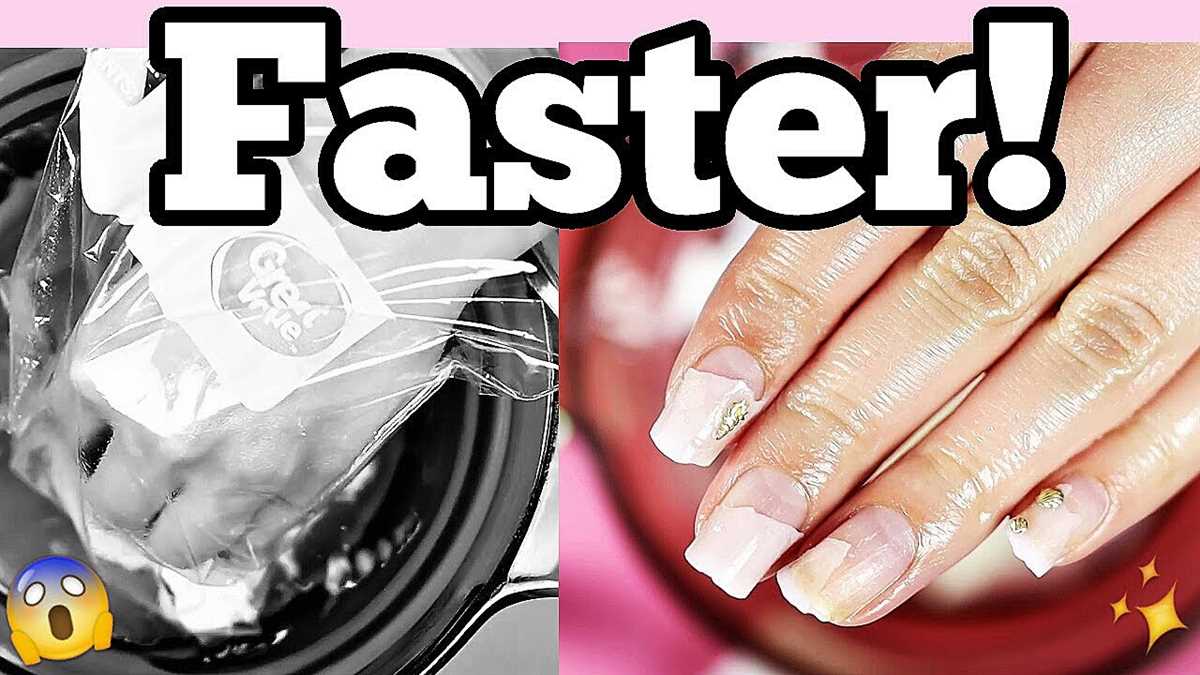
- Method 2: Aluminium Foil Wrap
- Cut small pieces of aluminum foil, large enough to wrap around each nail.
- Soak a cotton ball or pad in acetone and place it on top of your nail.
- Wrap the foil around your finger, securing the cotton ball in place.
- Repeat this process for all your nails.
- Leave the foil wraps on for 10-15 minutes to allow the acetone to penetrate and soften the polygel.
- After the allotted time, remove the foil wraps and use a cuticle pusher or orange stick to gently scrape off the polygel.
Remember to take breaks and be patient during the removal process to avoid causing damage to your natural nails.
Once all the polygel has been removed, you can gently file and buff your natural nails to smooth out any roughness.
Improve Nail Appearance

1. Keep Your Nails Clean and Neat
To improve the appearance of your nails, it is essential to maintain proper hygiene. Keep your nails clean by washing them regularly with soap and water, especially after removing any nail enhancements or polish. Trim your nails regularly to prevent them from becoming too long and prone to breakage. Use a nail file to shape your nails and smooth out any rough edges.
2. Moisturize Your Nails and Cuticles
Moisturizing your nails and cuticles is crucial for maintaining their health and improving their appearance. Apply a cuticle oil or a moisturizing cream specifically designed for nails to keep them hydrated and prevent dryness. Massage the oil or cream into your nails and cuticles daily to nourish them and promote healthy nail growth.
3. Avoid Harsh Chemicals
Using excessive amounts of harsh chemicals can damage your nails and make them appear dull and brittle. Avoid exposing your nails to chemicals such as acetone and harsh cleaning agents. When using nail polish removers, choose acetone-free formulas or opt for gentler methods like soaking your nails in warm water and using a cuticle pusher to gently remove any remaining product.
4. Use a Base Coat and Top Coat
Applying a base coat and top coat can help improve the appearance of your nails while providing protection. A base coat creates a smooth surface and helps prevent pigments from staining your nails. It also helps the polish adhere better, prolonging its wear time. A top coat adds shine, enhances the color, and protects the polish from chipping.
5. Avoid Nail Biting or Picking
Biting or picking at your nails can cause damage and hinder their growth. It can also create an uneven surface and make your nails appear jagged and unattractive. If you have a habit of biting or picking your nails, try finding alternative stress-relief methods or keep your nails painted to discourage the behavior.
6. Protect Your Nails
Protecting your nails from external factors can help maintain their appearance and prevent damage. Wear gloves while doing household chores or using harsh cleaning agents to shield your nails from chemicals and abrasion. Additionally, avoid using your nails as tools to open packages or scrape off labels, as this can cause them to chip or break.
7. Maintain a Healthy Diet
A nutrient-rich diet plays a significant role in improving the health and appearance of your nails. Include foods rich in vitamins, minerals, and proteins, such as leafy greens, lean meats, eggs, and nuts, to promote strong and healthy nails. Drink plenty of water to stay hydrated, as dehydration can lead to dry and brittle nails.
8. Visit a Professional Nail Technician
If you are struggling to improve the appearance of your nails or have specific concerns, consider visiting a professional nail technician. They can provide guidance, treatments, and services tailored to your needs, such as nail extensions, strengthening treatments, or nail art. A professional can also assess any underlying issues and recommend appropriate solutions.
By following these tips and incorporating them into your nail care routine, you can improve the appearance of your nails and keep them healthy and beautiful.
Save Money
Removing polygel nails without a drill can save you money in several ways:
No Need to Buy a Nail Drill
The biggest cost savings come from not having to invest in a nail drill. Nail drills can range in price from $50 to several hundred dollars, depending on the brand and features. By learning how to safely remove polygel nails without a drill, you can avoid this expense altogether.
Reuse Your Tools
When removing polygel nails without a drill, you can reuse many of the tools and supplies you already have. All you need are acetone, cotton balls or pads, aluminum foil, and an orangewood stick or cuticle pusher. These items are relatively inexpensive and can be easily found at most beauty supply stores or online.
Extend the Life of Your Polygel Nails
By learning how to remove polygel nails without a drill, you can extend the life of your current set. This means fewer trips to the nail salon for removal and application of new polygel nails. Over time, these savings can add up.
Do It Yourself
Another way to save money is by removing your polygel nails at home instead of going to a salon. Salons often charge a fee for nail removal, especially if you didn’t get your nails done there. By learning how to do it yourself, you can avoid these fees and save money.
Less Maintenance
Using a drill to remove polygel nails can sometimes lead to damage or thinning of the natural nail surface. This can result in the need for additional maintenance or repairs, which can be costly. By using gentle hand removal methods, you reduce the risk of damage and the associated costs.
In conclusion, removing polygel nails without a drill can help you save money by avoiding the need to purchase expensive nail drills, reusing tools and supplies you already have, extending the life of your current set, avoiding salon fees, and reducing the need for additional maintenance. So why not give it a try and start saving today?
Non-Drill Methods for Removing Polygel Nails
Although using a drill is a popular method for removing polygel nails, it can be quite aggressive and can damage the natural nails if not done properly. If you prefer a more gentle approach, there are several non-drill methods you can try to remove your polygel nails.
1. Soaking in Acetone
One of the most common non-drill methods for removing polygel nails is soaking them in acetone. Here’s how you can do it:
- Start by filing the top layer of your polygel nails to break the seal.
- Next, soak a cotton ball in acetone and place it directly on top of your nail.
- Secure the cotton ball in place by wrapping your nail with aluminum foil.
- Leave it on for around 10-15 minutes to allow the acetone to break down the polygel.
- After the time is up, gently remove the foil and the cotton ball.
- Use a cuticle pusher or an orangewood stick to gently push off the softened polygel from your nails.
Remember to be patient and gentle during the removal process to avoid damaging your natural nails.
2. Using a Polygel Dissolver
Another non-drill method for removing polygel nails is using a polygel dissolver. These dissolvers are specifically designed to break down polygel without the need for drilling. Here’s how you can use a polygel dissolver:
- Apply a generous amount of polygel dissolver onto your nails.
- Use a cotton ball or pad to spread the dissolver evenly across your nails.
- Wait for the dissolver to penetrate the polygel and soften it.
- Once the polygel has softened, use a cuticle pusher or an orangewood stick to gently push off the polygel from your nails.
Make sure to follow the instructions provided by the manufacturer when using a polygel dissolver.
3. Using Nail Polish Remover
If you don’t have acetone or a polygel dissolver, you can also try using a nail polish remover that contains acetone. Here’s how:
- Start by filing the top layer of your polygel nails to break the seal.
- Soak a cotton ball in the nail polish remover.
- Place the soaked cotton ball on top of your nail.
- Secure it in place with aluminum foil.
- Leave it on for around 10-15 minutes to allow the acetone to break down the polygel.
- Gently remove the foil and the cotton ball.
- Use a cuticle pusher or an orangewood stick to push off the softened polygel from your nails.
Keep in mind that nail polish remover may not be as effective as pure acetone or a polygel dissolver, so you may need to repeat the process multiple times.
Remember to moisturize your nails and cuticles after removing polygel to keep them healthy and hydrated.
Soak-off Method
Removing polygel nails without a drill can be done using the soak-off method. This method involves soaking the nails in acetone to break down the polygel and make it easier to remove.
Here is a step-by-step guide on how to remove polygel nails using the soak-off method:
1. Gather the necessary supplies:
– Acetone
– Cotton balls or pads
– Aluminum foil
– Cuticle pusher or orangewood stick
– Nail buffer or file
– Moisturizing lotion or oil
2. Start by buffing the top layer of the polygel nails to break the seal and remove the shine. This will allow the acetone to penetrate the polygel more effectively.
3. Soak a cotton ball or pad in acetone and place it on top of the nail. Make sure the cotton ball covers the entire nail.
4. Wrap each finger with aluminum foil to secure the cotton ball in place and create a barrier to prevent evaporation.
5. Repeat steps 3 and 4 for all the nails.
6. Let the acetone soak for about 15-20 minutes, or until the polygel becomes soft and starts to lift.
7. After the soak-off time, remove one finger at a time from the foil and gently press the cotton ball onto the nail to wipe away the softened polygel.
8. Use a cuticle pusher or orangewood stick to gently push off any remaining polygel from the nail surface. Be careful not to damage the natural nail.
9. If there are any stubborn areas, you can reapply the acetone-soaked cotton ball and foil wrap for a few more minutes.
10. Once all the polygel has been removed, use a nail buffer or file to smooth out any rough edges or residue.
11. Finally, apply a moisturizing lotion or oil to nourish and hydrate the nails and cuticles.
Note: It is important to take breaks between soaking-off the nails to prevent excessive drying of the skin. If you experience any discomfort or irritation during the process, stop and consult a professional nail technician.
Using the soak-off method is a safe and effective way to remove polygel nails without the use of a drill. Just remember to take your time and be gentle to avoid damaging your natural nails.
Using Acetone
Acetone is a common and effective solution for removing polygel nails. Here is a step-by-step guide on how to use acetone to remove polygel nails:
- Start by gathering all the necessary materials: acetone, cotton balls, aluminum foil, nail buffer, cuticle pusher, and a nail file.
- Use a nail buffer to gently file the surface of the polygel nails. This will help the acetone penetrate the layers of the polygel.
- Soak a cotton ball in acetone and place it on top of one nail.
- Wrap the aluminum foil around the cotton ball to secure it in place. Repeat this step for all the nails.
- Let the acetone soak into the polygel nails for about 15-20 minutes.
- After the soaking time is complete, carefully remove the foil wraps from each nail.
- Gently push back the cuticles using a cuticle pusher.
- Use a nail file to gently remove any remaining polygel residue from the nails.
- Finish off by washing your hands with soap and water to remove any traces of acetone.
Remember to moisturize your hands and nails after removing the polygel nails to keep them hydrated and healthy.
DIY Removal Techniques
If you don’t have access to a drill or prefer to remove your polygel nails without using one, there are a few DIY techniques you can try at home. These methods may take a bit more time and effort, but they can be effective in safely removing your polygel nails.
1. Soaking Method
- Start by gently filing the top layer of your polygel nails with a coarse nail file to break the seal and remove the shine.
- Fill a bowl with warm water and add a few drops of cuticle oil or mild dish soap.
- Soak your nails in the warm water for about 10-15 minutes to soften the polygel.
- After soaking, use a cuticle stick or orange wood stick to gently push off the softened polygel from your nails.
- If there are any stubborn areas, you can lightly file them away using a gentle nail file.
- Finish by moisturizing your nails with cuticle oil and applying a nourishing hand cream.
2. Acetone Wraps
- Gently file the top layer of your polygel nails to break the seal.
- Take a cotton ball or pad and soak it in acetone.
- Place the soaked cotton ball on top of your nail and wrap it tightly with a small piece of aluminum foil.
- Repeat this process for each nail, ensuring that the cotton ball is in direct contact with the polygel.
- Leave the acetone wraps on for about 15-20 minutes to allow the acetone to break down the polygel.
- After the allotted time, remove the wraps and use a cuticle stick or orange wood stick to gently push off the softened polygel.
- If needed, lightly file away any remaining polygel residue using a nail file.
3. Combination Method
If you’re dealing with particularly stubborn polygel nails, you can combine both the soaking and acetone wrap methods for an effective removal technique.
- Start by gently filing the top layer of your polygel nails to break the seal and remove the shine.
- Fill a bowl with warm water and add a few drops of cuticle oil or mild dish soap.
- Soak your nails in the warm water for about 5-10 minutes to soften the polygel.
- After soaking, remove your nails from the water and dry them off.
- Take a cotton ball or pad and soak it in acetone.
- Place the soaked cotton ball on top of your nail and wrap it tightly with a small piece of aluminum foil.
- Repeat this process for each nail and leave the wraps on for about 10-15 minutes.
- After the allotted time, remove the wraps and use a cuticle stick or orange wood stick to gently push off the softened polygel.
- If there are any stubborn areas, you can lightly file them away using a gentle nail file.
Remember to take your time and be gentle when removing your polygel nails. It’s important to avoid forcefully ripping or pulling off the polygel, as it can damage your natural nails.
Seeking Professional Help
If you are unsure about removing your polygel nails on your own or if you have sensitive nails, it is highly recommended to seek professional help. Nail technicians are trained to safely and efficiently remove polygel nails without causing damage to the natural nails.
Here are some advantages of getting professional help:
- Expertise: Nail technicians have the knowledge and experience to remove polygel nails properly. They are familiar with various techniques and products that can help make the process quick and painless.
- Safety: Professionals take the necessary precautions to protect your natural nails from damage. They will ensure that the removal process is done gently without causing any harm.
- Efficiency: Nail technicians are equipped with professional tools and products that can speed up the removal process. They can also save you time and effort compared to trying to remove the polygel nails on your own.
- Customized Approach: A professional nail technician can assess the condition of your nails and choose the most appropriate removal method for you. They can tailor the process to your specific needs, ensuring the best possible outcome.
When seeking professional help, make sure to choose a reputable nail salon or spa. Look for establishments that prioritize cleanliness and hygiene. You can also ask for recommendations from friends or read reviews online to find a trusted nail technician.
Remember, removing polygel nails without proper knowledge or tools can lead to nail damage. Seeking professional help is the safest and most reliable way to have your polygel nails removed.
FAQ:
Can I remove polygel nails without using a drill?
Yes, you can remove polygel nails without a drill. There are several easy ways to do it at home using acetone and other household items.
What materials do I need to remove polygel nails without a drill?
To remove polygel nails without a drill, you will need acetone, cotton balls or pads, aluminum foil, a cuticle stick, and a nail file.
How long does it take to remove polygel nails without a drill?
The time it takes to remove polygel nails without a drill can vary depending on the thickness of the polygel and the method used. Generally, it can take anywhere from 15 minutes to 1 hour.
Can I reuse the polygel after removing it without a drill?
No, once the polygel has been removed, it cannot be reused. It is best to discard it and use a fresh batch for your next application.
Video:

Meet Harrison Clayton, a distinguished author and home remodeling enthusiast whose expertise in the realm of renovation is second to none. With a passion for transforming houses into inviting homes, Harrison's writing at https://thehuts-eastbourne.co.uk/ brings a breath of fresh inspiration to the world of home improvement. Whether you're looking to revamp a small corner of your abode or embark on a complete home transformation, Harrison's articles provide the essential expertise and creative flair to turn your visions into reality. So, dive into the captivating world of home remodeling with Harrison Clayton and unlock the full potential of your living space with every word he writes.


