Easy Steps to Successfully Drill into Particle Board

Particle board is a common material used in furniture and carpentry projects. It is made from wood particles and resin, creating a strong and durable board. However, drilling into particle board requires some precautions to avoid splitting or splintering the material. By following a few simple steps, you can easily drill into particle board without damaging the surface.
Step 1: Choose the Right Drill Bit
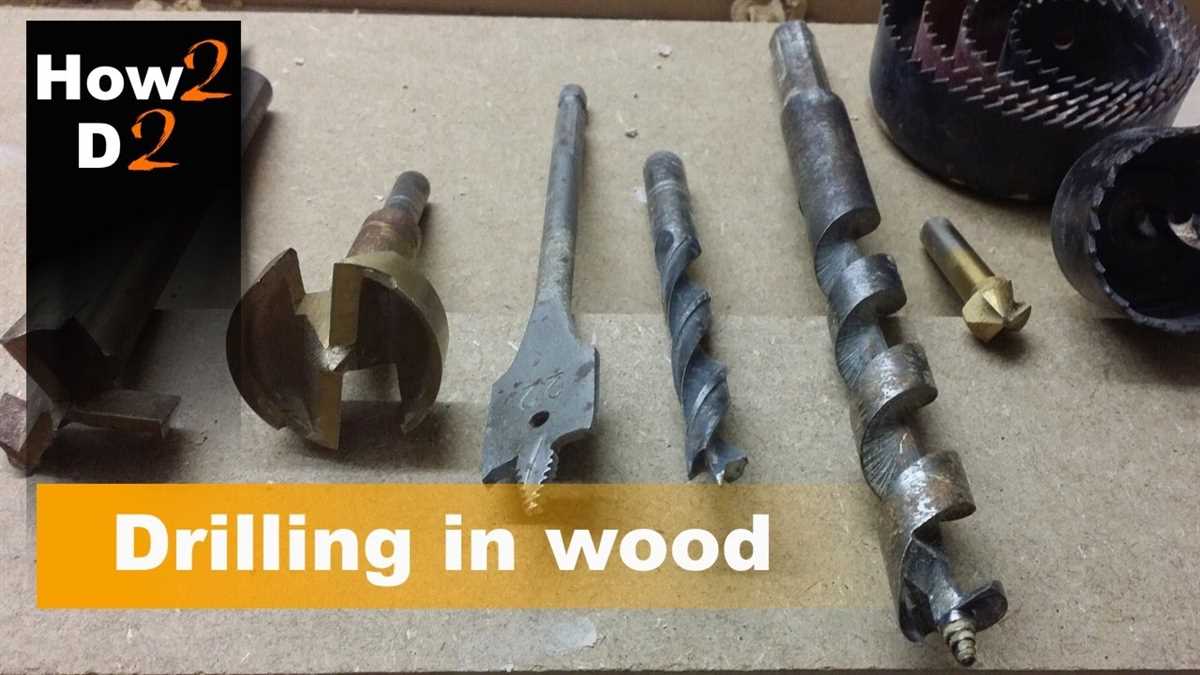
When drilling into particle board, it is important to select the right drill bit. A sharp, high-speed steel bit is ideal for this task. It will provide a clean cut without causing any damage to the particle board. Avoid using dull or worn-out drill bits as they can lead to splintering and make it difficult to create a clean hole.
Step 2: Mark the Drill Hole
To ensure accuracy, mark the exact spot on the particle board where you want to drill. You can use a pencil or a marker for this purpose. This will help prevent any mistakes and ensure that the hole is drilled in the right place.
Step 3: Use a Backer Board
Particle board is prone to splitting and splintering, especially at the exit point of the drill. To prevent this, place a backer board behind the particle board before drilling. A scrap piece of wood or a plywood sheet works well as a backer board. It will provide support and prevent any damage to the surface of the particle board.
Pro Tip: Apply masking tape on the surface of the particle board before drilling to further reduce the risk of splintering.
Step 4: Start Drilling
Now you are ready to drill into the particle board. Use a steady and even pressure to drill the hole. Start with a low speed and gradually increase the speed as you go. This will help prevent any sudden movements that could cause the particle board to chip or splinter.
Step 5: Remove the Backer Board
Once you have drilled the hole, remove the backer board to reveal a clean and smooth hole in the particle board. Inspect the hole to ensure that there are no splinters or rough edges. If necessary, use sandpaper to smooth out any imperfections.
By following these easy steps, you can successfully drill into particle board without any issues. Remember to take your time and use the right tools to ensure a clean and professional result.
Preparing the Drill
Before starting to drill into particle board, it’s important to properly prepare your drill and gather the necessary tools. Here are the easy steps to follow for a successful drilling experience:
- Select the right drill bit: Choose a drill bit that is suitable for drilling into wood or particle board. A general-purpose twist bit or a brad-point bit would work well. Make sure the drill bit is sharp to ensure clean and precise holes.
- Adjust the drill speed: Set the drill speed to low or medium to avoid causing any damage to the particle board. High-speed drilling can cause the board to splinter or chip, making the hole less neat.
- Secure the particle board: Place the particle board on a stable work surface or clamp it securely to prevent it from moving while drilling.
- Measure and mark the drilling location: Use a pencil or a measuring tape to determine the exact spot where you want to drill the hole. Make a small mark to ensure accurate drilling.
- Create a pilot hole: If you are drilling a large hole, it’s recommended to start with a pilot hole. This small pilot hole will guide the larger drill bit and help prevent the particle board from splitting.
- Protect the surface below: Place a piece of scrap wood or a sacrificial board underneath the particle board to prevent tear-out or damage to the work surface.
By following these simple steps, you will be well-prepared to drill into particle board. Remember to take your time and apply gentle pressure while drilling to achieve the best results without damaging the material.
Choosing the Right Drill Bit
When drilling into particle board, it’s important to choose the right drill bit to ensure success. Using the wrong bit can lead to splitting, chipping, or even breaking the particle board.
Here are some key factors to consider when choosing a drill bit for particle board:
1. Material
The material of the drill bit can greatly affect its performance on particle board. For drilling into particle board, it’s recommended to use a drill bit made of high-speed steel (HSS) or carbide.
2. Size
The size of the drill bit will determine the diameter of the hole it creates. When drilling into particle board, it’s best to use a bit that is slightly smaller than the diameter of the screw or anchor you will be using. This will help ensure a tight fit and prevent the particle board from splitting.
3. Point Type
There are different types of drill bit points, such as twist, brad, and spade points. For particle board, a twist point is typically the best option. This type of point allows for easier penetration without causing excessive damage to the particle board.
4. Coating
Some drill bits come with coatings that can help improve their performance and durability. When drilling into particle board, a drill bit with a titanium or black oxide coating can provide added strength and reduce friction, resulting in smoother drilling.
5. Speed and Pressure
Regardless of the type of drill bit you choose, it’s important to use the appropriate speed and pressure when drilling into particle board. Using too much force or drilling at high speeds can cause the particle board to chip or crack. Take your time and apply steady, even pressure to ensure clean and accurate holes.
6. Choosing the Right Bit Type
Depending on your project, you may need different types of drill bits for different tasks. For example, if you’re drilling pilot holes, a twist bit or brad point bit can work well. If you’re drilling large holes, a spade bit might be more appropriate. Consider the specific requirements of your project when choosing the right drill bit.
By taking these factors into consideration, you can choose the right drill bit for your particle board drilling needs. Remember to always follow safety guidelines and wear appropriate protective gear when operating power tools.
Marking the Drilling Area
Before you start drilling into particle board, it is important to properly mark the area where you want to drill. This will ensure that your holes are drilled in the right place and that your project turns out as planned.
Here are some easy steps to follow when marking the drilling area:
- Measure and mark: Use a measuring tape to determine the exact location where you want to drill the hole. Mark the spot with a pencil or a marker.
- Double-check: Take a moment to double-check your measurements and ensure that you have marked the correct spot. This will help prevent any mistakes before you start drilling.
- Use a square: If you need to drill multiple holes in a straight line, use a square to ensure that your marks are in a straight line. This will help maintain the alignment of the holes.
- Consider the material: Take into account the thickness and composition of the particle board. If it is a thicker material, you may need to use a longer drill bit. Also, if the particle board has a veneer finish, be careful not to damage it when drilling.
- Use masking tape: To further prevent any damage to the particle board, you can apply a small piece of masking tape over the mark. This can help reduce the chances of the wood chipping or splitting when you start drilling.
By following these steps, you can ensure that you accurately mark the drilling area on your particle board project. This will help make the drilling process much easier and increase the chances of successfully drilling into the particle board without any issues.
Securing the Particle Board
After drilling the holes into the particle board, it is important to secure it properly to ensure stability and prevent any potential damage. Here are some steps to securely fasten the particle board:
1. Choose the right screws
When securing particle board, it is important to use screws specifically designed for this type of material. Opt for screws that are made for wood or particle board, as they will have the right shape and thread pattern to effectively grip the material.
2. Pre-drill pilot holes
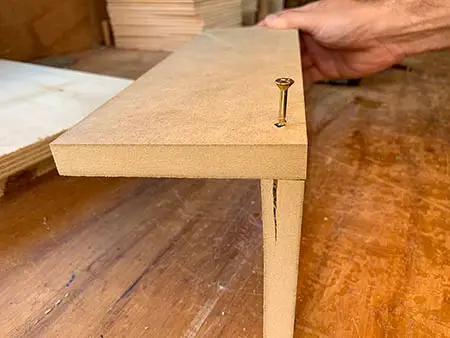
Before inserting the screws, it is recommended to pre-drill pilot holes into the particle board. This will help prevent the material from splitting and ensure that the screws go in smoothly.
Use a drill bit that is slightly smaller than the diameter of the screws you are using. Make sure the pilot holes are drilled straight and at the desired location.
3. Insert the screws
Once the pilot holes are drilled, align the screw holes on the particle board with the corresponding holes on the surface you are attaching it to. Insert the screws into the pilot holes and use a screwdriver or drill to drive them in, but be careful not to over-tighten them as it can cause the particle board to crack.
4. Check for stability

After securing the particle board, check for stability by applying pressure and gently shaking it. If there is any movement or wobbling, consider adding more screws or using larger screws to provide additional support.
5. Cover the screw heads
If desired, you can cover the exposed screw heads with screw caps or fillers to create a more finished look. There are various options available, including wood-colored caps or fillers that can be painted over to match the surrounding surface.
Follow the instructions provided with the chosen screw caps or fillers to properly cover the screw heads.
By following these steps, you can securely fasten particle board and ensure that it remains stable and durable over time.
Setting the Drill Speed
One important aspect of successfully drilling into particle board is setting the drill speed correctly. The drill speed should match the type of drill bit you are using and the density of the particle board.
1. Select the appropriate drill bit.
- The right drill bit can make a big difference in the success of your drilling. For particle board, a regular twist bit or a spade bit can work well.
- For larger holes, such as those needed for cable routing, a hole saw may be the best option.
- Choose the appropriate drill bit size for your project and ensure it is sharp and in good condition.
2. Adjust the drill speed setting.
- Most drills have adjustable speed settings, typically indicated by numbers or a range.
- For drilling into particle board, it is generally recommended to use a lower speed setting to avoid chip-out and splintering. Start with a speed of 500-1000 RPM (revolutions per minute) and adjust as needed.
3. Test the drill speed on a scrap piece of particle board.
- Before drilling into your actual project, it is always a good idea to test the drill speed on a scrap piece of particle board.
- Drill a small hole using the selected drill bit and observe the result. If the speed is too high, you may experience splintering or an uneven hole. If the speed is too low, the drilling process may feel difficult and slow.
- Adjust the drill speed accordingly until you achieve clean and smooth holes.
4. Use light pressure and a steady hand.
- Regardless of the drill speed, it is important to apply light pressure while drilling into particle board. Excessive pressure can lead to cracking or splintering.
- Keep a steady hand to maintain control over the drilling process and prevent the drill bit from wandering.
By following these steps and adjusting the drill speed accordingly, you can successfully drill into particle board without damaging the material.
Applying Steady Pressure

When drilling into particle board, it’s important to apply steady pressure to avoid any damage or splintering. Here are some steps to follow:
- Choose the right drill bit: Use a drill bit specifically designed for woodworking. A brad point bit or a spade bit are good options for drilling into particle board.
- Mark the drilling spot: Use a pencil or a marker to mark the spot where you want to drill. Double-check the placement to ensure accuracy.
- Secure the particle board: Place the particle board on a stable surface or clamp it down to prevent it from moving during the drilling process.
- Start drilling: Position the drill bit on the marked spot and start drilling at a slow speed. Apply gentle pressure and let the drill do the work. Avoid using excessive force, as it can cause the bit to slip or the particle board to splinter.
- Regularly remove the wood shavings: As you drill, wood shavings may accumulate around the hole. Stop periodically to clear away the shavings, as they can interfere with the drilling process and affect the quality of the hole.
- Control the drilling depth: If you need to drill to a specific depth, use a depth stop or wrap a piece of tape around the drill bit as a reference point. This will help you maintain control over the drilling depth and prevent drilling too deep.
Remember, take your time and apply steady pressure to achieve clean and precise holes in particle board.
Clearing the Dust
One important step in drilling into particle board is to clear the dust that accumulates during the drilling process. Dust can interfere with the drilling process and can also cause health hazards if inhaled.
Here are some easy steps to clear the dust:
- Wear protective gear, such as goggles and a dust mask, to avoid inhaling the dust.
- Use a brush or a vacuum cleaner with a brush attachment to remove the dust from the surface of the particle board.
- If necessary, use a damp cloth to wipe away any remaining dust.
- Dispose of the dust in a proper manner, such as sealing it in a bag and throwing it in the trash.
By clearing the dust, you can ensure that your drilling process is smooth and safe.
Finishing Touches
Once you have successfully drilled into your particle board, there are a few finishing touches that can enhance the overall appearance and durability of your project.
1. Sanding
After drilling, it’s a good idea to sand the area around the hole to smooth out any rough edges or imperfections. This can be done using sandpaper or a sanding block. Be sure to sand in a circular motion to blend the area seamlessly with the surrounding particle board.
2. Filling Holes
If there are any holes or gaps remaining after drilling, you can fill them with wood filler or putty. Apply the filler with a putty knife, making sure to press it firmly into the hole and smooth it out. Once the filler is dry, sand it down to create a flush surface.
3. Sealing
To protect the particle board from moisture and further damage, consider sealing the surface with a clear varnish or sealant. Apply the sealant using a brush or roller, following the manufacturer’s instructions. This will provide an extra layer of protection and help preserve the particle board’s integrity.
4. Painting or Staining

If you want to add some color or enhance the appearance of your project, you can paint or stain the particle board. Before painting, be sure to prime the surface to ensure better adhesion. If you choose to stain, apply the stain evenly with a brush or cloth, following the wood grain. Allow the paint or stain to dry completely before using or applying any further finishes.
5. Adding Hardware

If you are drilling into particle board to attach hardware, such as handles or knobs, make sure to choose appropriate hardware that is compatible with particle board. Use screws designed for particle board and ensure they are the correct length to avoid damaging the material. Follow the manufacturer’s instructions for installing the hardware.
6. Cleaning up
After completing your drilling project and applying any necessary finishes, be sure to clean up the work area. Remove any dust or debris using a vacuum or broom. Wipe down the surface with a damp cloth to remove any remaining residue or fingerprints. Keeping your project clean will help maintain its appearance and longevity.
By following these finishing touches, you can ensure that your particle board project looks professional and is built to last.
FAQ:
What is particle board made of?
Particle board is made of small wood particles or fibers that are bonded together with an adhesive.
Can I drill into particle board without a pilot hole?
Although it is possible to drill into particle board without a pilot hole, it is recommended to use a pilot hole to prevent splitting and to ensure a clean and accurate hole.
What type of drill bit should I use for drilling into particle board?
It is recommended to use a brad-point drill bit or a standard twist drill bit for drilling into particle board. These types of drill bits are designed to cut through wood fibers cleanly and without causing damage.
Do I need to use a special drill speed for drilling into particle board?
When drilling into particle board, it is best to use a moderate drill speed. Too high of a speed can cause the drill bit to overheat and potentially burn the particle board, while too low of a speed can cause the drill to become jumpy and result in an uneven hole.
How can I prevent the particle board from splitting when drilling?
To prevent particle board from splitting when drilling, it is important to use a pilot hole, especially if you are drilling near the edges. Additionally, applying masking tape over the area you plan to drill can help reduce the risk of splitting.
What are some tips for drilling into particle board?
Some tips for drilling into particle board include using a sharp drill bit, drilling at a steady pace without applying excessive force, and using a backing board to support the particle board and reduce tear-out.
Video:


