Easy Steps to Sharpen Drill Bits with a Dremel

Keeping your drill bits sharp is essential for efficient and clean cuts. However, buying new drill bits every time they become dull can be costly. That’s where a Dremel comes in handy. A Dremel is a versatile rotary tool that can be used for a variety of tasks, including sharpening drill bits.
Sharpening your drill bits with a Dremel is a simple process that can be done in a few easy steps. First, gather the necessary tools and materials, including a Dremel rotary tool, a sharpening stone attachment, safety goggles, and a vise to securely hold the drill bit.
Once you have everything ready, secure the drill bit in the vise, making sure it is held firmly in place. Put on your safety goggles to protect your eyes from any debris that may come off during the sharpening process. Attach the sharpening stone to your Dremel and set it to a low speed. Using a gentle and consistent pressure, slowly move the sharpening stone against the cutting edge of the drill bit, being careful to maintain the original shape and angle. Repeat this process until the cutting edge is sharp and free from any imperfections.
By following these easy steps, you can extend the life of your drill bits and ensure clean and precise cuts every time. With a Dremel and a little bit of practice, you’ll be able to easily sharpen your drill bits and save money in the long run.
Preparing the Drill Bit

Before you begin sharpening your drill bit with a Dremel, it’s important to properly prepare the drill bit. This will ensure that you achieve the best results and avoid any potential accidents or damage.
Clean the Drill Bit
The first step in preparing the drill bit is to clean it. Use a brush or cloth to remove any excess dirt, debris, or rust from the surface of the bit. This will help you see the condition of the bit more clearly and prevent any interference during the sharpening process.
Inspect the Drill Bit
After cleaning, carefully inspect the drill bit for any damage or excessive wear. Look for signs of chipping, dullness, or any irregularities in the cutting edges. If you notice any significant damage, it may be necessary to replace the drill bit rather than attempting to sharpen it.
Secure the Drill Bit
Once you have confirmed that the drill bit is in good condition, securely clamp it onto a stable work surface. This will prevent any movement or slipping during the sharpening process, which could be dangerous and affect the quality of the sharpening.
Prepare Safety Gear
Sharpening drill bits can create flying debris, so it’s crucial to protect yourself with appropriate safety gear. Wear safety glasses to shield your eyes from any metal shavings or fragments that may be generated during the sharpening process. Gloves are also recommended to protect your hands from potential injury.

Refer to the Drill Bit’s Specifications
Before sharpening the drill bit, refer to the manufacturer’s specifications or guidelines if available. Some drill bits may have specific angles or taper requirements that should be followed during the sharpening process. Following these guidelines will help you achieve the best sharpening results and maintain the drill bit’s effectiveness.
Gathering the Tools and Materials
Before you can start sharpening your drill bits with a Dremel, you will need to gather a few essential tools and materials. These include:
- A Dremel rotary tool with a grinding attachment
- A bench vise or a clamp to secure your drill bit
- Safety glasses or goggles to protect your eyes from flying debris
- A workbench or sturdy table to set up your tools
- A small cup of water or coolant to prevent overheating
- A sharpie or a marker to mark the cutting edges of the drill bit
- A wire brush or a cleaning cloth to remove debris
- A piece of wood or a sharpening jig to create a guide for your drill bit
Having these tools and materials ready beforehand will ensure a smooth and efficient sharpening process.
Setting up the Dremel
Before you can start sharpening your drill bits with a Dremel, you’ll first need to make sure the tool is set up correctly. Follow these steps to get your Dremel ready for the sharpening process:
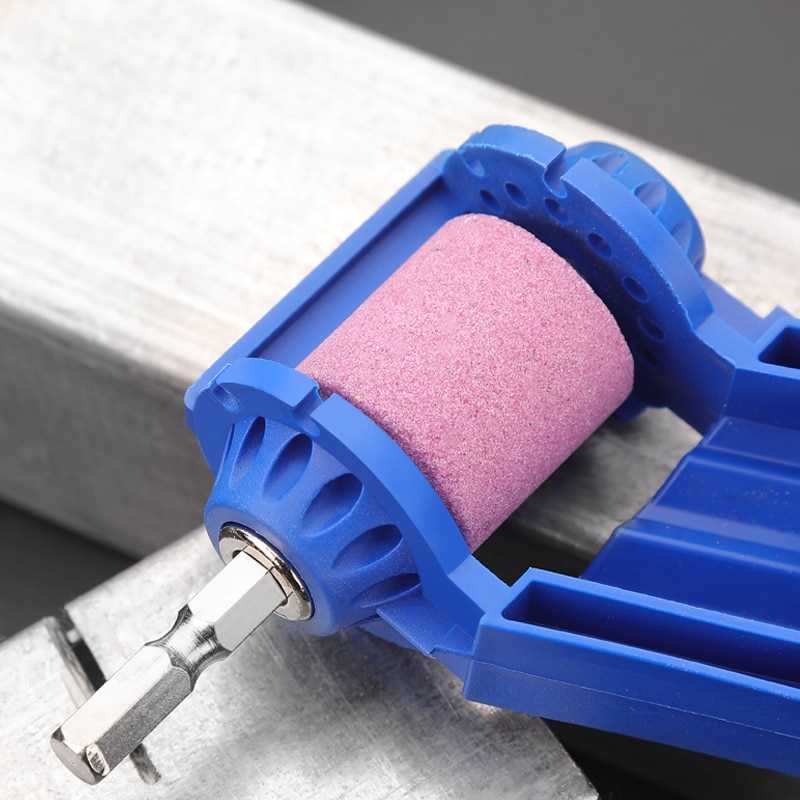
- Choose the right grinder attachment: The Dremel comes with different grinder attachments, each designed for specific tasks. For sharpening drill bits, you’ll need a grinding attachment with a small, cylindrical stone or a dedicated drill bit sharpening attachment. Make sure you have the correct attachment before proceeding.
- Secure the Dremel: Find a stable work surface and secure the Dremel in place. You can use a vice or a clamp to hold the tool securely, ensuring it won’t move while you’re sharpening the drill bits.
- Attach the grinding stone or sharpening attachment: Take the chosen grinder attachment and insert it into the Dremel. Make sure it is securely attached and properly aligned with the tool.
- Adjust the speed setting: Most Dremel models have variable speed settings. For sharpening drill bits, it’s recommended to use a medium to high speed setting. Consult your Dremel’s user manual to learn how to adjust the speed.
Once you’ve completed these steps, your Dremel should be ready for sharpening your drill bits. Remember to always wear safety goggles and work in a well-ventilated area when using power tools.

Securing the Drill Bit
Before you begin sharpening the drill bit, it’s important to securely fasten it in place. This will ensure a safe and efficient sharpening process.
1. Gather the necessary tools:
- A vice or clamp
- A set of pliers (optional)
2. Prepare the workspace:
Find a suitable workspace where you can securely attach the vice or clamp. Ensure that the surface is stable and won’t move during the sharpening process.
3. Insert the drill bit:
- Open the jaws of the vice or clamp.
- Place the drill bit into the jaws, making sure it is centered and aligned properly. The cutting edge should face up.
- Tighten the vice or clamp to securely hold the drill bit in place. Be careful not to overtighten, as this can damage the drill bit.
- If you don’t have a vice or clamp, you can use a set of pliers to hold the drill bit instead. However, this method may not provide as much stability, so use caution.
4. Double-check the security:
Before proceeding with the sharpening process, give the drill bit a gentle tug to ensure it is firmly held in place. If it moves or feels loose, readjust the vice or clamp to secure it properly.
5. Position the workspace:
Arrange your workspace so that you can comfortably access the drill bit while sharpening it. This will ensure accuracy and minimize the risk of accidents.

Adjusting the Angle
One of the most important aspects of sharpening drill bits is adjusting the angle of the bit. The angle determines the cutting edge and the sharpness of the bit. A proper angle helps the bit cut through materials more effectively and ensures clean and accurate holes.
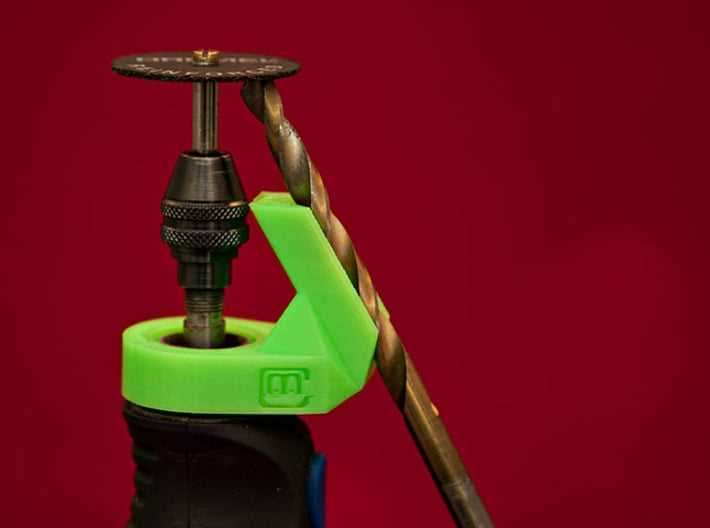
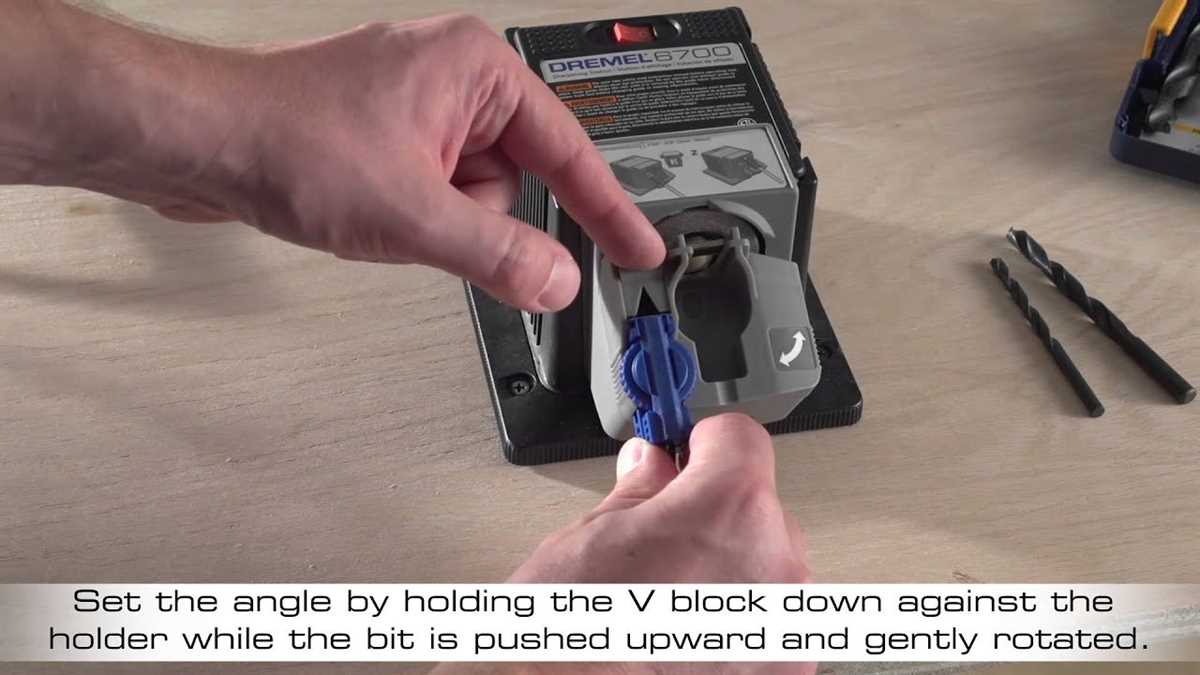
To adjust the angle, you will need an adjustable tool rest. This tool rest is usually included with a Dremel rotary tool kit or can be purchased separately. The tool rest allows you to position the bit at the desired angle.
Start by loosening the screws or knobs that hold the tool rest in place. Once loosened, you can adjust the angle by moving the tool rest up or down. The specific angle you need will depend on the type of drill bit you are sharpening and the material you will be drilling into.
It is recommended to refer to the manufacturer’s guidelines for the correct angle for each drill bit type. Alternatively, you can also find angle charts or guides that provide recommended angles for different drill bit types and materials.
Once you have set the tool rest to the desired angle, tighten the screws or knobs to secure it in place. It is important to make sure the tool rest is secure to maintain the accuracy of your sharpening.

When adjusting the angle, remember to take into account any wear on the drill bit. If the cutting edge is already significantly worn, you may need to adjust the angle slightly to compensate and ensure proper sharpening.
By adjusting the angle correctly, you can ensure that your drill bits are sharpened effectively and will provide clean and precise holes.
Starting the Sharpening Process
Before you begin sharpening your drill bits, it’s important to gather all the necessary materials and ensure a safe working environment. Here are the steps to get started:
- Put on safety goggles and work gloves to protect your eyes and hands from any flying debris.
- Secure your drill bit in a bench vise or a drill bit sharpening jig to hold it in place during the sharpening process.
- Attach the grinding stone attachment to your Dremel tool.
- Plug in your Dremel tool and turn it on. Ensure that the grinding stone is rotating smoothly and securely.
- Inspect the drill bit for any chips or damaged edges. If there are any, use a file or bench grinder to reshape the bit before moving on to the sharpening process.
With all the necessary preparations done, you are now ready to move on to the actual sharpening process of your drill bits. It’s important to follow the proper techniques to ensure effective and safe sharpening. The next section will guide you through the step-by-step process.
Applying the Grinding Stone
Once you have prepared your Dremel tool and secured the drill bit, it’s time to start sharpening. Follow the steps below to effectively apply the grinding stone:
- Position the drill bit: Hold the drill bit firmly against the grinding stone, making sure it aligns with the proper angle for sharpening. The angle will depend on the type of drill bit you are sharpening, so refer to the manufacturer’s guidelines if needed.
- Turn on the Dremel: Start the Dremel tool at a medium speed. Remember to always wear safety goggles and protective gloves when operating the tool.
- Apply gentle pressure: Slowly move the drill bit against the grinding stone, while maintaining a steady pressure. The grinding stone will gradually remove the dull metal and shape the cutting edge of the drill bit.
- Monitor the progress: Keep a close eye on the drill bit as you sharpen it. Check for a consistent and even surface along the cutting edge. If necessary, reposition the drill bit to ensure that all parts are evenly sharpened.
- Cooling breaks: To prevent overheating, take short breaks during the sharpening process. This will allow the drill bit and grinding stone to cool down and prevent any damage that could be caused by excessive heat.
- Check for sharpness: Once you are satisfied with the shape and overall sharpening of the drill bit, turn off the Dremel tool and carefully inspect the cutting edge. It should be sharp and free of any visible dull or jagged areas. If necessary, repeat the sharpening process until the desired sharpness is achieved.
Remember to always handle the Dremel tool and grinding stone with care. Following these steps will help you effectively sharpen your drill bits and improve their performance.
Checking the Sharpness and Finishing Touches
Once you have completed the sharpening process, it’s important to check the sharpness of your drill bit before using it. A dull drill bit can cause frustration and can also be dangerous to use.
Testing the Sharpness

To test the sharpness of the drill bit, carefully run your finger along the cutting edge. If it feels dull or rough, it needs further sharpening. If it feels sharp and smooth, it’s ready to be used.
Finishing Touches
After sharpening the drill bit, there are a few finishing touches you can do to ensure optimal performance:
- Remove any burrs: Use a file or sandpaper to remove any burrs or rough edges left from the sharpening process. This will improve the drilling efficiency.
- Clean the drill bit: Use a brush or cloth to remove any metal shavings or debris that may have accumulated on the drill bit during sharpening. Clean drill bits last longer and perform better.
Remember to always wear proper safety gear, including goggles or safety glasses, when working with drill bits. It’s important to take your time and be patient while sharpening to avoid accidents.
FAQ:
Why is it important to sharpen drill bits?
Sharpening drill bits is important because dull bits can cause inefficiency, difficulty in drilling, and can lead to accidents. Sharpening them ensures clean and precise drilling, saving time and effort.
Can I sharpen drill bits with a Dremel?
Yes, you can sharpen drill bits with a Dremel. It is a versatile tool that can be used for various tasks, including sharpening drill bits efficiently and effectively.
What materials do I need to sharpen drill bits with a Dremel?
To sharpen drill bits with a Dremel, you will need a Dremel rotary tool, a grinding stone or wheel attachment, safety goggles, and a drill bit sharpener or a bench grinder.
Are there any safety precautions I should take while sharpening drill bits?
Yes, there are several safety precautions you should take while sharpening drill bits. You should wear safety goggles to protect your eyes from flying debris, avoid wearing loose clothing or jewelry that can get caught in the tool, and always follow the manufacturer’s instructions for operating the Dremel and other tools.
Can I use any type of grinding stone or wheel attachment to sharpen drill bits?
No, it is important to use a grinding stone or wheel attachment specifically designed for sharpening drill bits. These attachments have the proper shape and grit to effectively sharpen the drill bits without causing damage.
Video:


Meet Harrison Clayton, a distinguished author and home remodeling enthusiast whose expertise in the realm of renovation is second to none. With a passion for transforming houses into inviting homes, Harrison's writing at https://thehuts-eastbourne.co.uk/ brings a breath of fresh inspiration to the world of home improvement. Whether you're looking to revamp a small corner of your abode or embark on a complete home transformation, Harrison's articles provide the essential expertise and creative flair to turn your visions into reality. So, dive into the captivating world of home remodeling with Harrison Clayton and unlock the full potential of your living space with every word he writes.