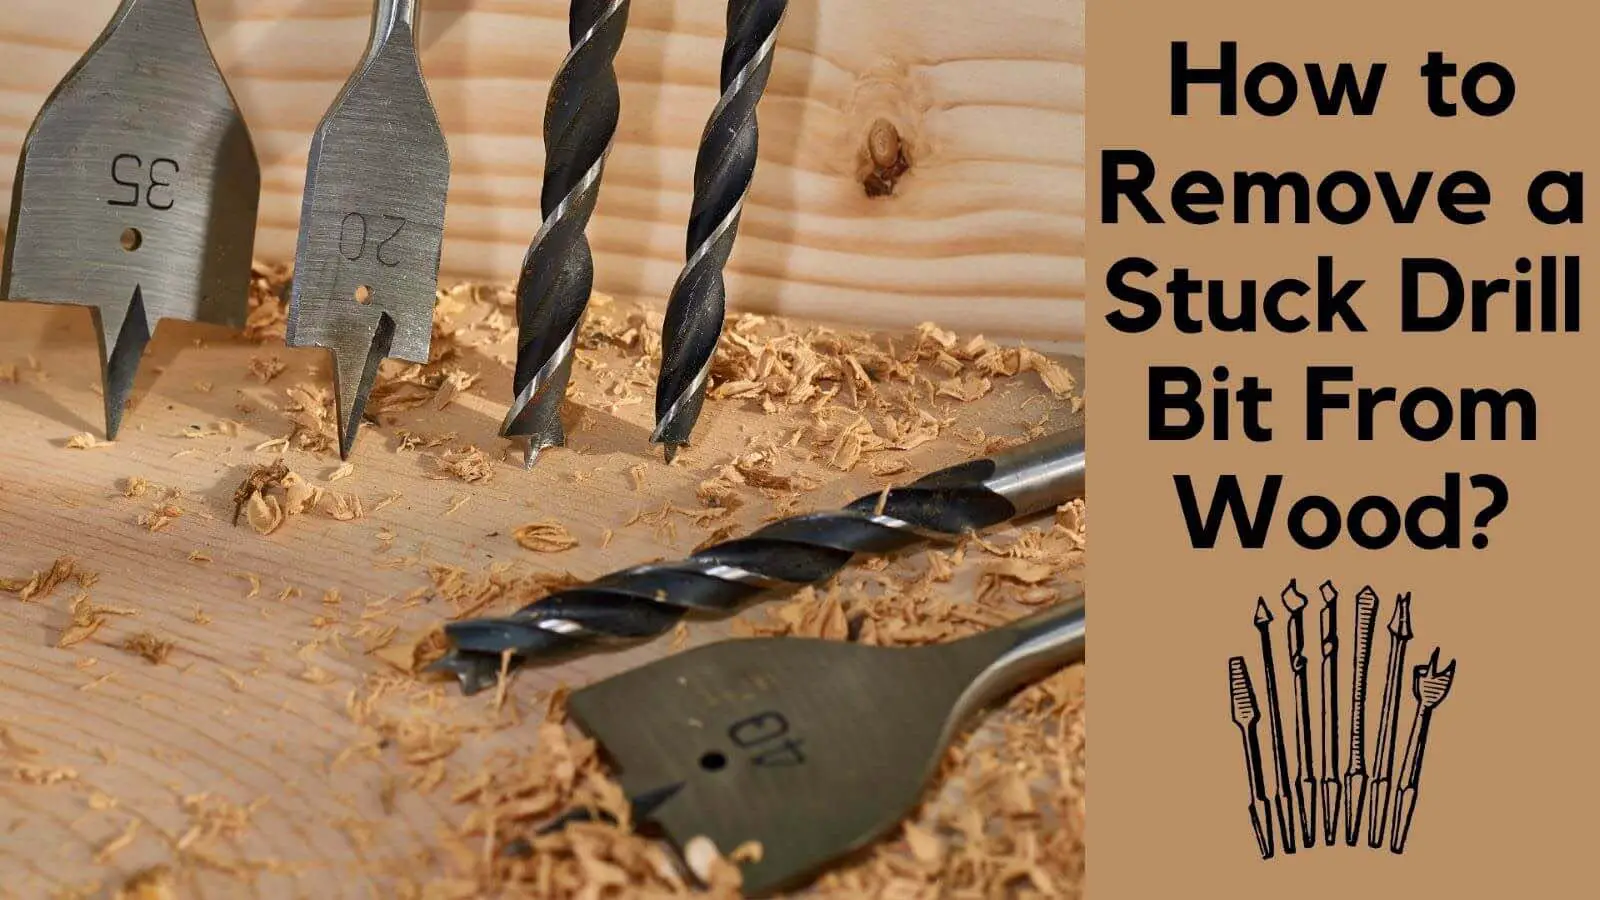
Easy Steps to Remove a Broken Drill Bit from Wood

Accidents happen, and one common mishap that can occur when working with wood is a broken drill bit. Whether you’re a professional woodworker or a DIY enthusiast, it’s important to know how to safely remove a broken drill bit from wood without causing further damage.
The key to successfully removing a broken drill bit from wood is using the right tools and techniques. With a few simple steps, you can safely extract the broken piece and get back to working on your project in no time.
First, it’s important to assess the situation and determine how much of the drill bit is still embedded in the wood. If only a small portion is visible, you can try using a pair of needle-nose pliers to carefully grip the bit and gently twist it out. Be sure to work slowly and steadily, applying even pressure to avoid any further damage.
If the bit is too firmly stuck or if only a small fragment is visible, you may need to use a drill extractor. These specialized tools are designed to grip the broken bit and help you remove it from the wood. Simply select an extractor that matches the size of your drill bit and carefully follow the manufacturer’s instructions.
Remember to always wear safety goggles and work gloves when attempting to remove a broken drill bit from wood. These precautions will help protect your eyes and hands from any potential harm. Additionally, take your time and exercise patience during the process to avoid any unnecessary damage to your workpiece.

Step 1: Gather the Necessary Tools
- A pair of needle-nose pliers
- A drill (optional)
- A small hammer
- A center punch
- A drill bit slightly smaller than the broken one
- A screwdriver
- A piece of wood or scrap material
- Safety goggles
- Gloves (optional)
Before attempting to remove a broken drill bit from wood, it’s important to gather all the necessary tools. These tools will help make the removal process easier and safer.
The most essential tool for this task is a pair of needle-nose pliers, which will allow you to grip and extract the broken piece from the wood. You can also use a drill if the broken drill bit fragment is too firmly lodged in the wood. In that case, a small hammer and a center punch may be needed to create a starting point for the drill. Additionally, you’ll need a drill bit that is slightly smaller than the broken one to drill a hole next to the broken bit and facilitate its removal.
A screwdriver may also come in handy for prying the broken bit out of the wood, especially if it’s loose or partially sticking out. To protect the surface of the wood, it’s recommended to have a piece of scrap material or wood to place under the work area. Safety goggles and gloves are also recommended to protect your eyes and hands during the process.
Step 2: Assess the Situation
Before attempting to remove the broken drill bit from the wood, it’s important to assess the situation to determine the best course of action. Taking some time to evaluate the condition of the broken bit can prevent further damage and increase the chances of a successful removal.

1. Examine the depth of the broken bit
Carefully inspect the broken drill bit to determine how much of it is embedded in the wood. This will help you gauge the difficulty of the removal process. If only a small portion of the bit is stuck, it may be easier to extract compared to a bit that is deeply embedded.
2. Consider the type of wood
Take into account the type of wood you are working with. Some woods, such as softwoods, are more forgiving when it comes to removing a broken bit. However, hardwoods like oak or maple can pose more of a challenge due to their density and hardness.
3. Evaluate the surroundings
Look at the surrounding area and nearby objects. If there are delicate or fragile components nearby, you’ll need to proceed with caution to avoid causing any additional damage.
4. Gather the necessary tools
Based on your assessment, determine the tools you’ll need to remove the broken bit. This may include pliers, a screwdriver, a drill, or other specialized extraction tools. Having the right tools on hand will make the process smoother and more efficient.
5. Decide on the removal method
Based on the condition of the broken bit and your assessment of the situation, weigh the different removal methods available. Some common techniques include using pliers, drilling a hole into the broken part, or utilizing specialized extraction tools. Choose the method that seems most appropriate for the specific case.

Step 3: Apply Lubricant
Applying a lubricant to the broken drill bit can help to loosen it from the wood and make it easier to remove. The lubricant will help to reduce friction between the drill bit and the wood, allowing it to slide out more smoothly.
Here’s how you can apply lubricant to the broken drill bit:
- Using a lubricating spray or oil, spray or apply a small amount of the lubricant directly onto the broken drill bit and the surrounding area.
- Allow the lubricant to penetrate the wood for a few minutes to loosen the grip of the drill bit.
- If the broken drill bit is lodged deep into the wood, you may need to use an applicator or a small brush to reach the lubricant into the crevices.
- Gently tap the broken drill bit using a hammer to help further loosen it.
Applying a lubricant is an important step as it helps to reduce the risk of further damaging the wood when attempting to remove the broken drill bit. The lubricant provides a slippery surface, making it easier for the drill bit to be extracted.
If the broken drill bit still remains stuck after applying lubricant, you may need to proceed to the next step to remove it.
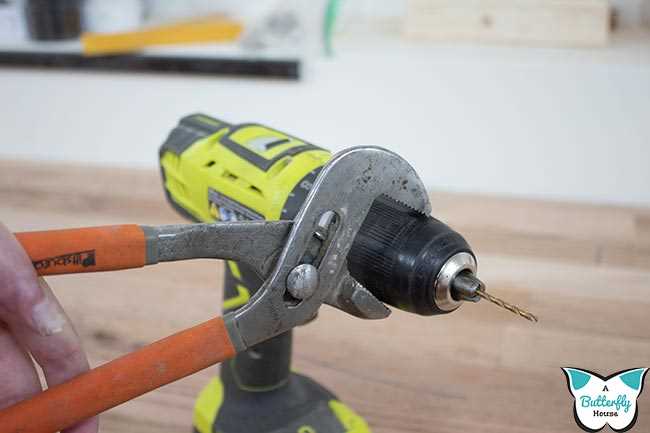
Step 4: Use Pliers or Vise-Grips
If the broken drill bit is protruding enough from the wood surface, you can attempt to remove it with a pair of pliers or vise-grips. This method requires a strong grip and careful maneuvering to avoid damaging the surrounding wood.

- Put on protective gloves to prevent any injuries to your hands.
- Choose a pair of pliers or vise-grips that have a wide jaw and long handles for better leverage.
- Place the jaws of the pliers or vise-grips as close to the broken drill bit as possible.
- Apply firm pressure to the handles to clamp down on the drill bit.
- Slowly and steadily turn the pliers or vise-grips counterclockwise to unscrew the broken drill bit.
- If necessary, use the leverage of the handles to break the grip of the drill bit and remove it from the wood.
Be cautious not to squeeze too hard with the pliers or vise-grips, as this may cause the drill bit to break further or damage the wood. If the broken drill bit is too small or deeply embedded, this method may not be effective.
Step 5: Apply Heat
Applying heat can be an effective method to remove a broken drill bit from wood. Heat can expand the metal, causing it to loosen its grip on the wood.
Here’s how you can apply heat to remove a broken drill bit:
- Ensure that the area is well-ventilated and clear of any flammable objects or materials.
- Wear heat-resistant gloves and safety goggles to protect yourself.
- Use a propane torch or an electric heat gun to heat the broken drill bit. Start by applying the heat to the area closest to the broken end.
- Be patient and allow the heat to penetrate the metal. It may take a few minutes for the heat to have the desired effect.
- Once the metal is heated, try to remove the broken drill bit using pliers or a wrench. The heat should have loosened its grip on the wood, making it easier to remove.
Note: Be cautious when applying heat to wood, as it can cause the wood to char or burn. Avoid applying excessive heat and monitor the wood closely during the process.
If the broken drill bit still doesn’t come loose after applying heat, you may need to consider other methods, such as using a drill extractor or seeking professional assistance.
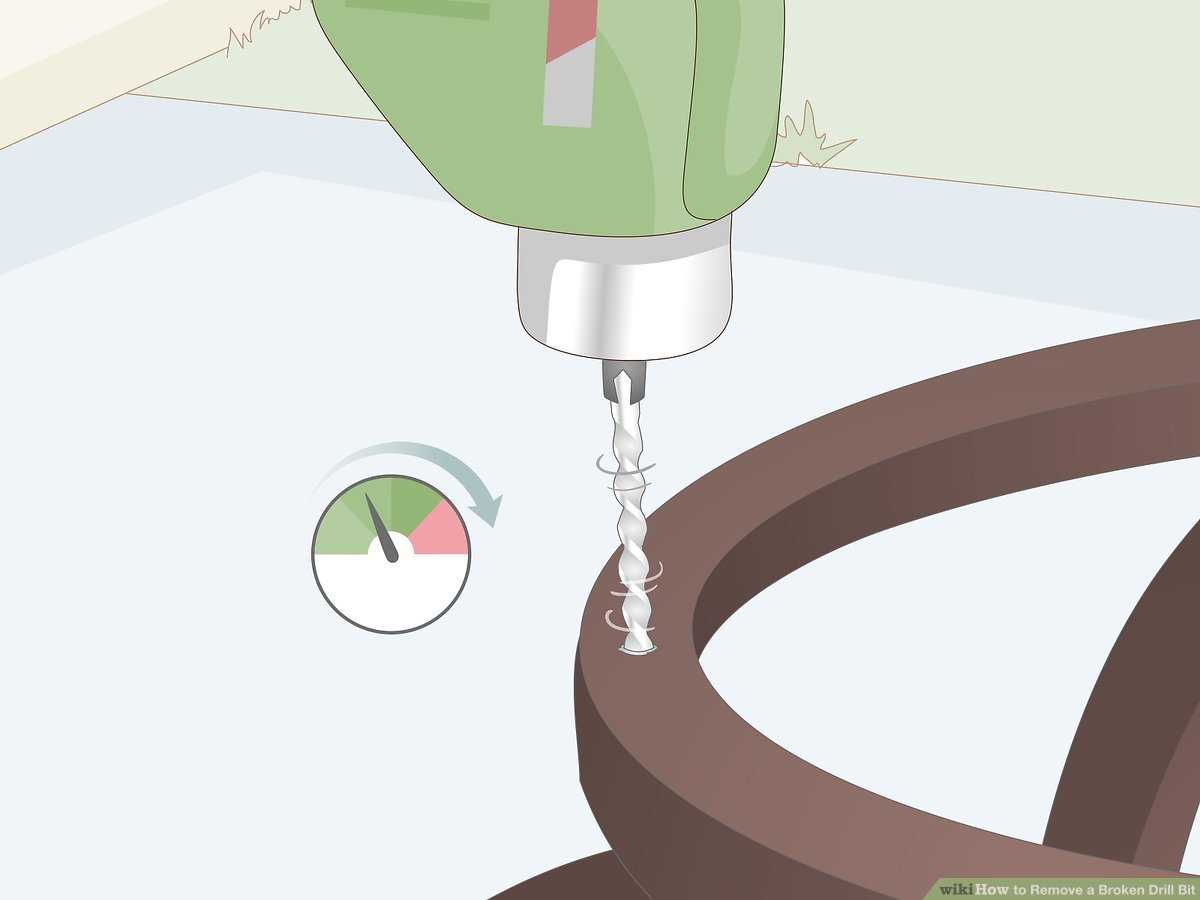
Step 6: Drill a Hole
Drilling a hole is an effective method to remove a broken drill bit from wood. This step requires caution and precision to avoid further damage to the wood surface.

- Select a drill bit that is smaller than the diameter of the broken drill bit. Using a bit that is slightly smaller will allow you to drill a pilot hole without affecting the surrounding wood.
- Secure the wood piece firmly in a vise or clamp to prevent any movement during the drilling process.
- Align the drill bit with the center of the broken drill bit and position it perpendicularly.
- Apply steady pressure while drilling the pilot hole. It is crucial to advance slowly to prevent the bit from wandering and damaging the surrounding area.
- Continue drilling until the pilot hole reaches past the broken drill bit.
By drilling a hole, you create a pathway for the broken drill bit to be extracted. This allows you to safely remove the broken piece without causing further damage to the wood surface.
Step 7: Extract the Broken Bit
Once you have carefully drilled a hole into the broken drill bit, it’s time to extract the broken piece. There are a few different methods you can use depending on the situation and the type of drill bit that broke.
Method 1: Using Pliers
- Choose a pair of pliers with a grip that can easily fit around the broken drill bit.
- Position the pliers around the broken bit, ensuring a firm hold.
- Gently apply pressure and try to twist the pliers counterclockwise to loosen and remove the broken bit from the wood.
- If the bit doesn’t come out easily, you can try tapping the pliers with a hammer to provide additional force.
Method 2: Using a Screw Extractor
- Locate a screw extractor that matches the size of the broken drill bit.
- Insert the screw extractor into the hole you drilled in the broken bit.
- Using a wrench or a pair of pliers, slowly turn the screw extractor counterclockwise.
- The screw extractor is designed to bite into the broken bit and provide leverage for removal.
- Continue turning until the broken bit is completely removed from the wood.
Method 3: Using a Drill Bit Removal Tool
- Acquire a drill bit removal tool, which is a specialized tool designed to remove broken drill bits.
- Insert the removal tool into the chuck of your drill.
- Ensure that the removal tool is securely attached to the drill.
- Position the removal tool over the broken bit.
- Start the drill and slowly apply pressure, allowing the removal tool to grip and extract the broken bit from the wood.
Remember to work slowly and carefully when extracting the broken bit to avoid any further damage to the wood or injury to yourself. If you’re having trouble removing the bit, don’t hesitate to seek assistance from a professional or someone with experience in drill bit removal.
Step 8: Clean and Repair the Wood
After successfully removing the broken drill bit from the wood, it’s important to clean and repair the affected area to restore the wood’s appearance and integrity. Follow these steps to effectively clean and repair the wood:
- Start by gently brushing away any wood shavings or debris that may have accumulated around the hole using a soft-bristled brush.
- If there are any remaining bits of the broken drill bit still embedded in the wood, carefully remove them using a pair of needle-nose pliers or tweezers. Take your time and be cautious to avoid any further damage.
- Use a mild soap solution and a soft cloth to clean the surface of the wood around the hole. This will help remove any dirt or grime that may have accumulated during the drilling process.
- If the wood has suffered any splintering or damage as a result of the broken drill bit, you may need to sand down the surrounding area to smooth out any rough edges. Start with a coarse-grit sandpaper and gradually work your way up to a finer-grit sandpaper until the surface is smooth.
- Once the surface is smooth, wipe away any dust or debris with a clean cloth.
- If necessary, you can fill any small holes or gaps in the wood using wood filler. Apply the wood filler according to the manufacturer’s instructions, using a putty knife to smooth it out and ensure a flush finish with the surrounding surface.
- Allow the wood filler to dry completely, and then sand down any excess using fine-grit sandpaper until the surface is level and smooth.
- After sanding, wipe away any remaining dust or debris with a clean cloth.
- If desired, you can apply a wood stain or finish to match the surrounding area and help blend the repaired section with the rest of the wood. Follow the manufacturer’s instructions for the specific stain or finish you choose.
By following these steps, you can effectively clean and repair the wood, ensuring a professional-looking result and restoring the functionality of the drilled hole.
FAQ:
What should I do if my drill bit breaks while drilling into wood?
If your drill bit breaks while drilling into wood, there are several steps you can take. First, you should stop drilling immediately to avoid causing further damage. Then, assess the situation to determine whether the broken bit is still visible or is stuck inside the wood. Depending on the case, you can either use pliers, a screw extractor, or a drill bit removal tool to remove the broken bit. Follow the easy steps outlined in the article to successfully remove the broken drill bit from wood.
Can I continue using my drill if the bit breaks?
No, it is not recommended to continue using your drill if the bit breaks. Using a drill with a broken bit can lead to further damage or injury. It is best to stop drilling immediately and proceed with the steps mentioned in the article to remove the broken bit from the wood.
What tools do I need to remove a broken drill bit from wood?
To remove a broken drill bit from wood, you will need a few tools. Depending on the situation, you may need pliers, a screw extractor, a drill bit removal tool, or a combination of these. The article provides a detailed explanation of each tool along with step-by-step instructions on how to use them.
Is it possible to remove a broken drill bit without damaging the wood?
Yes, it is possible to remove a broken drill bit without damaging the wood if you follow the correct steps and use the proper tools. When using pliers or a screw extractor, be careful not to apply too much force or you may risk damaging the surrounding wood. However, in some cases, it may be necessary to create a small hole or use a drill bit removal tool, which may cause minimal damage to the wood.
What should I do if the broken drill bit is stuck inside the wood?
If the broken drill bit is stuck inside the wood, you can try using a pair of pliers or a screw extractor. Carefully grip the broken bit with pliers and gently twist and pull it out. If the bit is still stuck, you may need to create a small hole next to the broken bit using a drill bit removal tool and then extract the broken piece using pliers or a screw extractor.
Can I prevent a drill bit from breaking while drilling into wood?
While it is not always possible to prevent a drill bit from breaking, there are a few steps you can take to minimize the risk. First, make sure to use a sharp drill bit that is appropriate for the type of wood you are drilling into. Applying consistent but not excessive pressure while drilling can also reduce the chances of the bit breaking. Additionally, drilling at a slower speed can help prevent overheating and potential breakage.
What should I do if none of the methods mentioned in the article work to remove the broken drill bit?
If none of the methods mentioned in the article work to remove the broken drill bit, it may be time to seek professional help. Contact a local hardware store or a professional repair service that specializes in removing broken drill bits. They will have the expertise and specialized tools to safely remove the broken bit without causing further damage to the wood.
Video:


Meet Harrison Clayton, a distinguished author and home remodeling enthusiast whose expertise in the realm of renovation is second to none. With a passion for transforming houses into inviting homes, Harrison's writing at https://thehuts-eastbourne.co.uk/ brings a breath of fresh inspiration to the world of home improvement. Whether you're looking to revamp a small corner of your abode or embark on a complete home transformation, Harrison's articles provide the essential expertise and creative flair to turn your visions into reality. So, dive into the captivating world of home remodeling with Harrison Clayton and unlock the full potential of your living space with every word he writes.