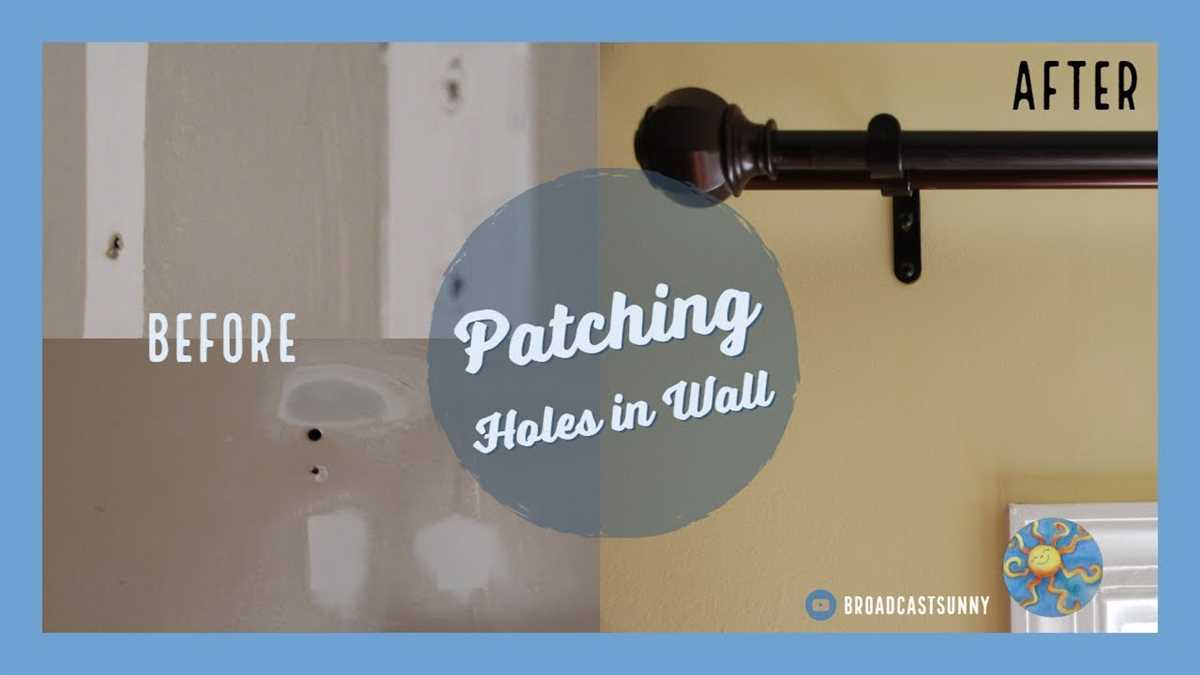
Easy Steps to Patch Drill Holes in Drywall
Drilling holes in drywall is a common task when it comes to hanging shelves, mirrors, or artwork. However, sometimes we end up with more holes than we need or accidentally create larger holes than intended. Fortunately, patching these drill holes in drywall is a straightforward process that can be completed with just a few simple steps.
To begin patching a drill hole in drywall, you will need a few basic supplies. These include a putty knife, sandpaper, spackling compound, and paint that matches the color of your wall. Once you have gathered these materials, you can follow these easy steps to fix the holes and restore your wall to its original condition.
Step 1: Clean the Hole
Start by cleaning the hole and removing any loose drywall debris. Use the putty knife to scrape away any loose pieces and create a clean, smooth surface for the patching compound.
Step 2: Apply Spackling Compound
Next, apply the spackling compound to the hole using the putty knife. Press the compound firmly into the hole, ensuring it fills the entire space. Smooth out the surface and remove any excess compound.
Step 3: Sand and Repeat
After the spackling compound has dried, use sandpaper to smooth out the patched area. This will create a seamless finish. If necessary, repeat steps 2 and 3 until you achieve a level surface.
Once the patched area is smooth and dry, you can proceed to paint over it with a color that matches your wall. By following these easy steps, you can confidently patch drill holes in drywall and restore the aesthetics of your room.
Gather the necessary materials
- Patching compound: You will need a patching compound to fill in the drill holes. This can typically be purchased at a hardware store or home improvement store.
- Putty knife: A putty knife is essential for applying the patching compound to the drill holes. Make sure you have one on hand before you begin.
- Sandpaper: Sandpaper will be needed to smooth out the patched areas once the patching compound has dried. Have a variety of grits on hand, such as coarse, medium, and fine.
- Primer: Primer is necessary to ensure that the patched areas blend in seamlessly with the rest of the wall. Make sure you have a primer that is compatible with your wall paint.
- Paint: Finally, you will need paint to touch up the patched areas. Choose a color that matches the existing wall color.
- Paintbrush or roller: Depending on the size of the patched areas, you may need a paintbrush or a roller to apply the touch-up paint.
- Dust mask and safety goggles: It is important to protect yourself while working with patching compound and sandpaper. Wear a dust mask to prevent inhaling dust particles and safety goggles to protect your eyes.
- Cloth or sponge: A cloth or sponge will come in handy for wiping away any excess patching compound or dust.
By gathering all of these materials before you start the patching process, you will be prepared and save time during the repair. Make sure to read the instructions on the patching compound and primer for any additional materials or tools that may be needed.
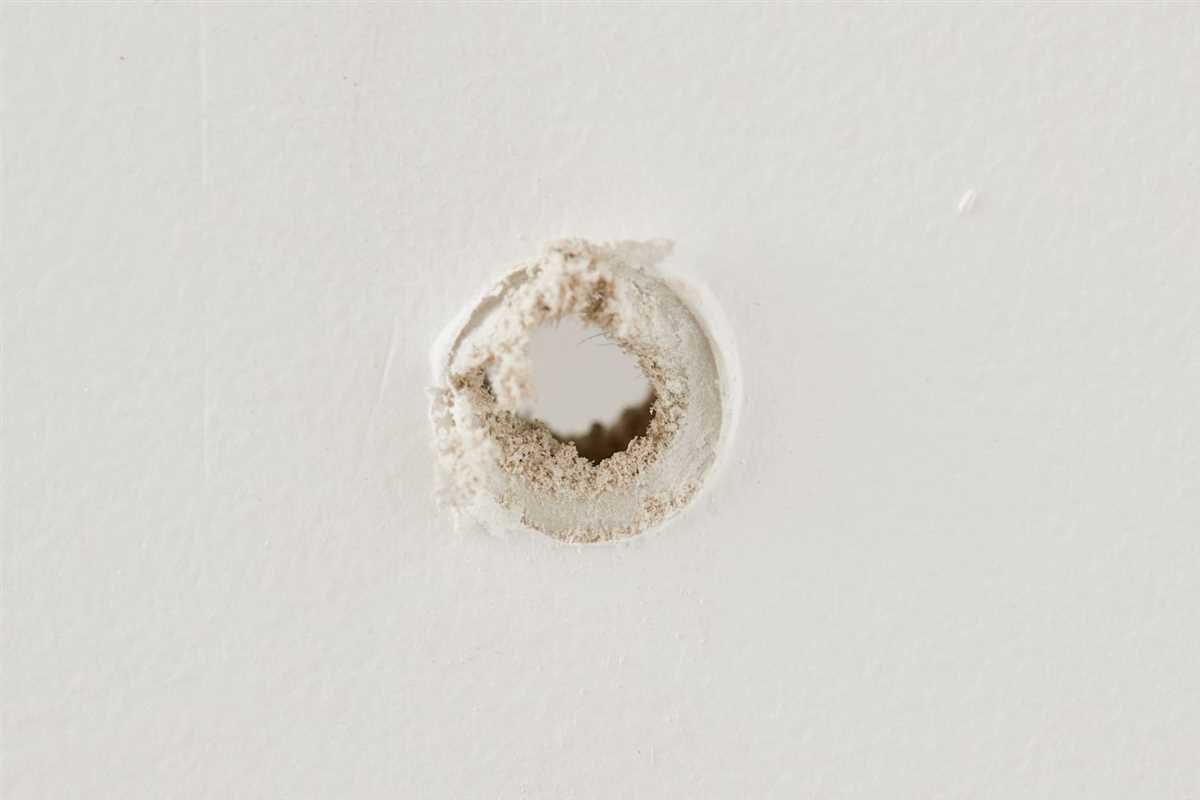
Prepare the damaged area
Before you begin patching the drill holes in drywall, it is important to prepare the damaged area properly. This will ensure that the patch adheres well and creates a seamless finish.

1. Clean the area
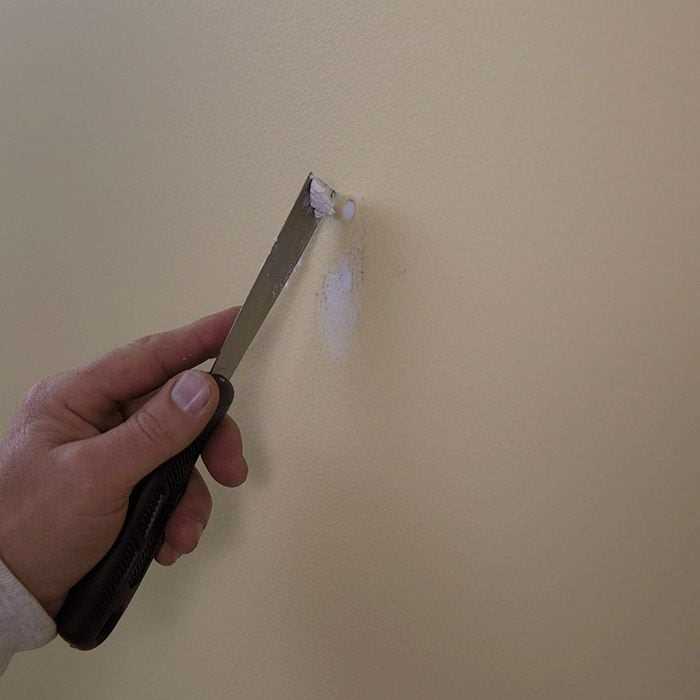
Start by cleaning the damaged area with a soft cloth or sponge and mild soap and water. Remove any dust, dirt, or debris that may be on the surface.
2. Sand the edges
Use sandpaper to gently sand the edges of the drill holes. This will help create a smooth surface and allow the patch to blend in better.
3. Remove loose drywall
If there are any loose or crumbling pieces of drywall around the drill holes, carefully remove them with a putty knife or sandpaper. This will ensure that the patch adheres securely to the surrounding area.

4. Apply primer
Before applying the patch, it is recommended to apply a coat of primer to the damaged area. This will help the patch adhere better and prevent the repaired area from standing out.
5. Let the area dry
After preparing the damaged area, allow it to dry completely before moving on to the next step. This will ensure that the patching materials adhere properly and create a seamless finish.
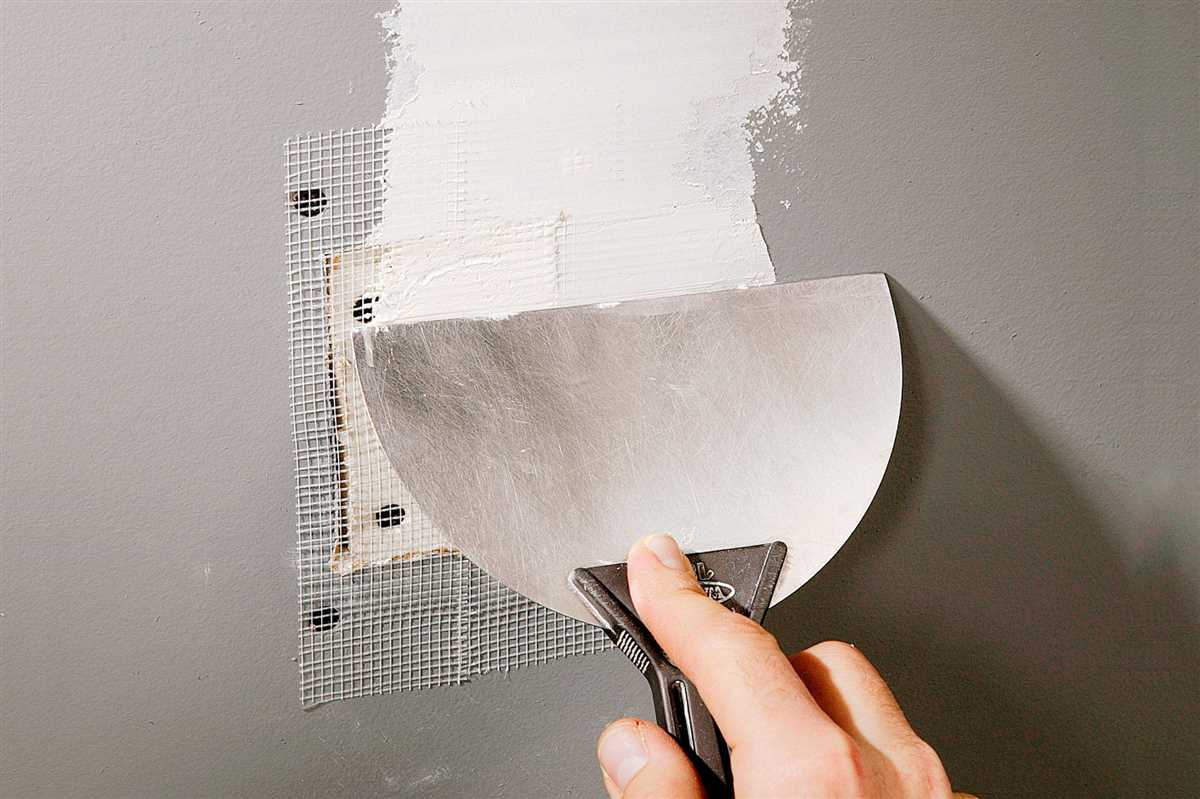
Apply the patching compound

Once the primer is dry, it’s time to apply the patching compound to the hole in the drywall. Here are the steps to follow:
- Clean the hole: Start by removing any loose drywall particles or dust from the hole. Use a vacuum cleaner or a dry cloth to clean the area thoroughly.
- Prepare the compound: Mix the patching compound according to the manufacturer’s instructions. Most compound products require mixing with water to achieve the right consistency. Use a stir stick or a putty knife to mix it well.
- Apply the compound: Using a putty knife, scoop a small amount of the compound onto the knife. Spread the compound over the hole, making sure to completely cover the damaged area. Use the knife to smooth out the compound and remove any excess. The goal is to create a smooth and even surface.
- Let it dry: Allow the patching compound to dry according to the manufacturer’s instructions. This usually takes a few hours. Avoid touching or disturbing the patch while it’s drying.
- Sand the patch: Once the compound is completely dry, use sandpaper to smooth out the patch. Begin with a coarse-grit sandpaper and gradually switch to a finer grit to achieve a seamless finish. Sand in a circular motion until the patch is smooth and blends with the surrounding wall.
- Wipe off dust: Use a damp cloth to wipe off any dust or debris from the sanded patch. This will ensure a clean surface for painting or applying a texture matching the rest of the wall.
After following these steps, your patched hole should be ready for further treatment, such as painting or texture matching. Remember to read and follow the instructions provided by the patching compound manufacturer for best results.

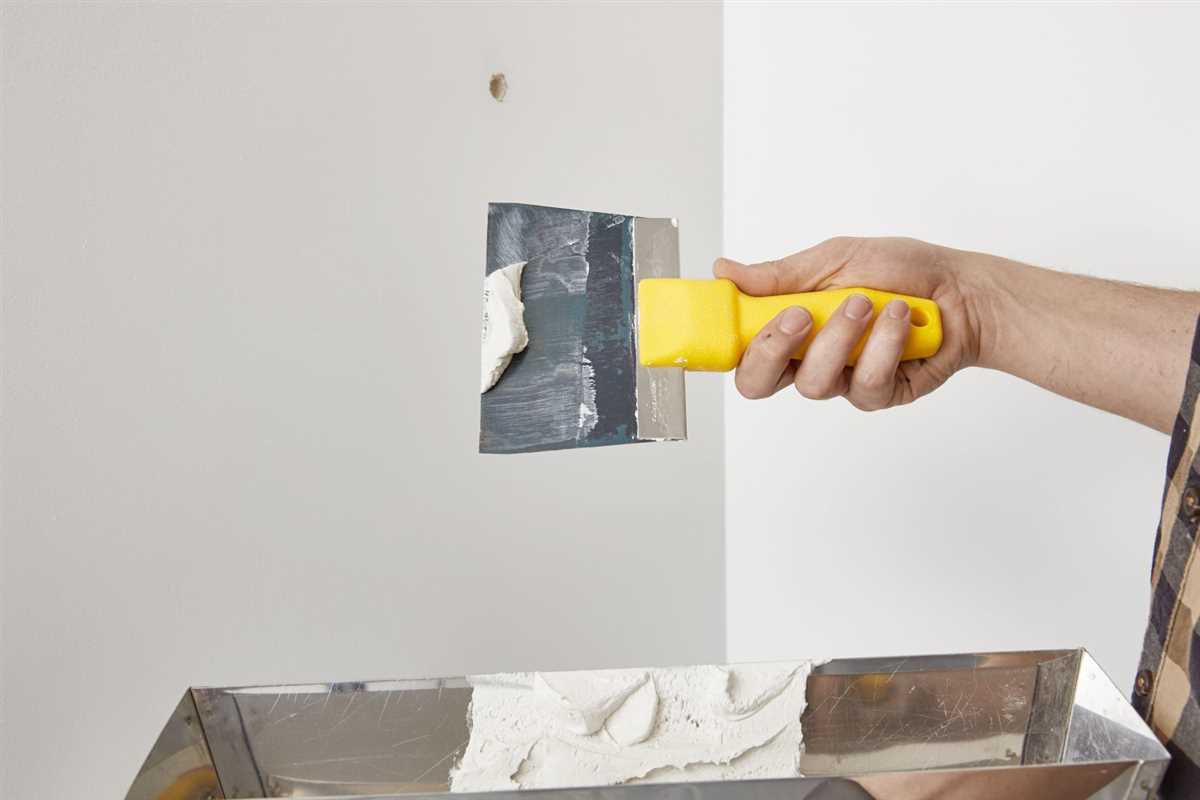
Spread the compound evenly
Once you have mixed the joint compound to the desired consistency, it’s time to spread it evenly over the patched drill holes in your drywall. This step is crucial to ensure a smooth and seamless finish.
Step 1: Apply a thin layer

Using a putty knife or a taping knife, take a small amount of joint compound and begin by applying a thin layer over the patch. Start from the center of the hole and work your way towards the edges, feathering and smoothing the compound as you go.
Step 2: Fill the hole
Continue to add joint compound to the hole until it is completely filled, ensuring that the compound is slightly raised above the surface of the wall. This will allow for sanding and blending with the surrounding wall later on.

Step 3: Smooth and blend
Using the flat edge of your putty knife or taping knife, carefully smooth and blend the compound with the surrounding wall. Make sure to remove any excess compound and create a seamless transition from the patch to the rest of the wall.
Step 4: Let it dry
Allow the joint compound to dry completely. Drying times may vary depending on the product, so be sure to check the manufacturer’s instructions. You can use a fan or open windows to speed up the drying process.
Step 5: Sand the surface
Once the joint compound is dry, use a fine-grit sandpaper to lightly sand the surface of the patch. This will help to smooth out any imperfections and create a seamless finish.

Remember, it’s important to take your time and work carefully during this step to ensure a professional-looking result. By spreading the compound evenly, you will be one step closer to perfectly patched drill holes in your drywall.
Let the compound dry

After applying the joint compound, you need to let it dry before moving on to the next step. The drying time will vary depending on the size and thickness of the patched area. Typically, it can take anywhere from a few hours to overnight for the compound to dry completely.
During the drying process, it is important to avoid touching or disturbing the patched area. This can cause the compound to crack or not adhere properly, resulting in an uneven finish. It’s also a good idea to create good ventilation in the room to help speed up the drying process.
If you are unsure whether the compound is dry, you can lightly touch it with your finger. If it feels firm and no longer damp, it is likely dry. However, it is best to wait the recommended drying time to ensure that the compound is fully dried.
Once the compound is dry, you can proceed with sanding and painting to achieve a smooth and seamless finish.
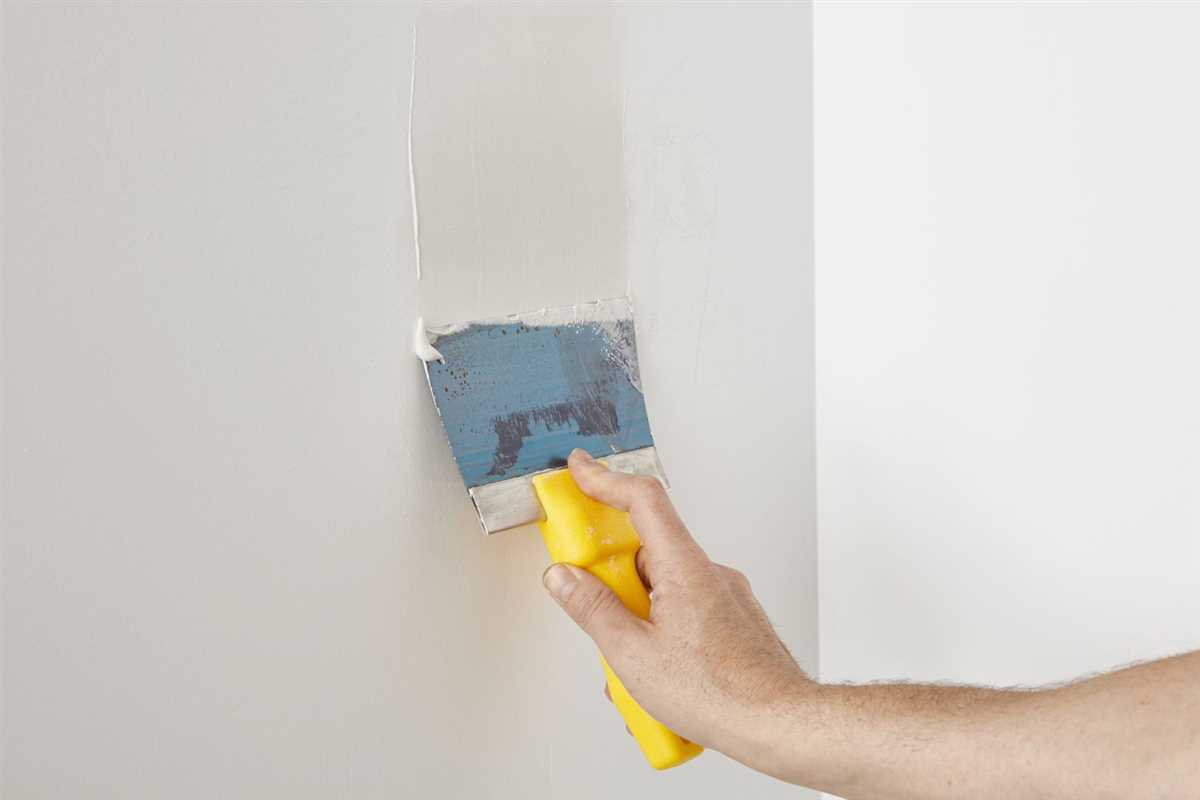
Sand the patched area
After the joint compound has completely dried, it’s time to sand the patched area. Sanding helps to smooth out the surface and make it blend in with the rest of the wall.
Here are the steps to sanding the patched area:
- Start by using a medium-grit sandpaper. This will help to remove any excess joint compound and create a smooth surface.
- Hold the sandpaper at a slight angle and gently sand the patched area in a circular motion. Be careful not to press too hard, as this could damage the surrounding drywall.
- Continue sanding until the patched area feels smooth to the touch and blends in with the surrounding wall. You may need to switch to a finer-grit sandpaper to achieve a more seamless finish.
- Once you are satisfied with the smoothness of the patched area, wipe away any dust with a dry cloth or vacuum cleaner. This will ensure a clean surface for painting or further finishing.
Remember to wear a dust mask and safety goggles while sanding to protect yourself from any airborne dust particles.
Apply primer and paint
Once the joint compound is fully dried, it’s time to prepare the patched area for painting. This involves applying primer and paint to ensure a smooth and seamless finish.
1. Prime the patched area
Before painting, it’s important to apply a coat of primer to the patched area. The primer helps to seal and prepare the surface, allowing the paint to adhere better and provide a more even color.
- Clean the area: Wipe down the patched area with a damp cloth to remove any dust or debris. Make sure the surface is clean and dry before proceeding.
- Apply primer: Use a brush or roller to apply a thin, even coat of primer to the patched area. Start from the center and work your way outwards, blending the primer with the surrounding wall. Allow the primer to dry completely before proceeding.
2. Paint the patched area
After the primer has dried, it’s time to paint the patched area to match the surrounding wall. Here’s how:
- Choose the paint color: Select a paint color that matches the existing wall color. If necessary, bring a sample of the paint to a home improvement store for color matching.
- Prepare the paint: Stir the paint thoroughly to ensure an even consistency. If needed, thin the paint with a small amount of water according to the manufacturer’s instructions.
- Apply paint to the patched area: Use a brush or roller to apply a thin, even coat of paint to the patched area. Start from the edges and work your way towards the center, blending the paint with the surrounding wall. Allow the first coat to dry completely before applying additional coats if needed.
- Apply additional coats if necessary: Depending on the color and coverage, you may need to apply multiple coats of paint to achieve a seamless finish. Allow each coat to dry completely before applying the next.
Once the final coat of paint has dried, the patched area should be virtually indistinguishable from the rest of the wall.
Clean up and admire your work
Once you have finished patching the drill holes in your drywall, it’s time to clean up the area and take a step back to admire your handy work. Follow these final steps to ensure a clean and professional finished look.
1. Remove any dust or debris
Use a vacuum or a microfiber cloth to remove any dust or debris that may have accumulated during the patching process. Pay special attention to the area around the patched holes to ensure a smooth and clean finish.
2. Wipe down the surrounding area
Take a damp cloth or sponge and wipe down the surrounding area to remove any excess spackle or drywall compound. This will help blend the patched holes with the rest of the wall and create a seamless finish.
3. Inspect the patched holes
Take a close look at the patched holes and make sure they are smooth and level with the rest of the wall. Use your fingers to check for any uneven areas or rough edges. If necessary, gently sand down any imperfections until the surface is smooth and uniform.
4. Apply a final coat of paint (if needed)
If the patched holes are visible or if you want to ensure a flawless finish, consider applying a final coat of paint to the patched area. Match the paint color to the rest of the wall and apply it evenly with a small brush or roller. Allow the paint to dry completely before proceeding.
5. Admire your work
Stand back and take a moment to admire your handiwork. The patched holes should now be virtually undetectable, leaving you with a wall that looks as good as new. Take pride in the fact that you were able to fix the drill holes in your drywall with ease and professionalism.
FAQ:
What materials do I need to patch drill holes in drywall?
You will need spackling compound, sandpaper, a putty knife, a drywall patch, and primer.
How can I patch a small drill hole in drywall?
To patch a small drill hole in drywall, you can start by cleaning the hole with a damp cloth and then applying spackling compound. Smooth the compound with a putty knife, let it dry, and then sand it down before applying primer.
What should I do if the drill hole in my drywall is large?
If the drill hole in your drywall is large, you will need to use a drywall patch. Cut the patch to fit the hole, apply it with spackling compound, and then smooth it out. Once it is dry, sand it down and apply primer.
Is it necessary to use primer after patching drill holes in drywall?
Yes, it is important to use primer after patching drill holes in drywall. Primer helps to seal the repaired area and ensures a smooth and even finish when you paint over it.
Can I use a different material instead of spackling compound to patch drill holes in drywall?
While spackling compound is commonly used to patch drill holes in drywall, you can also use joint compound or drywall mud as alternative materials.
How long does it take for the spackling compound to dry?
The drying time for spackling compound can vary depending on the brand and the thickness of the application. It is best to check the product instructions for specific drying times.
Video:

How many have your name

Meet Harrison Clayton, a distinguished author and home remodeling enthusiast whose expertise in the realm of renovation is second to none. With a passion for transforming houses into inviting homes, Harrison's writing at https://thehuts-eastbourne.co.uk/ brings a breath of fresh inspiration to the world of home improvement. Whether you're looking to revamp a small corner of your abode or embark on a complete home transformation, Harrison's articles provide the essential expertise and creative flair to turn your visions into reality. So, dive into the captivating world of home remodeling with Harrison Clayton and unlock the full potential of your living space with every word he writes.


