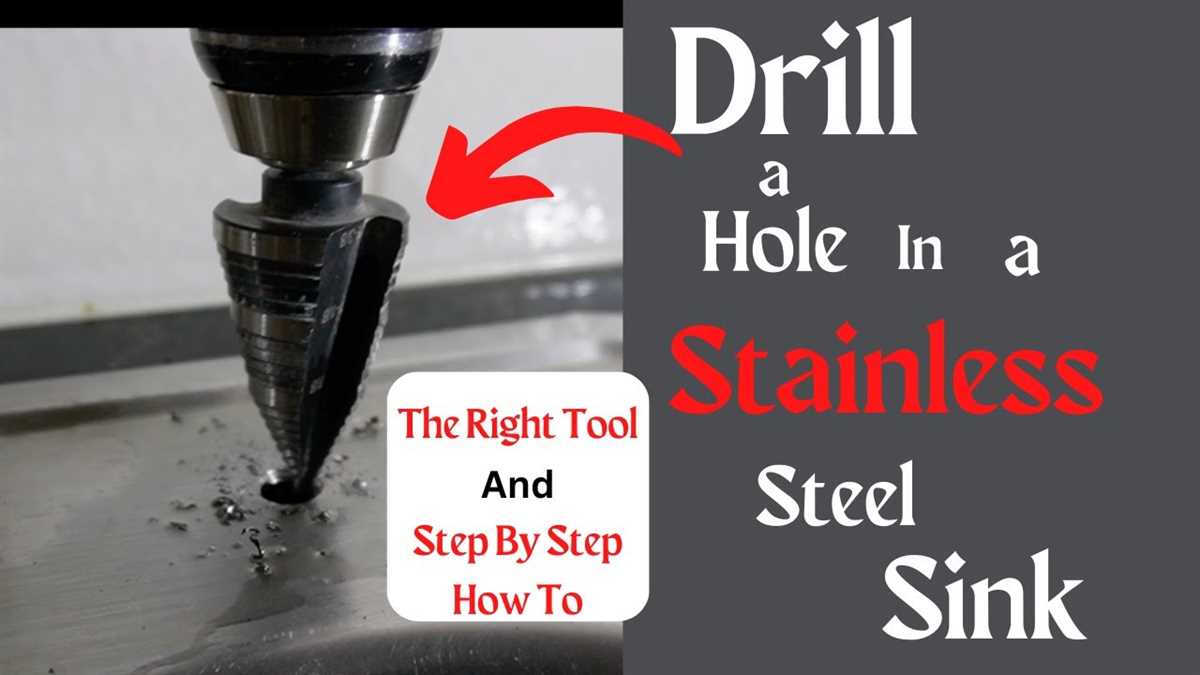
Easy Steps to Drill Through a Stainless Steel Sink

Drilling through a stainless steel sink may seem like a daunting task, but with the right tools and techniques, it can be done easily. Whether you need to install a new faucet or a soap dispenser, drilling through a stainless steel sink is an essential skill every DIY enthusiast should have.
Before you start drilling, it’s important to gather all the necessary tools and materials. You will need a power drill with a high-quality drill bit specifically designed for stainless steel, masking tape, a center punch, a hammer, and safety glasses. It’s also recommended to have a piece of scrap wood or a block of wood to use as a backing to prevent the sink from denting or buckling.
Once you have all the tools and materials ready, start by applying a strip of masking tape on the area where you want to drill the hole. This will not only help mark the spot but also prevent the drill bit from slipping. Next, use a center punch to create a small indentation on the marked spot. This will act as a guide for the drill bit and prevent it from wandering.
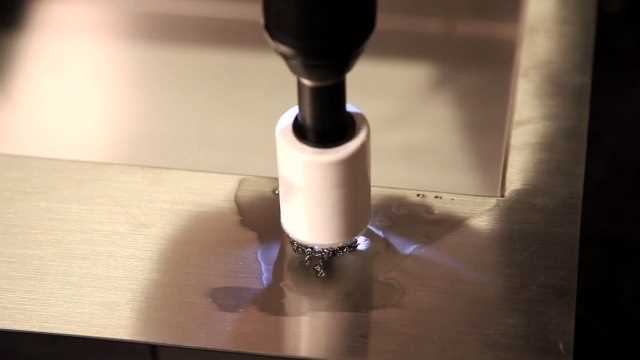
After creating the indentation, put on your safety glasses and align the drill bit with the indentation. Apply gentle pressure and begin drilling at a slow speed. It’s important to use a slow and steady speed to prevent the drill bit from overheating and wearing out. Additionally, remember to periodically lubricate the drill bit with cutting fluid or oil to keep it cool and prevent it from getting stuck.
As you drill, the stainless steel may produce sparks. This is normal and can be controlled by thoroughly lubricating the drill bit. Once the hole is drilled, remove the tape and clean any metal shavings from the sink. You can use a brush or a damp cloth to clean the area and ensure a smooth finish.

Drilling through a stainless steel sink may require some patience and practice, but by following these easy steps, you’ll be able to tackle this task with confidence and achieve professional results. Remember to always prioritize safety and take your time to ensure a successful outcome.
Preparation for Drilling
Before you start drilling through a stainless steel sink, it is important to properly prepare the area and gather the necessary tools and materials. This will help ensure a smooth and efficient drilling process.
Tools and Materials
- Power drill
- Drill bits suitable for stainless steel
- Masking tape
- Marker pen or grease pencil
- Safety glasses
- Work gloves
- Clamps or vice grip
- Step ladder, if needed
1. Clear the Surrounding Area
Make sure the area around the sink is clear of any objects or debris that may impede your drilling progress. Remove any dishes or utensils that may be in the sink to avoid accidentally damaging them during the drilling process.
2. Secure the Sink
If your sink is not already securely mounted, use clamps or vice grip to hold it in place. This will prevent the sink from moving or shifting while you drill through it.
3. Cover the Area with Masking Tape
Place strips of masking tape over the area where you plan to drill. This will help prevent the drill bit from slipping and scratching the surface of the sink.

4. Mark the Drill Spot
Use a marker pen or grease pencil to mark the exact spot where you want to drill. Double-check your measurements and ensure that the mark is centered and aligned correctly.
5. Put on Safety Gear
Before you start drilling, put on your safety glasses and work gloves to protect yourself from any potential debris or metal shavings that may be produced during the process.
6. Secure a Step Ladder, If Needed
If you are drilling through a sink that is mounted in a higher position, make sure you have a step ladder or a stable platform to place yourself on. This will ensure that you can comfortably and safely reach the drilling spot.
7. Prepare Your Drill and Bits
Choose the appropriate drill bit size for your project. Make sure to use drill bits specifically designed for stainless steel, as regular drill bits may not effectively penetrate the material. Insert the selected drill bit securely into your power drill.
8. Double-Check Everything
Before you begin drilling, take a moment to double-check that everything is properly set up and in place. Ensure that the drill bit is securely attached to the drill and that the sink is firmly clamped or secured.

By following these steps and taking the necessary precautions, you will be well-prepared to successfully drill through your stainless steel sink.
Choosing the Right Drill Bit
When drilling through a stainless steel sink, it is important to choose the right drill bit to ensure a clean and efficient drilling process. Stainless steel is a hard material, so using the wrong drill bit can result in dulling or breaking the bit, as well as causing damage to the sink itself. Here are some factors to consider when selecting a drill bit for stainless steel:
Type of Drill Bit
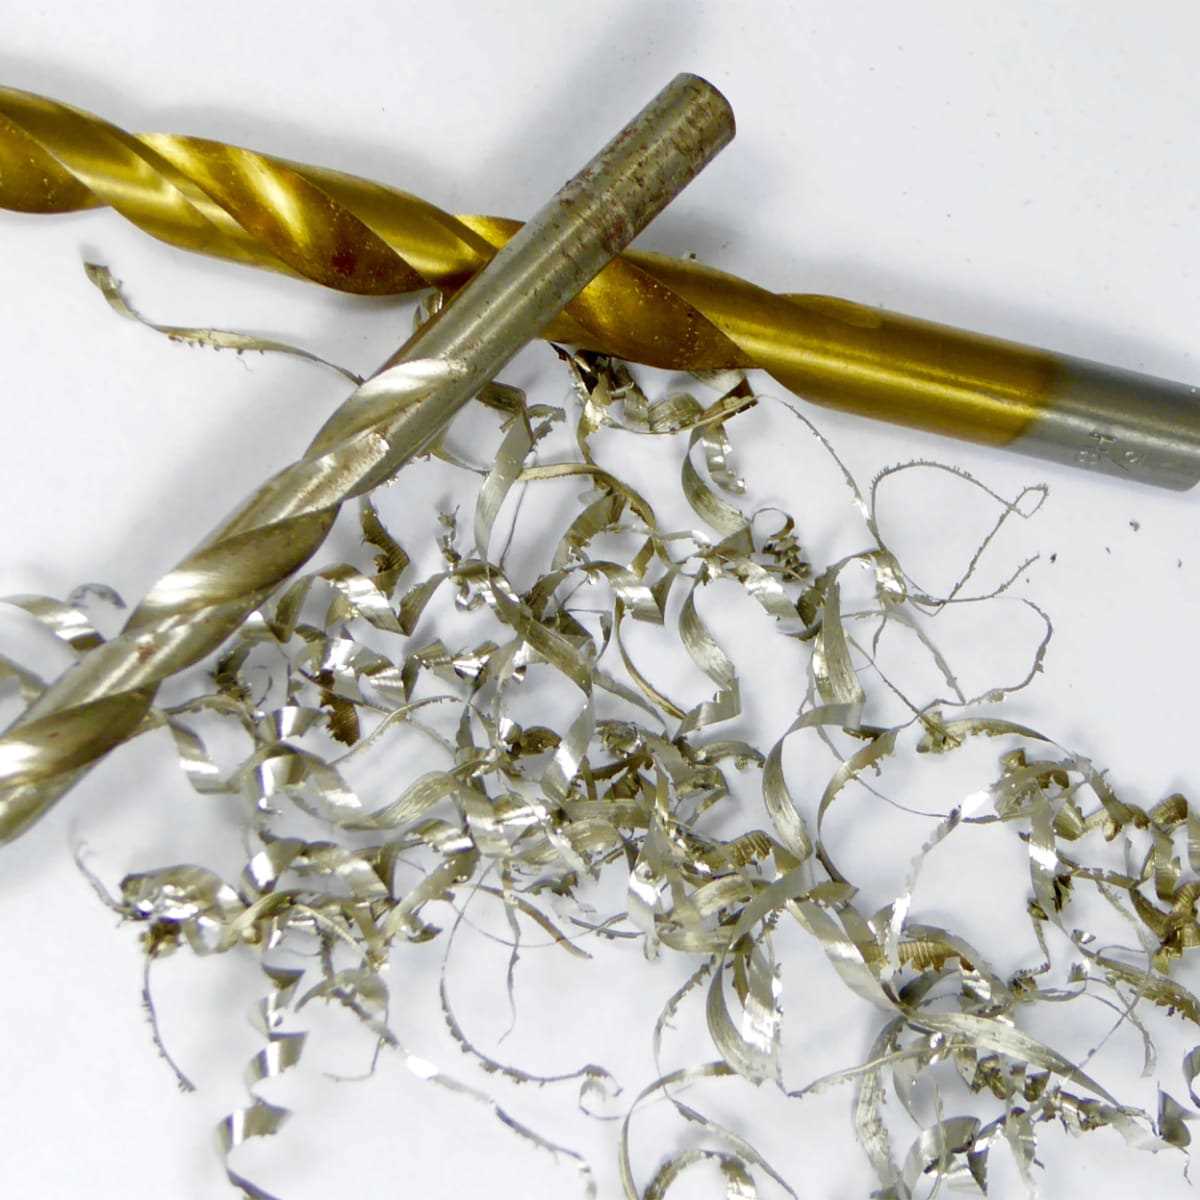
There are several types of drill bits available for drilling through stainless steel, including twist drill bits, cobalt drill bits, and carbide-tipped drill bits. Each type has its own advantages and is suitable for different projects.
- Twist Drill Bits: These are the most common and affordable drill bits. They are suitable for drilling small holes in stainless steel sinks but may struggle with larger holes or thicker steel.
- Cobalt Drill Bits: Cobalt drill bits are made of a high-speed steel alloy with added cobalt. They are harder and more durable than regular twist drill bits, making them a good choice for drilling through stainless steel. Cobalt drill bits also have excellent heat resistance, which helps prevent the bit from becoming dull.
- Carbide-tipped Drill Bits: These drill bits have a carbide tip, which is highly resistant to wear and can handle drilling through tough materials like stainless steel. They are more expensive than twist drill bits and cobalt drill bits, but they provide superior performance and longevity.
Size of Drill Bit
The size of the drill bit you choose will depend on the size of the hole you need to drill. It is important to select the appropriate size to ensure a clean and precise hole in the stainless steel sink. Measure the diameter of the hole you need to drill and choose a drill bit that matches that size.
Drill Bit Coating
Some drill bits come with coatings that improve their performance and longevity. Titanium nitride (TiN) coating, for example, reduces friction and helps the drill bit last longer. While a coated drill bit may be more expensive, it can provide better results in terms of speed and durability.

Drill Speed and Pressure
When drilling through stainless steel, it is important to use the correct drill speed and apply the right amount of pressure. Stainless steel is a hard material, so using too much speed or pressure can cause the drill bit to overheat and become dull. Follow the manufacturer’s instructions for the specific drill bit you are using to achieve the best results.
Marking the Drilling Point
Before you start drilling, it’s important to mark the exact point where you want to drill the hole in your stainless steel sink. This will help ensure precision and accuracy during the drilling process.
To mark the drilling point, follow these steps:
- Place a piece of masking tape over the spot where you want to drill the hole. This will help protect the sink’s surface and prevent any scratches or dents.
- Measure and mark the exact position of the hole on the masking tape. You can use a ruler or a measuring tape to ensure accuracy.
- If you are drilling multiple holes, make sure to measure and mark each one individually.
- Once you have marked the drilling point, double-check the measurements to ensure everything is aligned correctly.
Marking the drilling point is a crucial step, as it will determine the placement of the hole in your stainless steel sink. Take your time to ensure accuracy and double-check your measurements before proceeding to the next step.
Securing the Stainless Steel Sink

Once the stainless steel sink is properly in place, it is important to secure it to ensure stability and prevent any movement. Here are some easy steps to secure your stainless steel sink:
1. Use Silicone Caulk
Apply a bead of silicone caulk along the underside of the sink’s rim. This will create a watertight seal and help support the weight of the sink. Make sure to apply enough caulk to cover the entire rim.
2. Place Support Brackets
Position support brackets on the edges of the sink underneath the countertop. These brackets will provide additional support and help secure the sink in place. Make sure to follow the manufacturer’s instructions for proper placement.
3. Tighten Sink Clips
In some cases, stainless steel sinks come with clips or brackets that need to be tightened to secure the sink. Use a screwdriver to tighten these clips or brackets, ensuring the sink is firmly attached to the countertop.
4. Check for Stability
After securing the sink, check for stability by gently pressing down on different areas of the sink. It should feel solid and not move or wobble. If there is any movement, recheck the caulk, brackets, and clips to ensure they are properly installed.
5. Allow Caulk to Dry
Give the silicone caulk ample time to dry according to the manufacturer’s instructions. This will help ensure a strong and long-lasting bond between the sink and countertop.
Following these steps will help you secure your stainless steel sink and provide a stable and reliable installation.
Using a Pilot Hole
When drilling through a stainless steel sink, it is important to start with a pilot hole. A pilot hole is a small hole that serves as a guide for the larger drill bit. It helps prevent the drill bit from wandering or slipping as you start drilling into the stainless steel.
To create a pilot hole, follow these steps:
- Choose the right drill bit: Select a small drill bit that is suitable for drilling through stainless steel. A cobalt or titanium-coated bit is recommended for best results.
- Mark the drilling point: Use a marker or a punch to mark the exact spot where you want to drill the hole.
- Secure the sink: To prevent the sink from moving or vibrating during drilling, place a piece of scrap wood underneath it and clamp it securely.
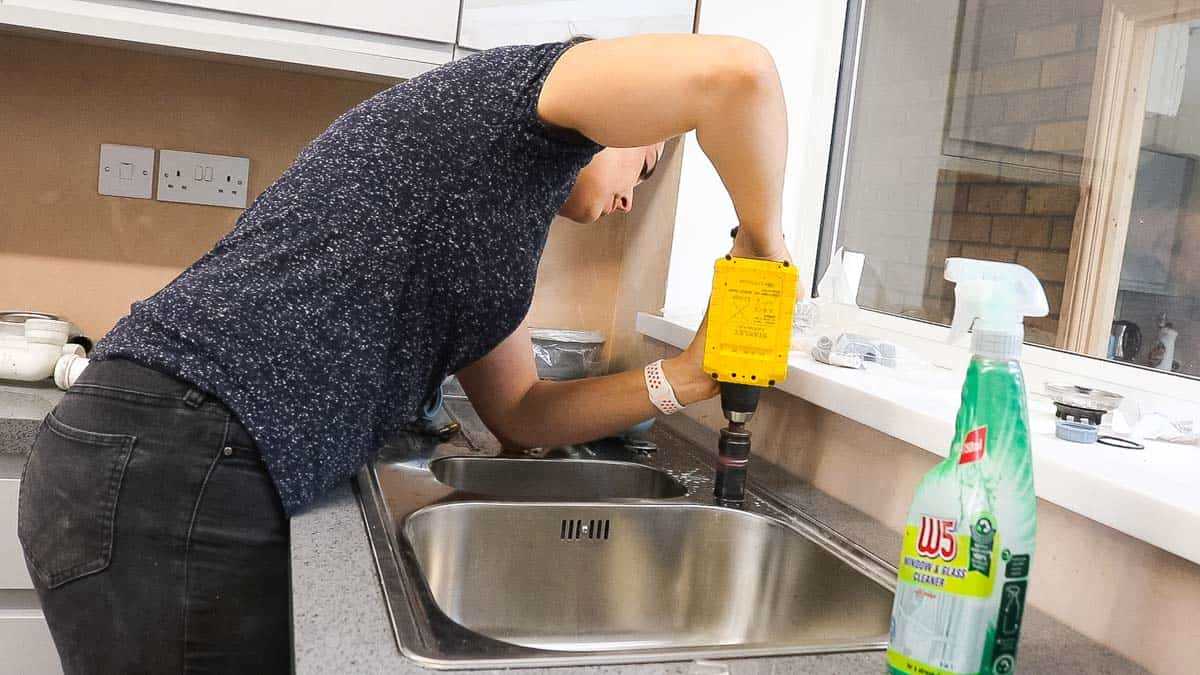
- Start drilling: Hold the drill perpendicular to the surface of the sink. Apply firm but gentle pressure and slowly begin drilling. It is important to go slowly to prevent overheating the drill bit or damaging the sink.
- Create a pilot hole: Continue drilling until the drill bit has created a small indentation in the stainless steel. This will serve as the pilot hole.
- Switch to a larger bit: Once the pilot hole is created, switch to a larger drill bit that is suitable for the size of the hole you need.
- Drill the final hole: Use the larger drill bit to enlarge the pilot hole and create the final hole in the stainless steel.
Remember to always wear safety goggles and work gloves when drilling through stainless steel to protect yourself from flying debris and sharp edges.
Drilling the Hole
Step 1: Gather the necessary tools
Before you start drilling the hole, make sure you have all the necessary tools handy. Here’s what you’ll need:
- A power drill
- A drill bit specifically designed for drilling through stainless steel
- Masking tape
- A center punch
- A hammer
- Safety goggles
Step 2: Mark the center
Using a center punch and a hammer, create a small indentation at the center of the spot where you want to drill the hole. This will help guide the drill bit and prevent it from slipping.
Step 3: Apply masking tape

To protect the surface of your stainless steel sink from scratches, apply a small piece of masking tape over the area where you’ll be drilling. This will also help prevent the drill bit from wandering.
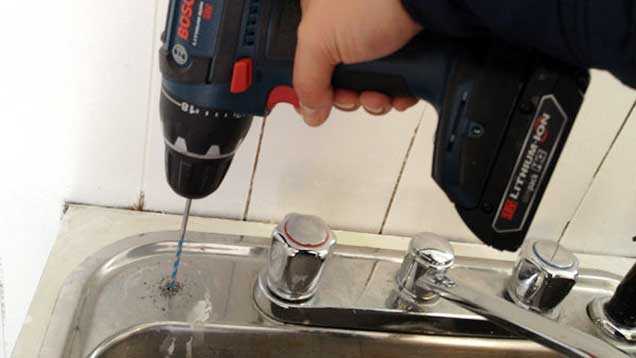
Step 4: Start drilling
Put on your safety goggles for added protection. Align the drill bit with the center mark and start drilling at a slow speed. Apply firm, steady pressure, but avoid pushing too hard as this can damage the sink.
Continue drilling until you reach the desired depth. If you’re drilling a large hole, you may need to periodically remove the drill bit and clear out any metal shavings.
Step 5: Clean up

Once you’ve drilled the hole, remove the masking tape and clean up any metal shavings or debris. You can use a cloth or a vacuum cleaner to do this.
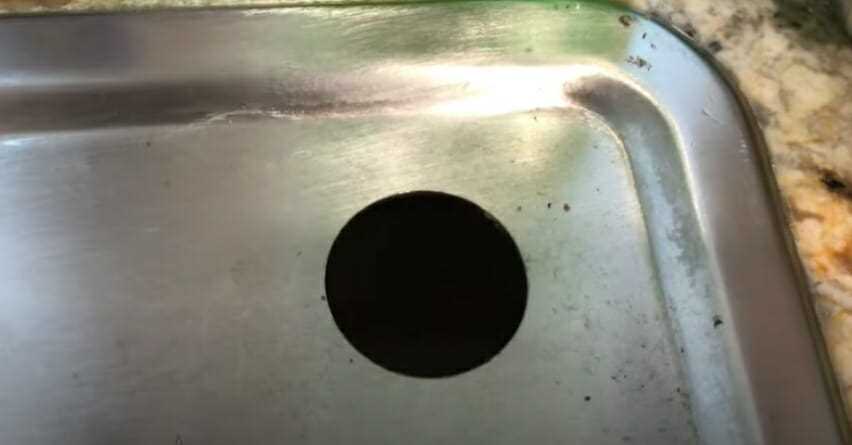
Step 6: Test the hole
Check the size and quality of the hole you’ve drilled. Ensure it’s suitable for the purpose you intend to use it for. If needed, you can use a deburring tool to smooth out any rough edges.
Step 7: Final touches
Now that you’ve successfully drilled a hole in your stainless steel sink, you can proceed with any additional steps required for your specific project, such as installing a faucet or a soap dispenser.
Remember to always exercise caution when working with power tools and wear appropriate safety gear.
Cleaning and Finishing
After drilling through your stainless steel sink, it is important to thoroughly clean the area and finish it properly to ensure a professional look and prevent any future issues. Here are some steps you can follow:
Step 1: Clean the Surface
Start by cleaning the drilled hole and the surrounding area on both sides of the sink. Use a mild detergent and warm water to remove any debris, grease, or dirt that may have accumulated during the drilling process. Rinse the area thoroughly and dry it with a clean cloth.
Step 2: Remove Burrs or Rough Edges
Inspect the edges of the drilled hole for any burrs or rough edges. These can be easily removed using a sandpaper or a deburring tool. Gently sand the edges in a circular motion until they are smooth and even.
Step 3: Apply a Finishing Product
To give the drilled hole a polished and finished look, you can apply a finishing product such as stainless steel polish or chrome polish. These products help remove any remaining scratches or imperfections on the surface and leave a protective layer that enhances the appearance of the sink.
Step 4: Buff the Surface
If you want to achieve an even shinier and more polished look, you can use a soft cloth or a buffing pad to buff the surface of the drilled hole. Apply a small amount of polishing compound to the cloth and gently buff the area in a circular motion until it shines.
Step 5: Inspect and Touch Up
Once you have finished cleaning and finishing the drilled hole, take a closer look to ensure that everything is in order. If you notice any remaining imperfections or scratches, use a touch-up paint or a similar product to fill them in and restore the smoothness of the surface.
By following these cleaning and finishing steps, you can achieve a professional and flawless look after drilling through a stainless steel sink. Remember to always work carefully and safely to avoid any damage to the sink or yourself.
Maintenance Tips
1. Clean your stainless steel sink regularly
To maintain the appearance and cleanliness of your stainless steel sink, it’s important to clean it regularly. Use a mild dish soap or stainless steel cleaner and a soft cloth or sponge to remove any dirt, stains, or residue. Avoid using abrasive cleaners that can scratch the surface of the sink.
2. Avoid leaving standing water in the sink
Avoid leaving standing water in the sink for long periods of time, as this can lead to water spots or mineral deposits. Always dry the sink with a clean cloth or towel after each use to prevent water stains and maintain its shine.
3. Use caution with sharp objects
While stainless steel sinks are durable, they can still be scratched or damaged by sharp objects such as knives or metal utensils. Be careful when using and handling sharp objects in or near the sink to avoid any potential damage. Consider using a sink grid or protective mats to prevent scratches.
4. Prevent rusting
Stainless steel is known for its resistance to rust, but it is not completely immune. To prevent rusting, avoid leaving wet sponges, cleaning pads, or metal objects in the sink for extended periods of time. It’s also a good idea to rinse the sink thoroughly after using any cleaning agents that contain chloride or bleach.
5. Remove hard water stains and mineral deposits
If you notice any hard water stains or mineral deposits on your stainless steel sink, you can remove them using a mixture of equal parts white vinegar and water. Simply apply the solution to the stained areas, let it sit for a few minutes, and then scrub gently with a soft cloth or sponge. Rinse thoroughly and dry the sink afterwards.
6. Avoid using harsh chemicals
Harsh chemicals such as bleach, ammonia, or abrasive cleaners should be avoided when cleaning your stainless steel sink. These substances can cause discoloration, damage the finish, or even corrode the sink’s surface. Stick to mild, non-abrasive cleaning products specifically formulated for stainless steel.
7. Consider a protective coating or polish
To maintain the shine and luster of your stainless steel sink, you can consider applying a protective coating or polish. There are various products available on the market that can help to protect the sink’s surface and make it easier to clean. Follow the manufacturer’s instructions carefully when applying any coating or polish.
8. Regularly check for leaks or damage
In addition to regular cleaning and maintenance, it’s important to inspect your stainless steel sink for any signs of leaks or damage. Check the faucet connections, drain assembly, and any other components regularly to ensure everything is in good working condition. Address any issues promptly to prevent further damage or water damage to your sink and countertop.
Remember, proper maintenance and care are key to keeping your stainless steel sink looking great and functioning well for years to come!
FAQ:
What are the steps to drill through a stainless steel sink?
The steps to drill through a stainless steel sink are as follows: 1. Mark the drilling spot on the sink. 2. Put on safety gear such as goggles and gloves. 3. Secure the sink with clamps or weights. 4. Start drilling slowly with a small drill bit. 5. Gradually increase the drill bit size until the desired hole size is reached. 6. Remove any metal shavings from the sink. 7. Clean the area around the hole.
Can I use a regular drill bit to drill through a stainless steel sink?
It is not recommended to use a regular drill bit to drill through a stainless steel sink. Stainless steel is a hard material, and drilling through it requires a special drill bit designed for metal. Using a regular drill bit may cause the bit to dull quickly or break, and it can also damage the sink.
What safety precautions should I take when drilling through a stainless steel sink?
When drilling through a stainless steel sink, it is important to take the following safety precautions: 1. Wear safety goggles to protect your eyes from metal shavings. 2. Wear gloves to protect your hands from sharp edges and metal shavings. 3. Work in a well-ventilated area to avoid breathing in fumes. 4. Use clamps or weights to secure the sink and prevent it from moving while drilling. 5. Keep a fire extinguisher nearby in case of any potential fire caused by sparks.
What should I do if I accidentally drill through a stainless steel sink?
If you accidentally drill through a stainless steel sink, you can try the following steps: 1. Remove the drill bit from the hole. 2. Assess the damage and determine if it can be repaired. 3. If the hole is small and does not affect the functionality of the sink, you can leave it as is. 4. If the hole is large or affects the performance of the sink, you may need to consider repairing or replacing the sink. Consult a professional for assistance if needed.
Video:

Meet Harrison Clayton, a distinguished author and home remodeling enthusiast whose expertise in the realm of renovation is second to none. With a passion for transforming houses into inviting homes, Harrison's writing at https://thehuts-eastbourne.co.uk/ brings a breath of fresh inspiration to the world of home improvement. Whether you're looking to revamp a small corner of your abode or embark on a complete home transformation, Harrison's articles provide the essential expertise and creative flair to turn your visions into reality. So, dive into the captivating world of home remodeling with Harrison Clayton and unlock the full potential of your living space with every word he writes.


