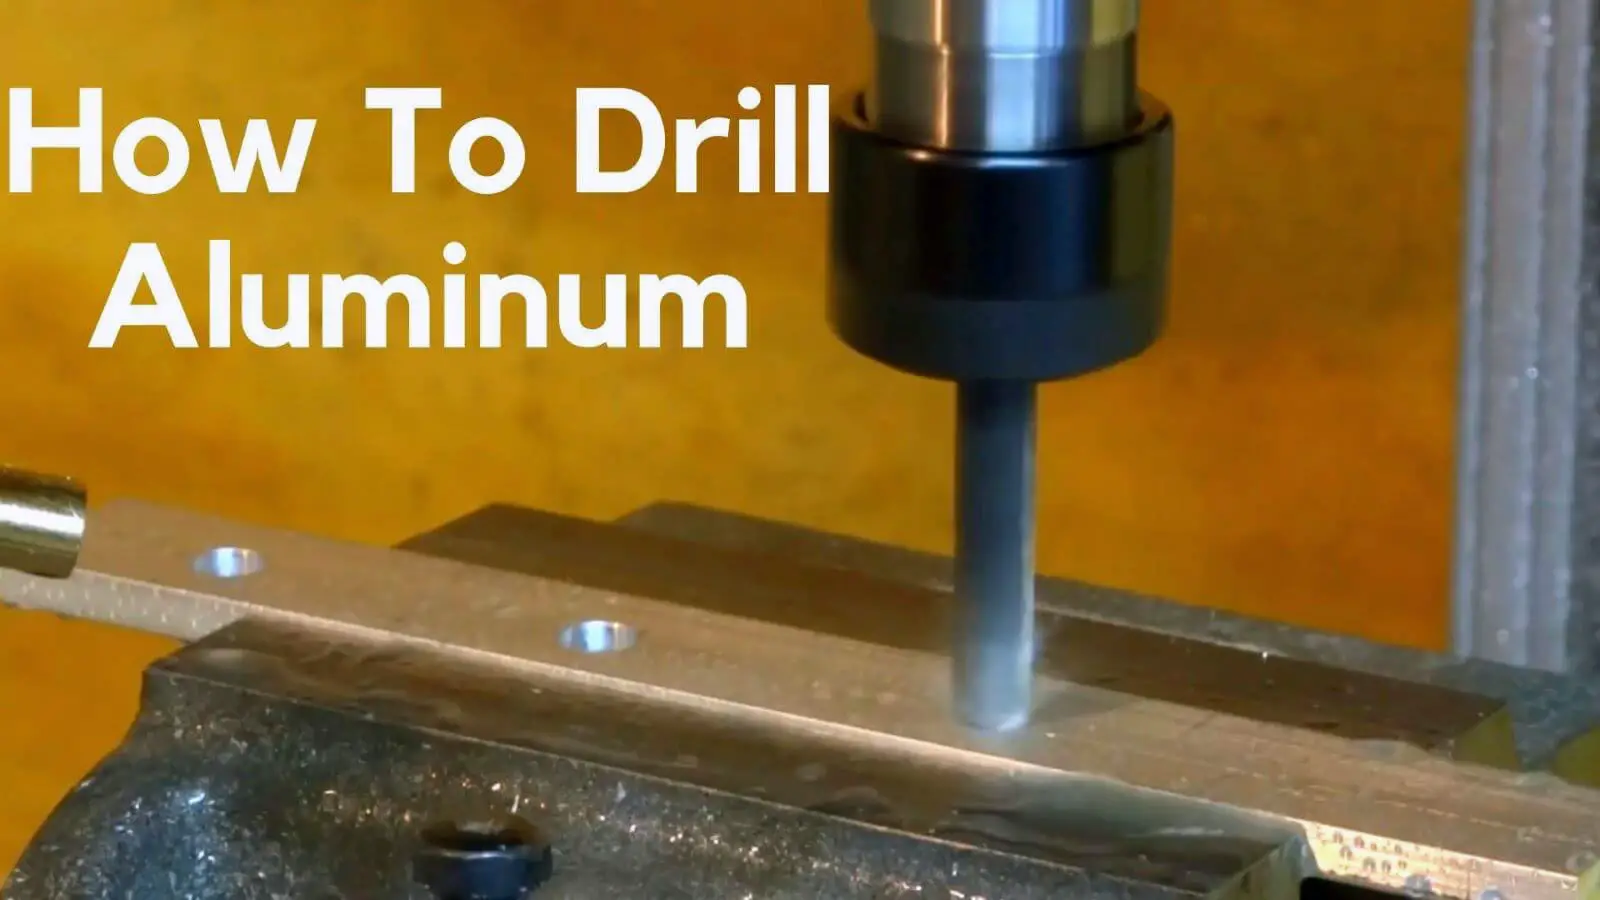
Easy Steps to Drill into Aluminum

Drilling into aluminum may seem daunting, but with the right tools and techniques, it can be a simple and straightforward process. Whether you’re a DIY enthusiast or a professional, knowing how to drill into aluminum can come in handy for various projects.
Step 1: Choose the right drill bit
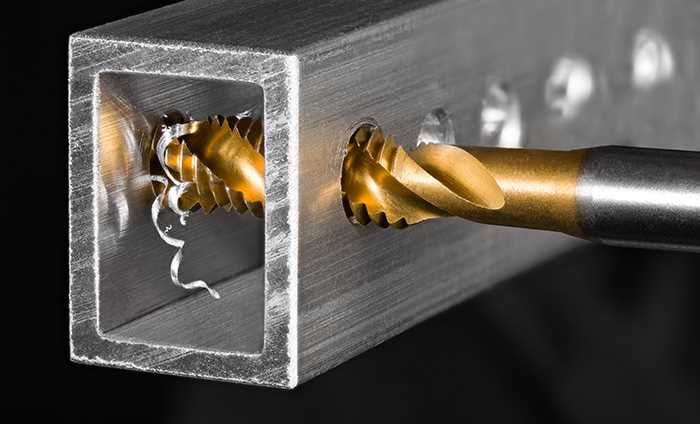
Before you begin drilling, it’s important to select the appropriate drill bit for the job. For drilling into aluminum, it’s recommended to use a high-speed steel (HSS) bit. These bits are designed to withstand the high heat generated while drilling into metal and provide clean and precise holes.
Pro Tip: If you’re drilling through thick aluminum, consider using a cobalt or titanium coated drill bit for added durability.
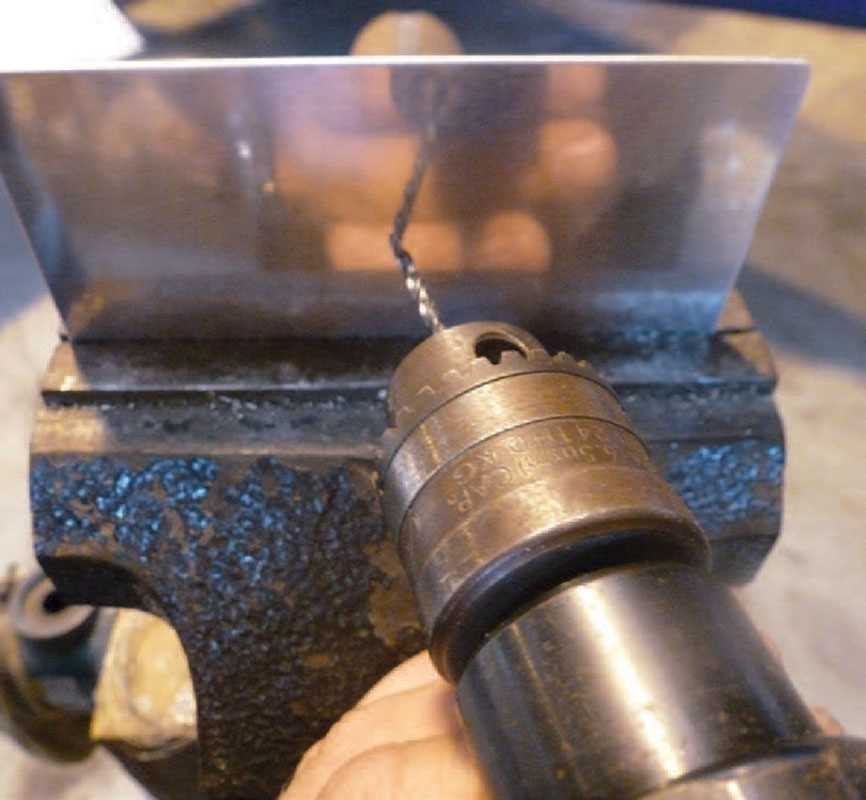
Step 2: Secure the aluminum

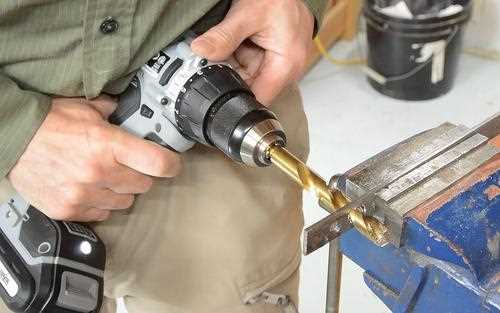
Next, secure the aluminum piece onto a stable surface using clamps or a vice. This will prevent it from sliding or moving while you drill. It’s essential to keep the aluminum piece steady to ensure accurate and safe drilling.
Pro Tip: To prevent the drill bit from slipping or scratching the aluminum surface, place a little bit of masking tape on the spot you plan to drill.
Step 3: Start drilling
Set your drill to the appropriate speed for aluminum (consult the manufacturer’s instructions for your specific drill). Begin drilling slowly and steadily, applying consistent pressure. It’s essential to let the drill bit do the work and avoid forcing it through the aluminum, as this can cause damage or break the bit.
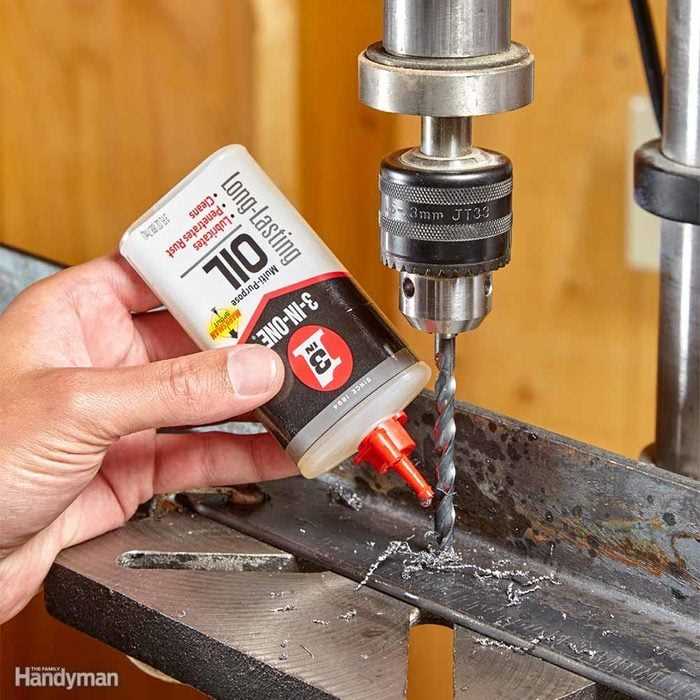
Pro Tip: To cool the drill bit and lubricate the cutting surface, you can periodically apply a small amount of cutting fluid or a mixture of water and dish soap.

Step 4: Clean up and deburr
Once you have drilled the desired hole(s), remove the aluminum from the clamp or vice. Use a deburring tool or a metal file to carefully remove any burrs or rough edges around the hole(s). This step will ensure that your project has a clean and professional finish.
Pro Tip: Always wear safety goggles and work gloves while drilling into aluminum to protect yourself from any flying metal fragments.
With these easy steps, you’ll be well on your way to drilling into aluminum like a pro. However, always remember to exercise caution and take necessary safety precautions when working with power tools.
Why Aluminum is Popular for Drilling
Aluminum is a versatile material that is widely used in various industries due to its many desirable properties. When it comes to drilling, aluminum offers several advantages that make it a popular choice:

- Lightweight: Aluminum is significantly lighter than other common drilling materials, such as steel. This makes it easier to handle and maneuver during the drilling process, reducing operator fatigue.
- High Strength-to-Weight Ratio: Despite its lightweight nature, aluminum has a high strength-to-weight ratio, meaning it can withstand considerable loads and stresses. This makes it suitable for drilling applications where strength is important.
- Corrosion Resistance: Aluminum naturally forms a protective oxide layer that helps it resist corrosion. This makes aluminum an excellent choice for drilling in environments where moisture or chemicals may be present.
- Thermal Conductivity: Aluminum is an excellent conductor of heat, allowing for efficient heat dissipation during drilling. This helps prevent overheating of the drill bit and prolongs its lifespan.
- Ease of Machining: Aluminum is relatively soft and easy to machine, making it ideal for drilling operations. It can be drilled quickly and with less effort compared to harder materials, reducing production time and costs.
Due to these advantages, aluminum is commonly used in industries such as aerospace, automotive, construction, and electronics, where drilling is frequently required. Whether it’s creating holes for fasteners, precision drilling for components, or creating intricate patterns, aluminum’s properties make it an excellent choice for drilling applications.
Step 1: Gather the Necessary Tools
Before you begin drilling into aluminum, you will need to gather a few essential tools. Having the right tools will make the drilling process easier and more efficient. Here are the tools you will need:
- Aluminum drill bit: This specific type of drill bit is designed for drilling holes in aluminum. It has a specialized tip that allows for easier penetration into the metal.
- Power drill: You will need a power drill with variable speed settings to control the drilling process. Make sure the drill is compatible with the size of the aluminum drill bit.
- Clamps or vice grips: These tools will help secure the aluminum in place during drilling, preventing any movement or slipping.
- Protective gear: Safety should always come first, so make sure to wear safety glasses or goggles to protect your eyes from any flying debris. It is also recommended to wear ear protection and work gloves.
- Measuring tools: You will need a ruler, tape measure, or any other measuring tool to ensure accurate hole placement on the aluminum surface.
- Lubricant: Using a lubricant, such as cutting oil or a small amount of water, can greatly reduce friction and heat generated during the drilling process. This helps to prevent the drill bit from overheating and prolongs its lifespan.
- Marker or pencil: These tools will help you mark the specific location where you want to drill the holes on the aluminum surface.
Make sure you have all these tools ready before you start drilling into aluminum. Having the proper tools and taking the necessary safety precautions will ensure a successful drilling experience.
Step 2: Secure the Aluminum Piece
Before you start drilling into the aluminum, it’s important to properly secure the piece. This will provide stability and prevent any unwanted movement or slipping during the drilling process.
Here are a few steps to help you secure the aluminum piece:

- Clamp the aluminum piece: Use a clamp to hold the aluminum securely in place. This will ensure that it remains stationary while you drill. Place the clamp on the area where you will be drilling, making sure it is tightly secured.
- Use a vise: If you have a vise available, you can also use it to secure the aluminum piece. Place the aluminum between the jaws of the vise and tighten it until it is securely held in place. Make sure the vise is attached to a stable surface to provide additional support.
- Create a work surface: If you don’t have a clamp or vise, you can create a work surface by using scrap wood or rubber mats. Place the aluminum piece on the surface and secure it in place with C-clamps. This will prevent it from moving while you drill.
Remember, it’s important to have a secure and stable surface before you start drilling. This will help you maintain control and produce accurate holes in the aluminum piece.
Step 3: Choose the Right Drill Bit
When drilling into aluminum, it’s important to choose the right drill bit for the job. Using the wrong drill bit can lead to damage to the aluminum, poor drilling performance, and even injury. Here are some tips for choosing the right drill bit for aluminum:
- Choose a high-speed steel (HSS) drill bit: HSS drill bits are designed to withstand the high temperatures generated when drilling into metal. They are the most common type of drill bits used for drilling into aluminum.
- Select the appropriate bit size: The size of the drill bit you need will depend on the size of the hole you want to create. Choose a drill bit that matches the diameter of the hole you want to drill.
- Consider using a bit with a coating: Some drill bits come with coatings that help reduce friction and heat buildup. These coatings can prolong the life of the drill bit and improve drilling performance in aluminum.
- Use a twist drill bit: Twist drill bits are the most common type of drill bits and are suitable for drilling into aluminum. They have flutes that help remove chips and debris from the hole as you drill.
- Ensure the drill bit is sharp: A dull drill bit can cause the aluminum to chip and crack. Before you start drilling, make sure your drill bit is sharp. If it’s not, you can sharpen it using a drill bit sharpener or replace it with a new one.
By choosing the right drill bit, you can ensure clean and accurate holes when drilling into aluminum. Remember to always wear safety glasses and take proper precautions when using power tools.
Step 4: Set the Drill Speed
Once you have chosen the appropriate bit for drilling into aluminum and have secured it in your drill, it’s important to set the drill speed correctly. The speed at which you drill into aluminum can greatly affect the quality of the hole and the overall success of your project.

Aluminum is a soft metal, so you’ll want to start with a slower drill speed. This will help prevent the bit from grabbing and spinning out of control, which can result in inaccurate holes and potential damage to your workpiece.
Begin by adjusting the drill speed to its lowest setting. This will allow you to have greater control over the drilling process. As you become more comfortable and confident, you can gradually increase the speed to find the optimal setting for your specific task.
It’s important to note that high-speed drilling is not recommended for aluminum, as it can cause the metal to heat up and melt. This can lead to an increased risk of the bit becoming stuck or broken, as well as a compromised hole quality. By setting the drill speed appropriately, you can ensure a smooth and efficient drilling process.
Step 5: Apply Lubrication
Applying lubrication is an essential step when drilling into aluminum as it helps to prevent overheating and reduces friction. This will make the drilling process much smoother and easier.
Here are some tips on how to apply lubrication:
- Choose the right lubricant: There are specific lubricants designed for use on aluminum. Look for lubricants that are specifically formulated for metal drilling.
- Apply lubricant to the drill bit: Before starting to drill, apply a small amount of lubricant directly onto the drill bit. This will help to keep the bit cool and prevent it from overheating.
- Apply lubricant to the drilling area: Apply a thin layer of lubricant to the area where you will be drilling. This will help to reduce friction and make the drilling process smoother.
- Reapply lubricant as needed: Depending on the size of the hole you are drilling and the length of time it takes, you may need to reapply lubricant during the drilling process. This will help to ensure that the drill bit stays cool and prevents any damage to the aluminum.
Remember to always follow the manufacturer’s instructions when choosing and applying lubrication. This will help to ensure that you are using the correct type and amount of lubricant for your specific drilling needs.
Step 6: Begin Drilling
- Secure the aluminum piece firmly in place using clamps or a vise to prevent any movement during drilling.
- Make sure the selected drill bit is appropriate for the material and the desired hole size.
- Double-check the drill bit to ensure it is sharp and in good condition.
- Attach the drill bit to the drill, making sure it is tightly secured.
- Put on safety goggles and work gloves to protect yourself from any potential hazards.
- Position the drill bit over the desired drilling location on the aluminum surface.
- Slowly apply pressure on the drill and begin drilling using a slow and steady motion.
- Keep the drill perpendicular to the aluminum surface to ensure a straight and accurate hole.
- Control the speed and depth of the drilling process to prevent overheating and damage.
- Periodically stop drilling to clear away any aluminum chips or debris that may accumulate around the hole.
- Continue drilling until the desired depth or hole size is achieved.
- Once drilling is complete, release the pressure on the drill and turn it off.
- Remove the aluminum piece from the clamps or vise, and inspect the drilled hole.
Congratulations, you have successfully drilled into the aluminum piece using the appropriate techniques and precautions!
Step 7: Control the Drilling Process
- Begin drilling the hole slowly and steadily to maintain control over the process.
- Apply light pressure on the drill to prevent any excessive force that could break or damage the aluminum.
- Ensure that the drill bit is perpendicular to the aluminum surface to prevent any angled holes.
- Keep the drill bit and the aluminum lubricated with cutting fluid or lubricating oil to reduce friction and heat buildup.
- Monitor the drilling process carefully, paying attention to any changes in the sound or feeling of the drill. If you notice any unusual vibrations or resistance, stop drilling and reevaluate the situation.
- Use a depth stop or mark the desired drilling depth on the drill bit to prevent drilling too far into the aluminum.
- Remove the drill bit from the hole periodically to clear out any accumulated debris and prevent clogging.
Following these control measures will help you drill into aluminum effectively and safely, ensuring accurate results and minimizing the risk of damage to the material or the drill bit.
Step 8: Clean and Inspect the Hole
After drilling into the aluminum, it is important to clean and inspect the hole to ensure that it is free of any debris or irregularities. This will help to ensure that the hole is prepared for any further processes or components that may be added.
Cleaning the Hole
- Use a brush or compressed air to remove any loose chips or shavings from the hole. This will help to prevent them from getting stuck inside the hole or interfering with the functionality of the drilled hole.
- If needed, use a damp cloth or cleaning solution to wipe away any residue or oil that may have accumulated around the hole. This will help to ensure that the area is clean and free of any potential contaminants.
Inspecting the Hole
- Visually inspect the hole to ensure that it is clean and does not have any rough edges or burrs. Use gloves to protect your hands during the inspection process.
- Check the depth and diameter of the hole to ensure that it meets the required specifications. Use a measuring tool, such as a caliper or depth gauge, to accurately measure these dimensions.
- If any irregularities or issues are identified during the inspection, take appropriate action to rectify them before proceeding with further processes or component installation.
By properly cleaning and inspecting the hole, you can ensure that it is in optimal condition for any future use or applications. This will help to maintain the integrity and functionality of the drilled hole in the aluminum material.
FAQ:
What kind of drill bit should I use to drill into aluminum?
You should use a high-speed steel or cobalt drill bit to drill into aluminum.
Do I need to use a special lubricant while drilling into aluminum?
Yes, it is recommended to use a lubricant such as cutting oil or WD-40 while drilling into aluminum to reduce heat and friction.
What is the recommended drilling speed for aluminum?
The recommended drilling speed for aluminum is between 1,000 and 2,000 RPM (rotations per minute).
How can I prevent the drill bit from slipping on the aluminum surface?
You can prevent the drill bit from slipping by using a center punch to create a small indentation on the aluminum surface before drilling, or by using a clamp to hold the aluminum securely in place.
Can I use a regular drill press to drill into aluminum?
Yes, a regular drill press can be used to drill into aluminum. Just make sure to adjust the drilling speed and use the appropriate drill bit for aluminum.
Are there any safety precautions I should take while drilling into aluminum?
Yes, some safety precautions you should take while drilling into aluminum include wearing safety glasses to protect your eyes, using a dust mask to avoid inhaling aluminum particles, and securing the workpiece to prevent it from moving during drilling.
Video:


Meet Harrison Clayton, a distinguished author and home remodeling enthusiast whose expertise in the realm of renovation is second to none. With a passion for transforming houses into inviting homes, Harrison's writing at https://thehuts-eastbourne.co.uk/ brings a breath of fresh inspiration to the world of home improvement. Whether you're looking to revamp a small corner of your abode or embark on a complete home transformation, Harrison's articles provide the essential expertise and creative flair to turn your visions into reality. So, dive into the captivating world of home remodeling with Harrison Clayton and unlock the full potential of your living space with every word he writes.


