Easy Steps on How to Release a Stuck Drill Bit

Drilling holes is a common task for many DIY enthusiasts and professionals alike. However, there may come a time when you encounter a stuck drill bit, which can be frustrating and potentially dangerous if not handled properly. In this article, we will provide you with some easy steps on how to release a stuck drill bit.
Firstly, it is important to remain calm and avoid panicking. Trying to force the drill bit out can potentially damage your drill or cause injury. Take a moment to assess the situation and determine the cause of the drill bit getting stuck.
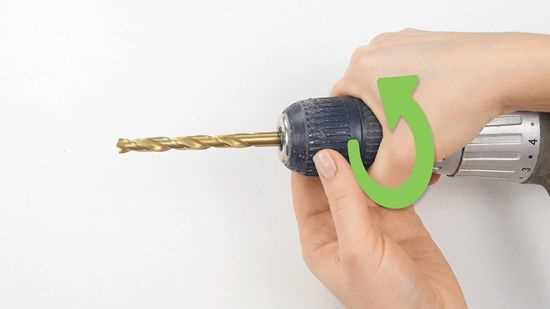
One common reason for a stuck drill bit is binding or jamming due to excessive pressure or incorrect drilling technique. To release a stuck drill bit in this case, you should reverse the drill’s rotation. Most drills have a reverse button or switch that allows you to change the direction of rotation. By switching to reverse, you can apply gentle pressure and give the drill bit a chance to release itself.
If reversing the rotation does not work, you can try lubricating the drill bit. Apply a small amount of lubricant, such as WD-40 or a penetrating oil, to the stuck drill bit. Allow the lubricant to penetrate for a few minutes and then try reversing the rotation again. The lubricant can help to loosen any debris or corrosion that may be causing the drill bit to be stuck.
It is also worth noting that a stuck drill bit may be due to a damaged chuck or drill bit itself. In this case, it may be necessary to replace the chuck or the drill bit. If you are unsure or uncomfortable doing this yourself, it is best to consult a professional or take your drill to a service center for assistance.

By following these easy steps, you can safely and effectively release a stuck drill bit. Remember to always prioritize safety and take your time when working with power tools. Happy drilling!
Preparing the drill bit
Before attempting to release a stuck drill bit, it is important to properly prepare the drill bit and the surrounding area. This will help minimize the risk of damage and ensure a successful removal.
1. Turn off the power
Prior to any work involving a stuck drill bit, it is essential to turn off the power to the drill. This will prevent any accidental injuries or damage.
2. Secure the workpiece

If the workpiece is not securely held in place, it may move or rotate during the bit removal process, making it more difficult to release the stuck bit. Use clamps or other appropriate methods to secure the workpiece in place.
3. Gather necessary tools
Before attempting to release the stuck drill bit, make sure you have the necessary tools readily available. This may include pliers, vise grips, adjustable wrench, penetrating lubricant, or a tap wrench.
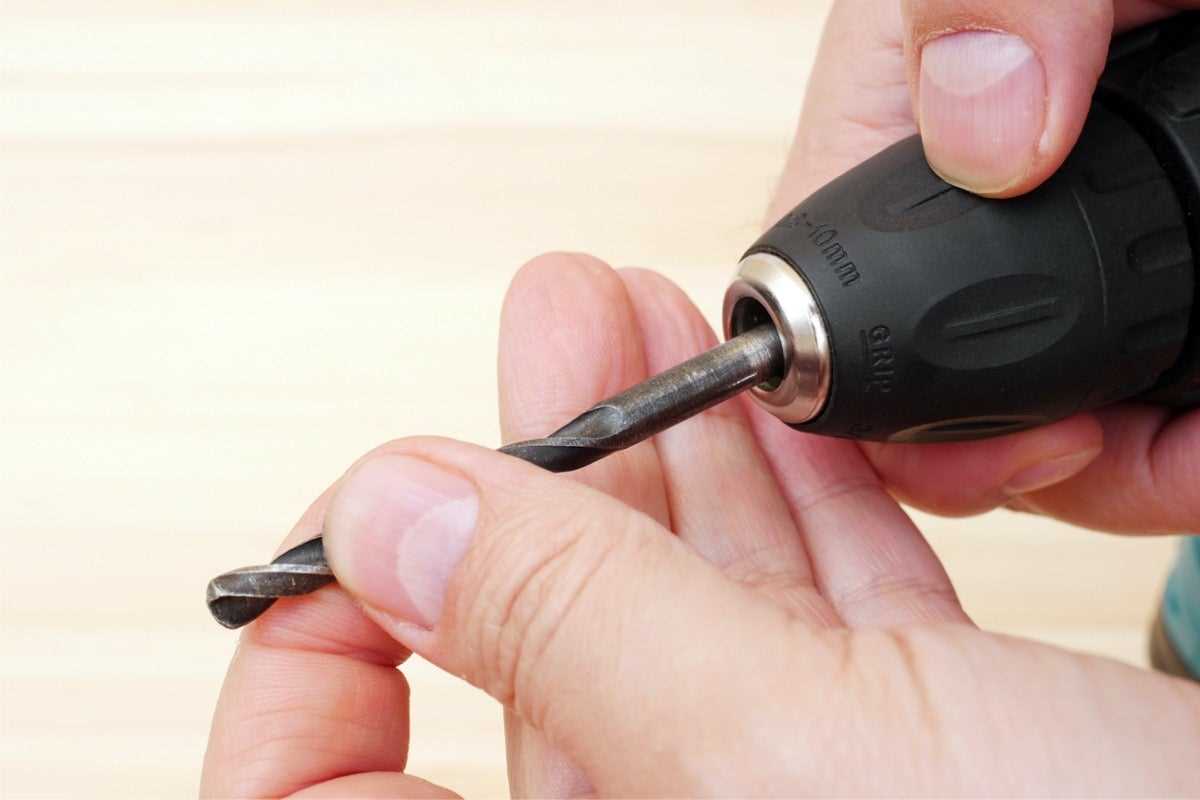
4. Inspect the drill bit
Take a moment to inspect the drill bit and assess the potential cause of it getting stuck. Look for any signs of damage, such as bending or wear, that may have contributed to the issue.
5. Clear away any debris
Remove any debris or excess material that may be obstructing the drill bit’s movement. This can be done using a brush, compressed air, or a vacuum, depending on the situation.

6. Apply lubricant (if necessary)
If the drill bit is stuck due to rust or corrosion, applying a penetrating lubricant can help loosen it. Allow the lubricant to sit for a short period of time to allow it to work its way into the stuck area.
7. Protect yourself
Before attempting to release the stuck drill bit, ensure that you are wearing appropriate safety gear, such as safety glasses and gloves, to protect yourself from any potential hazards.
By properly preparing the drill bit and the surrounding area, you can increase the chances of successfully releasing a stuck drill bit without causing any damage or harm.
Assessing the situation

Before attempting to release a stuck drill bit, it is important to assess the situation to ensure the safety of yourself and others. Here are some factors to consider when assessing the situation:
- Power source: Determine if the drill is still powered on. If it is, turn off the power source and unplug the drill to prevent any accidental activation while working on the bit.
- Bit position: Take note of the position of the stuck drill bit. Is it fully inserted into the material or only partially? This will affect your approach when trying to release it.
- Material type: Consider the type of material the drill bit is stuck in. Different materials may require different techniques to release the bit.
- Bit condition: Inspect the condition of the drill bit. Is it damaged or worn? This can affect its ability to be released and may require additional steps or precautions.
- Work area: Assess the surrounding work area for any potential hazards. Remove any objects or debris that could impede your ability to safely release the stuck drill bit.
By carefully assessing the situation, you can determine the most appropriate approach to releasing a stuck drill bit and minimize the risk of injury or damage.
Lubricating the drill bit

One effective way to release a stuck drill bit is by lubricating it. Lubrication helps reduce friction and allows the bit to move more smoothly. Here are a few steps to follow when lubricating a stuck drill bit:
- Step 1: Begin by applying a lubricant to the area where the drill bit is stuck. This can be a general-purpose lubricant or a specialized penetrating oil.
- Step 2: Allow the lubricant to sit on the stuck drill bit for a few minutes to let it penetrate and loosen any rust or debris.
- Step 3: Gently tap the stuck drill bit with a hammer or mallet to help loosen it. Be careful not to hit it too hard as this can damage the bit or the tool.
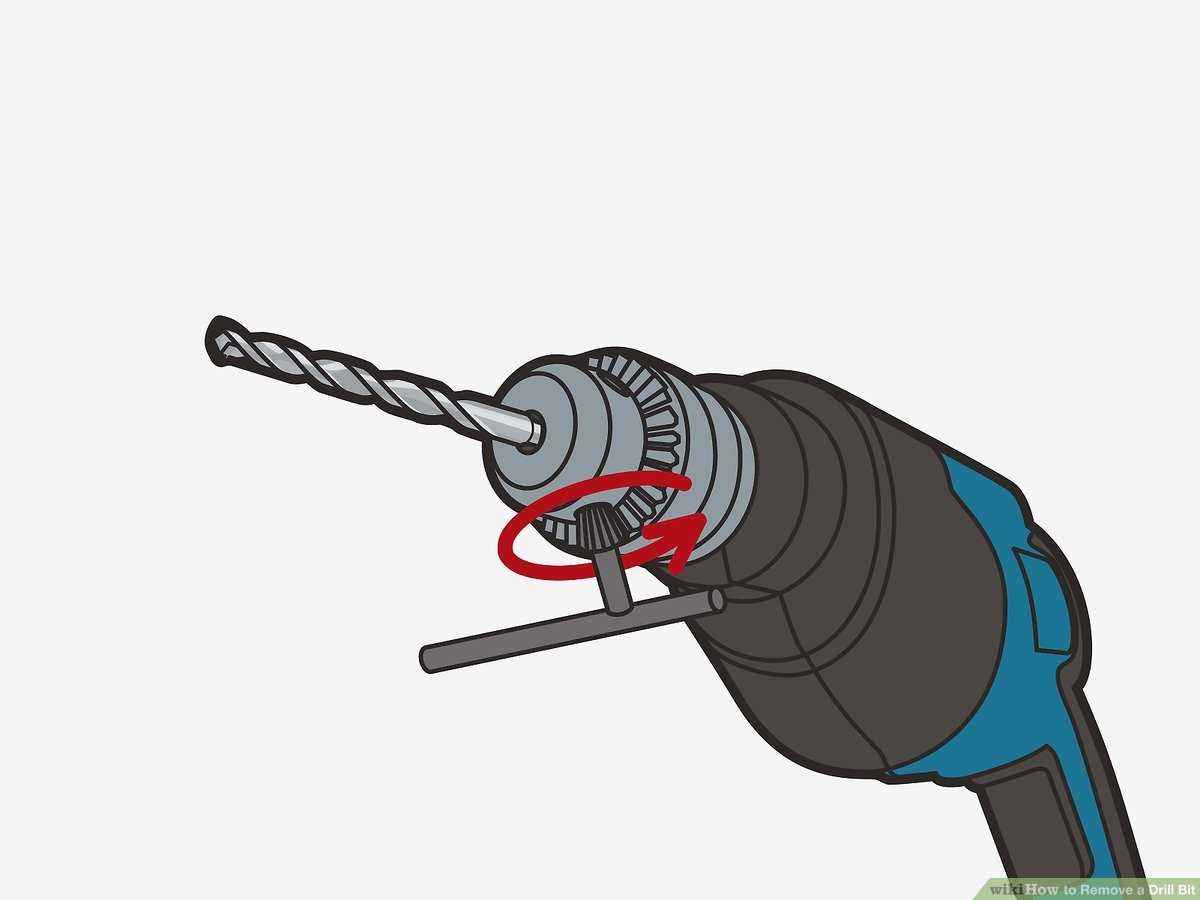
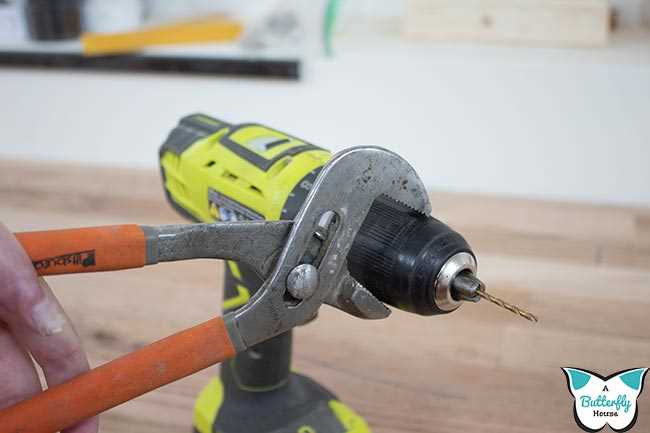
- Step 4: Use pliers or a wrench to turn the chuck of the drill in the reverse direction. This can help break the stuck drill bit free.
- Step 5: If the drill bit is still stuck, repeat steps 1-4, applying more lubricant and tapping it gently. Sometimes multiple attempts are needed to release a stuck drill bit.
Remember to take your time and be patient when trying to release a stuck drill bit. Rushing or applying excessive force can lead to damage or injury. If the above steps do not work, it may be best to consult a professional for assistance.

Using a drill bit extractor
If the previous methods did not work or you do not have access to them, you can try using a drill bit extractor. This tool is specifically designed to remove stuck drill bits and can be purchased at most hardware stores.
Here are the steps to using a drill bit extractor:
- First, ensure your safety by wearing gloves and safety glasses.
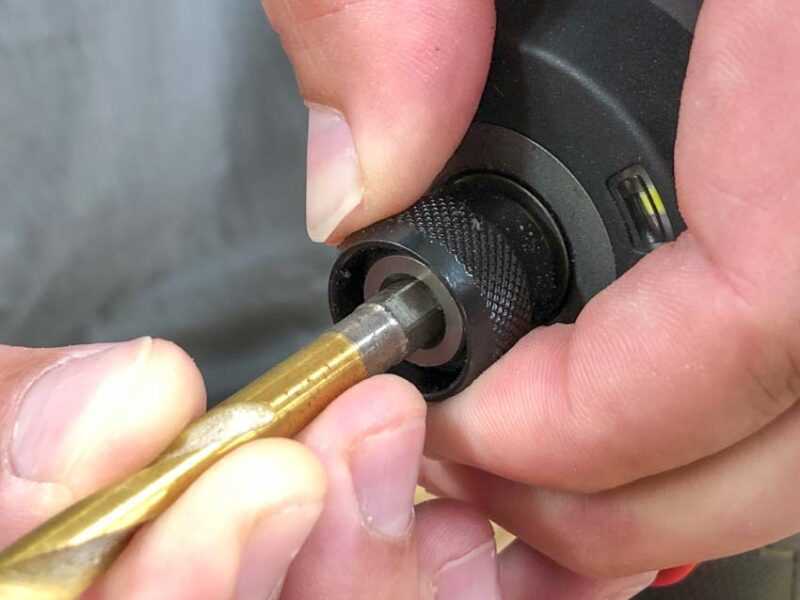
- Insert the drill bit extractor into the drill chuck, just like you would with a regular drill bit.
- Tighten the chuck securely to ensure a good grip on the extractor.
- Set the drill to reverse mode.
- Apply gentle pressure on the drill trigger while holding onto the extractor firmly.
- Slowly and steadily begin to back out the stuck drill bit.
- Continue until the bit is fully extracted from the material.
It is important to note that a drill bit extractor should only be used as a last resort, as it can be quite aggressive and may cause damage to the drill chuck or the stuck drill bit itself. If you are unsure or uncomfortable using a drill bit extractor, it is recommended to seek professional assistance.
Applying heat
Step 1: Gathering the necessary tools
To release a stuck drill bit using heat, you will need the following tools:
- Heat source (such as a heat gun or blowtorch)
- Protective gloves
- Protective eyewear
Step 2: Preparing the work area
Before applying heat, it’s important to ensure a safe work environment. Clear the area of any flammable materials and make sure you have proper ventilation.
Step 3: Heating the stuck drill bit
Once the work area is prepared, follow these steps to apply heat to the stuck drill bit:
- Put on your protective gloves and eyewear.
- Hold the heat source at a safe distance from the stuck drill bit. The exact distance will depend on the specific heat source you are using.
- Move the heat source evenly around the stuck area to heat it up. Be careful not to overheat the surrounding material or your drill bit.
- Continue applying heat for a few minutes, or until the metal around the stuck drill bit expands.
Step 4: Using pliers to release the drill bit
Once the metal has expanded, it should be easier to release the stuck drill bit. Follow these steps:
- Put on your protective gloves.
- Use a pair of pliers to grip the stuck drill bit firmly.
- Gently twist and pull the pliers to release the drill bit from the stuck position.
Remember to exercise caution when applying heat to avoid injury or damage to your tools or work area. If the drill bit remains stuck, it may be necessary to seek professional assistance.
Tapping the drill bit
If the drill bit is still stuck after attempting the previous methods, you can try tapping it to loosen it. Tapping can help dislodge any debris or rust that may be preventing the bit from moving.
Here are the steps to tap the drill bit:
- Put on a pair of safety gloves to protect your hands from any potential injuries.
- Use a hammer or mallet to tap the drill bit gently. Start by tapping lightly and gradually increase the force if necessary.
- Tap the sides of the chuck or the top of the drill bit. Be careful not to hit the drill bit too hard, as it may damage the bit or the chuck.
- Continue tapping the bit while applying slight pressure on the reverse switch to try and loosen it.
- If the bit starts to loosen, you can try using pliers or a wrench to manually turn the chuck counterclockwise to remove the bit.
If tapping the drill bit does not work, it may be necessary to seek professional help or consult the manufacturer for further assistance.
Using pliers
If the drill bit is still stuck after applying lubricant and tapping, you can try using a pair of pliers to remove it. Follow these steps:
- Gather the necessary tools: Find a pair of pliers that are suitable for gripping the drill bit securely. Make sure the pliers have a good grip and are not too large or too small for the job.
- Hold the drill bit: Use one hand to hold the drill bit firmly and prevent it from rotating.
- Use the pliers: With your other hand, grip the stuck portion of the drill bit tightly with the pliers. Make sure the pliers are positioned as close to the stuck part as possible without damaging the drill or the bit.
- Apply pressure: Once you have a firm grip with the pliers, use steady and controlled force to try and rotate the drill bit counterclockwise. Be careful not to apply too much force, as this may cause the drill bit to break or further damage the tool.
- Continue rotating: If the drill bit starts to turn, continue rotating it counterclockwise until it is completely free from the chuck. If it remains stuck, release the pressure and try again using a different grip or position with the pliers.
Using pliers can be an effective method for removing a stuck drill bit, but it is important to be cautious and avoid any excessive force that could lead to injury or damage to the tool. If the drill bit still does not come free, it may be best to seek professional assistance.
Seeking professional help
If you have tried all the above methods and still cannot release the stuck drill bit, it may be time to seek professional help. There are professionals who specialize in drilling and can assist you in removing the stuck bit safely and efficiently.
A professional can evaluate the situation and determine the best course of action to take. They may use specialized tools and techniques that are not available to the average person. By seeking professional help, you can avoid further damage to the drill or surrounding materials.
When searching for a professional to help you, consider looking for a reputable drilling service with experience in handling stuck drill bits. You can ask for recommendations from friends, family, or colleagues who have previously faced similar issues.
Additionally, you can search online for local drilling professionals and read customer reviews to gauge their reliability and expertise. Contact a few different professionals and ask for quotes and details on their services before making a decision.
Remember that seeking professional help may come at a cost, but it is often the safest and most effective option when dealing with a stuck drill bit. Avoid trying to force the bit out yourself as this can lead to further complications and potential injuries.
FAQ:
What should I do if my drill bit is stuck?
If your drill bit is stuck, the first thing you should do is turn off the drill and unplug it from the power source. Then, you can try a few different methods to release the stuck drill bit.
Can I use lubricant to release a stuck drill bit?
Yes, lubricant can be used to release a stuck drill bit. You can apply a small amount of lubricant, such as oil or WD-40, to the area where the drill bit is stuck. This can help reduce friction and make it easier to remove the bit.
What should I do if the drill bit is stuck in wood?
If the drill bit is stuck in wood, you can try using a pair of pliers or vise grips to grip the drill bit and twist it counterclockwise. If this doesn’t work, you can also try tapping the end of the drill bit with a hammer to loosen it from the wood. If neither of these methods work, you may need to use a drill extractor tool to remove the stuck bit.
Can I use heat to release a stuck drill bit?
Yes, heat can be used to release a stuck drill bit. You can use a heat gun or a blowtorch to heat up the area where the drill bit is stuck. The heat will expand the metal, which can help loosen the bit and make it easier to remove. However, be cautious when using heat, as it can cause damage to surrounding materials or cause injury if not used properly.
What is a drill extractor tool and how do I use it?
A drill extractor tool is a specialized tool used to remove stuck drill bits. It consists of a hardened steel bit with reverse threads that are designed to grip the stuck bit and turn it counterclockwise. To use a drill extractor tool, you will need to drill a small hole in the center of the stuck bit, insert the extractor tool, and then use a wrench or pliers to turn it counterclockwise to remove the stuck bit.
Are there any precautions I should take when trying to release a stuck drill bit?
Yes, there are some precautions you should take when trying to release a stuck drill bit. First, make sure the drill is turned off and unplugged from the power source. Use caution when applying force to avoid injury. Be mindful of the surrounding materials and surfaces to avoid damage. If you are unsure or uncomfortable with the process, it is best to seek professional assistance.
Video:

Meet Harrison Clayton, a distinguished author and home remodeling enthusiast whose expertise in the realm of renovation is second to none. With a passion for transforming houses into inviting homes, Harrison's writing at https://thehuts-eastbourne.co.uk/ brings a breath of fresh inspiration to the world of home improvement. Whether you're looking to revamp a small corner of your abode or embark on a complete home transformation, Harrison's articles provide the essential expertise and creative flair to turn your visions into reality. So, dive into the captivating world of home remodeling with Harrison Clayton and unlock the full potential of your living space with every word he writes.