Easy and Safe Methods to Remove Hard Gel Nails at Home Without a Drill

Hard gel nails have gained popularity over the years due to their durability and long-lasting shine. However, when it comes time to remove them, many people find themselves at a loss. Without the proper tools or knowledge, it can be difficult to remove hard gel nails without causing damage to the natural nails.
Fortunately, there are easy and safe methods to remove hard gel nails at home without the need for a drill. One method is using acetone-soaked cotton balls or pads to break down the gel. Simply soak the cotton balls or pads in acetone, place them on the nails, and wrap them with aluminum foil. Leave them on for about 15-20 minutes to allow the acetone to dissolve the gel. Then, gently scrape off any remaining gel using a cuticle pusher.
Another method involves using a nail file to gently file down the top layer of the gel. This helps to break the seal and make it easier for the gel to be removed. Once the top layer is filed down, soak the nails in acetone for about 10-15 minutes. After soaking, use a cuticle pusher to gently scrape off the loosened gel. Be sure to moisturize the nails and apply a strengthening treatment afterwards to promote healthy nail growth.
It’s important to note that these methods may take some time and patience, as the gel can be stubborn to remove. It’s recommended to take breaks between the removal process to avoid damaging the natural nails. If you’re unsure or uncomfortable with removing the gel nails yourself, it’s always best to consult a professional nail technician for assistance.
How to Remove Hard Gel Nails at Home Without a Drill
Removing hard gel nails at home without using a drill can be done using a few simple and safe methods. Follow the steps below to safely remove your hard gel nails without any professional tools:

- Gather the necessary supplies: Before starting the removal process, make sure you have the following supplies:
- Acetone or gel nail polish remover
- Nail file/buffer
- Cuticle pusher
- Cotton balls or pads
- Tin foil or nail wraps
- A towel or hand towel
- Prepare your nails: File the top layer of your gel nails to remove the shiny finish. This will help the acetone penetrate the gel more easily.
- Soak cotton balls: Soak cotton balls or pads in acetone or gel nail polish remover. Make sure they are saturated but not dripping.
- Wrap your nails: Tear small pieces of tin foil or cut nail wraps and wrap them around each finger, securing the soaked cotton ball on top of the gel nail.
- Wait for the gel to loosen: Let your nails soak in the acetone for about 15-20 minutes. This will help the gel polish to loosen and peel off more easily.
- Remove the foil wraps: Gently remove the foil wraps from each finger, taking care not to damage your natural nails.
- Gently remove the gel: Use a cuticle pusher or an orangewood stick to gently scrape off the softened gel. Be careful not to scrape too hard to avoid damaging your natural nails.
- Buff and moisturize: After removing all the gel, use a nail file or buffer to smooth out any rough edges. Apply a moisturizer or cuticle oil to rehydrate your nails and cuticles.
By following these steps, you can safely remove your hard gel nails at home without a drill. Remember to take your time and be gentle to avoid damaging your natural nails. If you’re unsure or uncomfortable doing the removal yourself, it’s always best to seek professional help.
Gather the necessary supplies
Before you begin removing your hard gel nails at home, make sure you have all the necessary supplies. Having everything prepared in advance will make the process easier and more efficient. Here are the supplies you will need:
- Acetone nail polish remover
- Cotton balls or cotton pads
- Aluminum foil
- A nail file
- A cuticle pusher
- A buffer block
- A nail clipper
- A nail oil or cuticle oil
- A moisturizing hand cream or lotion
These supplies will help you safely and effectively remove the hard gel from your nails without causing any damage. Make sure you have all the items mentioned above before you start the process.
Soften the hard gel
Before you can successfully remove hard gel nails, you need to soften the gel to make it easier to file or scrape off. There are a few different methods you can use to achieve this:
1. Acetone soak
One of the most common and effective ways to soften hard gel nails is to soak them in acetone. Acetone is a powerful solvent that can break down the gel and make it easier to remove.

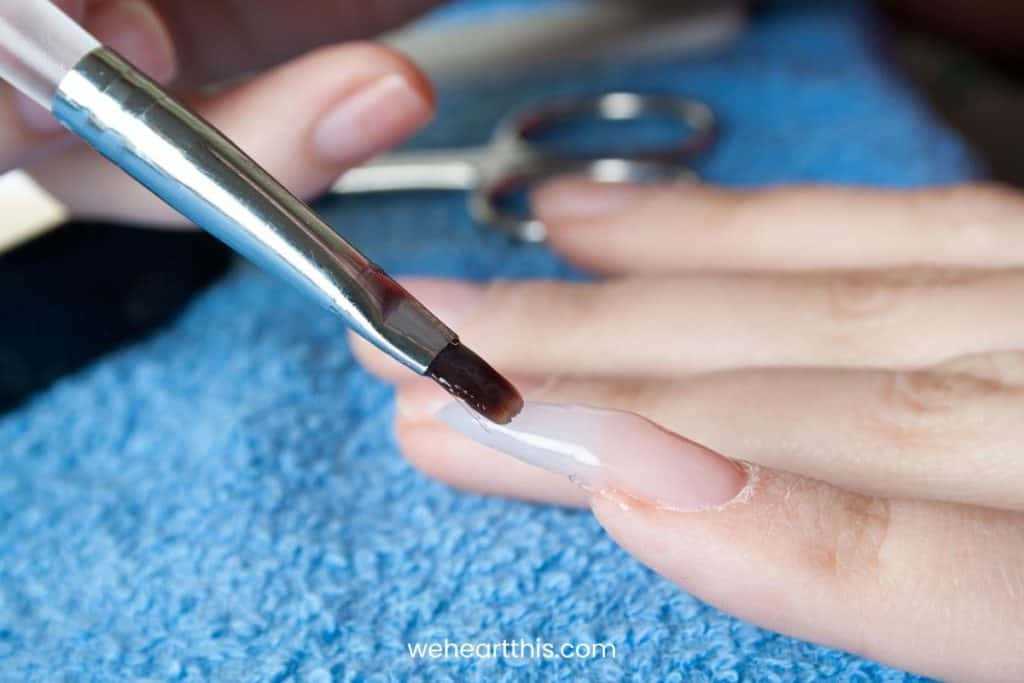
- Start by filing off the shiny top coat of your gel nails to allow the acetone to penetrate better.
- Pour some acetone into a bowl or glass container and soak your nails in it for about 10-15 minutes. Make sure to fully submerge your nails.
- You can speed up the process by wrapping your nails in aluminum foil or using acetone wraps. This helps to create a more concentrated and controlled environment for the acetone to work.
- After soaking, use a cuticle pusher or an orange stick to gently scrape off the softened gel. Be careful not to apply too much pressure or damage your natural nails.
2. Gel polish remover
If you have a gel polish remover specifically designed for hard gel nails, you can use it to soften and remove the gel.
- Apply a generous amount of the gel polish remover to a cotton ball or pad.
- Place the soaked cotton ball or pad onto your gel nails and wrap them with aluminum foil or use nail clips to secure them in place.
- Leave the remover on your nails for the recommended amount of time, usually around 10-15 minutes.
- After the allotted time, remove the foil or clips and gently scrape off the softened gel using a cuticle pusher or an orange stick.
3. Professional gel remover
If you’re having trouble removing hard gel nails at home, you may want to consider using a professional gel remover. These products are specifically formulated to break down and remove hard gel nails.
- Follow the instructions provided with the gel remover product.
- Apply the gel remover to your nails using a brush or applicator.
- Leave the gel remover on your nails for the recommended amount of time.
- After the allotted time, gently scrape off the softened gel using a cuticle pusher or an orange stick.
Remember to always follow the instructions provided with the products you’re using and take proper safety precautions. If you’re not confident in your ability to remove hard gel nails at home, it’s best to seek the assistance of a professional nail technician.

File down the gel
Another method to remove hard gel nails at home without a drill is to file down the gel. This method requires some patience and precision, but it can be an effective way to gradually remove the gel without causing damage to your natural nails.
Here’s how you can file down the gel:
- Start by using a coarse nail file to gently file off the top layer of the gel. Be careful not to file too aggressively, as you don’t want to damage your natural nails underneath.
- Continue filing the gel until you reach the base coat or your natural nails. Take breaks if needed, as this process can be time-consuming.
- Once you have filed down the gel, switch to a finer nail file or buffer to smooth out any rough edges or remaining gel on your nails.
- After filing, apply cuticle oil or a nourishing nail treatment to hydrate and protect your nails.
Note: If you have sensitive or thin nails, be extra cautious when using this method as filing down the gel can potentially weaken your natural nails. It’s also important to use a high-quality nail file to minimize any damage.
Remember to take your time and be gentle during the filing process to avoid any unnecessary harm to your nails. If you’re unsure about the proper technique, consider consulting a professional nail technician for guidance.

Soak your nails in acetone
One of the most common methods to remove hard gel nails at home is by soaking your nails in acetone. Acetone is a strong solvent that can break down the gel nail polish and make it easier to remove.
To soak your nails in acetone, follow the steps below:
- Gather the necessary materials: acetone, cotton balls, aluminum foil, nail file, and a cuticle pusher.
- File the top layer of your gel nails gently to remove the shiny surface. This will allow the acetone to penetrate the gel polish more effectively.
- Soak a cotton ball in acetone and place it on top of your nail.
- Wrap each finger with a small piece of aluminum foil to hold the cotton ball in place. This will create a small pocket of acetone around your nail, allowing it to soak and soften the gel polish.
- Leave the cotton balls and aluminum foil wraps on for about 15-20 minutes to allow the acetone to work its magic. You can also use a small towel or glove to keep your hands warm, as heat can help speed up the process.
- Remove the aluminum foil wraps and gently push off the softened gel polish using a cuticle pusher. Be careful not to scrape or damage your natural nails.
- If there is any remaining gel polish, you can repeat the process by soaking another cotton ball in acetone and reapplying it to your nails.
- Once all the gel polish has been removed, wash your hands thoroughly and moisturize them to counteract the drying effects of acetone.
Remember to always take caution when using acetone, as it can be drying to the skin and nails. If you experience any irritation or discomfort, stop the process immediately and consult a professional.
Use foil wraps
Another popular and effective method to remove hard gel nails at home without a drill is by using foil wraps. This method involves soaking your nails in acetone, which helps break down the gel nail polish for easy removal.

Here’s how you can use foil wraps to remove hard gel nails:
- Start by filing the top layer of your gel nails to remove the shine.
- Next, tear small pieces of cotton pad or ball, and saturate them with acetone.
- Place the acetone-soaked cotton pad or ball on each of your nails.
- Cover each nail with a small piece of aluminum foil, ensuring the cotton pad or ball is pressed against the gel nail polish.
- Leave the foil wraps on for about 15-20 minutes to allow the acetone to dissolve the gel polish.
- After the designated time, remove the foil wraps and gently scrape off the softened gel nail polish using a cuticle stick or orangewood stick.
- Repeat the process on each nail until all the gel polish is removed.
- Once the gel polish is completely removed, wash your hands to remove any remaining acetone residue.
Using foil wraps is a convenient and safe method to remove hard gel nails at home, as it helps minimize the need for excessive filing or drilling. However, it is important to be patient and gentle during the process to avoid any damage to your natural nails.
Gently scrape off the gel
Another effective method for removing hard gel nails at home without a drill is to gently scrape off the gel. This method requires patience and caution to avoid damaging the nails.
Here are the steps to follow:
- Start by using a cuticle pusher or an orangewood stick to gently lift the edges of the gel manicure.
- Once you have lifted the edges, take a gel polish removal tool or a wooden manicure stick and slide it under the lifted gel.
- Gently push the tool or stick forward to scrape off the gel. Be careful not to scrape too forcefully or dig into the natural nail.
- Continue scraping off the gel layer by layer until you have removed all of the gel polish. Take breaks to allow your nails and cuticles to rest if needed.
- After scraping off the gel, you may notice some residue left on your nails. Use a buffing block or a gentle nail file to lightly smooth out any remaining gel.
- Finish off by moisturizing your nails and cuticles with a nourishing oil or cuticle cream to replenish moisture.
It’s important to note that scraping off the gel can be time-consuming and may require multiple attempts if the gel is thick. Take your time and be patient to avoid causing any damage to your natural nails.

Moisturize and care for your nails
The process of removing hard gel nails can leave your nails feeling dry and brittle. To restore moisture and prevent damage, it’s important to properly moisturize and care for your nails. Here are some tips:
1. Use cuticle oil
Applying cuticle oil regularly is essential for keeping your nails hydrated. The oil helps to nourish and moisturize the nail bed, promoting healthy nail growth. Massage a few drops of cuticle oil onto your nails and cuticles every day.
2. Keep your nails short
Once you have removed your hard gel nails, it can be tempting to let your natural nails grow out. However, keeping them short is a good way to prevent breakage and damage. Regularly trim your nails to keep them at a manageable length.
3. Avoid harsh nail products
Some nail products, such as acetone-based removers and harsh polishes, can strip your nails of their natural oils and moisture. Opt for gentle, acetone-free nail polish removers and nourishing polishes to minimize damage to your nails.
4. Apply a nail strengthening treatment

Using a nail strengthening treatment can help to restore strength and resilience to your natural nails. Look for products that contain ingredients like keratin, biotin, and vitamins to nourish and protect your nails.
5. Protect your nails
Wearing gloves when doing household chores or any activities that involve exposing your nails to water or chemicals can help prevent damage. Moisture can weaken your nails, so it’s important to protect them when necessary.
6. Avoid using your nails as tools
Using your nails to open packages, scrape off labels, or perform other tasks can cause them to chip, break, or peel. Use the proper tools instead of relying on your nails to avoid unnecessary damage.
7. Maintain a healthy diet
A well-balanced diet rich in vitamins, minerals, and protein is essential for healthy nails. Include foods like spinach, eggs, salmon, and almonds in your diet to promote nail strength and growth.
By following these tips, you can help prevent dryness, brittleness, and damage to your nails after removing hard gel nails. Remember to be gentle with your nails, consistently moisturize them, and provide them with the care they need for optimal health.
Alternatives to gel nail removal
1. Soaking method
The soaking method is one of the most popular and safest alternatives to remove gel nails at home. To do this, follow these steps:
- Clip your nails as short as possible.
- Buff the surface of your nails with a nail file.
- Soak a cotton ball in acetone nail polish remover.
- Place the soaked cotton ball on top of your nail.
- Wrap your finger in aluminum foil to hold the cotton ball in place.
- Leave it on for about 10-15 minutes.
- Remove the foil and cotton ball.
- Gently scrape off the softened gel with a cuticle pusher or orangewood stick.
- Repeat the process on all nails.
2. Peeling method
If you prefer not to use acetone or soak your nails, the peeling method is another alternative. Here’s how to do it:
- Clip your nails as short as possible.
- Use a buffer or nail file to gently roughen the surface of the gel.
- Apply a thin layer of cuticle oil or olive oil around your nails.
- Use a cuticle pusher or orangewood stick to gently lift the edge of the gel nail.
- Continue to gently peel the gel off from the edge.
- Repeat the process on all nails.
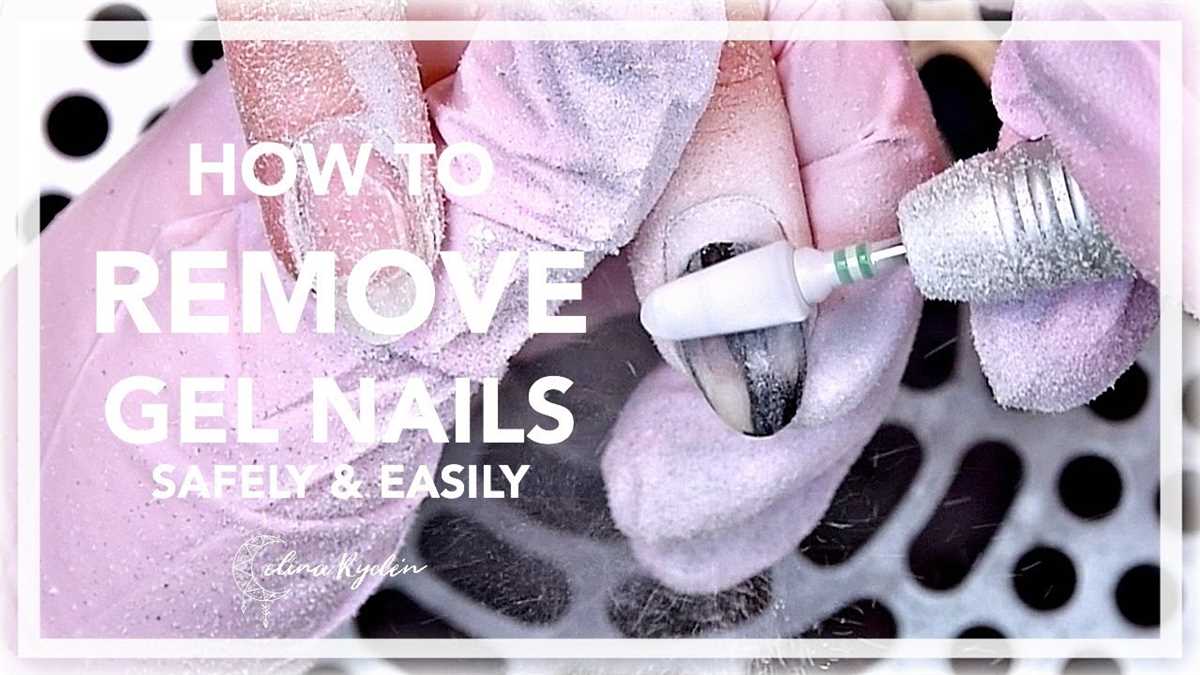
3. Filing method
If your gel nails are too hard to be soaked or peeled off, you can try the filing method:
- Clip your nails as short as possible.
- Use a coarse nail file or an electric nail file to file down the top layer of the gel.
- Be careful not to file too aggressively to avoid damaging your natural nails.
- Continue filing until the gel is thin enough to be gently scraped off with a cuticle pusher.
- Repeat the process on all nails.
4. Professional gel nail removal
If you’re unsure or uncomfortable with removing gel nails at home, it’s best to seek the help of a professional nail technician. They have the appropriate tools and techniques to safely remove gel nails without causing damage to your natural nails.
FAQ:
What are some easy and safe methods to remove hard gel nails at home?
There are several easy and safe methods to remove hard gel nails at home. One method is to soak the nails in acetone for about 15-20 minutes and then gently scrape off the gel using a cuticle pusher or a manicure stick. Another method is to use gel nail polish remover wraps, which are pre-soaked in acetone and can be wrapped around the nails to dissolve the gel. Both of these methods are effective and safe if done correctly.
Can I remove hard gel nails at home without using a drill?
Yes, you can definitely remove hard gel nails at home without using a drill. Using a drill is not necessary for gel nail removal, as there are other easier and safer methods available. Soaking the nails in acetone or using gel nail polish remover wraps are two popular methods that can be done without the need for a drill.
Is it safe to remove hard gel nails at home?
Yes, it is generally safe to remove hard gel nails at home if you follow the proper methods and take necessary precautions. It’s important to be careful while using acetone, as it can be drying to the skin and cuticles. It’s also important to avoid excessive scraping or filing, as this can lead to damage to the natural nails. If done correctly and with care, home gel nail removal can be a safe and effective option.
How long should I soak my nails in acetone to remove hard gel?
To remove hard gel using acetone, you should soak your nails for about 15-20 minutes. This allows the acetone to penetrate and dissolve the gel, making it easier to remove. You can use an acetone-resistant bowl or soak-off caps to keep the acetone in contact with the nails during the soaking process. Once the gel has started to soften, you can gently scrape it off using a cuticle pusher or a manicure stick.
Are gel nail polish remover wraps effective in removing hard gel nails?
Yes, gel nail polish remover wraps are effective in removing hard gel nails. These wraps are pre-soaked in acetone and can be wrapped around the nails, allowing the acetone to dissolve the gel. They are convenient and easy to use, and can save you the hassle of manually soaking your nails in acetone. Just make sure to follow the instructions and leave the wraps on for the recommended amount of time for optimal results.
Can I use regular nail polish remover to remove hard gel nails?
No, regular nail polish remover is not effective for removing hard gel nails. Hard gel is much stronger and more durable than regular nail polish, so it requires a stronger solvent like acetone to break it down. Regular nail polish remover is not strong enough to dissolve the gel, and using it can take a long time and may not give satisfactory results. It’s best to use acetone specifically designed for gel nail removal.
What should I do if my nails feel weak or damaged after removing hard gel?
If your nails feel weak or damaged after removing hard gel, it’s important to give them some time to recover and strengthen. You can apply a nourishing nail oil or cuticle cream to hydrate and strengthen the nails. Taking breaks from wearing nail enhancements can also help to improve the health of your natural nails. If the damage persists or worsens, it’s advisable to consult a professional nail technician or a dermatologist for further guidance.
Video:


Meet Harrison Clayton, a distinguished author and home remodeling enthusiast whose expertise in the realm of renovation is second to none. With a passion for transforming houses into inviting homes, Harrison's writing at https://thehuts-eastbourne.co.uk/ brings a breath of fresh inspiration to the world of home improvement. Whether you're looking to revamp a small corner of your abode or embark on a complete home transformation, Harrison's articles provide the essential expertise and creative flair to turn your visions into reality. So, dive into the captivating world of home remodeling with Harrison Clayton and unlock the full potential of your living space with every word he writes.


