Easy and Effective Ways to Cut Screws with a Drill

When it comes to cutting screws for your DIY projects, using a drill can be a game-changer. Whether you need to shorten a screw to fit a particular length or create a custom size, a drill can make the job quick and easy. There are several methods you can use to cut screws with a drill, and in this article, we will discuss some of the most effective ones.
Method 1: Grinding
If you have a grinding wheel attachment for your drill, you can simply grind down the length of the screw until it reaches the desired size. This method is particularly useful for cutting screws that are too long and need to be shortened. However, it is important to keep in mind that grinding generates a lot of heat, so it is crucial to take breaks and prevent the screw from overheating.
Method 2: Cutting with a Saw Blade
Another effective way to cut screws with a drill is by using a saw blade attachment. This method is ideal for cutting screws to a specific length or creating custom sizes. Simply attach the saw blade to your drill, hold the screw securely, and slowly push the saw blade into the screw, making sure to maintain a steady pressure. With a little patience and practice, you can achieve clean and precise cuts.

Method 3: Using a Metal Cutting Disc
If you have a metal cutting disc attachment for your drill, you can use it to easily cut screws. This method is especially useful when you need to cut screws made of harder materials, such as stainless steel or hardened steel. Similar to the previous methods, make sure to hold the screw securely and apply steady pressure while cutting. It is also recommended to wear safety goggles and gloves to protect yourself from any flying debris.
Remember to always exercise caution and follow safety guidelines when using a drill. Make sure to wear appropriate safety gear, such as goggles and gloves, and work in a well-ventilated area. Additionally, take breaks when necessary to prevent overheating and avoid damaging your equipment.
In conclusion, cutting screws with a drill can be an efficient and convenient way to customize their length or size for your DIY projects. Whether you choose to grind, use a saw blade, or a metal cutting disc, these methods can provide you with clean and precise cuts. Just remember to prioritize safety and take the necessary precautions to protect yourself and your equipment.
Ways to Cut Screws with a Drill
Description
When working on DIY projects or construction projects, it is often necessary to cut screws to a specific length. While there are different tools and methods available for this task, using a drill can be an easy and effective way to cut screws. This article will explore a few ways to cut screws with a drill, providing step-by-step instructions for each method.

Method 1: Using a Hacksaw Blade
Materials needed: Drill, hacksaw blade, ruler, marker
- Measure and mark the desired length on the screw using a ruler and marker.
- Secure the screw in a vise or clamp to hold it steady.
- Attach a hacksaw blade to the drill by clamping it into the chuck. Make sure it is securely attached.
- Hold the drill with both hands and align the blade with the marked line on the screw.
- Start the drill at a slow speed and apply steady pressure to cut through the screw.
- Continue cutting until you reach the desired length.
- Remove the screw from the vise or clamp and clean off any metal shavings.
Method 2: Using a Cutting Wheel
Materials needed: Drill, cutting wheel, ruler, marker
- Measure and mark the desired length on the screw using a ruler and marker.
- Secure the screw in a vise or clamp to hold it steady.
- Attach a cutting wheel to the drill by clamping it into the chuck. Make sure it is securely attached.
- Hold the drill with both hands and align the cutting wheel with the marked line on the screw.
- Start the drill at a slow speed and apply steady pressure to cut through the screw.
- Continue cutting until you reach the desired length.
- Remove the screw from the vise or clamp and clean off any metal shavings.
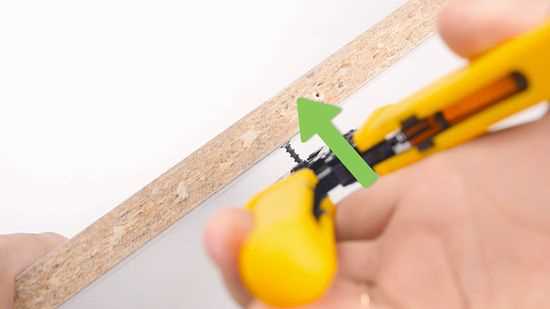
Method 3: Using a Screw Cutter Attachment
Materials needed: Drill, screw cutter attachment, ruler, marker
- Measure and mark the desired length on the screw using a ruler and marker.
- Secure the screw in a vise or clamp to hold it steady.
- Attach the screw cutter attachment to the drill according to the manufacturer’s instructions.
- Hold the drill with both hands and position the screw cutter at the marked line on the screw.
- Start the drill at a slow speed and apply steady pressure to cut through the screw.
- Continue cutting until you reach the desired length.
- Remove the screw from the vise or clamp and clean off any metal shavings.
Conclusion
Using a drill to cut screws can be a quick and efficient method for achieving the desired length. Whether using a hacksaw blade, cutting wheel, or screw cutter attachment, following the proper steps and taking necessary safety precautions will ensure successful results. Remember to always wear eye protection and work in a well-ventilated area when cutting screws with a drill.

Essential Tools for Cutting Screws
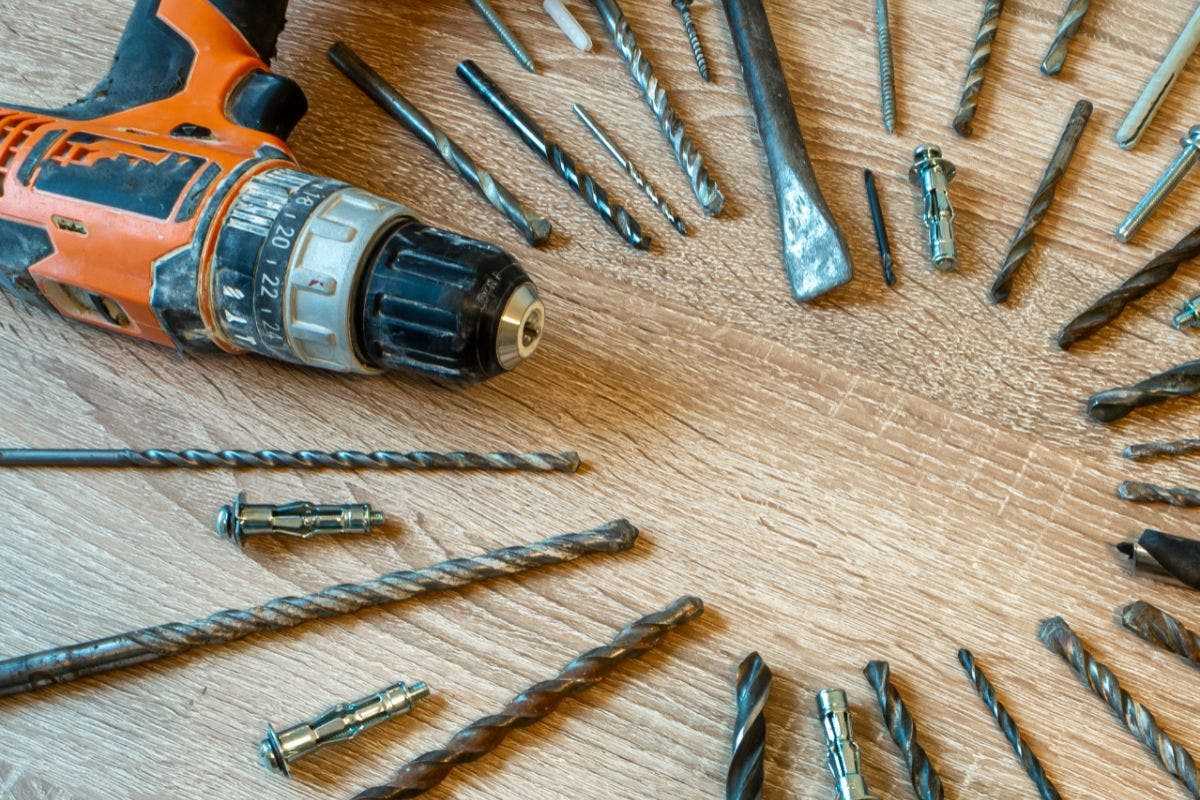
1. Power drill
A power drill is an essential tool for cutting screws. It provides the necessary power and speed to easily and effectively cut through different types of screws. Make sure you have a drill with variable speed settings to achieve the desired cutting speed.
2. Drill bit
Choose the right drill bit for cutting screws. A metal or high-speed steel drill bit is recommended for cutting through metal screws, while a carbide-tipped or masonry drill bit is suitable for cutting through concrete or wood screws. Make sure the drill bit size matches the size of the screw you want to cut.
3. Cutting oil or lubricant

Using cutting oil or lubricant while cutting screws can help reduce friction and heat, prolonging the life of your drill bit and making the cutting process smoother. Apply a small amount of cutting oil or lubricant to the area where you will be cutting the screw.
4. Safety goggles and gloves


Whenever you are using a power drill, it is important to protect your eyes and hands. Wear safety goggles to protect your eyes from flying debris, and gloves to protect your hands from potential injuries.
5. Workbench or clamps
To provide stability and control while cutting screws, use a workbench with a vise or clamps to secure the piece that you are cutting. This will prevent slipping or movement that could result in inaccurate or dangerous cuts.
6. Files or sandpaper
Once you have cut the screw, it may have sharp edges or burrs. Use files or sandpaper to smooth out these rough edges and ensure a clean and safe finish. Take your time to file or sand the cut end of the screw until it is smooth and free from any sharp edges.
7. Measuring tools
Before cutting screws, it is important to accurately measure and mark the desired length. Use a measuring tape or ruler to measure and make a clear mark on the screw. This will ensure that you cut the screw to the correct length and avoid any unnecessary waste.
8. Bench grinder (optional)
If you frequently cut screws or need to cut a large number of screws, investing in a bench grinder can be beneficial. A bench grinder allows you to quickly and easily shape and sharpen drill bits, making the cutting process even more efficient.

Preparing for the Cutting Process
Before you begin cutting screws with a drill, it’s important to properly prepare for the process. This will help ensure safety and optimal results. Follow these steps to get ready:
1. Gather the necessary tools and materials
- A drill with a cutting disc attachment
- Protective goggles and gloves
- Workbench or sturdy surface
- Clamps or a vise to secure the screw
- Measuring tape or ruler
2. Choose the appropriate cutting disc
There are different types of cutting discs available, so it’s essential to select the right one for the job. Determine the diameter and thickness of the screw you plan to cut, and choose a cutting disc that matches those specifications.
3. Mark the cutting line
Use a measuring tape or ruler to mark the desired length of the screw. Make sure the mark is clearly visible and easy to follow during the cutting process. This will help you achieve accurate cuts.
4. Secure the screw
Place the screw on a stable workbench or surface, ensuring it is firmly held in place. You can use clamps or a vise to secure the screw and prevent it from moving during the cutting process. This will improve safety and cutting precision.
5. Wear protective gear
Always wear protective goggles and gloves before starting the cutting process. This will shield your eyes from flying debris and protect your hands from potential injuries. Safety should be a top priority throughout the entire process.
6. Set up a suitable work environment
Clear the area around your workbench or surface to provide enough space for the cutting process. Remove any items that could obstruct your movement or cause accidents. Keep in mind that you’ll be using a power tool, so maintaining a clean and organized work environment is crucial.
7. Double-check the drill’s settings
Before you begin cutting, make sure your drill is set to the appropriate speed and rotation direction. Refer to the manufacturer’s instructions for the recommended settings based on the type of cutting disc and screw you’re working with. This will help prevent damage to both the drill and the screw.
By following these preparatory steps, you’ll be ready to safely and effectively cut screws with a drill. Remember to prioritize your safety and work in a controlled environment.
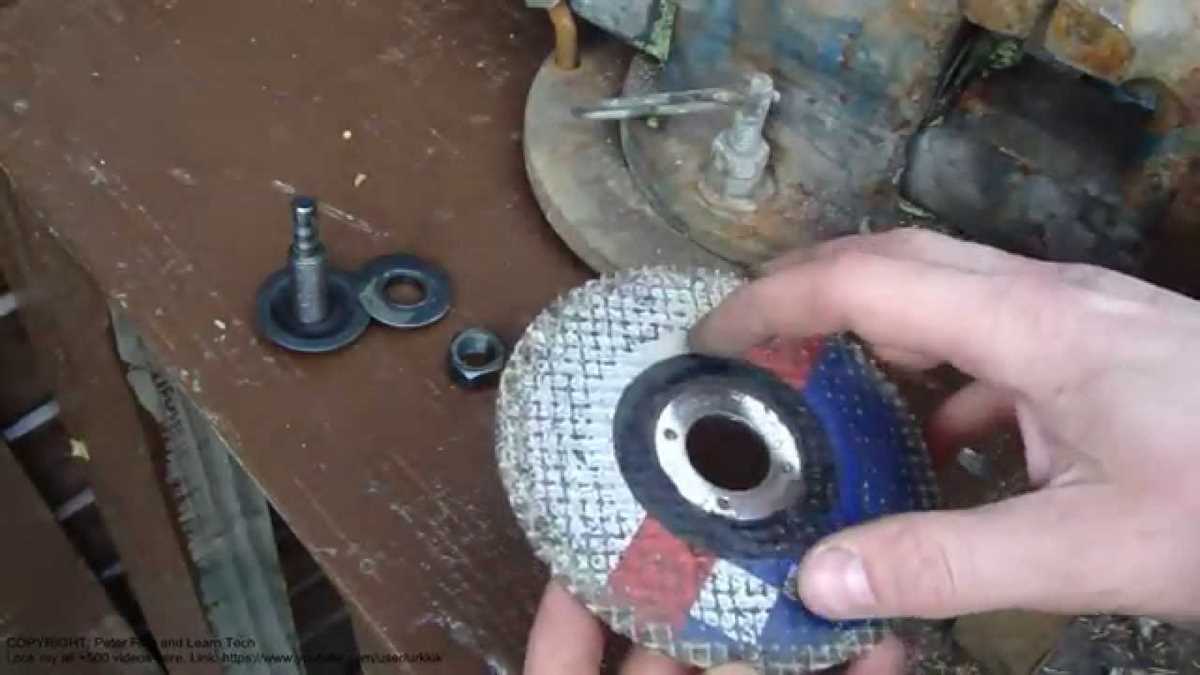
Using a Cutting Disk
Another method for cutting screws with a drill is by using a cutting disk. This technique is ideal for larger screws or when you want to make precise cuts.
Materials Needed:
- Drill
- Cutting disk
- Protective gloves
- Safety goggles
Steps:
- Put on your protective gloves and safety goggles to ensure your safety.
- Insert the cutting disk into the drill, making sure it is securely attached.
- Hold the screw firmly in place with a vice or clamp.
- Position the cutting disk at the desired location on the screw.
- Turn on the drill and slowly lower the cutting disk onto the screw.
- Apply gentle pressure and let the cutting disk do the work, slowly cutting through the screw.
- Continue cutting until the desired length is achieved.
- Turn off the drill and remove the cutting disk.
- Inspect the cut end of the screw to ensure it is clean and smooth.
Using a cutting disk with a drill is an effective method for cutting screws, allowing for precision and control in the cutting process. However, it is important to follow safety precautions and wear protective gear to prevent injury.
Cutting Screws with a Hacksaw
If you don’t have a drill or if you prefer a more manual approach, cutting screws with a hacksaw is a simple and effective method. Here are the steps to follow:
- Gather the necessary tools: To cut screws with a hacksaw, you will need a hacksaw with a blade suitable for cutting metal, a vise or clamp to securely hold the screw in place, and safety goggles to protect your eyes.
- Secure the screw: Place the screw in the vise or clamp, making sure it is held securely and does not move during the cutting process. This will provide stability and prevent accidents.
- Measure and mark: Use a ruler or measuring tape to measure the desired length of the screw. Make a clear and visible mark on the screw with a marker or a piece of tape.
- Cut the screw: Hold the hacksaw with your dominant hand and the handle firmly with the other hand. Align the hacksaw blade with the marked line on the screw and start cutting with slow and steady strokes. Apply moderate pressure to the hacksaw blade as you cut through the screw.
- Monitor your progress: As you cut, periodically stop and check your progress. Ensure that you are cutting straight along the marked line and adjust your technique if necessary.
- Finishing touches: Once you have cut through the screw, use a file or sandpaper to remove any burrs or sharp edges that may have formed during the cutting process. This will ensure that the cut end of the screw is smooth and safe to handle.
Remember to always wear safety goggles when cutting screws to protect your eyes from flying metal shavings. Additionally, take your time and work slowly to avoid accidents and achieve a clean and precise cut.
Using a Reciprocating Saw
A reciprocating saw is a versatile power tool that can be used to cut screws quickly and effectively. Here are some easy steps to follow when using a reciprocating saw:
- Choose the right blade: Select a blade that is suitable for cutting screws. A demolition or metal cutting blade will work best for this task.
- Secure the screw: Make sure the screw is securely clamped or held in place before you start cutting. This will prevent it from moving or vibrating during the cutting process.
- Mark the cutting line: Use a marker or a pencil to mark the cutting line on the screw. This will help guide your saw and ensure an accurate cut.
- Start cutting: Position the reciprocating saw blade on the marked cutting line and switch on the saw. Make sure the blade is lined up properly before you start cutting.
- Apply steady pressure: Apply steady and even pressure on the saw to cut through the screw. Let the saw do the work and avoid forcing it through the material.
- Keep the saw perpendicular: Maintain a perpendicular angle between the saw blade and the screw to ensure a straight cut. This will minimize the risk of veering off the cutting line.
- Monitor the cutting: Keep an eye on the progress of the cut and adjust your speed and pressure as needed. Take breaks if necessary to avoid overheating the saw or blade.
- Finish the cut: Once the screw is cut through, switch off the saw and remove the blade from the material. Be careful when handling the cut screw, as it may be sharp.
- Clean up: Dispose of any debris and clean the work area after completing the cut. This will help maintain a safe and organized workspace.
By following these steps, you can easily and effectively cut screws using a reciprocating saw. Always prioritize safety and wear appropriate protective gear when using power tools.
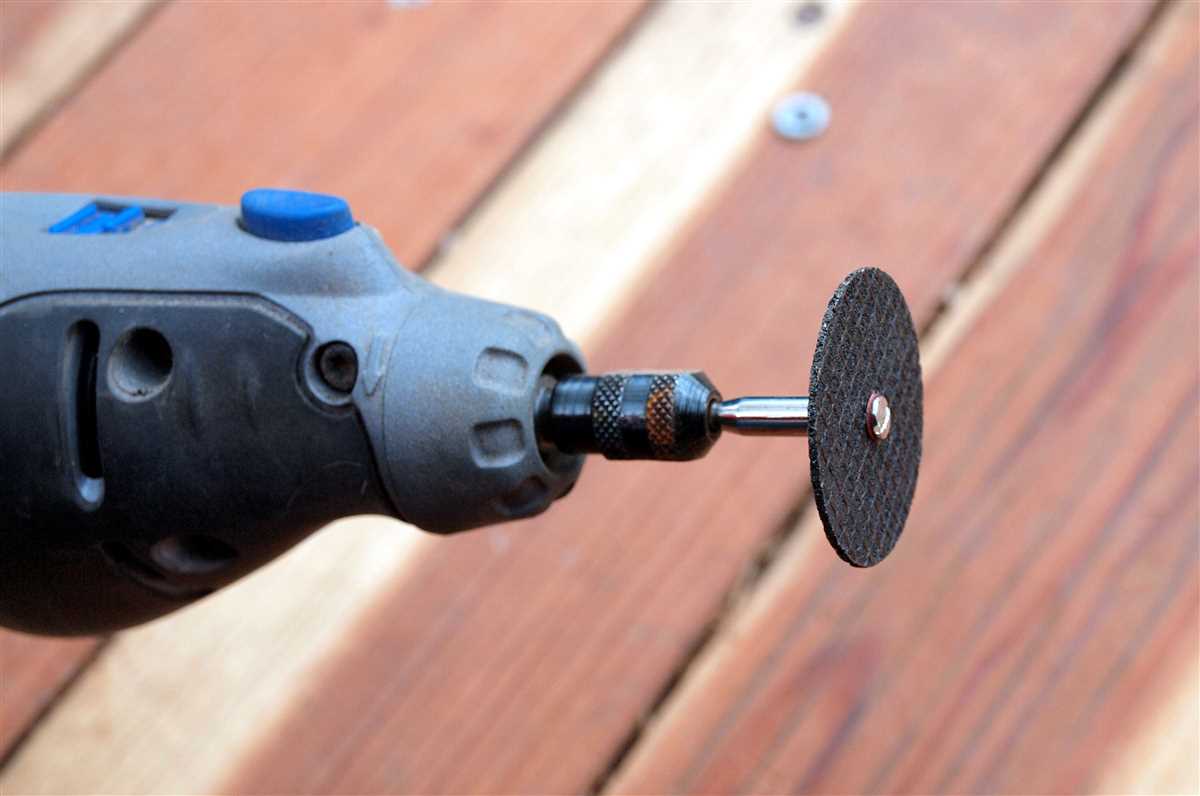
Cutting Screws with a Rotary Tool
A rotary tool, such as a Dremel, can be a handy tool to cut screws, especially when you need precision and control. Here are some easy and effective ways to cut screws with a rotary tool:
1. Choose the Right Cutting Bit
Before you start cutting screws with a rotary tool, it’s important to choose the right cutting bit. A cutting wheel or a metal cutting bit is ideal for cutting screws. Make sure the bit is securely attached to the rotary tool.
2. Mark the Screw
Use a marker or a pencil to mark the point on the screw where you want to make the cut. This will help you stay on track and ensure that you cut the screw at the right spot.
3. Secure the Screw
Before you start cutting, it’s important to secure the screw. You can use a clamp or a vice to hold the screw in place. This will prevent it from moving while you cut.
4. Start Cutting
Turn on the rotary tool and slowly bring it towards the marked point on the screw. Apply gentle pressure and let the tool do the cutting. Move the tool back and forth or in a circular motion to gradually cut through the screw.
5. Check the Progress
Periodically stop and check the progress of the cut. Make sure you are cutting straight and staying on track with your mark. Adjust your technique if needed.
6. Sand the Cut Edge
After you’ve finished cutting the screw, use sandpaper or a file to smooth out the cut edge. This will remove any burrs or rough edges left by the cutting process.
7. Clean and Test the Screw
Once you’re satisfied with the cut, clean off any debris from the screw. Test the screw to make sure it fits properly and functions as intended.
Remember to wear safety goggles and gloves when using a rotary tool to cut screws. This will protect your eyes and hands from any flying debris or accidental slips.
With these easy steps, you can effectively cut screws with a rotary tool and achieve precise results. Happy cutting!
Using a Bolt Cutter
If you’re looking for a quick and easy way to cut screws, a bolt cutter can be a useful tool. Bolt cutters are designed to cut through bolts and other thick metal rods, making them ideal for cutting screws. Here’s how to use a bolt cutter to cut screws:
Step 1: Safety First
Before you begin, it’s important to ensure your safety. Wear safety goggles and gloves to protect your eyes and hands from flying metal shards or sharp edges.
Step 2: Position the Screw
Position the screw between the blades of the bolt cutter as close to the head as possible. Make sure the screw is aligned straight and centered between the blades to ensure a clean cut.
Step 3: Apply Pressure
Once the screw is properly positioned, firmly grip the handles of the bolt cutter and apply pressure to cut through the screw. Bolt cutters have long handles to provide leverage, allowing you to exert the necessary force to cut through the metal.
Step 4: Repeat if Necessary
If the screw is not completely cut through after the initial cut, reposition it between the blades of the bolt cutter and repeat the process. Apply more pressure if needed to cut through the remaining portion of the screw.
Step 5: Inspect the Cut

After cutting through the screw, inspect the cut to ensure it is clean and even. If there are any rough or jagged edges, use a metal file or sandpaper to smooth them out.
Using a bolt cutter to cut screws is a straightforward and effective method. However, it’s important to note that bolt cutters are typically designed for cutting through thick metal, so they may not be suitable for cutting small screws or delicate materials. In those cases, consider using alternative methods such as a hacksaw or a Dremel tool.
Safety Tips for Cutting Screws
1. Wear Safety Gear
Before you start cutting screws with a drill, it’s essential to protect yourself by wearing the appropriate safety gear. This includes safety goggles to protect your eyes from any flying debris, gloves to protect your hands from sharp edges or hot materials, and earplugs or earmuffs to protect your ears from the noise generated by the power tools.
2. Choose the Right Drill Bit

Make sure you select the proper drill bit for the type of material you are cutting. Different materials require different types of drill bits. Using the wrong bit can lead to inefficient cutting or damage to the drill bit or the material you are working with. Refer to the manufacturer’s guidelines or consult with a professional to determine the right drill bit for your specific project.
3. Secure the Screw
Prior to cutting the screw, it’s important to secure it properly. Ensure that the screw is tightly clamped in a vise or firmly held in place to prevent it from moving during the cutting process. This will not only ensure accuracy but also prevent accidents that can occur if the screw slips or spins unexpectedly.
4. Measure and Mark the Cut Line
Take precise measurements and mark the exact point where you want to cut the screw. This will help you guide the drill and ensure accurate cutting. Using a ruler or a measuring tape, measure and mark the cut line clearly on the screw. Double-check the measurements before proceeding with the cutting process.
5. Start Slowly
When initiating the cut, start drilling at a slow speed. This will allow you to have better control over the drill and prevent any sudden slips or jerks. Gradually increase the speed as you gain confidence and maintain a steady pace throughout the process.
6. Use Proper Technique
While cutting screws with a drill, it’s important to maintain the correct technique. Apply gentle, steady pressure and let the drill bit do the work. Avoid exerting excessive force or pushing the drill too hard, as it may lead to loss of control and increased risk of accidents. Focus on maintaining a consistent angle and smooth motion while cutting.
7. Stay Alert and Focused
Always remain alert and focused while cutting screws with a drill. Avoid distractions and ensure that you are fully present during the entire cutting process. Stay aware of your surroundings, keep your hands away from the moving parts, and never leave the drill unattended while it is still running.
8. Practice Safe Storage
Once you have finished cutting the screws, make sure to store the power tools and related accessories safely. Unplug the drill and store it in a secure place, away from the reach of children or unauthorized individuals. Properly organize the drill bits and other accessories to prevent any accidents or injuries.
9. Seek Professional Help if Needed
If you are unsure about any aspect of cutting screws or lack the necessary experience, it is best to seek professional help. Consulting with a professional or experienced individual can provide valuable guidance, ensuring accurate cutting and minimizing the risk of accidents.
10. Regularly Inspect Tools and Equipment

Prior to each use, inspect your drill, drill bits, and other equipment for any signs of damage or wear. Replace any worn-out or damaged parts immediately. Regular maintenance and inspection of your tools will not only enhance safety but also improve their performance and longevity.
- Wear safety goggles, gloves, and ear protection
- Select the right drill bit for the material
- Secure the screw properly before cutting
- Measure and mark the cut line carefully
- Start drilling at a slow speed
- Use proper cutting technique
- Stay alert and focused throughout the process
- Practice safe storage of tools and accessories
- Seek professional help if necessary
- Regularly inspect and maintain tools and equipment
FAQ:
Can I use a hacksaw to cut screws?
Yes, you can use a hacksaw to cut screws. To do this, secure the screw in a vise and carefully cut through it using a hacksaw. Make sure to use a fine-toothed blade and apply consistent pressure to ensure a clean cut. It’s important to wear safety goggles and take necessary precautions when cutting screws with a hacksaw.
Is it possible to cut screws with a Dremel tool?
Yes, it is possible to cut screws with a Dremel tool. To do this, attach a cutting wheel to the Dremel tool and slowly cut through the screw. Be sure to wear safety goggles and take necessary precautions when using a Dremel tool. Additionally, it’s important to remember that Dremel tools are best suited for small or thin screws.
What is the best way to cut screws with a grinder?
The best way to cut screws with a grinder is to use a grinding wheel. Secure the screw in a vise or clamp and carefully cut through it using the grinder. Be sure to wear safety goggles and take necessary precautions when using a grinder. It’s important to note that grinders can be quite powerful, so exercise caution and control when cutting screws with this tool.
Can I use a reciprocating saw to cut screws?
Yes, you can use a reciprocating saw to cut screws. Secure the screw in a vise or clamp and use a reciprocating saw with a metal-cutting blade to cut through it. This method is best suited for larger screws or bolts. However, caution should be exercised when using a reciprocating saw as it can be powerful and may cause the screw to spin or jump, potentially causing injury. Safety goggles and other protective gear should always be worn.
Is it possible to cut screws with a bolt cutter?
Yes, you can cut screws with a bolt cutter, but it is important to note that bolt cutters are more suitable for cutting thinner screws. If the screw is thin enough, you can place it between the jaws of the bolt cutter and apply pressure to cut through it. However, bolt cutters may struggle with thicker screws or bolts. It’s also important to wear safety goggles and take necessary precautions when using bolt cutters.
Video:


Meet Harrison Clayton, a distinguished author and home remodeling enthusiast whose expertise in the realm of renovation is second to none. With a passion for transforming houses into inviting homes, Harrison's writing at https://thehuts-eastbourne.co.uk/ brings a breath of fresh inspiration to the world of home improvement. Whether you're looking to revamp a small corner of your abode or embark on a complete home transformation, Harrison's articles provide the essential expertise and creative flair to turn your visions into reality. So, dive into the captivating world of home remodeling with Harrison Clayton and unlock the full potential of your living space with every word he writes.


