Drilling Through Metal Studs: A Step-by-Step Guide

When it comes to drilling through metal studs, there are a few important steps to follow to ensure success and avoid any damage. Whether you are installing shelves, hanging a television, or mounting cabinets, knowing how to properly drill through metal studs is essential. This step-by-step guide will walk you through the process, making it easy to tackle any project.
Step 1: Gather the tools you will need. Before you begin drilling, make sure you have all the necessary tools. These typically include a power drill, a drill bit designed for metal, a stud finder, a level, and safety goggles. Having all the tools ready will save you time and frustration as you work.
Step 2: Locate the metal studs. Use a stud finder to locate the metal studs in the wall where you plan to drill. Metal studs are typically spaced 16 to 24 inches apart, so locate the first stud and measure accordingly. Mark the center of each stud with a pencil for reference.
Step 3: Choose the right drill bit. Select a drill bit designed specifically for drilling through metal. These drill bits are typically made of cobalt or carbide and have a sharp tip for easy penetration. Using the wrong drill bit can result in a dull bit or damage to the stud.
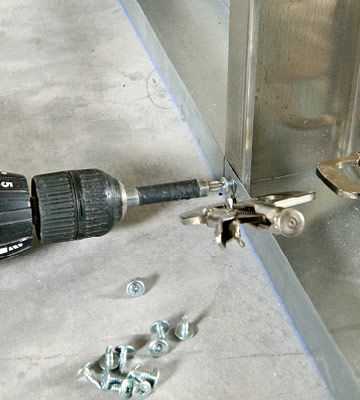
Step 4: Drill slowly and steadily. With your safety goggles on, begin drilling slowly into the metal stud. Apply steady pressure and avoid pushing too hard, as this can cause the drill to slip. Start with a pilot hole and gradually increase the size of the hole to accommodate your fastener.

Step 5: Check for level. After drilling your holes, use a level to ensure that your project will be straight and even. This is especially important if you are mounting shelves or cabinets. Make any necessary adjustments before proceeding.
Step 6: Proceed with your project. Once you have completed drilling through the metal studs and confirmed the level, you can proceed with your project. Install your fasteners or anchors, following the manufacturer’s instructions, and securely attach your desired items to the wall.
Remember to always use caution when drilling through metal studs, as they can be hard and difficult to work with. Take your time, follow these steps, and you’ll be able to tackle any project with confidence.
Preparing for Drilling
Before you begin drilling through metal studs, it’s important to properly prepare your workspace and gather the necessary tools and materials. Follow these steps to ensure a smooth drilling process:
Gather the necessary tools and materials
- Hammer drill
- Metal drill bits
- Tape measure
- Pencil or marker
- Level
- Safety goggles
- Work gloves
Identify the location of the studs
Use a stud finder or tap on the wall to locate the metal studs. Once you find a stud, make a small mark on the wall to indicate its position.

Measure and mark the hole locations
- Measure and mark the desired location for the hole on the metal stud. Use a level to ensure the mark is straight and aligned with other marks, if applicable.
- Double-check the measurements and marks before proceeding.
Clear the workspace
Clear away any obstructions or debris in the area where you will be drilling to create a clean and safe workspace.
Put on safety gear
Before you start drilling, put on your safety goggles and work gloves to protect your eyes and hands from any potential debris or injuries.
Choosing the Right Tools
When it comes to drilling through metal studs, using the right tools is essential. Not all drills are created equal, and using the wrong one can lead to frustration and potentially damage the stud.

Drill
There are two main types of drills that are commonly used for drilling through metal studs: corded drills and cordless drills. Corded drills typically provide more power and are better suited for heavy-duty drilling tasks. However, cordless drills offer more freedom of movement and are usually sufficient for most DIY projects.
When choosing a drill for drilling through metal studs, look for one with variable speed settings and a depth stop. Variable speed settings will allow you to adjust the drilling speed to match the requirements of the stud, while a depth stop will prevent you from drilling too deep and damaging the surface behind the stud.
Drill Bit
The type of drill bit you use is also important for drilling through metal studs. For most metal stud drilling tasks, a high-speed steel (HSS) drill bit will work well. HSS drill bits are designed to withstand the high temperatures and friction generated when drilling through metal.
It’s important to use a sharp drill bit to ensure clean, precise holes. Dull drill bits can cause the drill to wander and may result in a sloppy hole. If you notice that your drill bit has become dull, it’s best to replace it before attempting to drill through metal studs.

Safety Equipment
When working with power tools, it’s important to prioritize safety. When drilling through metal studs, wear safety goggles to protect your eyes from flying debris. Additionally, consider wearing work gloves to protect your hands from cuts and scrapes.
If you’re drilling through metal studs in a confined space, such as a crawl space or attic, it may be beneficial to wear a dust mask to prevent inhalation of any dust or debris that may be generated during the drilling process.
Conclusion
Choosing the right tools is crucial when drilling through metal studs. By selecting the appropriate drill, drill bit, and safety equipment, you can ensure a successful and safe drilling experience.
Marking the Studs
Before you start drilling through metal studs, it’s important to locate and mark the positions of the studs accurately. This will help you avoid hitting any electrical wires or pipes that may be running through the wall.

Here’s a step-by-step guide to marking the studs:
- Identify the first stud: Start by measuring and marking 16 inches from a corner of the wall. Most construction standards require studs to be spaced 16 inches apart, although it may vary in some cases.
- Mark the remaining studs: Once you have identified the first stud, you can use a stud finder to locate the remaining studs. Move the stud finder along the wall and listen for any beeping sound or for the indicator light to turn on when it is positioned over a stud. Mark the positions of the studs with a pencil or a marker.
- Double-check the markings: After marking all the studs, it’s a good idea to use a level to double-check the accuracy of your markings. Place the level against the wall and adjust the positions of the markings if necessary.
Marking the studs accurately is crucial for ensuring that your drilling is done safely and without causing any damage to the wall or the hidden wiring and pipes. Taking the time to mark the studs properly will make the drilling process much easier and more efficient.
Determining the Drill Size
Before you start drilling through metal studs, it’s important to determine the appropriate drill size for the job. Using the wrong size drill bit can result in a hole that is too big or too small, making it difficult to properly secure screws or nails.
There are a few factors to consider when determining the drill size:
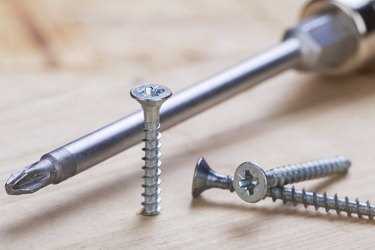
- Fastener Size: The size of the screws or nails you plan to use will dictate the drill size needed. Check the packaging of the fasteners to find the recommended drill bit size.
- Stud Gauge: Metal studs come in various gauges, which refer to the thickness of the metal. Thicker gauges require larger drill bits, while thinner gauges may require smaller drill bits.
- Pilot Hole: If you plan to create a pilot hole before drilling through the metal studs, you’ll need to choose a drill bit size slightly smaller than the fastener size. This helps guide the fastener into the stud and reduces the risk of splitting or damaging the metal.
It’s always a good idea to consult the manufacturer’s guidelines for the specific metal studs you are working with. They may have specific recommendations for drill sizes based on their product.
| Metal Stud Gauge | Recommended Drill Bit Size |
|---|---|
| 16 | 1/8″ or 9/64″ |
| 18 | 5/64″ or 3/32″ |
| 20 | 3/32″ or 7/64″ |
These recommended drill sizes are just a general guideline. Always double-check the product specifications and guidelines before drilling through metal studs.
Measuring the Stud Thickness
Before you start drilling into metal studs, it’s important to know the thickness of the stud. This will help you determine what type of drill bit and screws to use for the job. Here are a few steps to measure the stud thickness:
- Locate the stud: Use a stud finder to locate the position of the stud. This will give you an idea of where to measure the thickness.
- Remove any covering: If the stud is covered by drywall or another material, you will need to remove it to access the stud. Use a utility knife to cut through the covering and expose the metal stud beneath.
- Measure the thickness: Once the stud is exposed, use a tape measure or caliper to measure the thickness. Place the measuring device on one side of the stud and stretch it across to the other side, making sure to measure the widest part of the stud.
It’s important to note that metal studs come in different thicknesses, typically ranging from 16 to 25 gauge. The thickness will determine the type of drill bit and screws you need for the project.
If you’re unsure about the thickness or need specific guidance, consult the manufacturer’s specifications or seek advice from a professional before drilling into metal studs.
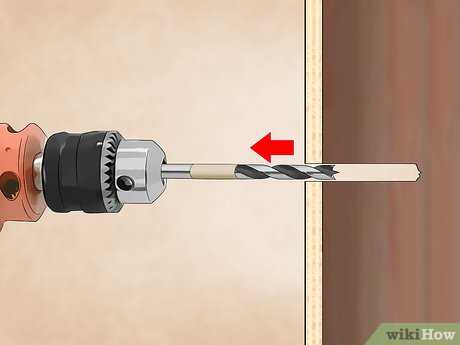
Selecting the Appropriate Drill Bit
When drilling through metal studs, it is important to use the correct type of drill bit. Using the wrong type of bit can result in ineffective drilling, damage to the stud, or even injury to yourself. Here are some factors to consider when selecting the appropriate drill bit:
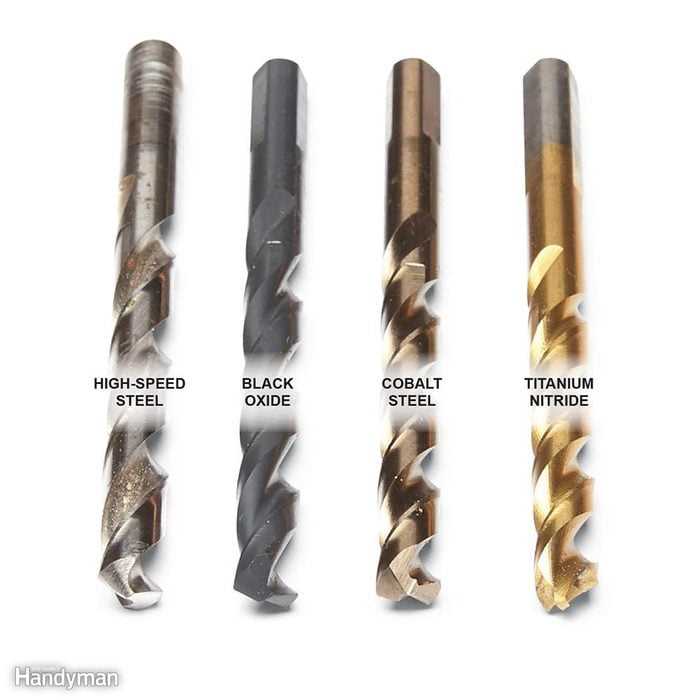
1. Material
Firstly, consider the material you will be drilling into. Metal studs are typically made from steel or aluminum. Depending on the type of metal, you will need to choose a drill bit that is specifically designed for that material. For steel studs, a high-speed steel (HSS) or cobalt bit is recommended. For aluminum studs, a standard HSS bit should suffice.
2. Diameter
The diameter of the hole you need to drill will also determine the type of bit you should use. If you are drilling small holes (e.g., for screws), a twist drill bit will be sufficient. However, if you need to drill larger holes (e.g., for pipes or cables), a step drill bit or a hole saw may be more appropriate.
3. Coating
Some drill bits come with coatings that can enhance their performance and durability. For drilling through metal studs, consider using drill bits with titanium nitride (TiN) or black oxide coatings. These coatings reduce friction, increase hardness, and provide better chip evacuation, resulting in faster drilling and longer tool life.
4. Shank Type
The shank type of the drill bit is also important to consider. Most drill bits have a straight shank that can be used with a variety of drill chucks. However, if you are using a hammer drill, you may need a drill bit with a special shank designed for use with hammer drills.
Remember to always wear appropriate safety gear, such as safety goggles and gloves, when drilling into metal studs. Additionally, make sure to follow the manufacturer’s instructions for both your drill and the drill bit you are using for optimal results.
Making a Pilot Hole
Before drilling through a metal stud, it is important to create a pilot hole. This small hole will help guide the drill bit and prevent the metal stud from shifting or cracking during the drilling process.
To make a pilot hole, follow these steps:
- Measure and mark: Use a tape measure to measure and mark the location where you want to drill the hole on the metal stud. Make sure to double-check your measurements before proceeding.
- Select the appropriate drill bit: Choose a drill bit that is suitable for drilling through metal. High-speed steel or cobalt drill bits are recommended for this purpose.
- Secure the metal stud: Use clamps or another securing method to hold the metal stud in place and prevent it from shifting during drilling.
- Start drilling: Position the drill bit at the marked spot on the metal stud and apply gentle pressure. Begin drilling slowly using a low speed setting on your drill.
- Create the pilot hole: Continue drilling until you penetrate the metal stud. Avoid applying excessive force, as this can cause the drill bit to break or the stud to deform.
Once you have created the pilot hole, you can proceed with the drilling process using a larger drill bit or the desired size for your project. Remember to always wear appropriate safety gear such as goggles and gloves when working with power tools and metal.
Using a Center Punch
A center punch is a helpful tool when drilling through metal studs. It helps to create a small indentation in the metal, which helps to prevent the drill bit from slipping as you start drilling. Here are the steps to use a center punch correctly:
- Step 1: Position the center punch – Place the point of the center punch on the spot where you want to drill the hole. Make sure the punch is perpendicular to the surface of the metal stud.
- Step 2: Apply pressure – Hold the center punch firmly and apply steady pressure. Use a hammer or a mallet to tap on the other end of the center punch. This will create a small indentation in the metal surface.
- Step 3: Double-check the position – Before proceeding with drilling, make sure the indentation created by the center punch is centered and in the correct location for the hole.
Note: Using a center punch is particularly important when drilling through metal studs, as the metal can be quite hard and slippery. The indentation created by the center punch helps to give the drill bit a starting point and improves accuracy.
By using a center punch, you can ensure that your drill bit stays in place and drills through the metal stud accurately. This will help you create clean and precise holes for your desired application.
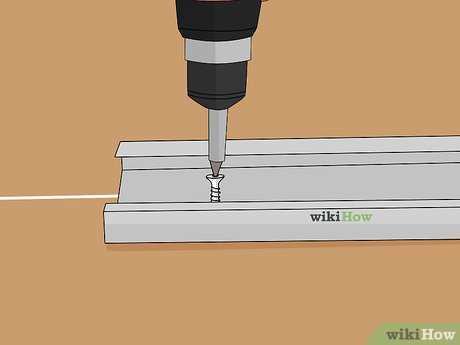
Drilling the Pilot Hole
Before you start drilling into the metal studs, it is important to drill a pilot hole to guide the larger drill bit. A pilot hole is a small hole that serves as a guide for the larger drill bit, preventing it from slipping or wandering off course. Here’s how to drill a pilot hole:
Materials you will need:
- Drill
- Pilot drill bit
- Safety goggles
Step-by-step guide:
- Put on your safety goggles to protect your eyes from any flying debris.
- Attach the pilot drill bit to your drill.
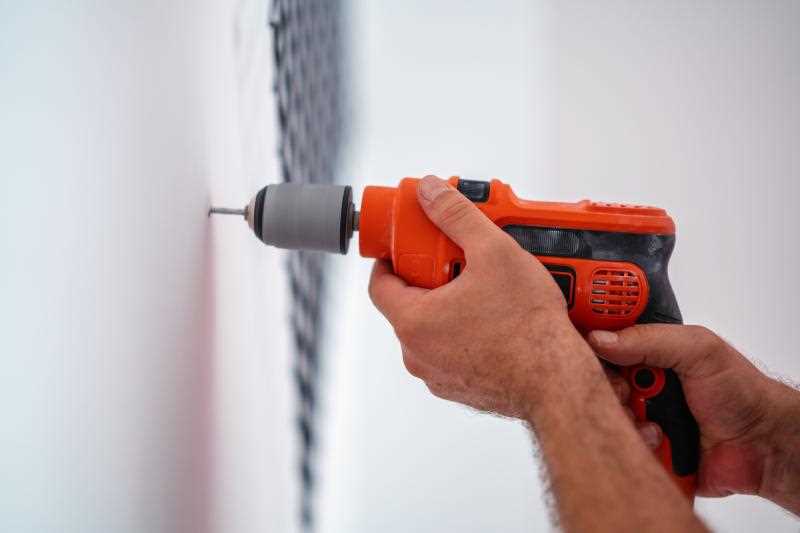
- Hold the drill perpendicular to the surface of the metal stud where you want to drill the hole.
- Apply light pressure and start drilling slowly, allowing the pilot drill bit to bite into the metal.
- Continue drilling until you have drilled through the metal stud.
- Once the pilot hole is drilled, remove the pilot drill bit from the drill and replace it with the larger drill bit that you will use to create the final hole.
Remember to take your time and apply steady pressure as you drill the pilot hole. This will help prevent the drill bit from slipping or creating a larger hole than intended. It is also important to choose the correct size of pilot drill bit that matches the size of the larger drill bit you will be using.
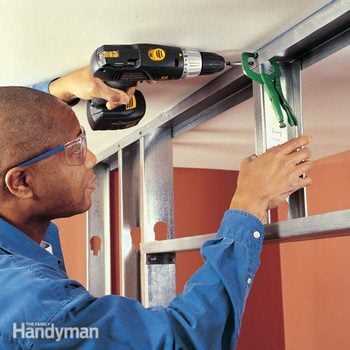
Drilling Through the Stud
Once you have determined the exact location for your hole, follow these steps to drill through the metal stud:
- Put on safety goggles and work gloves to protect your eyes and hands.
- Select the appropriate drill bit for your project. For drilling through metal studs, a high-speed steel (HSS) drill bit with a 1/8-inch diameter is recommended.
- Attach the drill bit to your drill. Make sure it is securely tightened.
- Place the tip of the drill bit over the marked location on the stud.
- Apply steady pressure to the drill and start drilling. Use a medium speed to avoid overheating the drill bit. Hold the drill straight and perpendicular to the stud for the best results.
- Continue drilling until you have penetrated the entire stud. You may feel some resistance as you near the end, but keep applying pressure until the drill bit has fully passed through the stud.
- Once the hole is complete, remove the drill bit from the stud and set aside.
It’s important to note that drilling through metal studs may produce metal shavings. Therefore, it’s recommended to have a brush or vacuum nearby to clean up any debris that is left behind.
With the hole now drilled through the metal stud, you can proceed with your intended project, whether it’s installing a wall mount, running electrical wiring, or hanging a heavy object. Remember to always exercise caution and take appropriate safety measures when working with power tools.
FAQ:
What tools will I need to drill through metal studs?
You will need a power drill, drill bits designed for metal, a stud finder, and safety goggles.
Is it difficult to drill through metal studs?
It can be slightly more challenging than drilling through wood studs, but with the right tools and technique, it is definitely doable.
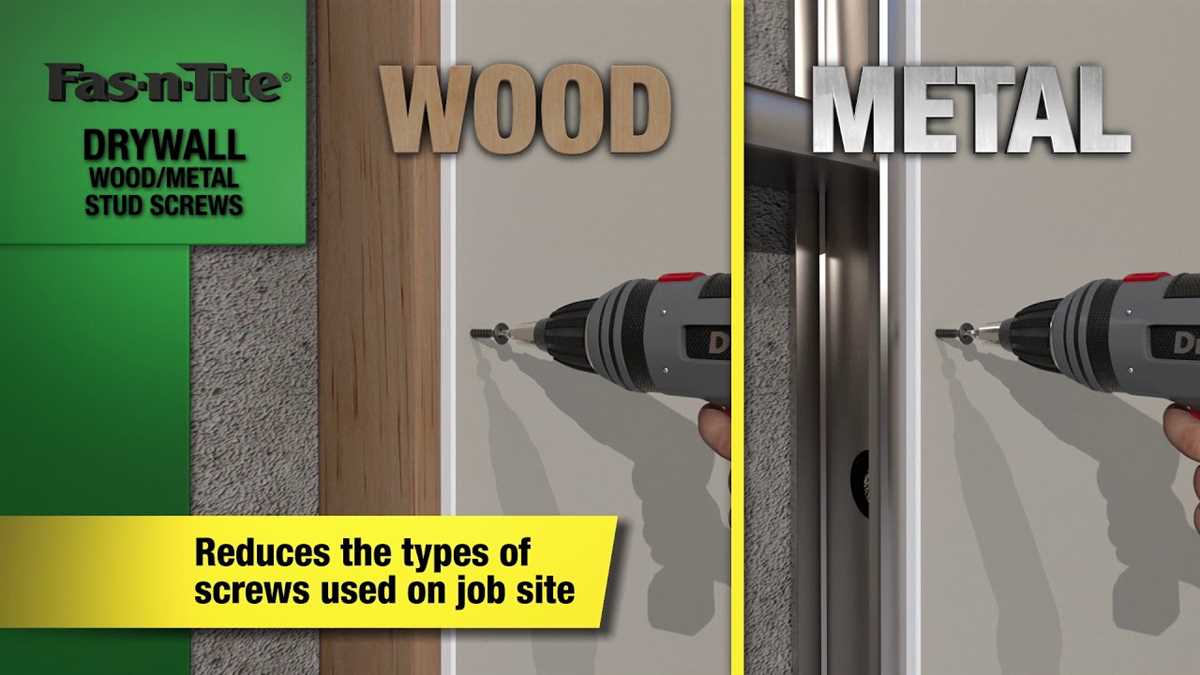
Can I use the same drill bits for drilling through wood and metal studs?
No, you will need specific drill bits designed for metal studs, as they are made of a harder material and require sharper bits.
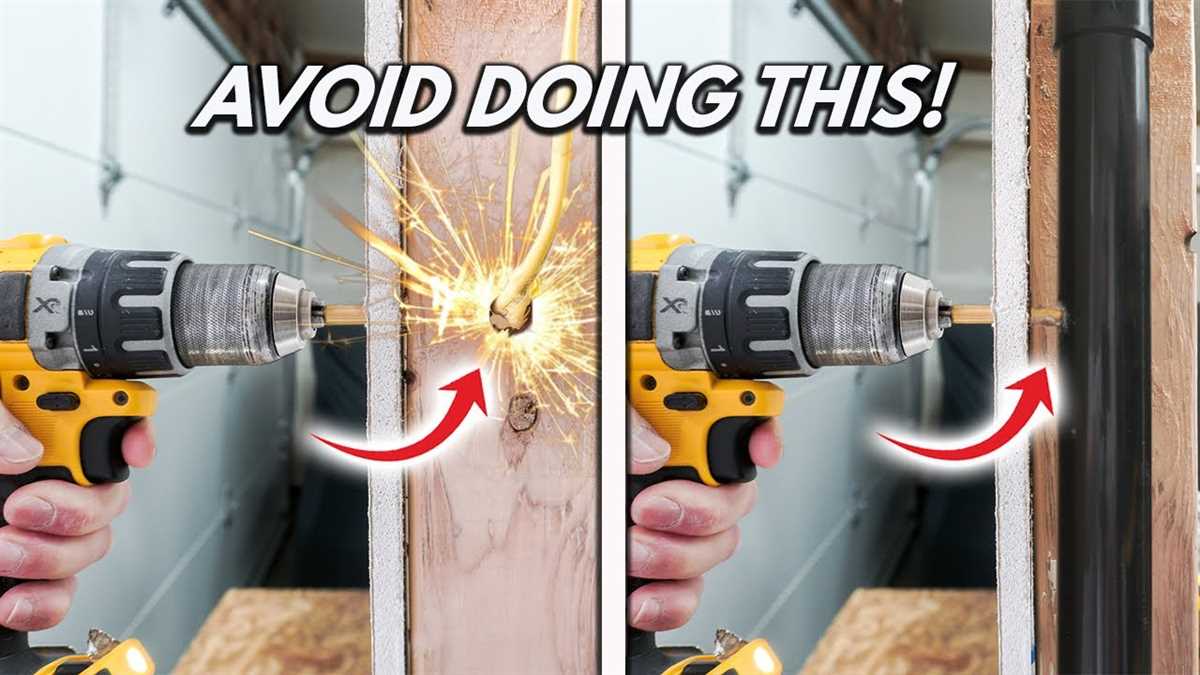
What precautions should I take while drilling through metal studs?
It is important to wear safety goggles to protect your eyes from sparks or flying metal shavings. Additionally, make sure to secure the stud with clamps or your hand to prevent it from moving while drilling.
Video:

How to hang venetian blinds

Meet Harrison Clayton, a distinguished author and home remodeling enthusiast whose expertise in the realm of renovation is second to none. With a passion for transforming houses into inviting homes, Harrison's writing at https://thehuts-eastbourne.co.uk/ brings a breath of fresh inspiration to the world of home improvement. Whether you're looking to revamp a small corner of your abode or embark on a complete home transformation, Harrison's articles provide the essential expertise and creative flair to turn your visions into reality. So, dive into the captivating world of home remodeling with Harrison Clayton and unlock the full potential of your living space with every word he writes.


