Drilling Techniques for Round Baluster Holes

Drilling round holes for balusters can be a challenging task, as it requires accuracy and precision to ensure a proper fit. Whether you are installing balusters for a staircase, deck, or any other project, it is important to follow the right drilling techniques to achieve the desired results. In this article, we will explore some effective drilling techniques that can help you achieve professional-looking round baluster holes.
1. Marking the center: Before drilling the hole, it is necessary to accurately mark the center of the baluster location. This can be done by measuring the width of the baluster and dividing it in half. Use a ruler or a tape measure to ensure the marks are aligned properly. Marking the center will ensure that the hole is drilled in the right spot.
2. Choosing the right drill bit: The next step is to choose the right drill bit for the job. For round baluster holes, a Forstner bit is often the best option. These bits are designed to create clean and precise holes in wood, making them ideal for baluster installations. Make sure to select a drill bit that matches the diameter of your baluster.
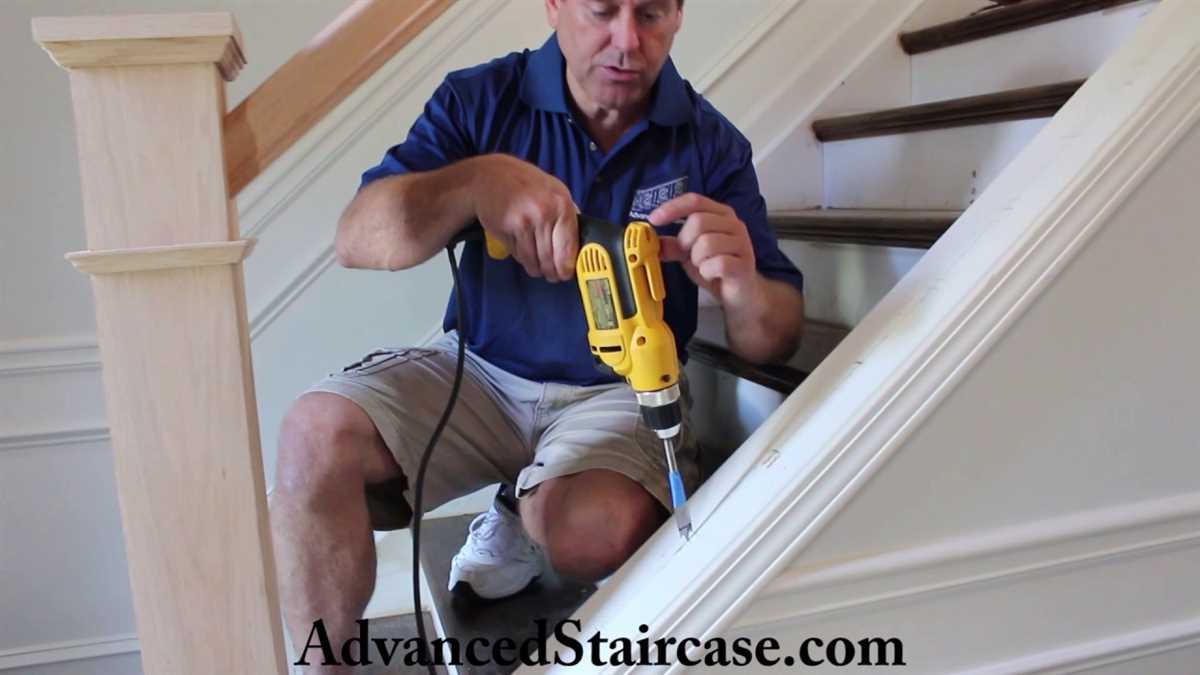
3. Drilling the hole: Once you have marked the center and selected the right drill bit, it’s time to start drilling. Begin by placing the tip of the drill bit on the center mark and applying steady pressure. Make sure to keep the drill perpendicular to the surface to ensure a straight hole. Slowly drill the hole, periodically removing the bit to clear out any wood chips. Take your time and be patient to avoid any mistakes.
4. Smoothing the hole: After drilling the hole, it is important to smooth the edges to ensure a snug fit for the baluster. Use a sandpaper or a file to remove any rough edges or splinters. This will make it easier to slide the baluster into the hole and ensure a tight fit. Take your time and pay attention to detail to achieve professional-looking results.
Remember, drilling round baluster holes requires precision and attention to detail. By following these drilling techniques, you can achieve clean and accurate holes that will enhance the overall appearance of your project. Take your time, be patient, and always measure twice before drilling!
Preparing the Surface for Drilling
Before you start drilling the round baluster holes, it is important to properly prepare the surface to ensure clean and accurate results. Proper preparation of the surface will also help prevent any damage to the material or the drilling equipment. Here are the steps you should follow for preparing the surface for drilling:
- Clean the surface: Use a clean, dry cloth to remove any dust, dirt, or debris from the surface where you plan to drill the round baluster holes. This will help ensure that the drill bit can make a clean cut without any interference.
- Mark the drilling spots: Use a measuring tape and a pencil to mark the exact spots where you want to drill the round baluster holes. Make sure the marks are clear and visible so that you can accurately position the drill bit.
- Secure the material: If you are working with a large piece of material, such as a wooden railing or a metal frame, it is important to secure it firmly in place before drilling. You can use clamps or a vice to hold the material securely, ensuring that it doesn’t move or vibrate during the drilling process.
- Protect the surrounding area: Drilling can produce dust and debris, which can potentially damage nearby surfaces or objects. To protect the surrounding area, place a drop cloth or a sheet of plastic underneath the drilling spot. This will catch any debris that falls during the drilling process.
By following these steps to prepare the surface for drilling, you can ensure that your round baluster holes are clean, accurate, and free from any damage. Taking the time to properly prepare the surface will ultimately result in a more professional and aesthetically pleasing finished product.
Choosing the Right Drill Bit
When it comes to drilling round baluster holes, it’s important to choose the right drill bit. The type of drill bit you use will depend on the material of the baluster and the size of the hole you need to create. Here are some factors to consider when selecting a drill bit:
Material
The first thing to consider is the material of the baluster. Different materials will require different types of drill bits. For example, if you are drilling into wood, a standard twist bit will work well. However, if you are drilling into metal or concrete, you will need a specialized drill bit designed for those materials.
Size
The size of the hole you need to create will also determine the type of drill bit you should use. If you are drilling small holes for balusters, a standard twist bit in the appropriate size should suffice. However, if you are drilling larger holes for thicker balusters, you may need to use a specialized bit such as a spade bit or a hole saw.
Quality
It’s important to choose a high-quality drill bit that is designed to withstand the rigors of drilling. Look for drill bits made from durable materials such as high-speed steel or carbide. These bits will be more expensive, but they will also last longer and provide better results.
Speed and Feed Rate

When drilling baluster holes, it’s important to use the correct speed and feed rate for the type of material you are drilling. Using the wrong speed or feed rate can cause the drill bit to overheat or become dull prematurely. Consult the manufacturer’s guidelines or seek advice from a professional to determine the appropriate settings for your drill bit.
Safety Precautions

When using a drill bit, it’s important to follow proper safety precautions. Always wear safety goggles to protect your eyes from flying debris, and use clamps or a vise to secure the baluster while drilling. Additionally, make sure to keep your hands and fingers away from the drill bit to avoid injury.
By considering these factors and taking the necessary precautions, you can ensure that you choose the right drill bit for drilling round baluster holes. This will help you achieve precise and professional results in your baluster installation project.
Marking the Center Point
Before drilling the holes for the round balusters, it is important to accurately mark the center point on the surface where the hole will be drilled. This ensures that the balusters are evenly spaced and aligned.
There are several methods that can be used to mark the center point:
- Measuring and dividing: Use a tape measure to determine the overall length of the surface where the balusters will be installed. Divide this length by the desired spacing between each baluster to determine the number of balusters needed. Mark the center point between each baluster.
- Using a center-finding tool: A center-finding tool can be used to easily locate the center point. This tool typically consists of two arms that are adjustable to fit different surfaces. Place the tool on the surface and adjust the arms until they align with the edges. The intersection of the arms will be the center point.
- Using a chalk line: A chalk line can be used to create a straight line on the surface. Measure and mark the ends of the line, then stretch the chalk line between the marks and snap it to create a line. The center point can be marked on this line.
Once the center point is marked, it is important to double-check the measurements and ensure that the marks are accurate before proceeding with drilling the holes for the round balusters.
Drilling at the Correct Angle
One of the important aspects of drilling round baluster holes is ensuring that the holes are drilled at the correct angle. The angle at which the holes are drilled will determine the alignment and stability of the balusters.
Here are some guidelines to follow when drilling at the correct angle:
- Use a level: Before drilling, it is crucial to ensure that the surface where the balusters will be installed is level. This will help determine the correct angle at which to drill the holes.
- Measure and mark: Once the surface is level, measure and mark the positions of the baluster holes. Use a tape measure and pencil to make accurate markings.
- Choose the right drill bit: Select a drill bit that matches the diameter of the baluster. Using the wrong size drill bit can lead to misalignment and an unstable installation.
- Set the drill at the correct angle: Position the drill at the desired angle for the baluster holes. This angle will depend on the style and design of the balustrade system being installed. It is important to consult the manufacturer’s instructions or guidelines for the specific angle required.
- Secure the workpiece: To ensure stability and accuracy while drilling, secure the workpiece using clamps or a vise. This will prevent slippage or movement during the drilling process.
- Drill slowly and evenly: Start drilling slowly and apply even pressure to the drill. This will prevent the drill bit from wandering off track and ensure a clean and precise hole.
- Check alignment: After drilling each hole, visually check the alignment to ensure that they are consistent and straight. Adjust the angle if necessary before drilling the remaining holes.
Following these guidelines will help ensure that the baluster holes are drilled at the correct angle, resulting in a professional and secure balustrade installation.
Using the Correct Drilling Technique
When it comes to drilling holes for round balusters, it is important to use the correct technique in order to ensure a secure and professional installation. Here are some tips on how to properly drill round baluster holes:
- Measure and mark the desired hole locations: Start by measuring and marking the locations where you want to drill the holes for the round balusters. Use a measuring tape and pencil to ensure accuracy.
- Choose the appropriate drill bit: Select a drill bit that matches the diameter of the round balusters you will be using. It is important to use a bit that is slightly larger than the baluster to allow for a snug fit.
- Secure the workpiece: Place the workpiece securely on a stable surface, such as a workbench or sawhorses. This will help prevent any movement or wobbling while drilling.
- Drill the holes: Use a power drill with the selected drill bit to drill the holes at the marked locations. Start drilling at a slow speed and gradually increase the speed as you progress. Apply steady, even pressure to the drill to ensure a clean hole.
- Check the depth: Periodically stop drilling and check the depth of the hole using a depth gauge or by measuring the drill bit itself. Make sure the holes are drilled to the appropriate depth to accommodate the length of the balusters.
- Clear any debris: After drilling each hole, use a brush or compressed air to remove any wood chips or debris from the hole. This will ensure a clean and smooth surface for the baluster to fit into.
Following these steps will help you achieve accurate and professional-looking round baluster holes. Remember to always wear safety goggles and follow proper safety precautions when using power tools.
Ensuring Clean and Smooth Holes
1. Use the Right Drill Bit
One of the most important factors in drilling clean and smooth holes for round balusters is using the right drill bit. It is recommended to use a spade bit or a Forstner bit that is specifically designed for drilling large holes with a clean edge. These bits have a flat bottom that allows for precise drilling and helps prevent splintering or tearing of the wood.
2. Mark the Hole Location

Before drilling, it is essential to accurately mark the location of the hole on the surface of the wood. Using a measuring tape and a pencil, measure and mark the precise spots where the holes need to be drilled. This will help ensure that the drill bit is aligned correctly and that the holes are evenly spaced.
3. Slow and Steady Drilling
When drilling the holes for round balusters, it is important to maintain a slow and steady drilling speed. Applying excessive force or drilling too quickly can cause the bit to wander or create rough edges. By maintaining a consistent drilling speed and allowing the bit to do the work, you can achieve cleaner and smoother holes.
4. Backer Board
Using a backer board is another technique that can help ensure clean and smooth holes. A backer board is a piece of scrap material that is clamped or attached to the back side of the wood being drilled. This helps to minimize tear-out and splintering, as the drill bit exits the wood. The backer board should be positioned in such a way that it supports the wood fibers and provides a clean exit point for the drill bit.
5. Sanding and Finishing
After drilling the holes for the round balusters, it is important to sand and finish the wood surface to achieve a clean and smooth appearance. Using sandpaper or a sanding block, carefully sand any rough edges or imperfections around the drilled holes. Once the surface is smooth, apply the desired finish or paint to enhance the overall look of the baluster holes.
6. Maintain and Sharpen Drill Bits
Regularly maintaining and sharpening the drill bits can significantly impact the quality of the holes drilled for round balusters. Dull or worn-out drill bits can cause splintering and rough edges. It is important to keep the drill bits clean, remove any debris or buildup, and sharpen them when necessary to ensure clean and precise holes.
By following these techniques, you can ensure clean and smooth holes for round balusters, resulting in an aesthetically pleasing and professional finish.
Tapping Threads for Baluster Connections
When installing balusters, it is important to ensure strong connections between the balusters and the surrounding structure. One effective way to achieve this is by tapping threads for baluster connections. Tapping threads involve creating threads on the surface of the material to allow for the insertion of screws or bolts.
Tools and Materials Needed:
- Drill
- Tapping bit
- Countersink bit
- Hammer
- Tap wrench
- Threaded inserts
- Screws or bolts
Procedure:
- Measure and mark the locations where the balusters will be installed.
- Pre-drill holes in the marked locations using a drill and a tapping bit. The size of the tapping bit should match the size of the threaded inserts.
- Use a countersink bit to create a recessed area around the pre-drilled holes. This will allow the tops of the threaded inserts to sit flush with the surface of the material.
- Insert the threaded inserts into the pre-drilled holes. Use a hammer to gently tap them into place.
- Attach the tap wrench to the threaded inserts and rotate them clockwise to tap the threads into the material. Make sure to apply steady pressure and avoid excessive force to prevent damage to the threads.
- Once the threads are fully tapped, remove the tap wrench and clean any debris from the holes.
- Insert screws or bolts into the threaded inserts and tighten them with a screwdriver or wrench to secure the balusters in place.
Tapping threads for baluster connections provides a secure and reliable way to attach balusters to a structure. It ensures that the balusters are firmly anchored and able to support weight and withstand external forces. By following the steps outlined above and using the appropriate tools and materials, you can successfully tap threads for baluster connections.
Precautions and Safety Measures
1. Read and Understand the Manual
Before using any drilling equipment, it is essential to thoroughly read the manufacturer’s manual. The manual will provide important information about the specific drilling techniques required for round baluster holes, as well as any safety precautions specific to the equipment being used.
2. Wear Personal Protective Equipment (PPE)
Always wear the appropriate personal protective equipment (PPE) when drilling round baluster holes. This includes safety goggles to protect the eyes from flying debris, ear protection to prevent hearing damage from the noise of the drilling equipment, and gloves to protect hands from sharp edges or rotating parts.
3. Choose a Suitable Work Area
Select a suitable work area for drilling round baluster holes. Ensure there is enough space to safely maneuver the drilling equipment, and that the work area is well-ventilated. Avoid drilling in confined spaces where fumes or dust may accumulate.
4. Secure the Workpiece
Before starting the drilling process, ensure that the workpiece is securely clamped or otherwise fixed in place. This will prevent the workpiece from moving or spinning during drilling, which could result in accidents or unevenly drilled holes.
5. Use the Correct Drill Bit
Choose the appropriate drill bit for drilling round baluster holes. Refer to the manufacturer’s recommendations or the drilling manual for the correct bit size and type to use. Using the wrong drill bit could result in uneven or damaged holes, or could cause the drill to become stuck in the workpiece.
6. Maintain Proper Body Position
Stand in a stable position with your feet shoulder-width apart while operating the drilling equipment. Maintain a firm grip on the equipment and align your body in a way that allows for proper control and balance. Avoid leaning over the drill press or moving parts of the equipment while it is in operation.
7. Keep the Area Clean
Regularly clean the work area to remove debris, dust, or oil that may have accumulated during the drilling process. A clean work area helps prevent slips, trips, and other accidents caused by a cluttered or slippery surface.
8. Regularly Inspect and Maintain Equipment
Regularly inspect the drilling equipment to ensure it is in proper working condition. Check for any loose or damaged parts that may need to be repaired or replaced. Follow the manufacturer’s recommendations for maintenance and servicing to keep the equipment in optimal condition.
9. Stay Focused and Alert

When operating drilling equipment, it is important to stay focused and avoid distractions. Avoid wearing loose clothing or jewelry that could get caught in the machinery. Stay alert and avoid using the equipment if you are feeling fatigued or under the influence of drugs or alcohol.
10. Seek Professional Help if Needed
If you are unsure about any aspect of drilling round baluster holes, or if you encounter any issues or difficulties during the process, seek professional help. A professional with experience in drilling techniques can provide guidance, assistance, and ensure that the job is done safely and effectively.
By following these precautions and safety measures, you can ensure a safe and successful drilling process for round baluster holes.
FAQ:
What are the commonly used drilling techniques for round baluster holes?
The commonly used drilling techniques for round baluster holes include using a drill press with a Forstner bit, using a handheld drill with a paddle bit, and using a router with a straight bit.
Which drilling technique is best for creating round baluster holes?
There is no one-size-fits-all answer to this question as the best drilling technique for creating round baluster holes depends on various factors such as the type of wood, the desired size of the hole, and the tools available. However, using a drill press with a Forstner bit is often considered the most precise method.
What is a Forstner bit and why is it commonly used for drilling round baluster holes?
A Forstner bit is a specialized drill bit that is designed to create flat-bottomed holes with smooth sides. It is commonly used for drilling round baluster holes because it allows for precise and clean cuts, resulting in a professional-looking finish.
Can a handheld drill be used to create round baluster holes?
Yes, a handheld drill can be used to create round baluster holes. However, it may be more difficult to achieve precise and clean cuts compared to using a drill press with a Forstner bit. It is important to use a paddle bit that is appropriate for the size of the hole needed.
Why would someone choose to use a router for drilling round baluster holes?
Using a router with a straight bit can be an alternative method for drilling round baluster holes. This technique allows for more control and precision compared to using a handheld drill. Additionally, a router can be easily adjusted to create holes of different sizes, making it a versatile tool for woodworking projects.
Video:


