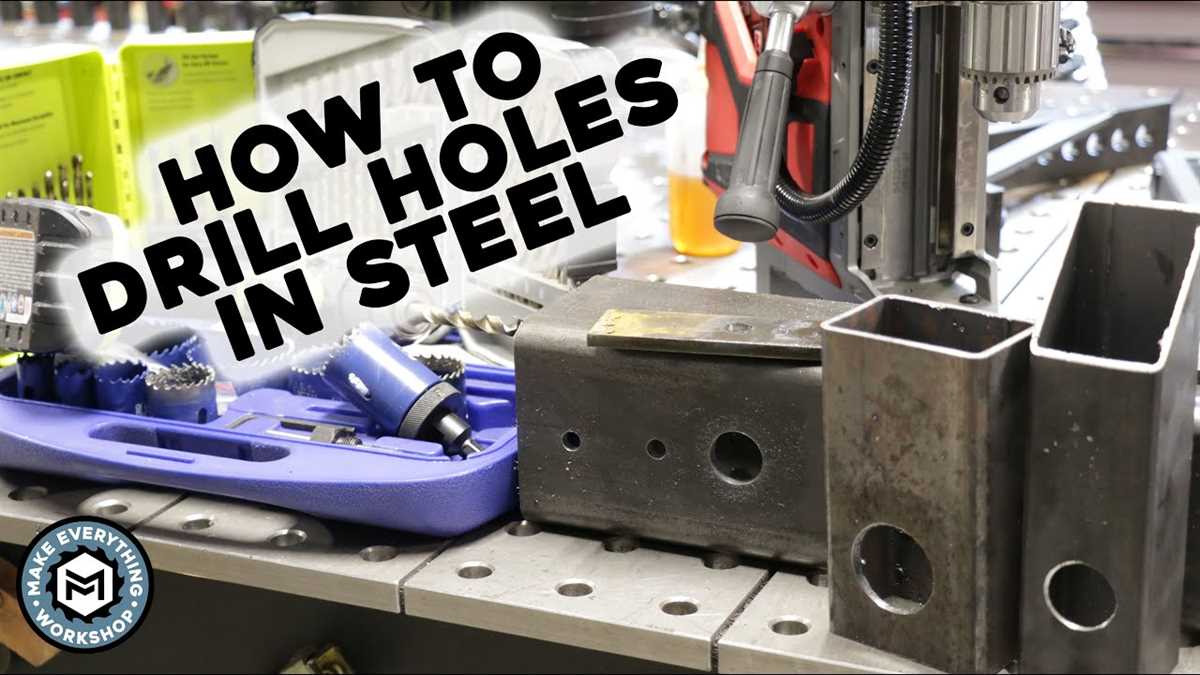
Drilling into Metal: Step-by-Step Guide and Tips

Drilling into metal can be a challenging task, but with the right tools and technique, it can be accomplished with ease. Whether you are a professional metalworker or a DIY enthusiast, this step-by-step guide will provide you with the necessary knowledge to successfully drill into metal.
Step 1: Choose the Right Drill Bit
One of the most important factors in drilling into metal is selecting the right drill bit. HSS (High-Speed Steel) and Cobalt drill bits are commonly used for drilling into metal due to their hardness and durability. They are capable of cutting through even the toughest metals, such as stainless steel and hardened steel.
Step 2: Mark the Drilling Spot
Before you start drilling, it is essential to mark the exact spot where you want to drill. This will ensure precision and accuracy in your drilling operation. You can use a center punch or a marker to create a small indentation or mark on the metal surface.

Step 3: Secure the Metal
In order to prevent the metal from moving or vibrating during the drilling process, it is crucial to secure it properly. You can use clamps or a vise to hold the metal firmly in place. This will provide stability and make drilling easier and safer.
Step 4: Apply Lubrication
When drilling into metal, it is recommended to use lubrication such as cutting oil or lubricating wax. This helps to reduce friction and heat, which can cause the drill bit to overheat and wear out quickly. It also helps to prolong the life of the drill bit and improve the drilling efficiency.
Step 5: Start Drilling
Now that everything is set up, it’s time to start drilling. Start the drill at a slow speed and gradually increase the speed as the hole gets deeper. Apply light and steady pressure to the drill, letting it do the work. Avoid putting too much pressure as it can cause the drill bit to break or the metal to deform.
By following these step-by-step instructions, you will be able to drill into metal like a pro. Remember to wear appropriate safety gear, such as eye protection and gloves, and always double-check your measurements before drilling. Happy drilling!
Step-by-Step Guide for Drilling into Metal
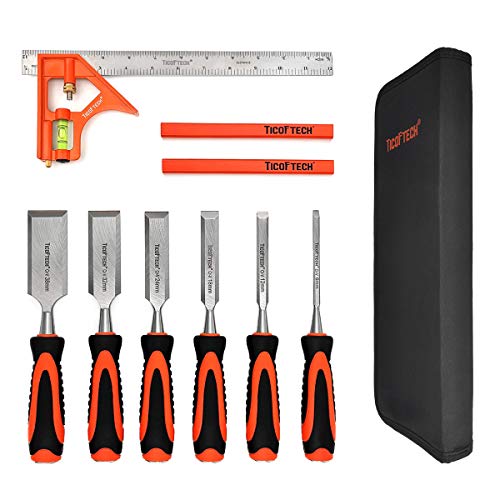
1. Prepare your materials and equipment
Before you begin drilling into metal, gather all the necessary materials and equipment:
- Metal drilling bit
- Drill
- Clamps or vise
- Protective gear (safety glasses and gloves)
- Marker or pencil for marking the drilling point
- Lubricant or cutting fluid
2. Mark the drilling point
Use a marker or pencil to mark the exact spot where you want to drill. This will help guide your drilling and ensure accuracy.
3. Secure the metal
Use clamps or a vise to secure the metal piece you are drilling. This will prevent it from moving or vibrating during drilling, ensuring a cleaner and more precise hole.
4. Choose the appropriate drilling speed and force
When drilling into metal, it is important to choose the right drilling speed and force. Start with a low speed and gradually increase it until you find the optimal speed for your specific metal. Apply steady and consistent pressure to maintain control.
5. Apply lubricant or cutting fluid
Apply a lubricant or cutting fluid to the drilling area. This will reduce heat and friction, prolonging the life of the drill bit and improving drilling efficiency. Follow the instructions on the lubricant or cutting fluid for best results.
6. Start drilling
Position the drill bit on the marked drilling point and slowly start drilling. Keep the drill straight and apply steady pressure. Avoid excessive force or sudden movements, as this can cause the drill bit to break or damage the metal.
7. Use a pilot hole for larger drill bits
If you are using a larger drill bit, it is recommended to start with a smaller pilot hole. This will help guide the larger drill bit and prevent it from slipping or wandering off course.
8. Remove metal shavings
After drilling, remove any metal shavings or debris from the drilled hole. You can use compressed air or a vacuum cleaner to clean the hole and surrounding area.
9. Check the drilled hole
Inspect the drilled hole to ensure it meets your requirements. If necessary, use a file or deburring tool to smooth any rough edges or burrs.
10. Clean and maintain your drill bit
After drilling into metal, clean your drill bit using a brush or cloth to remove any metal shavings or debris. You can also sharpen the drill bit if needed. Proper maintenance will prolong the life of your drill bit and ensure optimal performance.
Choose the Right Drill Bit
Choosing the right drill bit is crucial when drilling into metal. The type of drill bit you use will depend on the specific metal you are drilling into and the size of the hole you need.
1. Twist Drill Bits: These are the most common type of drill bits used for drilling into metal. They have a spiral shape with sharp, angled edges that help to cut through the metal smoothly. Twist drill bits come in a variety of sizes and are suitable for drilling holes in different thicknesses of metal.
2. Cobalt Drill Bits: Cobalt drill bits are made with a higher percentage of cobalt, which makes them more durable and heat-resistant. They are designed specifically for drilling into hard metals like stainless steel and cast iron.
3. Carbide Drill Bits: Carbide drill bits are made with tungsten carbide, which is a very hard and strong material. These drill bits are ideal for drilling into extremely hard metals like hardened steel and titanium.
4. Step Drill Bits: Step drill bits are used for drilling holes of different diameters. They have a conical shape with multiple stepped levels, allowing you to gradually widen the hole as you drill.
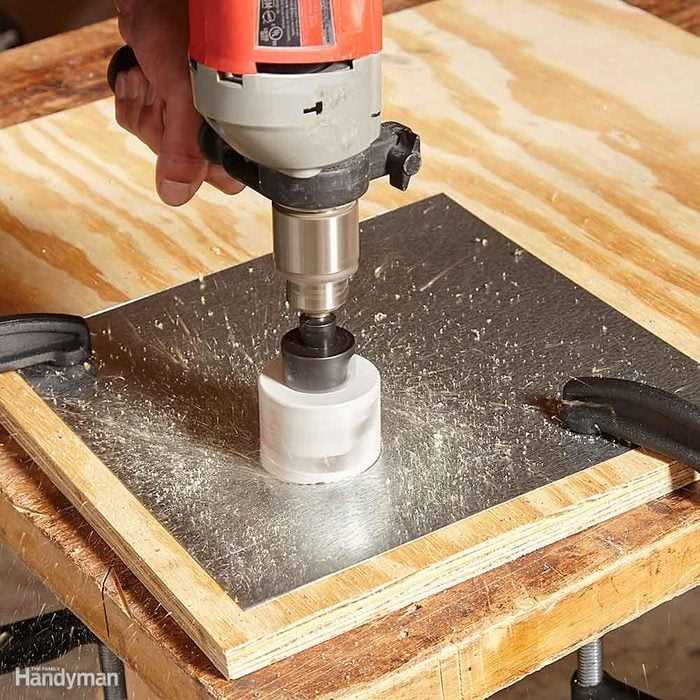
5. Hole Saw Drill Bits: Hole saw drill bits are used for drilling larger holes in metal. They have a cylindrical shape with a saw-toothed edge that cuts through the metal. Hole saw bits are available in different sizes to accommodate your specific needs.
6. Countersink Drill Bits: Countersink drill bits are used to create a chamfer or conical hole in the surface of the metal. This allows the head of a screw to sit flush with the surface, preventing it from protruding and creating a smooth finish.
7. Drill Bit Coatings: Some drill bits come with coatings that help to reduce friction and increase durability. Common coatings include black oxide, titanium nitride, and cobalt. These coatings can improve the performance and lifespan of the drill bit.
Remember: Always use the appropriate drill bit for the type of metal you are drilling into. Using the wrong drill bit can result in a slower drilling process, damage to the drill bit or the metal, and an overall unsatisfactory outcome.
Mark the Drilling Spot
Before you begin drilling into the metal, it’s important to accurately mark the spot where you want to drill. This will help ensure that you drill in the right location and avoid any unnecessary mistakes or damage to the metal.
Here are some steps to follow when marking the drilling spot:
- Clean the surface: Use a clean cloth or a mild cleaner to remove any dirt, dust, or oil from the surface of the metal. This will allow the marker to adhere better and create a more precise marking.
- Measure and mark: Use a measuring tape or ruler to determine the exact location where you want to drill. Make sure to double-check your measurements to ensure accuracy. Once you have determined the spot, use a marker or a center punch to make a small mark on the surface of the metal. This mark will be your guide when drilling.
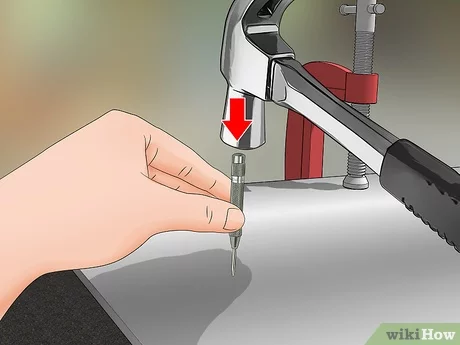
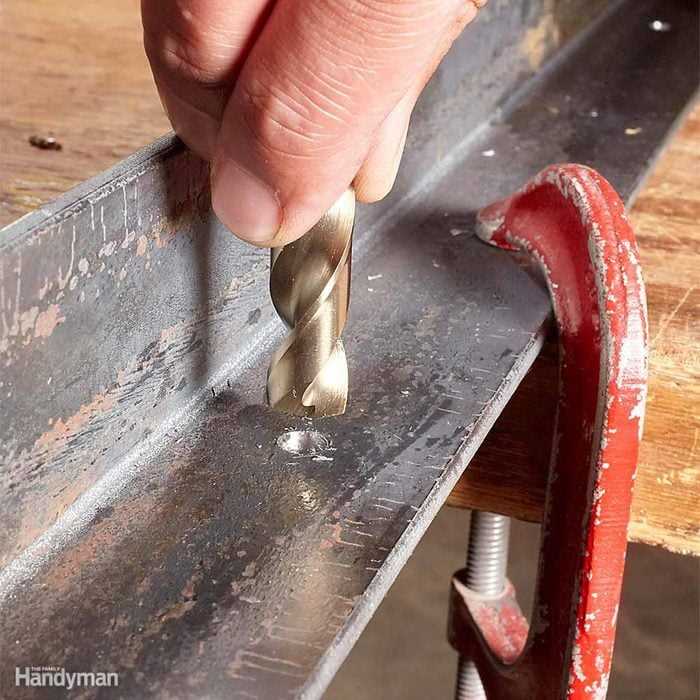
- Use a center punch: If you are drilling a hole larger than 1/8 inch, it is recommended to use a center punch. Place the center punch on the mark you made and give it a firm tap with a hammer. This will create a small indentation that will help guide the drill bit and prevent it from slipping off the mark.
- Double-check: Before you start drilling, double-check the marking one last time to ensure it is in the right position. This will help avoid any mistakes and ensure that you drill in the correct spot.
By taking the time to accurately mark the drilling spot, you can greatly increase your chances of success and prevent any unnecessary errors or damage to the metal. So, make sure to follow these steps before you begin drilling.
Secure the Material
Before drilling into metal, it is important to secure the material properly to ensure safety and accuracy. Here are some steps to follow:
1. Use clamps or a vise
When drilling into metal, it is essential to make sure that the material is securely held in place. This can be achieved by using clamps or a vise to hold the material firmly. This will prevent any movement or vibrations while drilling, which can lead to inaccurate holes or even personal injury.
2. Mark the drilling point
Before securing the material, it is important to mark the drilling point accurately. This can be done by using a center punch or a sharp object to create a small indentation on the surface of the metal. This will provide a starting point for the drill bit and help to prevent it from slipping or wandering during drilling.
3. Choose the right drill bit
Selecting the appropriate drill bit is crucial for drilling into metal. Different types of metals require different drill bits, so make sure to choose one that is suitable for the specific type of metal you are working with. Using the wrong drill bit can result in poor performance or damage to both the drill bit and the material.
4. Use lubrication
When drilling into metal, it is recommended to use lubrication such as cutting oil or a lubricating spray. This helps to reduce friction and heat generated during drilling, which can cause the drill bit to wear out quickly. Applying lubrication also helps to remove metal chips and debris, making the drilling process smoother and more efficient.
5. Start drilling slowly
Once the material is securely held in place, the drilling point is marked, the appropriate drill bit is selected, and lubrication is applied, it is time to start drilling. Begin by setting the drill to a low speed and apply gentle and consistent pressure on the drill. Starting slow helps to prevent the drill bit from wandering and allows more control over the drilling process.
6. Maintain a steady hand
During drilling, it is important to maintain a steady hand and apply even pressure on the drill. Avoid excessive force or sudden movements, as this can cause the drill bit to break or the material to become damaged. Keep the drill perpendicular to the surface of the material to ensure straight and accurate holes.
By following these steps to secure the material properly before drilling into metal, you can ensure a safer and more successful drilling experience.
Start with a Small Pilot Hole
When drilling into metal, it is always recommended to start with a small pilot hole. A pilot hole is a small-diameter hole that serves as a guide for the larger drill bit.
Starting with a pilot hole has several advantages:
- It helps to prevent the drill bit from slipping or wandering off the desired drilling point.
- It allows for better control and accuracy when drilling.
- It reduces the risk of damaging the metal surface or causing it to crack.
Here is how you can create a pilot hole:
- Choose the right drill bit: Select a drill bit that is slightly smaller in diameter than the desired final hole size. For example, if you want to drill a 1/4-inch hole, start with a 1/8-inch drill bit.
- Mark the drilling point: Use a punch or awl to mark the center of the drilling point. This will help to guide the drill bit accurately.
- Secure the metal: Place the metal on a stable surface or secure it in a vise to prevent it from moving during drilling.
- Start drilling: Hold the drill perpendicular to the metal surface and apply steady pressure as you begin drilling with the chosen drill bit.
- Create the pilot hole: Drill into the metal until the pilot hole is created. Take care to drill straight and avoid applying too much pressure, as this may cause the drill bit to break.
Once the pilot hole is created, you can proceed to enlarge it to the desired hole size by using progressively larger drill bits. Remember to use lubrication or coolant when drilling into metal to prevent overheating and to prolong the life of the drill bits.
Use Lubrication for Better Results
Drilling into metal can create a lot of heat and friction, which can cause your drill bit to dull prematurely and even damage the surface you’re drilling into. To prevent this, it’s important to use lubrication when drilling into metal.
Choosing the Right Lubricant
When drilling into metal, you’ll want to use a lubricant that is specifically designed for metalworking. There are a few different options to choose from:
- Cutting Fluid: Cutting fluid is a popular choice for drilling into metal. It helps to reduce heat and friction, and can also improve the overall quality of your hole.
- Tapping Fluid: If you’re using a tap to create threads in your hole, you’ll want to use tapping fluid. This type of lubricant is specifically designed to provide lubrication during the tapping process.
- WD-40: While not specifically designed for metalworking, WD-40 can also be used as a lubricant when drilling into metal. It helps to reduce friction and can make the drilling process smoother.
How to Apply Lubrication
Applying lubrication when drilling into metal is fairly simple. Just follow these steps:
- Before you begin drilling, apply a small amount of lubricant to the surface of the metal. You can either use a spray bottle or a brush to apply the lubricant.
- As you drill, periodically stop and apply more lubricant to the drill bit. This will help to keep the bit cool and prevent it from overheating.
- If you’re using a tap, apply a few drops of tapping fluid to the hole before you start tapping. This will help to lubricate the threads and make the process easier.
Benefits of Using Lubrication
Using lubrication when drilling into metal offers several benefits:
- Reduces heat and friction, which helps to prevent the drill bit from dulling prematurely.
- Improves the overall quality of the hole by reducing chip weld and burr formation.
- Makes the drilling process smoother and more efficient.
- Helps to prolong the life of your drill bits.
Overall, using lubrication when drilling into metal is a simple and effective way to ensure better results. Whether you choose cutting fluid, tapping fluid, or WD-40, applying lubrication will help to reduce heat and friction, improve the quality of your hole, and prolong the life of your drill bits.
Maintain the Right Speed and Pressure
When drilling into metal, it’s important to maintain the right speed and pressure to ensure accurate and clean holes. Here are some tips to help you achieve the desired results:
Choose the Right Drill Speed
The drilling speed plays a crucial role in achieving the desired results. Too high a speed can cause the drill bit to overheat and dull quickly, while too low a speed can result in an inefficient drilling process. It’s important to match the drill speed with the hardness of the metal you’re drilling into. The general rule of thumb is to start with a slower speed and gradually increase it if needed.
Apply the Right Pressure
Applying the right pressure while drilling into metal is essential. Too much pressure can cause the drill bit to wander, resulting in an uneven and inaccurate hole. Conversely, too little pressure can lead to slow progress and an insufficient hole. It’s important to apply consistent and firm pressure without forcing the drill bit too hard.
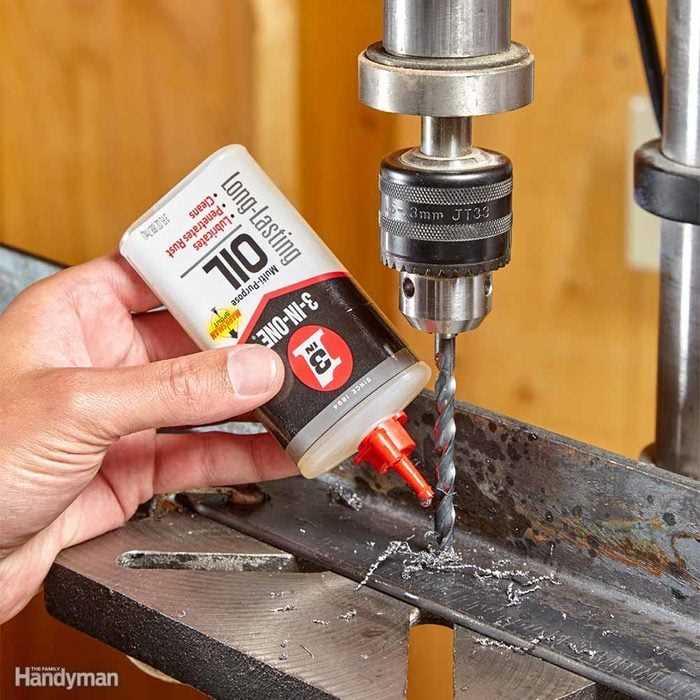
Use Lubrication
Using a lubricant while drilling into metal can help reduce friction and heat buildup, resulting in smoother and more efficient drilling. For example, applying a few drops of cutting oil to the drill bit and the surface being drilled can make a notable difference. Additionally, lubrication can help prolong the lifespan of the drill bit by reducing wear and tear.
Monitor the Drill Bit
While drilling, it’s important to keep an eye on the drill bit for any signs of overheating or dullness. If the drill bit starts to smoke or discolor, this is an indication that it’s getting too hot. In such cases, it’s advisable to stop drilling and let the bit cool down or switch to a different drill bit if necessary. Dull drill bits should be replaced with sharp ones to ensure accurate and efficient drilling.
Take Breaks
Depending on the size of the hole and the hardness of the metal, drilling can be a physically demanding task. It’s important to take regular breaks to prevent fatigue and avoid overheating the drill bit. Taking short breaks allows the drill bit and motor to cool down, helping to maintain optimal drilling performance.
By maintaining the right speed and pressure, using lubrication, monitoring the drill bit, and taking breaks, you can achieve accurate and clean holes when drilling into metal.
Clear the Chips and Cool the Drill Bit
When drilling into metal, it’s important to clear the chips and cool the drill bit. This helps to prevent overheating and damage to the bit.
Clearing the Chips
As you drill into metal, chips will be created. These chips can build up in the hole and cause the drill bit to become clogged, making it less effective. To clear the chips, you can use a variety of methods:
- Back it out: Occasionally pulling the bit out of the hole while drilling can help to clear the chips. This is particularly useful when drilling larger holes.
- Blow it out: Using compressed air or a handheld air pump, blow out the chips from the hole. This can be done periodically during the drilling process.
- Use a wire brush: A wire brush can be used to brush away the chips from the hole. This is useful for removing stubborn chips that may be stuck in the hole.
Cooling the Drill Bit
Drilling into metal can generate a lot of heat, which can cause the drill bit to become dull or even break. To cool the drill bit and prevent overheating, you can use the following methods:
- Apply cutting fluid: Applying a cutting fluid to the drill bit and the metal surface can help to reduce heat buildup. Cutting fluids also act as a lubricant and can improve the drilling process.
- Keep the bit moving: When drilling, it’s important to keep the drill bit moving. This helps to dissipate heat and prevent excessive heat buildup in one area.
- Use a cooling system: Some drill presses or drilling machines have built-in cooling systems that circulate coolant around the drill bit. If available, this can be a good option for cooling the bit.
By regularly clearing the chips and cooling the drill bit, you can ensure a more effective and efficient drilling process when working with metal.
Finish and Clean the Drilled Hole
Once you have successfully drilled the hole in the metal, it is important to properly finish and clean it. This step will ensure that the hole is smooth, free from burrs, and ready for further use or application.
Step 1: Remove any burrs
After drilling the hole, it is common for burrs or rough edges to form around the opening. These burrs can affect the functionality of the hole and can be sharp, posing a safety hazard. To remove the burrs, you can use a deburring tool or a metal file. Simply run the deburring tool or file along the edges of the hole in a smooth motion until the burrs are completely removed. Be sure to wear safety gloves to protect your hands during this process.
Step 2: Clean the hole

Once the burrs are removed, you should clean the drilled hole to remove any debris or metal shavings that may be present. You can use a brush or a blast of compressed air to clean out the hole. Ensure that the hole is completely free from any loose particles as they can cause issues later on.
Step 3: Smooth the hole
If necessary, you can further smooth the interior of the drilled hole using sandpaper or a sanding block. This step is particularly important if you plan to insert screws, bolts, or other fasteners into the hole, as it will ensure a proper fit and prevent any damage to the fastener or the metal.
Step 4: Inspect the hole
Before proceeding with any further steps or applications, it is crucial to inspect the drilled hole for any irregularities or defects. Look for any cracks, rough spots, or other imperfections that may affect the hole’s overall functionality. If any issues are found, consider either correcting them or drilling a new hole altogether.
Step 5: Protect the hole
Once the hole is finished and cleaned, it is advisable to protect it from corrosion or rust. You can apply a rust inhibitor or primer to the inside and outside of the hole, particularly if it will be exposed to moisture or other corrosive elements. Additionally, if the hole will be left unused for an extended period, you can consider covering it with a protective cap or plug to prevent any further contamination.
By following these steps, you can ensure that the drilled hole is properly finished, clean, and ready for its intended use. Remember to always prioritize safety and take the necessary precautions when working with metal and power tools.
FAQ:
What are the basic steps for drilling into metal?
The basic steps for drilling into metal are: choosing the right drill bit, marking the spot, securing the metal, drilling a pilot hole, and drilling the final hole.
How do I choose the right drill bit for metal?
To choose the right drill bit for metal, you should consider the type of metal you’re drilling into and its thickness. For softer metals, a high-speed steel (HSS) drill bit will suffice, while for harder metals, you may need a cobalt or carbide drill bit.
What is the purpose of marking the spot before drilling into metal?
Marking the spot before drilling into metal helps ensure accuracy and precision. It allows you to drill the hole exactly where you want it, preventing any mistakes or misalignment.
How can I secure the metal while drilling into it?
You can secure the metal by using clamps or a vise. This will prevent it from moving or vibrating while you drill, ensuring a clean and accurate hole.
Why is it important to drill a pilot hole in metal?
Drilling a pilot hole in metal is important because it creates a smaller hole before drilling the final hole. This helps guide the drill bit and prevents it from slipping or wandering, resulting in a more precise and controlled drilling process.
Are there any tips for drilling into metal?
Yes, here are a few tips for drilling into metal: use cutting fluid or lubricant to reduce heat and friction, start drilling slowly to avoid damaging the drill bit, and apply consistent pressure while drilling to ensure a smooth and even hole.
Video:


Meet Harrison Clayton, a distinguished author and home remodeling enthusiast whose expertise in the realm of renovation is second to none. With a passion for transforming houses into inviting homes, Harrison's writing at https://thehuts-eastbourne.co.uk/ brings a breath of fresh inspiration to the world of home improvement. Whether you're looking to revamp a small corner of your abode or embark on a complete home transformation, Harrison's articles provide the essential expertise and creative flair to turn your visions into reality. So, dive into the captivating world of home remodeling with Harrison Clayton and unlock the full potential of your living space with every word he writes.