Drilling Holes for Cabinet Pulls: Step-by-Step Guide

Installing cabinet pulls is a simple and effective way to update the look of your cabinets. Whether you’re installing new pulls or replacing existing ones, drilling precise holes is essential for a professional and seamless finish. In this step-by-step guide, we’ll walk you through the process of drilling holes for cabinet pulls.
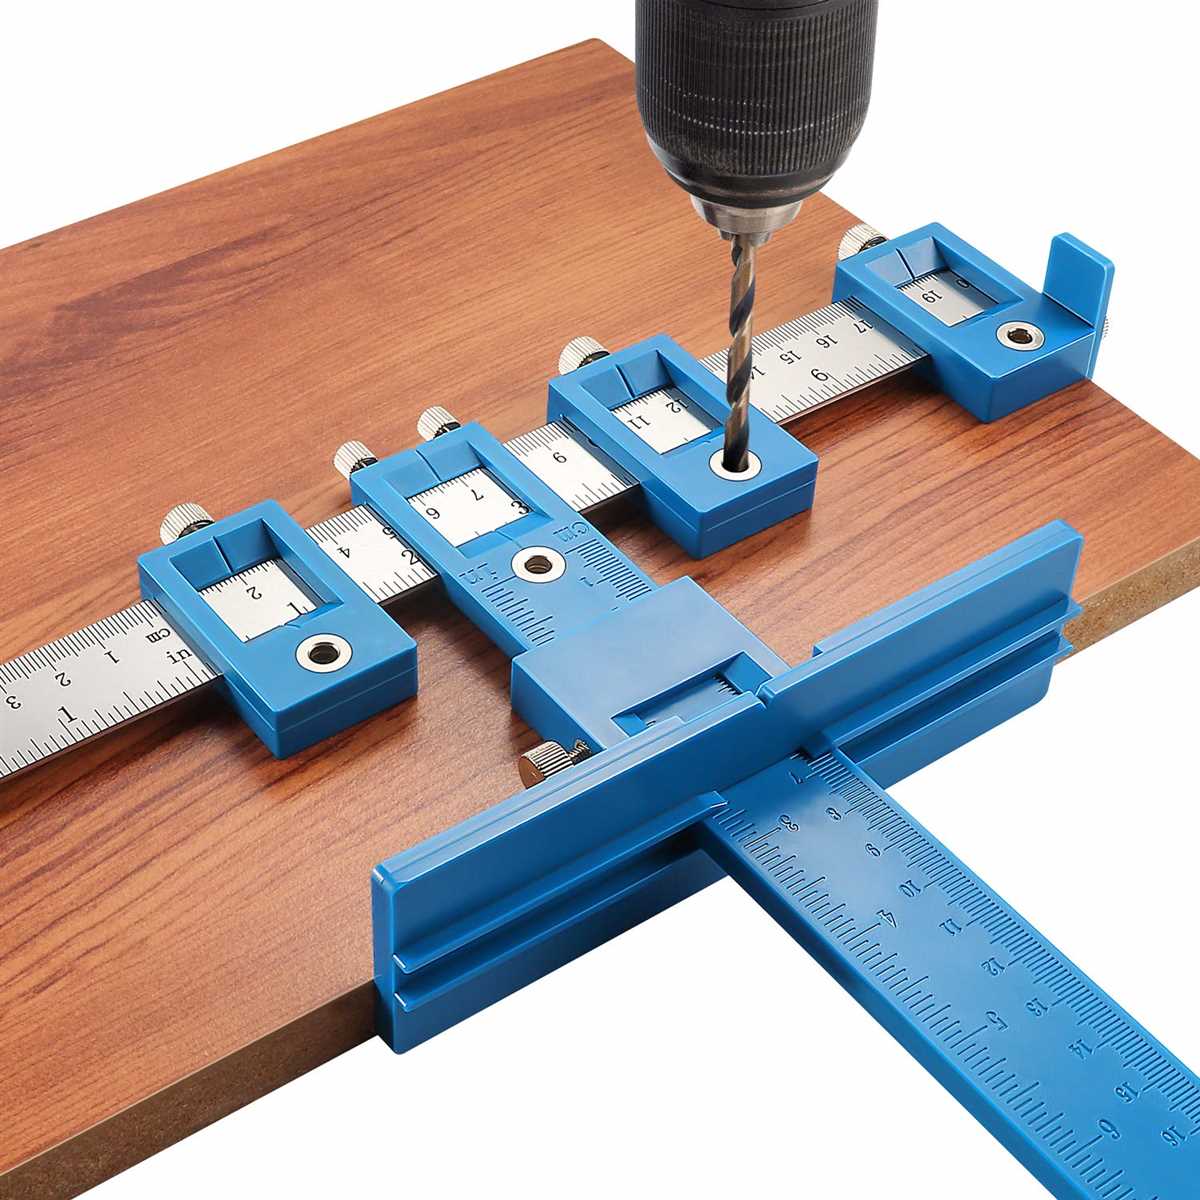
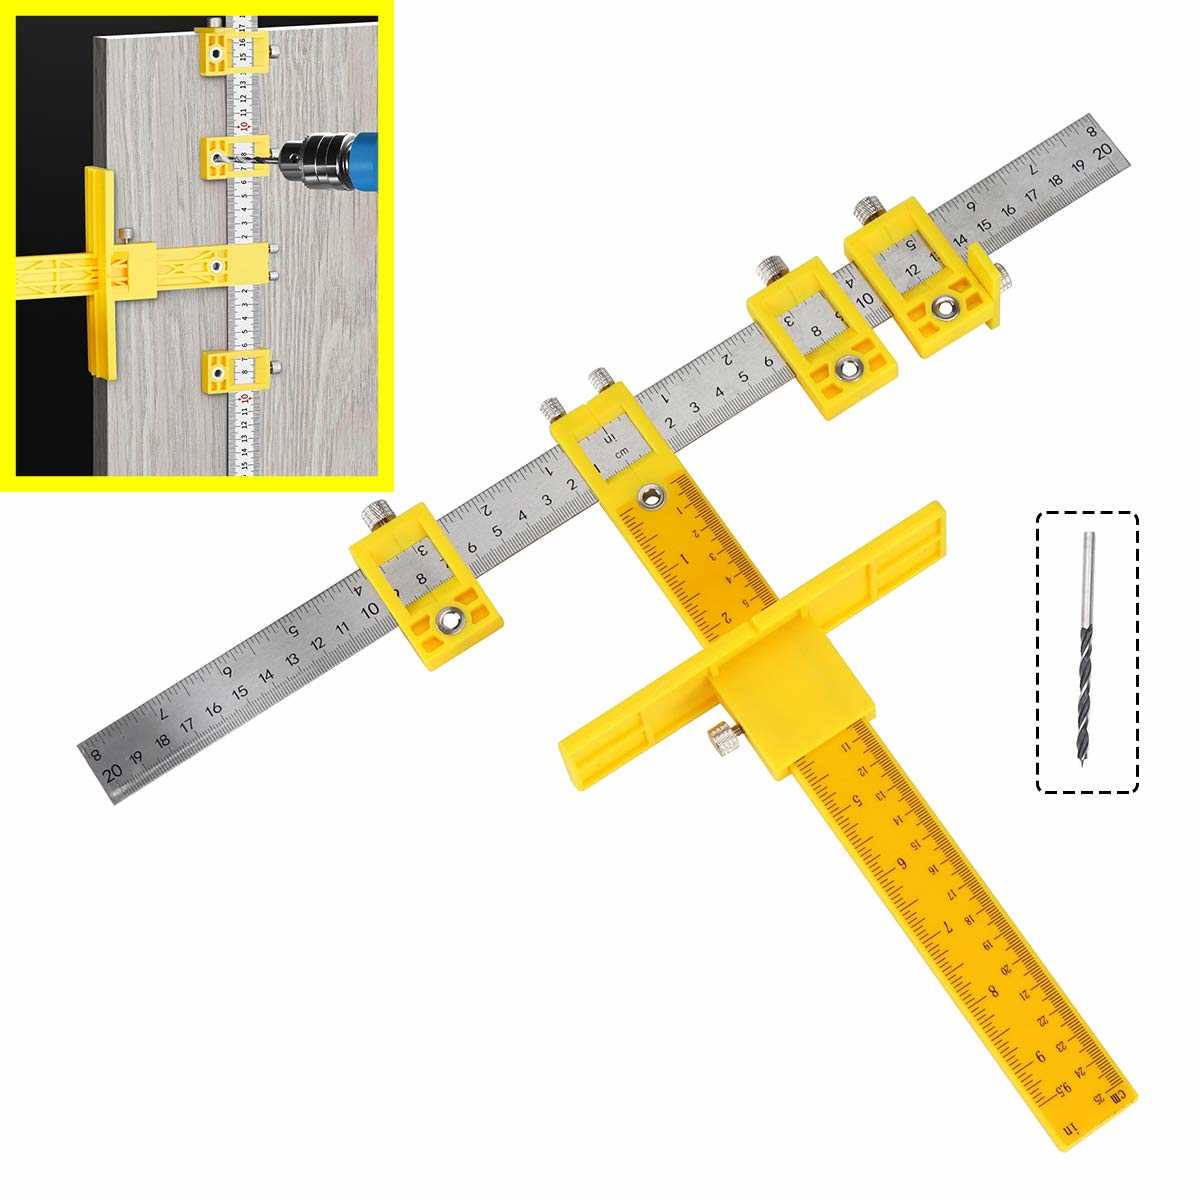
1. Measure and mark: The first step is to measure and mark the desired location for your cabinet pulls. Using a tape measure, determine the center point for each pull and mark it with a pencil. Ensure that your marks are level and evenly spaced for a balanced look.
2. Choose the right drill bit: Once you have your marks in place, it’s important to select the right drill bit size. The size of your drill bit should match the diameter of the screws that come with your cabinet pulls. This will ensure a secure and snug fit.
3. Secure the cabinet door: Before drilling, it’s important to secure the cabinet door to prevent any movement. You can use a clamp or ask someone to hold the door steady for you. This will ensure that the holes are drilled accurately and in the right position.
4. Drill the holes: Now it’s time to drill the holes. Holding the drill perpendicular to the cabinet door, slowly drill through the marked points. Apply gentle and consistent pressure to avoid splintering the wood. Be sure to stop drilling once the hole is deep enough to accommodate the screw length.

5. Install the cabinet pulls: Once the holes are drilled, it’s time to install the cabinet pulls. Insert the screws through the back of the pull and align the holes with the drilled points on the cabinet door. Use a screwdriver or drill to tighten the screws until the pulls are securely in place.
6. Test and adjust: After installing the cabinet pulls, give them a gentle tug to ensure they are properly secured. If there is any wobbling or movement, you may need to adjust the screws or tighten them further. Take the time to make any necessary adjustments for a flawless finish.
Following these step-by-step instructions will help you drill precise holes for your cabinet pulls, resulting in a professional and polished look. With just a few simple tools and some patience, you can transform the look of your cabinets and enhance the overall aesthetic of your space.
Tools and Materials

- Measuring tape: Used to measure the distance between the cabinet pulls and ensure they are evenly spaced.
- Pencil: Used to mark the exact spot where the holes will be drilled.
- Drill: Used to create the holes for the cabinet pulls.
- Drill bit: Installed in the drill to create the holes of the appropriate size for the cabinet pulls.
- Masking tape: Used to mark the depth on the drill bit, ensuring the holes are drilled to the correct depth.
- Safety glasses: Worn to protect the eyes from any flying debris while drilling.
- Safety gloves: Worn to protect the hands from any sharp edges or accidents while drilling.
- Level: Used to ensure the cabinet pulls are installed straight and evenly.
- Ruler or straight edge: Used to create straight guidelines for drilling the holes.
- Dust mask or respirator: Worn to protect from inhaling any dust or particles while drilling.
Measuring and Marking
Before you begin drilling holes for cabinet pulls, it’s essential to measure and mark their placement accurately. Follow these steps to ensure precise measurements and markings:

- Measure the width of your cabinet door or drawer front to determine the center point where the cabinet pull will be installed.
- Divide the width measurement by two to find the center point.
- Mark the center point on the top edge of the cabinet door or drawer front using a pencil.
- Measure the distance between the center point and the edge of the door or drawer front to determine where the first hole will be drilled.
- To ensure consistent placement of the cabinet pulls on all doors or drawers, create a marking template using a piece of scrap wood or cardboard.
- Place the marking template on the top edge of the cabinet door or drawer front, aligning it with the center point.
- Using a pencil or awl, mark the location of the holes on the template. These marks will serve as guides for drilling the holes.
- Repeat the process for each cabinet door or drawer front, making sure to align the marking template in the same position each time for consistent placement.
By accurately measuring and marking the placement of your cabinet pulls, you can ensure that they will be installed in the desired location and offer a visually pleasing appearance.
Choosing the Right Drill Bit
When it comes to drilling holes for cabinet pulls, choosing the right drill bit is essential for achieving clean and precise results. Here are a few factors to consider when selecting a drill bit for the job:
Material
Drilling into different materials requires different types of drill bits. For drilling holes in wooden cabinets, a standard twist bit is generally sufficient. However, if you are working with harder materials such as metal or ceramic, you will need a specialized drill bit designed for those materials.
Size
The size of the drill bit you choose should match the size of the cabinet pull screws you plan to use. Most cabinet pulls require a 3/16-inch drill bit, but it’s always a good idea to double-check the manufacturer’s instructions for the specific size recommended for your pulls.
Length
The length of the drill bit should be chosen based on the thickness of the cabinet doors or drawers. You want to make sure that the drill bit is long enough to go all the way through the material without drilling into any surfaces you don’t want to damage.

Quality
Investing in a high-quality drill bit can make a significant difference in the drilling process. Cheap drill bits are more likely to dull quickly, resulting in uneven holes or damage to the material. Look for drill bits made from durable materials, such as high-speed steel or carbide, for the best results.
Speed and RPM
Depending on the material you are drilling into, you may need to adjust the drill’s speed and RPM (revolutions per minute) settings. Refer to the manufacturer’s guidelines for the recommended speed and RPM for drilling into different materials. Using the wrong settings can cause the drill bit to overheat or break, and may result in poor hole quality.
Using the Right Pilot Hole
Before drilling the final hole for the cabinet pull, it is recommended to create a pilot hole. A pilot hole helps guide the drill bit and prevents the wood or material from splintering or cracking. The size of the pilot hole should be slightly smaller than the diameter of the screw for a snug fit.

By considering these factors and choosing the right drill bit, you can ensure that the installation of your cabinet pulls goes smoothly and results in a professional finish.
Securing the Cabinet
After drilling the holes for the cabinet pulls, it’s time to secure the cabinet in place. Follow these steps to ensure a sturdy and stable installation:
- Start by aligning the holes on the cabinet with the holes on the drawer or door. Make sure the cabinet is positioned correctly, with the front of the drawer or door flush with the front of the cabinet.
- Insert the screws through the holes on the cabinet pulls, then through the holes on the drawer or door. Use a screwdriver or drill to tighten the screws, ensuring a secure connection between the cabinet pulls and the drawer or door.
- Check the stability of the cabinet pulls by pulling and pushing them. If there is any movement or loosening, tighten the screws further until the pulls are securely fastened to the cabinet.
- Repeat the process for each cabinet pull, ensuring that they are all secured tightly and evenly.
Once all the cabinet pulls are securely attached, test their functionality by opening and closing the drawers or doors. They should open smoothly and without any resistance. If any issues arise, adjust the position or tightness of the cabinet pulls as needed.
Drilling the Holes
1. Marking the hole placement
Start by measuring and marking the desired location for your cabinet pulls. Use a measuring tape to ensure accuracy and a pencil to mark the spots where you’ll be drilling the holes.
Make sure to measure and mark the same spot on each cabinet door or drawer front to ensure consistency in placement.

2. Choosing the right drill bit
Select a drill bit that is the same diameter as the screws that came with your cabinet pulls. You want the hole to be just large enough for the screw to fit snugly, but not so large that it won’t provide enough support for the pull.
If you’re unsure of the size, it’s always better to start with a smaller drill bit and gradually increase the size if necessary.
3. Preparing the drill
Attach the correct drill bit to your drill and make sure it is securely tightened. If you’re using a corded drill, ensure that it is plugged into a power source.
For cordless drills, make sure the battery is fully charged before starting.
4. Drilling the holes
Hold the drill perpendicular to the cabinet door or drawer front and position the drill bit on one of the marked spots.

Apply steady pressure and start drilling while keeping the drill straight. Let the drill bit do the work and avoid forcing it or applying excessive pressure, as this can cause the wood to chip or splinter.
If you’re drilling through a material that is prone to splintering, like laminated particle board, you can place a piece of masking tape over the area where you’ll be drilling to minimize splintering.
5. Cleaning up
Once the hole is drilled, remove any wood shavings or debris from the hole and clean the surface of the cabinet door or drawer front.
If necessary, use a sandpaper or file to smooth any rough edges around the hole.
6. Repeat for all holes
Repeat the process for each hole you need to drill, making sure to measure and mark the placement accurately each time.

Use a level or straightedge to ensure that your holes are aligned correctly.
7. Installing the cabinet pulls
Once all the holes are drilled, insert the screws through the holes from the backside of the door or drawer front.
Place the cabinet pull over the screws and tighten them with a screwdriver or drill. Be careful not to overtighten, as this can damage the pull or strip the screw.
That’s it! You’ve successfully drilled the holes for your cabinet pulls and installed them. Enjoy the new look and functionality they bring to your cabinets!
Installing the Cabinet Pulls
The final step in completing your cabinet installation project is installing the cabinet pulls. Here is a step-by-step guide on how to do this:
1. Determine the Placement
First and foremost, you need to determine where exactly you want to install the cabinet pulls. Measure and mark the desired location on each cabinet door or drawer front.
2. Choose the Right Size Pulls
Before purchasing the cabinet pulls, make sure you choose the right size. Take into consideration the size of your cabinets and the overall design aesthetic you are aiming for. Also, consider the functionality and ease of use of the pulls.
3. Gather the Necessary Tools
Before starting the installation process, gather all the necessary tools and equipment. You will need a drill, a drill bit, a tape measure, a screwdriver, and the cabinet pulls themselves.
4. Drill Holes
Using the measurements you made earlier, use a drill and the appropriate drill bit to drill holes in the marked locations. Ensure that you drill straight and at the correct depth.
5. Attach the Pulls
Once the holes are drilled, it’s time to attach the cabinet pulls. Place a screw in each hole and tighten it using a screwdriver. Ensure that the pulls are securely attached and aligned properly.
6. Test the Pulls
After all the pulls are attached, give them a test to make sure they are functioning properly. Open and close the cabinet doors and drawers to ensure that the pulls are comfortable to use and do not interfere with the cabinet functionality.
That’s it! By following these steps, you can easily install the cabinet pulls and complete your cabinet installation project. Enjoy your new cabinets!
Finishing Touches
1. Clean the Cabinet Surface
Before installing the cabinet pulls, make sure to clean the cabinet surface thoroughly. Use a mild detergent and warm water solution to remove any dirt, grease, or residue. This will ensure a clean and smooth surface for the pulls to be attached. Make sure to dry the cabinet surface completely before moving on to the next step.
2. Mark the Placement of the Cabinet Pulls
Using a tape measure and pencil, mark the placement of the cabinet pulls on the cabinet doors or drawers. Take into consideration the overall design and functionality of the cabinet when determining the placement. It is recommended to measure and mark the positions for all the pulls in advance to ensure consistency and avoid mistakes.
3. Drill Pilot Holes
To prevent the wood from splitting and ensure accurate placement of the pulls, it is important to drill pilot holes before installing the pulls. Use an electric drill with a drill bit that matches the size of the screws provided with the pulls. Place the drill bit on the marked spots and gently drill pilot holes. Repeat this step for all the marked positions.
4. Attach the Cabinet Pulls
Once the pilot holes are drilled, it’s time to attach the cabinet pulls. Take the screws provided with the pulls and insert them through the holes in the pulls. Align the holes in the pulls with the pilot holes on the cabinet doors or drawers. Use a screwdriver to tighten the screws until the pulls are securely attached. Repeat this step for all the pulls.
5. Test the Functionality
After all the pulls are attached, give them a gentle tug to ensure they are securely installed. Test the functionality of the pulls by opening and closing the cabinet doors or drawers. Make any necessary adjustments to the screws if needed. The pulls should be firm and easy to grip without any wobbling or loosening.
6. Enjoy the Finished Look
With the cabinet pulls properly installed, step back and admire the finished look. The pulls not only enhance the aesthetic appeal of the cabinets but also provide a convenient way to open and close them. Take the time to appreciate the improved functionality and overall upgrade that the pulls have brought to your cabinets.
FAQ:
What tools do I need to drill holes for cabinet pulls?
To drill holes for cabinet pulls, you will need a power drill, a drill bit that is the same size as the screws that came with your cabinet pulls, a measuring tape or ruler, a pencil, and a level.
What is the best size of drill bit to use for cabinet pulls?
The best size of drill bit to use for cabinet pulls is typically the same size as the screws that came with your cabinet pulls. Measure the diameter of the screws and choose a drill bit that matches that size.
How do I measure and mark where to drill the holes for cabinet pulls?
To measure and mark where to drill the holes for cabinet pulls, first decide the placement of your pulls. Measure the distance between the center of one screw hole to the center of the other screw hole on the pull. Then, transfer those measurements to the cabinet door or drawer, using a measuring tape or ruler and a pencil. Use a level to ensure that the markings are straight.
Do I need to drill pilot holes before drilling the final holes for cabinet pulls?
Yes, it is recommended to drill pilot holes before drilling the final holes for cabinet pulls. Pilot holes help prevent the wood from splitting when you insert the screws. Use a smaller drill bit than the size of the screws to drill the pilot holes.
What can I do if I accidentally drill the holes in the wrong spot?
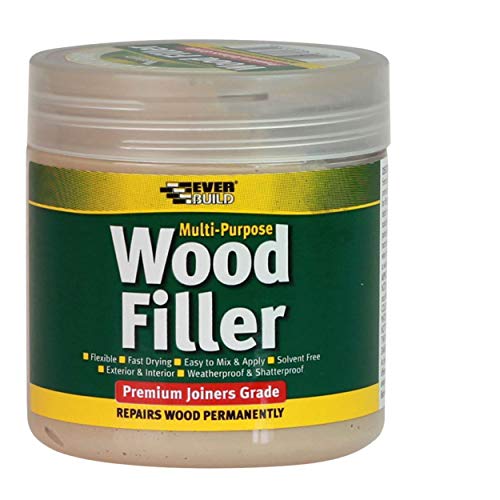
If you accidentally drill the holes in the wrong spot, you can fill the holes with wood filler or putty and then start over. Let the filler dry completely before drilling new holes. Alternatively, you can try using decorative cabinet hardware backplates to cover up the incorrect holes.
Video:


Harrison Clayton
Meet Harrison Clayton, a distinguished author and home remodeling enthusiast whose expertise in the realm of renovation is second to none. With a passion for transforming houses into inviting homes, Harrison's writing at https://thehuts-eastbourne.co.uk/ brings a breath of fresh inspiration to the world of home improvement. Whether you're looking to revamp a small corner of your abode or embark on a complete home transformation, Harrison's articles provide the essential expertise and creative flair to turn your visions into reality. So, dive into the captivating world of home remodeling with Harrison Clayton and unlock the full potential of your living space with every word he writes.