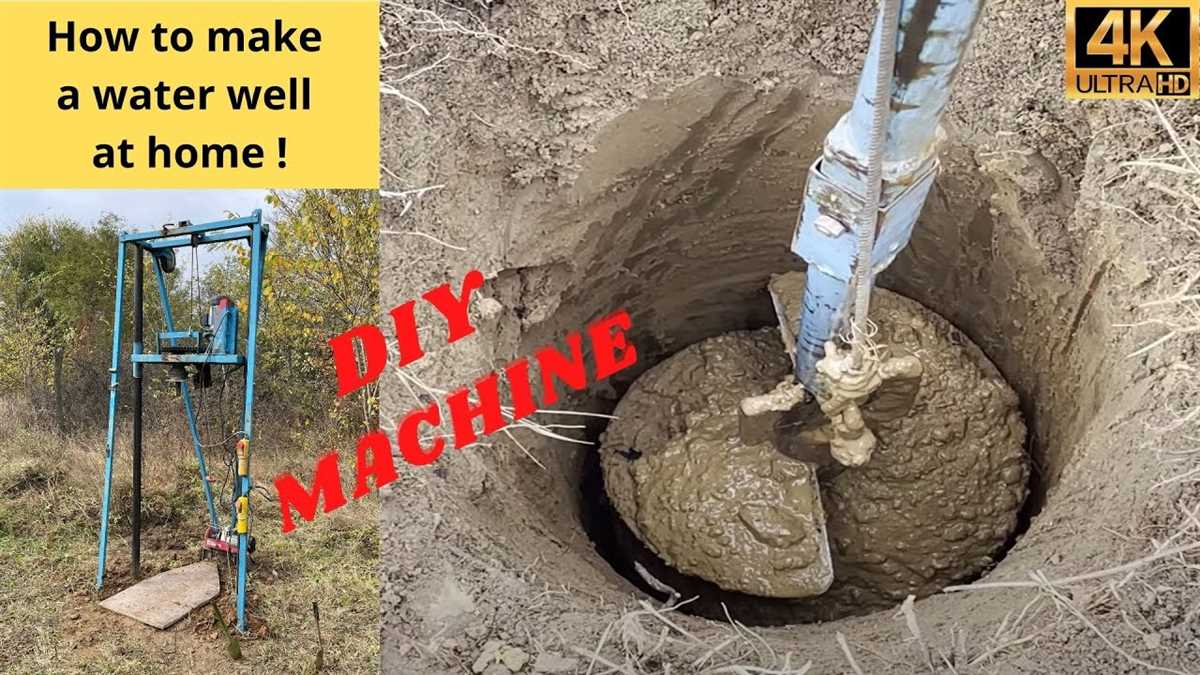
DIY: Learn How to Drill Your Own Water Well

Are you tired of relying on municipal water sources for your daily needs? Have you ever considered drilling your own water well? With a little bit of knowledge and the right tools, you can become self-sufficient in providing your own water supply. In this article, we will guide you through the process of drilling your own water well, step by step.
Drilling a water well may seem like a daunting task, but it can be a rewarding and cost-effective solution in the long run. By drilling your own well, you have control over the water quality and quantity, and you don’t have to worry about water restrictions or water bills. Plus, it can be a fun and educational DIY project!
Before you start the drilling process, it is important to understand the local regulations and obtain any necessary permits. You will also need to gather the right tools and equipment, such as a drilling rig, drill bits, casing pipes, and a water pump. It is recommended to consult with professionals or attend a well-drilling workshop to learn the techniques and safety precautions.
The Essential Equipment You Will Need to Drill Your Own Water Well
Drilling your own water well can be a cost-effective and sustainable solution for accessing clean water. However, it is important to have the right equipment to ensure a successful drilling process. Here are the essential tools and equipment you will need to drill your own water well:
1. Drill Rig

A drill rig is the most critical piece of equipment you will need for drilling a water well. There are various types of drill rigs available, including truck-mounted rigs, portable rigs, and mechanical rigs. Choose a drill rig that suits your drilling needs and budget.
2. Drill Pipe
Drill pipe is used to connect the drill bit to the drill rig. It transfers the rotational motion and torque from the rig to the drill bit, enabling the drilling process. Make sure to purchase drill pipe of the appropriate length and diameter for your drilling project.
3. Drill Bit
A drill bit is the cutting tool attached to the end of the drill pipe. It is responsible for creating the borehole by breaking the rock or soil. Different drill bits are designed for specific types of ground conditions, so choose a bit that is suitable for the geology in your area.
4. Mud Pump
A mud pump is used to circulate drilling fluid, also known as drilling mud, during the drilling process. The drilling fluid helps to cool and lubricate the drill bit, remove drill cuttings, and stabilize the borehole walls. Invest in a reliable mud pump to ensure efficient drilling operations.

5. Casing Pipe
Casing pipe is used to line the borehole and prevent it from collapsing. It also provides a pathway for water to flow from the aquifer into the well. Choose casing pipe that is durable and corrosion-resistant to ensure the longevity and reliability of your water well.
6. Well Screen
A well screen is a perforated pipe that is placed at the bottom of the casing pipe to filter out sand, sediment, and other debris from the groundwater. It prevents clogging of the well and ensures that only clean water enters the well. Select a well screen with the appropriate mesh size for your well.
7. Hand Pump or Electric Pump
Once your water well is drilled, you will need a pump to extract water from the well. Depending on your preferences and needs, you can choose between a hand pump or an electric pump. Hand pumps are simpler and more reliable, but electric pumps offer greater convenience.
8. Well Cap
A well cap is used to seal the top of the well and protect it from environmental contaminants. It also provides easy access for maintenance and testing. Ensure that your well cap meets local regulations and standards to ensure the safety and purity of your well water.
9. Tools and Accessories
- Wrenches: You will need wrenches of various sizes to tighten and loosen pipe connections.
- Tape Measure: Use a tape measure to determine the depth of your well and the length of pipe you will need.
- Level: A level is crucial for ensuring that your well is properly aligned and vertical.
- Torch: A torch or flashlight is essential for working in dark and cramped spaces.
- Safety Gear: Wear gloves, safety glasses, and appropriate clothing to protect yourself during the drilling process.
- Drilling Fluid: Purchase or make drilling fluid to lubricate the drill bit and remove drill cuttings.
By having the right equipment and taking necessary safety precautions, you can successfully drill your own water well and ensure a reliable water source for your needs.

Learn the Steps of DIY Well Drilling
Gather the necessary tools and equipment
Before you start drilling your own well, it’s important to gather all the necessary tools and equipment. Here is a list of the basic items you will need:
- Water well drilling rig
- Drill pipe
- Drill bit
- Pump and connections
- Water tank or storage system
- Pipe wrench
- Teflon tape
- Well screen
- Well cap
- Water test kit
Choose the drilling location
Once you have all the necessary tools and equipment, you need to choose the location for drilling your well. It’s important to check if there are any local regulations or permits required for drilling a well on your property. Find a suitable location away from septic systems, fuel tanks, and other potential sources of contamination.
Drill the well
Now it’s time to start drilling your well. Follow these steps:
- Set up the drilling rig and secure it in place.
- Attach the drill pipe and drill bit to the rig.
- Start drilling slowly and steadily, using water to keep the drill bit cool.
- Continue drilling until you reach the desired depth or hit water.
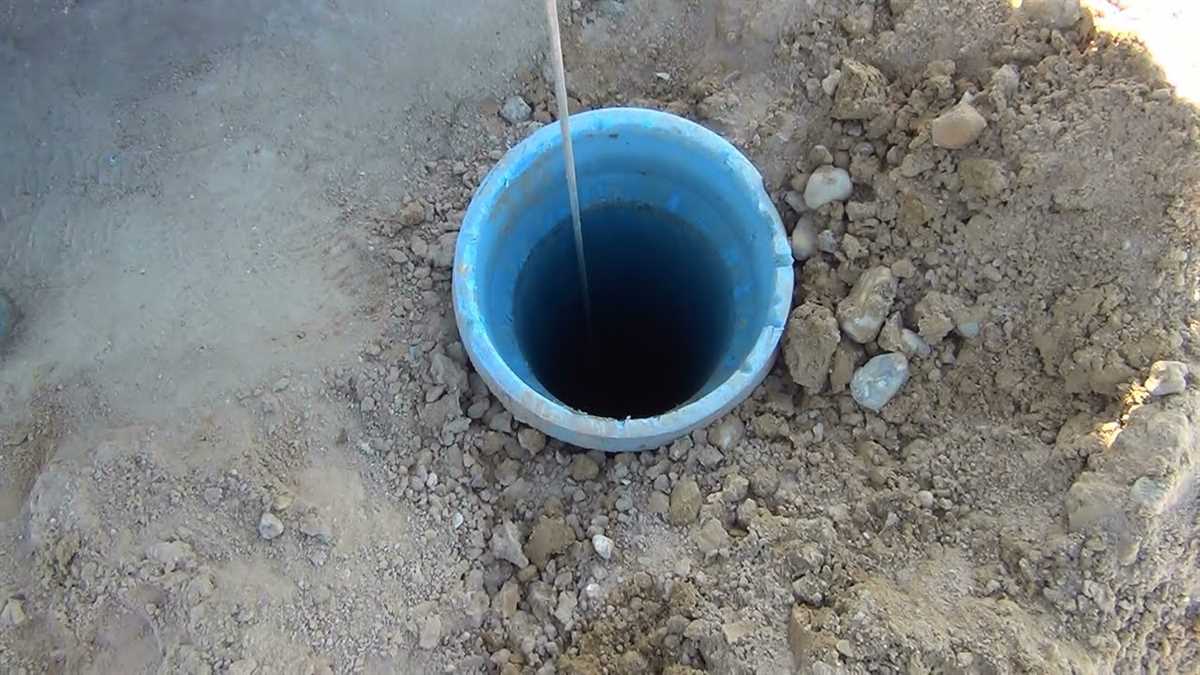
- Remove the drill pipe and replace it with the well screen.
- Pump water into the well to flush out any debris.
- Attach the pump and connections to the well.
Test and maintain the well
Once the well drilling process is complete, it’s important to test the quality of the water and maintain the well. Use a water test kit to check for any contaminants or impurities. Regularly inspect and clean the well screen to ensure proper functioning. Keep the area around the well free from debris and maintain the pump and connections regularly.
Conclusion
Drilling your own water well can be a challenging but rewarding DIY project. By following the steps outlined above and taking proper precautions, you can have a reliable source of water on your property.

Choosing the Right Location for Your Water Well
When it comes to drilling your own water well, one of the most important steps is choosing the right location. The success and efficiency of your well will depend on where it is placed, so it’s essential to carefully consider a few factors before starting the drilling process. Here are some key points to keep in mind:
1. Groundwater Availability
Before drilling a well, it’s essential to determine the availability of groundwater in the area. Consult with local authorities or professionals who can provide information about the depth and quality of groundwater in the vicinity. This will give you a better idea of the potential success of your well.
2. Distance from Contaminants
It’s crucial to place your well at a safe distance from potential sources of contamination. Avoid drilling in areas that are close to septic tanks, livestock operations, or industrial facilities. These sources can contaminate the groundwater, making it unsafe for consumption.
3. Elevation
Consider the elevation of the area when choosing the location for your well. The well should be situated at the lowest point possible to allow for natural downward flow of water. This will help ensure a steady supply of water to your well.

4. Accessibility
Accessibility is another important factor to consider. Make sure the chosen location is easily accessible for drilling equipment and maintenance purposes. Consider factors such as road access, terrain, and space for equipment setup.
5. Legal Requirements
Check with your local authorities for any legal requirements or permits needed for drilling a water well on your property. There may be regulations regarding setback distances, well construction standards, or other specifications that need to be followed.
6. Geology and Soil Composition
Understanding the geology and soil composition of the area can also influence the success of your well. Consult with professionals or conduct a thorough geological survey to determine the best location based on the underlying rock formations and soil types.
7. Proximity to Other Wells
Consider the proximity of existing wells in the area when choosing your own location. Drilling too close to other wells can lead to interference and decreased water yield. Maintain a recommended distance between wells to ensure optimum performance.
8. Water Table Depth
The depth of the water table is a critical factor to consider. Drilling too deep may result in higher costs and decreased efficiency, while drilling too shallow could lead to water scarcity during dry periods. Obtain information about the typical water table depth in the area to help guide your decision.
By carefully considering these factors and conducting thorough research, you can choose the right location for your water well. Remember, it’s always best to consult with professionals or local authorities to ensure compliance with any regulations and to maximize your chances of success.
Understanding the Groundwater Resources in Your Area
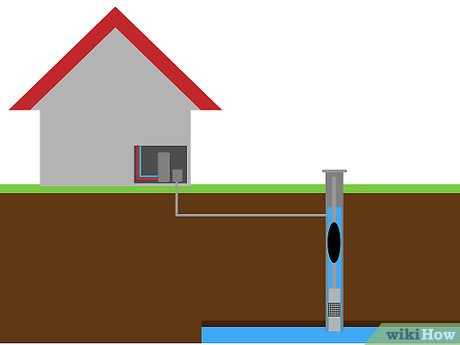
Before you begin drilling your own water well, it is important to understand the groundwater resources in your area. This knowledge will help you make informed decisions about well placement, pumping rates, and overall water management.
Assessing the Availability of Groundwater
The first step in understanding the groundwater resources in your area is to assess the availability of groundwater. This can be done by consulting local geological surveys or contacting a professional hydrogeologist. They will be able to provide you with information about the depth and quality of groundwater in your area.
Determining the Aquifer Type
Once you have assessed the availability of groundwater, you will need to determine the type of aquifer in your area. Aquifers are underground layers of permeable rock or sediment that can hold and transmit groundwater. The type of aquifer will affect the drilling method and well construction that you will need to use.
- Unconfined Aquifers: These are aquifers where the water table is at or near the ground surface. They are typically easier to access and do not require extensive drilling.
- Confined Aquifers: These are aquifers where the water table is confined between layers of impermeable rock or sediment. Drilling into these aquifers may require more advanced methods.
- Artesian Aquifers: These are aquifers where water is confined under pressure and can rise above the ground surface without pumping. They are typically found in areas with steeply dipping rock layers.
Understanding Water Quality
Another important aspect of understanding groundwater resources is assessing water quality. Water quality can vary depending on the geology and land use in your area. It is important to test the water for contaminants before using it for drinking or other purposes.
| Contaminant | Possible Sources | Potential Health Effects |
|---|---|---|
| Bacteria | Septic systems, animal waste, agricultural runoff | Gastrointestinal illness |
| Nitrates | Agricultural runoff, septic systems | Blue baby syndrome, increased risk of certain cancers |
| Heavy Metals | Industrial waste, mining activities | Neurological damage, kidney damage, cancer |
Monitoring and Maintenance
Once you have drilled your well and established a water supply, it is important to regularly monitor and maintain your well. This will help ensure the longevity and quality of your water supply. Regular testing for contaminants, checking the well casing for cracks, and maintaining proper wellhead seals are all important aspects of well maintenance.
By understanding the groundwater resources in your area, you can make informed decisions about well placement and construction. This will help ensure a reliable and safe water supply for you and your family.
Preparing Your Drilling Site and Equipment
Choosing a Site for Drilling
Before you begin drilling, it’s important to choose a suitable location for your well. Here are some factors to consider:
- Accessibility: Make sure the drilling site is easily accessible for equipment and water transportation.
- Distance from Contaminants: Select a site away from potential sources of contamination such as septic tanks, chemical storage facilities, or agricultural areas.
- Geological Survey: Conduct a geological survey of the area to identify potential obstacles or formations that could affect drilling.
- Water Source: Look for signs of existing water sources, such as natural springs or water seepage, which can indicate the presence of an underground water table.
Gathering Equipment
Before you start drilling, it’s important to gather all the necessary equipment. Here’s a list of essential tools for drilling a water well:
- Drilling Rig: This is the main equipment needed for drilling. Depending on the depth you’re aiming for, you can choose from various types of drilling rigs, such as cable tool rigs or rotary drilling rigs.
- Drill Bit: Select a suitable drill bit based on the type of soil or rock you’ll be drilling through. Different formations may require different types of bits, such as tricone bits or hammer bits.
- Drill Pipe: This is the pipe that connects the drill bit to the drilling rig. Choose a sturdy and durable drill pipe that can withstand the forces involved in drilling.
- Water Swivel: A water swivel is used to supply water to the drill bit during drilling. It helps to cool the bit and flush out the cuttings.
- Other Tools: You may also need various hand tools, such as wrenches, hammers, and pliers, for assembling and maintaining the drilling equipment.
Clearing the Site
Before you start drilling, it’s important to clear the drilling site of any obstacles or vegetation that could interfere with the drilling process. Here’s what you need to do:
- Clear Vegetation: Remove any grass, plants, or trees from the area where you’ll be drilling.
- Level the Ground: Ensure that the drilling site is flat and level to provide stability for the drilling rig.
- Mark the Drilling Location: Use stakes or markers to indicate the exact spot where you’ll be drilling.
Setting Up the Drilling Rig
Once the site is cleared, you can start setting up the drilling rig. Follow these steps:
- Position the Rig: Place the drilling rig near the designated drilling location, ensuring that it is stable and securely anchored.
- Assemble the Rig: Follow the manufacturer’s instructions to assemble the various components of the drilling rig, such as the mast, drill head, and winch.
- Attach the Drill Pipe: Connect the drill pipe to the drill head, making sure it is tightly secured.
- Attach the Drill Bit: Attach the appropriate drill bit to the end of the drill pipe, using the appropriate tools.
Ensuring Safety Precautions
Before you start drilling, it’s important to take necessary safety precautions to protect yourself and others. Here are some key safety measures:
- Wear Protective Gear: Always wear safety goggles, gloves, and a hard hat to protect yourself from flying debris and other hazards.
- Secure the Area: Secure the drilling site to prevent unauthorized access and to ensure the safety of people in the vicinity.
- Follow Local Regulations: Familiarize yourself with any local regulations or permits required for drilling a water well, and ensure you comply with them.
- Follow Manufacturer’s Instructions: Read and follow all safety guidelines provided by the manufacturer of the drilling equipment.
By following these steps to prepare your drilling site and equipment, you’ll be well-prepared to start drilling your own water well.
The Step-by-Step Process of Drilling Your Well
1. Prepare the Site
Before you begin drilling your well, you need to prepare the site properly. Start by selecting a suitable location for your well. Ensure that the chosen spot is away from any potential sources of contamination, such as septic tanks or chemical storage areas.
Next, mark the location where you will drill the well. Clear any vegetation or debris from the area and level the ground to provide a stable drilling surface.
2. Gather the Equipment and Supplies
Once the site is prepared, gather all the necessary equipment and supplies for drilling the well. This includes a drilling rig, drill bits, drilling mud, water supply, casing materials, and safety gear, such as gloves and goggles.
3. Start Drilling
Begin drilling the well by attaching the appropriate drill bit to the drilling rig. Lower the drill bit into the hole and start the drilling process. As you drill, periodically remove the drill cuttings and add drilling mud to facilitate the drilling process.
Continue drilling until you reach the desired depth for your well. The depth will depend on the water table in your area and any local regulations or recommendations.
4. Install Casing and Screen
Once the drilling is complete, it’s time to install the casing and screen. The casing helps stabilize the well and prevents the sides from collapsing. Select the appropriate size and material for your casing and lower it into the well.
After the casing is in place, install a screen to filter out any debris or sediment. The screen allows water to enter the well while keeping unwanted materials out.
5. Develop the Well
After the casing and screen are installed, it’s important to develop the well. This involves flushing out any sediment or drilling mud that may have accumulated during the drilling process. Use a high-pressure water pump to force water into the well, dislodging any debris and improving the flow of water.
6. Test the Well
Once the well is developed, it’s crucial to test its performance. This involves measuring the well’s yield or the rate at which it can supply water. Use a flow meter or a timed bucket test to determine the yield. It’s also recommended to test the water quality for any potential contaminants.
7. Complete Well Construction
After successfully drilling and testing the well, complete the well construction by sealing the annular space around the casing and installing a well cap or cover. Ensure that the well is properly labeled and protected to prevent accidental contamination or tampering.
8. Maintain and Monitor
Once your well is complete, it’s important to establish a regular maintenance and monitoring schedule. Regularly inspect the well and its components for any signs of damage or deterioration. Test the water quality periodically to ensure it remains safe for use.
By following this step-by-step process, you can drill your own water well and become more self-sufficient in obtaining a reliable water supply.
Troubleshooting Common Issues During Well Drilling
1. Lack of Water Flow
If you notice a lack of water flow during the drilling process, there may be several possible causes:
- The well screen could be clogged with debris, preventing water from entering the well. Try cleaning the screen with a brush or contacting a professional to remove any obstructions.
- The water level in the aquifer may be too low. This can happen if the well is drilled too deep or if the aquifer has low water reserves. Consult with a hydrogeologist to determine if drilling deeper or relocating the well is necessary.
- The pump may not be functioning properly. Check the pump for any signs of damage or wear and tear. Additionally, ensure that the pump is the correct size for the well and aquifer capacity.
2. Contamination
If you suspect that your well water is contaminated, it is important to address the issue promptly to ensure safe and clean drinking water:
- Test the water for common contaminants, such as bacteria, nitrates, and chemicals. This can be done through a water testing laboratory or by using a home testing kit.
- If contamination is detected, determine the source of contamination and take necessary corrective measures. This may involve installing a filtration system or implementing proper waste disposal practices.
- Regularly monitor the water quality to ensure that contamination does not occur in the future. This can be done by conducting periodic water tests and maintaining proper well and septic system maintenance.
3. Well Collapse
In some cases, a well may collapse during the drilling process or after completion. Here are some steps to take if you encounter a well collapse:
- Stop drilling immediately if you suspect a collapse has occurred. Continuing to drill can exacerbate the problem and make it more difficult to rectify.
- Contact a professional well contractor or drilling company to assess the situation and determine the best course of action. They will have the expertise and equipment needed to address a well collapse effectively.
- If necessary, the well may need to be re-drilled or repaired. This will depend on the extent of the collapse and the condition of the surrounding formation.
4. Insufficient Water Quality
If the water quality from your well is not up to your desired standards, there are several potential causes and solutions:
- The water may contain high levels of minerals or other contaminants. Installing a water treatment system, such as a water softener or reverse osmosis system, can help improve the water quality.
- Proper well construction and maintenance are crucial for preventing the ingress of contaminants. Ensure that the well casing is intact and properly sealed, and regularly inspect and maintain the well to avoid potential issues.
- If the water source is located near potential sources of contamination, such as septic systems or agricultural fields, consider implementing additional protective measures, such as increased setbacks or enhanced filtration systems.
Remember, it is important to consult with professionals and obtain the necessary permits before drilling a well. They can help guide you through the process and ensure that any issues are addressed properly.
Testing and Maintaining Your DIY Water Well
Regular Testing
Once you have completed drilling your own water well, it is important to regularly test the quality and quantity of the water to ensure its safety and availability.
Performing regular testing can help identify any potential issues with the well, such as contamination or decreased water flow. It is recommended to test your well water at least once a year, or more frequently if you notice any changes in the taste, color, or odor of the water.
Water Quality Testing
- Chemical Testing: Test for any contaminants in the water such as bacteria, nitrates, pesticides, or heavy metals. This can be done using water testing kits that are available at most hardware stores or by sending a sample to a certified laboratory.
- Physical Testing: Check for any visible particles, sediment, or discoloration in the water. If you notice any abnormalities, further testing may be required to identify the cause and potential solutions.
- Taste and Odor: Trust your senses to detect any unusual taste or odor in the water. If you notice any changes, it is important to investigate and take appropriate actions.
Water Quantity Testing
Testing the quantity of water from your well involves measuring the flow rate and water level.
- Flow Rate: Measure how many gallons of water per minute (GPM) your well can produce. This can be done by running the water from a known source and timing how long it takes to fill a container of known volume.
- Water Level: Measure the depth of the water in your well using a water level indicator. This can help determine the overall health of the well and if any adjustments or maintenance is required.
Maintaining Your DIY Water Well
Regular maintenance is essential to keep your DIY water well in good working condition.
- Inspect and Clean: Regularly inspect the wellhead, pipes, and fittings for any signs of damage, corrosion, or leaks. Clean the wellhead from any debris, leaves, or other materials that could enter the well.
- Monitor the Water Level: Keep track of the water level in your well to ensure it remains stable. If you notice a significant drop in the water level, it may indicate a problem with the well or the surrounding groundwater.
- Protect the Wellhead: Install a protective cover or casing around the wellhead to prevent any potential contaminants from entering the well. This can include sealing the area around the well with concrete or using a well cap.
- Professional Inspections: It is recommended to have your DIY water well professionally inspected every few years to identify any potential issues that may require repairs or maintenance.
Conclusion
Testing and maintaining your DIY water well is crucial for ensuring a safe and reliable water supply. Regular testing of water quality and quantity can help identify any issues while proper maintenance can help extend the lifespan of the well. By being proactive in the care of your well, you can enjoy the benefits of having your own water source for years to come.
Important Safety Guidelines for Well Drilling at Home
1. Obtain the Necessary Permits and Information
Before starting any well drilling activities at home, it is important to check with your local authorities and obtain the necessary permits. They will provide you with specific guidelines and regulations that need to be followed. Additionally, gather information about the location of underground utilities to avoid any accidents during the drilling process.
2. Use Protective Gear
Ensure that you wear the appropriate protective gear while drilling a well at home. This includes safety goggles, gloves, ear protection, and a hard hat. These items will protect you from flying debris, noise, and other potential hazards.
3. Inspect the Equipment
Prior to starting the drilling process, thoroughly inspect all equipment to ensure that it is in good working condition. Check for any leaks, loose parts, or damaged components. Faulty equipment can lead to accidents and injuries.
4. Follow Manufacturer’s Instructions
Read and understand the manufacturer’s instructions for the drilling equipment. Follow them closely to ensure safe and proper usage. Improper handling of equipment can result in injuries or equipment failure.
5. Maintain a Safe Distance
Keep a safe distance from the drilling area and any operating machinery. This will help protect you from potential hazards such as falling objects or equipment malfunctions.
6. Know the Location of Underground Utilities
Obtain accurate information about the location of underground utilities to prevent accidental damage to gas lines, electrical cables, or water pipes. Contact utility companies for guidance and support.
7. Have a First Aid Kit on Hand
Always have a well-stocked first aid kit readily available in case of any injuries or accidents. It should include items such as bandages, antiseptic solution, and adhesive tape.
8. Practice Safe Water Handling
When handling water during the drilling process, practice safe procedures to minimize the risk of contamination or injury. Use clean containers and avoid direct contact with the water.
9. Be Mindful of Environmental Impact
Drilling a well at home may have environmental implications. Be mindful of the potential impact and take necessary precautions to protect the environment, such as proper disposal of drilling waste and preventing contamination of nearby water sources.
10. Seek Professional Help if Needed
If the drilling process becomes challenging or poses a safety risk, it is advisable to seek professional assistance. Well drilling experts have the knowledge and experience to handle complex situations and ensure safety.
Following these safety guidelines will help ensure a safe and successful well drilling project at home. Prioritize personal safety and take necessary precautions throughout the process.
FAQ:
What are the benefits of drilling your own water well?
Drilling your own water well has several benefits. First, it can save you money on water bills since you won’t have to rely on a municipal water supply. Second, it provides you with a sustainable water source, especially if you live in a rural area. Lastly, it gives you control over the quality and safety of your water, as you can monitor and maintain the well yourself.
Is drilling a water well a difficult task?
Drilling a water well can be a challenging task, but it is definitely achievable for DIY enthusiasts. It requires careful planning, the right equipment, and the knowledge of the local regulations and geological conditions. With proper research and preparation, drilling your own water well can be a rewarding and cost-effective project.
What equipment do I need to drill my own water well?
To drill your own water well, you will need several essential tools and equipment. These include a drilling rig or a well drilling kit, which typically consists of a drilling machine, drill bits, and pipes. You will also need a pump to extract the water, as well as various hand tools for the installation and maintenance of the well. It is crucial to ensure that you have all the necessary equipment before starting the drilling process.
Are there any risks or challenges associated with drilling your own water well?
Yes, there are certain risks and challenges associated with drilling your own water well. One of the main risks is encountering contaminated water or pollutants in the ground, which can pose a health hazard. It is important to conduct water tests and consult with local authorities to ensure the safety of the water source. Additionally, drilling without proper knowledge or equipment can lead to accidents or damage to the surrounding environment. It is advisable to seek professional guidance or assistance to mitigate these risks.
Video:


Harrison Clayton
Meet Harrison Clayton, a distinguished author and home remodeling enthusiast whose expertise in the realm of renovation is second to none. With a passion for transforming houses into inviting homes, Harrison's writing at https://thehuts-eastbourne.co.uk/ brings a breath of fresh inspiration to the world of home improvement. Whether you're looking to revamp a small corner of your abode or embark on a complete home transformation, Harrison's articles provide the essential expertise and creative flair to turn your visions into reality. So, dive into the captivating world of home remodeling with Harrison Clayton and unlock the full potential of your living space with every word he writes.


