DIY: How to Make Holes in a Wall Without a Drill

Whether you’re a renter who wants to avoid damaging the walls or simply don’t have access to a drill, there are still plenty of ways you can make holes in a wall without using a power tool. With a few simple tools and techniques, you can easily hang shelves, pictures, and other items securely.
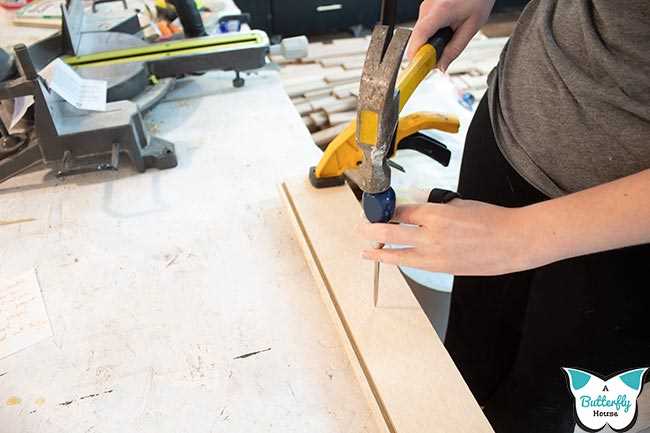
One method you can use is the nail and hammer technique. By choosing the right size and type of nail, you can easily create small holes in the wall that are strong enough to hold lightweight objects. Simply line up the nail with the desired location, hold it against the wall at a slight angle, and tap it gently with a hammer until it goes through the wall.
Another option is to use adhesive hooks. These hooks have a sticky backing that makes them easy to attach to the wall without drilling. Simply peel off the backing, press the hook against the wall, and hold it in place for a few seconds to ensure it adheres properly. Adhesive hooks are a great option for hanging lightweight items.
If you need to hang something heavier, you can try using anchors and screws. Anchors provide extra support for heavy objects and prevent them from pulling out of the wall. To use anchors, first drill a small pilot hole into the wall, then insert the anchor and screw in the screw. This technique requires a bit more effort and tools, but it provides a secure hold for heavier items.
Remember, it’s important to consider the weight of the item you’re hanging and choose the appropriate method accordingly. By following these simple DIY techniques, you can easily make holes in a wall without a drill and still hang your items securely.

Wall-Mounting Basics
Choosing the Right Wall-Mounting Method
When it comes to wall-mounting, there are several methods you can consider depending on your needs and the type of wall you have. Here are some common options:
- Screws and Anchors: This traditional method involves using screws and anchors to securely attach your item to the wall. It requires drilling holes into the wall.
- Adhesive Hooks or Strips: If you’re not comfortable with drilling or have a temporary need, adhesive hooks or strips can be a good option. They stick to the wall and can hold lightweight items.
- Tension Rods: Tension rods are typically used for hanging curtains or shower curtains, but they can also be used for lightweight wall-mounting. They are easy to install and remove without leaving any holes.
Preparing the Wall Surface
Before you begin wall-mounting, it’s important to prepare the wall surface to ensure a secure and long-lasting installation. Follow these steps:
- Remove any dust, dirt, or debris from the wall using a dry cloth or brush.
- If necessary, clean the wall with a mild detergent and water solution. Be sure to let it dry thoroughly before proceeding.
- If you’re using screws and anchors, mark the exact spot where you want to place your item using a pencil or masking tape.
Installing the Wall-Mounting Hardware
Now that you’ve prepared the wall surface, it’s time to install the wall-mounting hardware. Here’s how:
- If you’re using screws and anchors, drill pilot holes at the marked spots using a drill bit slightly smaller than the screws. Insert the anchors into the holes.
- If you’re using adhesive hooks or strips, follow the instructions provided by the manufacturer to ensure proper adhesion.
- For tension rods, simply twist them until they fit snugly between the walls.
Mounting Your Item
After properly installing the wall-mounting hardware, it’s time to mount your item. Follow these steps:
- For screws and anchors, align your item with the installed hardware and use a screwdriver to securely attach it to the wall.
- For adhesive hooks or strips, remove the backing and press the item firmly against the wall.
- For tension rods, adjust the length so that it fits securely between the walls, and then hang your item from it.
Testing and Adjusting
Once you’ve mounted your item, give it a gentle tug or shake to ensure it’s securely attached to the wall. If it feels loose or unstable, readjust the wall-mounting hardware as needed.

Removing Wall-Mounted Items
If you no longer need a wall-mounted item or want to reposition it, follow these steps to remove it:
- For screws and anchors, use a screwdriver to unscrew and remove the item from the wall.
- For adhesive hooks or strips, carefully peel them off the wall, following the manufacturer’s instructions.
- For tension rods, twist them to their shortest length and carefully remove them from the walls.
Tips and Safety Precautions
Here are some additional tips and safety precautions to keep in mind when wall-mounting:
- Use the right hardware: Make sure to select wall-mounting hardware that is suitable for the weight and type of item you are hanging.
- Follow weight limits: Adhesive hooks and strips have weight limits, so be sure not to exceed them to prevent damage to the wall or the item.
- Avoid hanging items near electrical outlets: When wall-mounting, avoid placing items near electrical outlets or any other potential safety hazards.
- Protect the wall surface: Use protective pads or bumpers on the back of your item to prevent any damage to the wall surface.
Materials Needed
- Adhesive Hooks: These hooks come with a sticky back that can adhere to the wall without the need for drilling.
- Wall Anchors: If you have heavier items to hang, wall anchors are necessary to provide additional support.
- Screwdriver: A screwdriver will be needed to install wall anchors or to tighten screws on adhesive hooks.
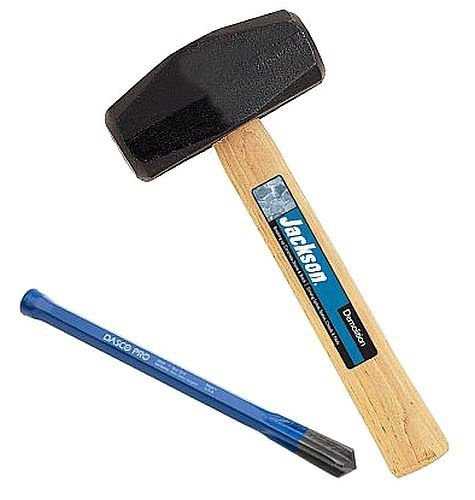
- Hammer: If you need to tap in any nails or anchors, a hammer will be necessary.
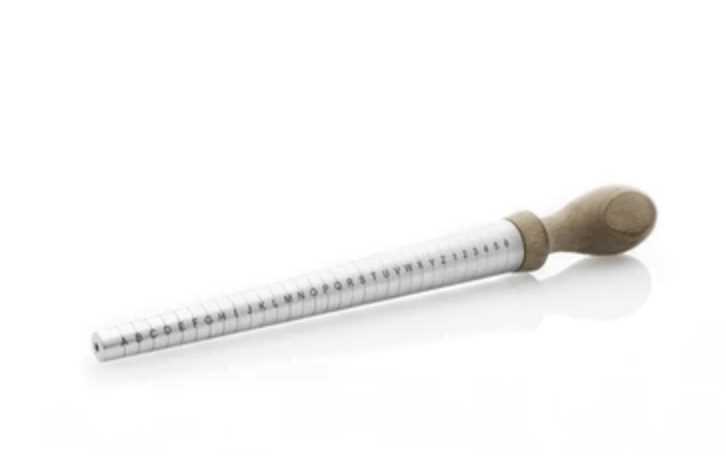
- Tape Measure: To ensure accurate placement, a tape measure will be helpful in determining the proper location for your holes.
- Pencil: Marking the location of the holes with a pencil will help guide you during the installation process.
- Level: To ensure your item is straight and level on the wall, a level will be necessary.
- Putty Knife: A putty knife will be useful in repairing any small holes or blemishes in the wall.
- Spackle: If you need to patch any holes, spackle can be used to fill them in.
- Sandpaper: Sandpaper will be helpful in smoothing out any patched areas.
- Paint or Touch-up: If necessary, have paint or touch-up paint on hand to cover any patched areas.
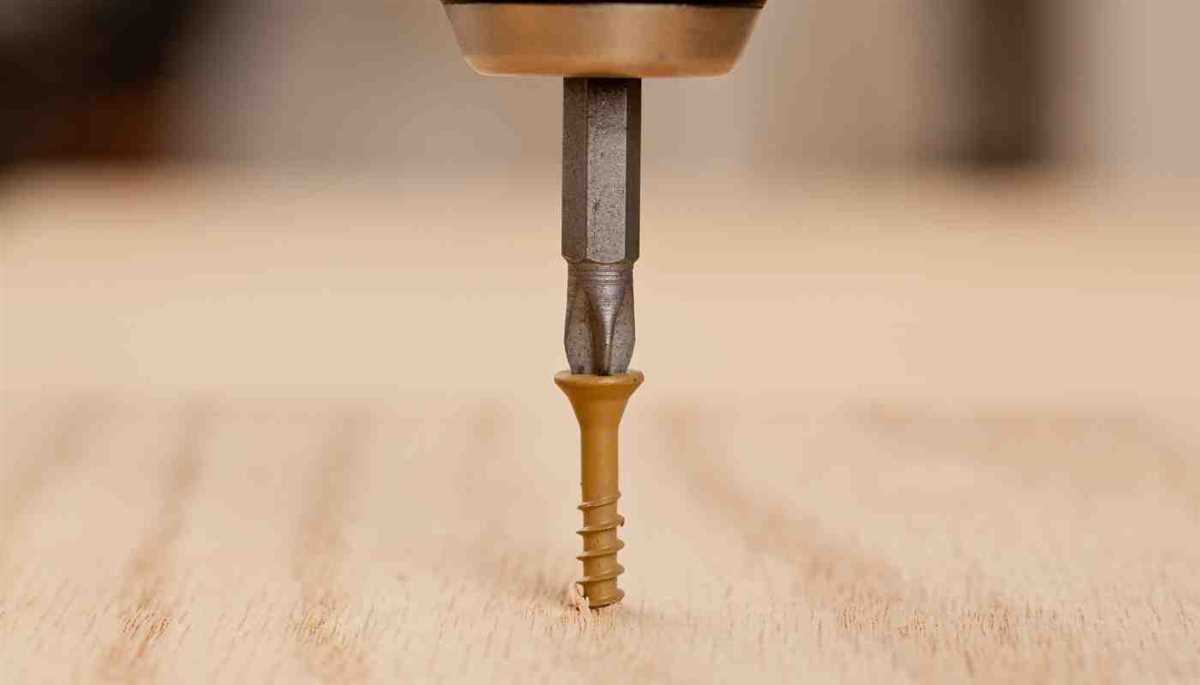
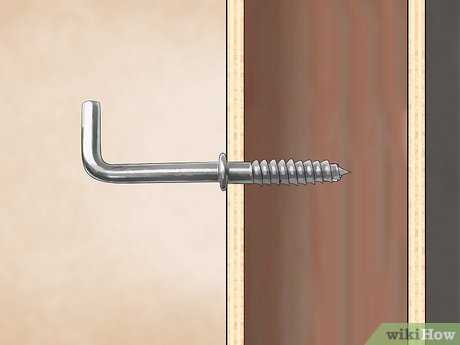
Using Anchors and Screws
If you don’t have a drill, you can still hang items on your wall using anchors and screws. Anchors are often used to provide extra support for hanging objects in drywall or other weak materials. Here is a step-by-step guide on how to use anchors and screws to make holes in a wall without a drill:
- Choose the appropriate anchor and screw size for the weight of the object you want to hang. Manufacturers usually provide weight ratings for their anchors.
- Locate the spot on the wall where you want to hang your object. Use a pencil to mark the spot.
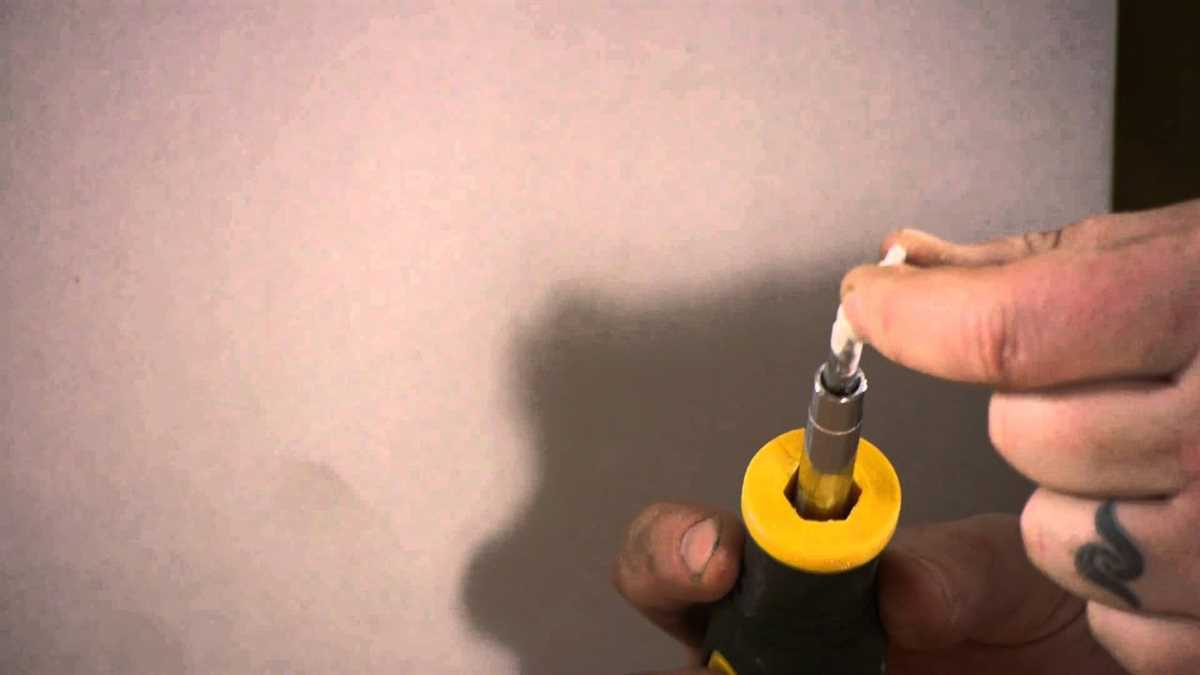
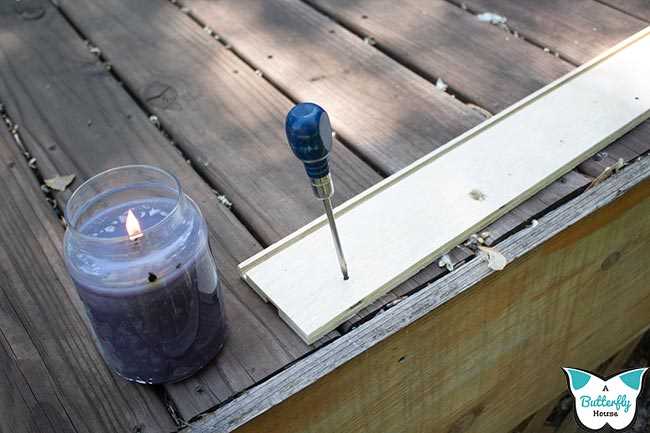
- Hold the anchor against the wall at the marked spot and gently tap it with a hammer to make a small pilot hole. Be careful not to tap too hard, as this can damage the wall.
- Once the anchor is partially inserted into the wall, use a screwdriver to fully tighten it. The anchor should be flush with the wall surface.
- If necessary, remove the screw from the anchor and attach the object you want to hang. Then, insert the screw back into the anchor and tighten it to secure the object in place.
Keep in mind that using anchors and screws without a drill may not provide as secure or stable of a hold as using a drill. It is also important to note that anchors and screws may not be suitable for all types of walls or materials. Before using anchors and screws, ensure that your wall is capable of supporting the weight of the object and that the anchor is appropriate for the wall material.

Hanging Pictures and Mirrors
1. Determine the Placement
Before you begin hanging your pictures or mirrors, decide on the ideal placement. Consider the size and shape of the wall, as well as the height at which you want to hang the items.
2. Mark the Wall
Once you have determined the placement, use a pencil to mark the spot where you want to hang your picture or mirror. Use a level to ensure your marks are straight and evenly positioned.
3. Prepare the Hanging Hardware
Depending on the weight and size of your picture or mirror, you may need different types of hanging hardware. For lightweight items, adhesive hooks or sawtooth hangers can work well. For heavier items, consider using wall anchors and screws.
4. Hang the Picture or Mirror
If you are using adhesive hooks or sawtooth hangers, simply press them onto the wall at the marked spot. For wall anchors and screws, first, drill a small hole at the marked spot using a drill or a nail. Then, insert the wall anchor into the hole and screw in the screw. Finally, hang your picture or mirror onto the hook or screw.
5. Level and Adjust

Once your picture or mirror is hung, use a level to ensure it is straight. If it is not level, make any necessary adjustments by moving the hardware or repositioning the hanging wire.
6. Secure and Finish
After making sure your picture or mirror is straight, secure it in place. If you used adhesive hooks, press firmly to ensure they are securely attached to the wall. If you used wall anchors and screws, tighten the screw until it is snug against the wall.
7. Enjoy Your New Decor
Step back and admire your newly hung pictures or mirrors. It’s now time to enjoy the enhanced aesthetic appeal they bring to your space!
Putting up Shelves
What You’ll Need:
- Shelf brackets
- Screws
- Wall anchors
- Level
- Tape measure
- Pencil
- Screwdriver or drill
Step 1: Measure and Mark
Using a tape measure, determine the desired height and spacing for your shelves. Mark the wall with a pencil to indicate the placement of each bracket.
Step 2: Install Wall Anchors
If your wall is made of drywall, you’ll need to use wall anchors to ensure the shelves can support weight. Use a screwdriver or drill to install the wall anchors at the marked locations.

Step 3: Attach Shelf Brackets
Line up each shelf bracket with the wall anchors and secure them using screws. Make sure the brackets are level to ensure a straight shelf.
Step 4: Test the Stability
Once all the shelf brackets are attached, give them a gentle tug to test their stability. If they feel secure, you can proceed with placing the shelves on top.
Step 5: Add Shelves
Place your chosen shelves on top of the brackets and make sure they are evenly spaced and level. Adjust the position of the brackets if needed.
Step 6: Secure Shelves (Optional)
If desired, you can secure the shelves to the brackets using additional screws. This will provide extra stability and prevent the shelves from accidentally sliding off.
Step 7: Decorate and Organize
Once the shelves are securely in place, you can now decorate and organize them with your chosen items. Add books, plants, or any other decorative or functional objects to personalize your shelves.
Step 8: Enjoy Your New Shelves!
Step back and admire your handiwork. Your new shelves are ready to be enjoyed!
Installing Curtain Rods
Installing curtain rods can be a simple and effective way to add style and functionality to your windows. Follow these steps to install curtain rods without using a drill:
Materials Needed:
- Curtain rods
- Mounting brackets
- Screws
- Anchors (if needed)
- Level
- Tape measure
- Pencil
- Screwdriver
- Wall adhesive (optional)
Step 1: Measure the Window
Use a tape measure to measure the width of your window. Determine the desired height of your curtain rod and mark it with a pencil. Make sure to measure and mark the same height on each side of the window.
Step 2: Choose the Curtain Rod
Select a curtain rod that fits the width of your window. Make sure the rod is sturdy enough to support the weight of your curtains.
Step 3: Install the Mounting Brackets
- Place the mounting brackets on the wall at the marked height. Use a level to ensure they are straight.
- Mark the screw hole locations on the wall with a pencil.
- If needed, use anchors to provide extra support for the screws.
- Screw the mounting brackets into place using a screwdriver.
Step 4: Attach the Curtain Rod
- Slide the curtain rod through the curtain panels.
- Place one end of the curtain rod into a mounting bracket.
- Hold the other end of the curtain rod and attach it to the second mounting bracket.
- Make sure the curtain rod is securely in place.
Step 5: Finishing Touches
- Adjust the curtain rod to ensure it is level and the curtains hang evenly.
- If desired, use wall adhesive to secure the mounting brackets in place for extra stability.
Installing curtain rods without a drill is a simple and effective DIY project. With just a few tools and materials, you can easily add curtains to your windows and enhance the look of your space.
Mounting TVs or Monitors
Choosing the Right Wall Mount
Before mounting your TV or monitor, it is important to choose the right wall mount for your needs. Consider the weight and size of your device, as well as the VESA mounting pattern. Measure the distance between the mounting holes on the back of your device to ensure compatibility with the wall mount.
Gathering the Necessary Tools
Here are the tools you will need:
- Wall mount kit
- Screwdriver
- Level
- Pencil
- Tape measure
- Stud finder
Finding the Right Location
Use a stud finder to locate the studs in your wall. Mounting your TV or monitor on a stud will provide the necessary support. Mark the center of each stud with a pencil.
Mounting the Wall Bracket
Hold the wall bracket against the wall, aligning the center with the marks you made for the studs. Use a level to ensure the bracket is straight. Once aligned, mark the screw holes on the wall with a pencil.
Attach the wall bracket to the wall using the provided screws and a screwdriver. Make sure the screws are securely fastened into the studs for maximum stability.
Attaching the Mounting Plate
Attach the mounting plate to the back of your TV or monitor using the provided screws. Make sure the screws are tightened securely.
Mounting your TV or Monitor
Carefully lift your TV or monitor and align the mounting plate with the wall bracket. Once aligned, gently lower the device onto the bracket. You may need someone to assist you with this step to ensure the device is properly mounted.
Securing the Device
After mounting your TV or monitor, check to make sure it is securely attached to the wall bracket. Gently give it a slight tug to ensure it is stable. If needed, adjust the position of the device on the bracket.
Enjoying Your Mounted TV or Monitor
Once your TV or monitor is securely mounted, sit back and enjoy your favorite shows or movies without any worry of it falling off the wall. Remember to follow the manufacturer’s instructions for any additional steps or precautions.
Patching and Repairing Holes
When you’re finished making holes in your wall, it’s essential to patch and repair them properly to ensure a smooth and seamless finish. Here are some steps to follow:
1. Gather Materials
Before you begin, gather all the necessary materials for patching and repairing holes in your wall. This may include spackling compound, a putty knife, sandpaper, a sponge, and paint that matches your wall color.
2. Clean the Area
Start by cleaning the area around the hole. Remove any loose debris or flaking paint using a sponge or a damp cloth. This will ensure that the patching material adheres properly.
3. Apply Spackling Compound
Using a putty knife, apply a small amount of spackling compound to the hole. Smooth it out evenly, applying more as needed to fill the hole completely. Use the putty knife to create a smooth surface, blending it with the surrounding wall.
4. Let it Dry
Allow the spackling compound to dry completely according to the manufacturer’s instructions. This generally takes around 24 hours.
5. Sand the Patch
Once the spackling compound is dry, use sandpaper to smooth the patched area. Start with a fine-grit sandpaper and gradually move to a coarser grit if necessary. Sand until the patched area is flush with the surrounding wall.
6. Clean the Area Again
After sanding, use a damp cloth or sponge to wipe away any dust or debris from the patched area. This will ensure a clean and smooth surface for your painted finish.
7. Paint the Patched Area
Finally, paint the patched area to match the rest of the wall. Use a small brush or roller to apply the paint, feathering it out slightly beyond the patched area for a seamless blend.
8. Allow the Paint to Dry
Let the paint dry according to the manufacturer’s instructions. Once it’s fully dry, inspect the patched area to ensure it blends seamlessly with the rest of the wall. If necessary, apply another coat of paint to achieve a perfect finish.
9. Enjoy Your Repaired Wall
Now that you’ve patched and repaired the holes in your wall, take a step back and admire your handiwork. Your DIY project is complete, and your wall looks as good as new!
FAQ:
What are some alternative methods to make holes in a wall without a drill?
There are several alternative methods to make holes in a wall without a drill. Some options include using a hammer and nail, a screwdriver, adhesive hooks, or a wall anchor.
Can I use a hammer and nail to make a hole in a wall?
Yes, you can use a hammer and nail to make a small hole in a wall. However, it is important to be cautious and make sure you are hammering the nail into a stud or wall anchor to avoid damaging the wall.
How do I use a screwdriver to make a hole in a wall?
To use a screwdriver to make a hole in a wall, you can push the screwdriver into the wall and then rotate it in a clockwise or counterclockwise motion until the desired hole size is achieved. This method is best for creating small holes for hanging pictures or light items.
What are adhesive hooks and how do they work?
Adhesive hooks are small hooks that have a sticky backing. To use them, you simply peel off the backing and press the hook firmly onto the wall. Adhesive hooks can hold lightweight items and are a great option for temporary solutions.
What is a wall anchor and how is it used?
A wall anchor is a device that is inserted into a wall to provide additional support for hanging heavy items. To use a wall anchor, you would first drill a small hole in the wall, then insert the anchor, and finally screw in the desired hardware (such as a screw or hook) into the anchor.
Are there any disadvantages to making holes in a wall without a drill?
One disadvantage of making holes in a wall without a drill is that the holes may not be as secure or sturdy as those made with a drill. Additionally, some methods, like using a hammer and nail, can potentially cause damage to the wall if not done carefully.
Video:


Meet Harrison Clayton, a distinguished author and home remodeling enthusiast whose expertise in the realm of renovation is second to none. With a passion for transforming houses into inviting homes, Harrison's writing at https://thehuts-eastbourne.co.uk/ brings a breath of fresh inspiration to the world of home improvement. Whether you're looking to revamp a small corner of your abode or embark on a complete home transformation, Harrison's articles provide the essential expertise and creative flair to turn your visions into reality. So, dive into the captivating world of home remodeling with Harrison Clayton and unlock the full potential of your living space with every word he writes.


