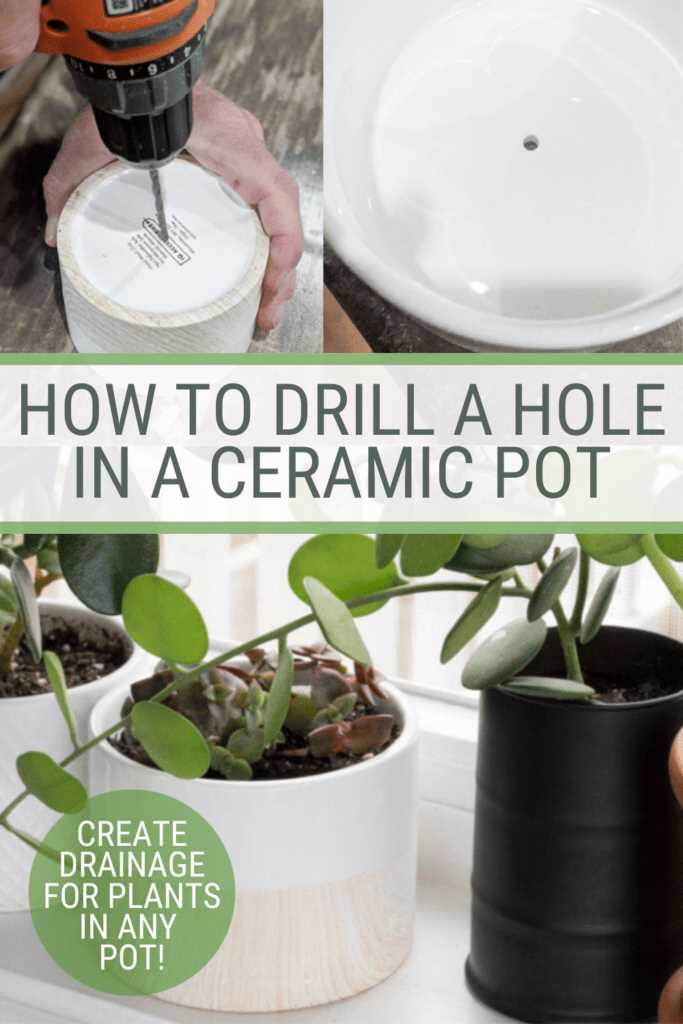
Create a hole in a ceramic pot without using a drill: effortless tips and techniques

Having a hole in a ceramic pot is essential for proper drainage and allows excess water to escape, preventing root rot and other plant diseases. However, not everyone has access to a drill or feels comfortable using one on fragile materials like ceramics. Fortunately, there are a few effortless tips and techniques that you can use to create a hole in a ceramic pot without a drill.
One method is to use a nail and a hammer. Start by placing the pot on a sturdy surface, such as a concrete floor or a thick piece of wood. Then, carefully position the nail on the spot where you want the hole to be and tap it gently with the hammer. Apply steady pressure and continue tapping until the nail breaks through the ceramic. Be sure to wear safety goggles and work in a well-ventilated area to protect yourself from flying debris.
Another technique is to use a heated metal rod. Heat the rod using a flame, such as a propane torch or a gas stove. Once the rod is hot, carefully press it against the ceramic pot at the desired location for the hole. Apply steady pressure and rotate the rod in a circular motion to create a clean, even hole. This method requires caution and precision, as the rod will be extremely hot and can cause burns if mishandled.
If you prefer a non-invasive method, you can use a ceramic hole saw or core drill bit designed specifically for pottery. These tools have a sharp edge that can cut through ceramic without cracking or shattering the material. Simply attach the hole saw or core drill bit to a hand drill or a rotary tool, position it on the pot, and apply gentle pressure as you slowly drill the hole. Remember to use a slow speed and keep the ceramic pot wet to prevent overheating and to prolong the lifespan of the tool.
By using one of these effortless tips and techniques, you can create a hole in a ceramic pot without using a drill, ensuring that your plants have proper drainage and a healthy growing environment.

Create a hole in a ceramic pot without using a drill: effortless tips and techniques
Introduction
If you have ever found yourself needing to create a hole in a ceramic pot but don’t have a drill on hand, don’t worry! There are several alternative methods you can use to create a hole in a ceramic pot without the need for a drill. These tips and techniques are easy to implement and require common household items.
Method 1: Using a Hammer and Nail
Materials needed:
- Ceramic pot
- Hammer
- Nail
Instructions:
- Place the ceramic pot on a sturdy surface, such as a concrete floor or an outdoor workbench.
- Hold the nail firmly near the tip, then position it on the spot where you want to create the hole.
- Gently tap the nail with the hammer, applying light pressure. Make sure to maintain a steady hand and repeat the process until the nail breaks through the ceramic surface.
- Remove the nail from the hole and check if the size is appropriate for your needs. If necessary, use sandpaper to enlarge or smoothen the hole.
Method 2: Using a Hot Nail
Materials needed:
- Ceramic pot
- Nail
- Heat source (e.g., gas stove, torch)
- Pliers
Instructions:
- Heat the nail using a heat source until it turns red hot. Ensure the nail is made of a heat-resistant material.
- Using pliers, hold the heated nail and position it on the spot where you want to create the hole.
- Apply light pressure and let the hot nail melt through the ceramic surface. Be cautious and avoid touching the hot nail directly.
- Once the nail has created a hole, remove it and check if the size is suitable for your needs. Adjust the hole size if required using sandpaper or a file.
Method 3: Using a Ceramic Pot Hole Saw
Materials needed:
- Ceramic pot
- Ceramic pot hole saw
- Electric drill with adjustable speed
- Water or lubricant
Instructions:
- Attach the ceramic pot hole saw to the electric drill, following the instructions provided with the saw.
- Apply water or a lubricant to the ceramic surface to prevent overheating and ensure a smoother cutting process.
- Position the hole saw on the spot where you want to create the hole.
- Using the electric drill on a low-speed setting, slowly and steadily apply pressure to cut through the ceramic surface. Remember to keep the drill perpendicular to the pot while drilling.
- Once the hole saw has made a hole, remove it and check if the size is suitable for your needs. Adjust the hole size if required using sandpaper or a file.
Conclusion
Creating a hole in a ceramic pot can be achieved without a drill by using alternative methods such as using a hammer and nail, a hot nail, or a ceramic pot hole saw. These methods are simple, effective, and require minimal tools. Remember to exercise caution and work carefully to avoid any accidents or damage to the ceramic pot. With these tips and techniques, you’ll be able to create holes in ceramic pots effortlessly for various gardening or DIY projects.
Essential Tools for the Job
- Ceramic pot: The main item you will need is a ceramic pot. Make sure it is the right size and shape for your needs.
- Marker or pencil: To mark the spot where you want to create the hole, use a marker or pencil. This will ensure accuracy.
- Hammer: You will need a hammer to create the hole in the ceramic pot. Choose a hammer that is small and easy to handle.
- Nail or awl: A small nail or awl will be used as a punch to create a starting point for the hole.
- Protective goggles: Safety should always be a priority. Wear protective goggles to shield your eyes from any flying debris.
- Work gloves: It is advisable to wear work gloves to protect your hands from any potential injuries while working with the ceramic pot.
- Sandpaper: Sandpaper will be used to smooth the edges of the hole after it has been created.
Preparing the Ceramic Pot
Before you start creating a hole in a ceramic pot without using a drill, you need to prepare the pot properly. Follow these steps to ensure a successful outcome:
1. Gather supplies
Make sure you have all the necessary supplies on hand:
- A ceramic pot
- A nail or screw
- A hammer or mallet
- A towel or mat to protect your work surface
- Safety goggles and gloves
2. Choose the right location
Select a suitable location on the pot where you want to create the hole. Consider the size of the pot and the purpose of the hole. It’s best to choose a spot near the bottom of the pot for drainage purposes.
3. Measure and mark
Use a ruler or measuring tape to measure the desired diameter of the hole. Mark the spot on the pot using a permanent marker or masking tape. This will help guide you during the hole creation process.
4. Protect your work surface
Place a towel or mat on your work surface to prevent any accidental damage to the pot or the surface itself. This will also provide cushioning and stability while you work.
5. Put on safety gear
Prioritize your safety by wearing safety goggles to protect your eyes from flying ceramic shards. Gloves will also help protect your hands from any accidental mishaps.
6. Position the pot
Place the pot on the towel or mat, ensuring it is stable and won’t move around while you work. This will help you maintain control and accuracy during the hole creation process.
7. Get ready to create the hole
Hold the nail or screw perpendicular to the marked spot on the pot. Be sure to retain a firm grip on the tool and maintain a steady hand while creating the hole.
8. Start pounding
Using the hammer or mallet, start gently pounding the tip of the nail or screw onto the marked spot on the pot. Apply consistent pressure while rotating the tool to create a hole.
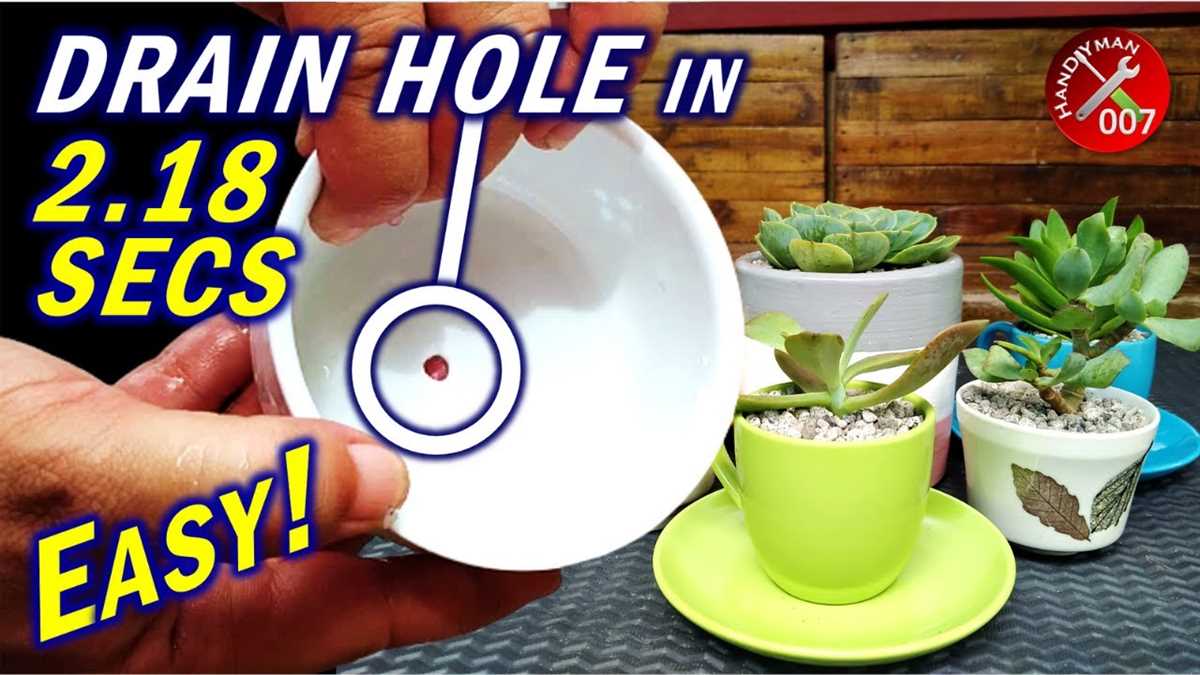
9. Test the hole
Once you’ve created the hole, check its size and shape. You can use sandpaper or a file to smooth out any rough edges if necessary. Test the hole’s functionality by pouring a small amount of water to ensure proper drainage.
By following these steps, you can easily prepare the ceramic pot for creating a hole without using a drill. Remember to work with caution to avoid any injuries or damage to the pot.
Using a Hot Nail to Create the Hole
If you don’t have a drill or don’t want to use one, using a hot nail is another option for creating a hole in a ceramic pot. This method requires caution and precision, as working with heat can be dangerous.
Materials Needed:
- Ceramic pot
- Nail
- Heat source (e.g. candle, propane torch)
- Safety gloves
- Goggles
Step-by-Step Instructions:
- Choose a nail that is small enough to create the desired hole size.
- Put on safety gloves and goggles to protect yourself from any potential accidents.
- Place the ceramic pot on a stable surface.
- Heat the nail using a heat source such as a candle or propane torch until it becomes red hot.
- While holding the hot nail with the safety gloves, carefully press it against the ceramic pot where you want the hole to be.
- Apply consistent pressure to the nail, using a twisting motion if necessary, until the nail penetrates through the ceramic and creates the desired hole.
- Allow the pot to cool before handling it further.
Note: Be extremely cautious when using this method, as working with a hot nail can be hazardous. Always wear appropriate protective gear and work in a well-ventilated area. Additionally, keep in mind that the heat may cause the ceramic pot to crack, so proceed with caution.
| Advantages | Disadvantages |
|---|---|
| Doesn’t require a drill | Potential for cracking the ceramic pot |
| Relatively inexpensive method | Potential for injury if not careful |
| Can create small holes | Requires patience and precision |
Using a Screwdriver and a Hammer
If you don’t have access to a drill, you can still create a hole in a ceramic pot using a screwdriver and a hammer. This method requires a bit more effort, but it can still be an effective way to create drainage holes.
Here are the steps to follow:
- Gather your materials: a ceramic pot, a screwdriver with a sharp point, and a hammer.
- Choose a spot on the pot where you want the hole to be. It’s best to choose a location that is away from the edges or any decorative elements.
- Place the tip of the screwdriver on the chosen spot and hold it firmly in place.
- With the screwdriver in place, use the hammer to carefully tap on the handle of the screwdriver. The force of the hammer will help push the screwdriver through the ceramic pot. Be sure to tap gently to avoid cracking or breaking the pot.
- Continue tapping until the screwdriver has created a hole all the way through the pot. If necessary, you can rotate the screwdriver slightly while tapping to widen the hole.
- Remove the screwdriver from the hole and check if it is the desired size. If you need a larger hole, you can repeat the process with a larger screwdriver.
- After creating the hole, it’s important to smooth any rough edges. You can use sandpaper or a metal file to gently file down the edges of the hole and make it smooth.
Using a screwdriver and a hammer to create a hole in a ceramic pot can be a bit more challenging than using a drill. However, with a steady hand and some patience, you can still achieve the desired result. Remember to be cautious and take your time to avoid damaging the pot.
Creating a Hole with a Glass Cutter
If you don’t have access to a drill or you want to try alternative techniques, you can create a hole in a ceramic pot using a glass cutter. Here is a step-by-step guide on how to do it:
- Prepare the necessary materials: You will need a glass cutter, masking tape, safety gloves, safety goggles, a small wooden block, and a bucket of water.
- Choose the location: Decide where you want to create the hole in the ceramic pot. Place a piece of masking tape on that spot to mark it.
- Protect yourself: Put on your safety gloves and safety goggles to protect your hands and eyes from potential injuries.
- Score the ceramic surface: Hold the glass cutter firmly, with the blade perpendicular to the ceramic pot. Apply gentle but steady pressure and score a straight line along the masking tape. Make sure the score line is deep enough to penetrate the surface of the pot but not too deep to risk breaking it.
- Break the scored line: Place the ceramic pot on a small wooden block to support it. Hold the pot with one hand while using your other hand to gently tap along the scored line with a wooden dowel or a similar object. Apply even pressure to ensure a clean break. Be cautious and avoid using excessive force that can cause the pot to shatter.
- Smooth the edges: After breaking the pot, you may notice some sharp edges around the hole. Use sandpaper or a metal file to smooth these edges out to prevent any cuts or injuries.
- Clean and rinse: Clean the ceramic pot and remove any debris or dust. Rinse the pot thoroughly under running water to remove any remaining particles.
- Test the hole: Fill the pot with water or soil to test the effectiveness of the hole. Make sure there are no leaks and the hole is functional for your intended use.
By following these steps and taking proper safety precautions, you can successfully create a hole in a ceramic pot using a glass cutter. Remember to be patient and gentle throughout the process to avoid damaging the pot.
Using a Strong Adhesive Tape and a Sharp Knife
If you don’t have access to a drill, you can still create a hole in a ceramic pot using a strong adhesive tape and a sharp knife. This method requires patience and caution, as you will be cutting through the pot manually.
Here are the steps to create a hole in a ceramic pot using a strong adhesive tape and a sharp knife:
- Start by cleaning the area where you want to create the hole. Remove any dirt or debris so that the tape adheres properly.
- Choose a strong adhesive tape that can securely hold the pot together during the cutting process. Duct tape or heavy-duty adhesive tape works best for this technique.
- Measure and mark the exact location where you want the hole to be. Use a ruler or a measuring tape to ensure accuracy.
- Cut a piece of adhesive tape slightly larger than the marked area. Place it over the marked spot, ensuring it sticks firmly to the pot’s surface.
- Take a sharp knife with a narrow and pointed blade. Start cutting along the marked area, applying gentle, steady pressure. Be careful not to push too hard, as ceramic pots can be fragile and prone to cracking.
- Continue cutting along the marked area until you have completely removed the desired section. Take your time and use caution to avoid any accidents or injuries.
- Inspect the cut edge to make sure it is smooth and even. You may use sandpaper or a file to refine the cut edge if necessary.
Remember to wear protective gloves and goggles while using the knife, as ceramic pieces can be sharp and may cause injuries if mishandled. Take your time and exercise caution throughout the process to achieve the desired result.
Using a strong adhesive tape and a sharp knife is an alternative method for creating a hole in a ceramic pot when you don’t have access to a drill. However, it requires patience and precision to ensure a clean and smooth cut. If you’re unsure about using this method or lack experience, it’s always advisable to seek assistance from a professional or someone familiar with ceramic work.
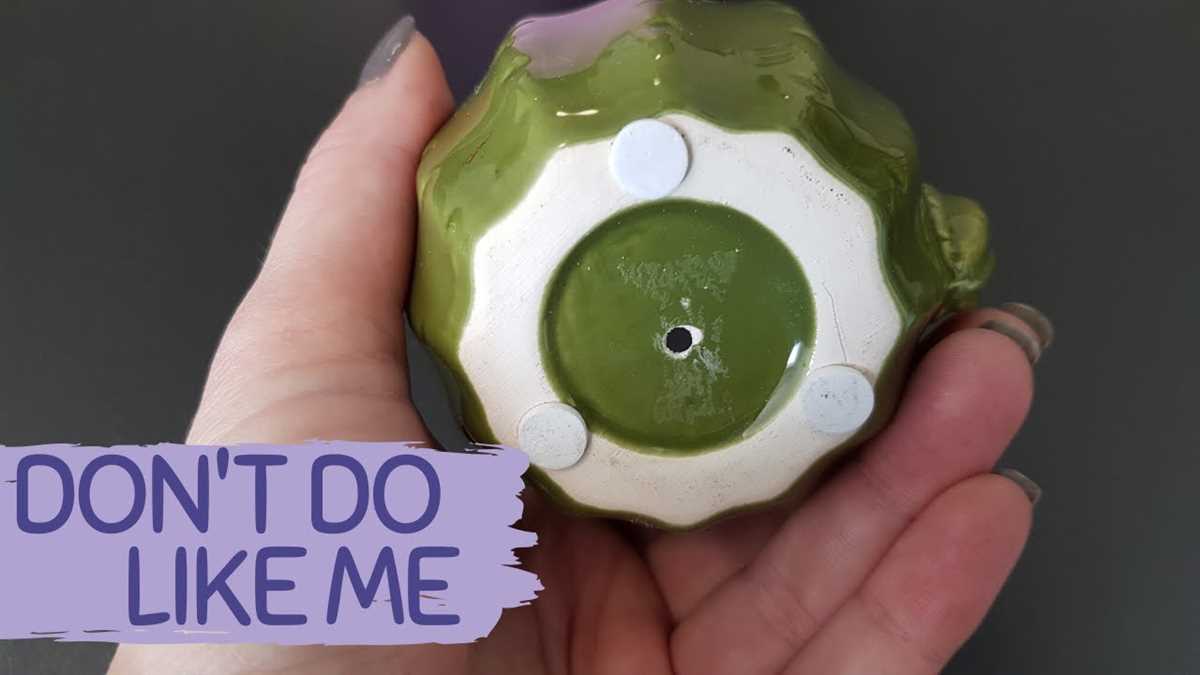
Breaking a Hole with a Hammer and a Nail
Breaking a hole in a ceramic pot can be done using simple tools like a hammer and a nail. This method requires some caution and precision to avoid damaging the pot, but it can be an effective way to create a hole without the need for a drill.
Materials you will need:
- Ceramic pot
- Hammer
- Nail
- Protective goggles
Step-by-step guide:
- Pick a spot on the pot where you want to create the hole. Ensure that it is away from any delicate designs or areas that may easily crack.
- Put on protective goggles to protect your eyes from any flying debris.
- Hold the nail perpendicular to the pot’s surface and place it on the spot you selected.
- With a light tap, start gently tapping the head of the nail with the hammer. The goal is to create a small indentation and initiate a crack in the ceramic.
- Continue tapping the nail with increasing force, focusing on the same spot until you see a small crack forming.
- Once the crack is visible, carefully increase the strength of your taps to widen it. Make sure to maintain control and prevent excessive force that could shatter the pot.
- If necessary, reposition the nail and continue creating cracks until you have the desired size of the hole.
- Once the hole is large enough, remove any excess ceramic fragments gently.
Tips and precautions:
- Be patient and take your time. Rushing the process may lead to unnecessary damage to the pot.
- Use lighter taps at the beginning to prevent the ceramic from shattering suddenly.
- If the crack doesn’t seem to progress, stop and try tapping a different spot to create a new crack.
- Keep the pot supported on a stable surface to minimize the risk of accidental drops or slips.
- Dispose of any broken ceramic pieces properly to avoid injuries.
Remember, breaking a hole in a ceramic pot with a hammer and a nail requires caution and precision. If you have access to a drill, it is recommended to use it instead for a more controlled and efficient hole creation process.
Alternative Methods for Creating a Hole
1. Nail and Hammer
If you don’t have access to a drill, a simple and effective alternative method for creating a hole in a ceramic pot is to use a nail and a hammer.
- Choose the spot where you want the hole to be and mark it with a pencil or marker.
- Hold the nail against the marked spot on the ceramic pot.
- Gently tap the nail with the hammer to create a small indentation in the pot.
- Continue tapping the nail until it gradually creates a hole in the pot.
2. Hot Nail Method
If using a nail and hammer is too slow for you, another alternative method is the hot nail method.
- Heat the tip of a nail using a lighter or candle flame until it becomes red hot.
- Hold the hot nail against the marked spot on the ceramic pot.
- Apply gentle pressure and rotate the nail in a circular motion to create a hole.
- Be cautious while using this method and avoid touching the hot nail to prevent burns.
3. Diamond Tip Engraver
If you are looking for a more precise method, a diamond tip engraver can be a great alternative.
- Choose a diamond tip engraver with a thin point.
- Hold the engraver against the marked spot on the ceramic pot.
- Apply gentle pressure and slowly rotate the engraver to create a hole.
- This method may require more time and effort, but it offers better control and precision.
4. Ceramic Hole Saw
If you frequently need to create holes in ceramic pots, investing in a ceramic hole saw is a great option.
- Choose a ceramic hole saw with the appropriate size for the hole you want to create.
- Attach the ceramic hole saw to a power drill.
- Position the saw on the marked spot and secure it firmly.
- Start the drill and apply gentle pressure to slowly create the hole.
These alternative methods can help you create a hole in a ceramic pot without using a drill. Choose the method that suits your needs and available tools, and always take proper safety precautions. Remember to handle the tools with care to avoid any accidents or injuries.
FAQ:
Is it possible to create a hole in a ceramic pot without using a drill?
Yes, it is possible to create a hole in a ceramic pot without using a drill. There are several techniques and tools that can help you achieve this, such as using a hammer and nail, a hand-held rotary tool, or a diamond hole saw.
What should I do if I don’t have a drill or any of the mentioned tools?
If you don’t have access to a drill or any of the mentioned tools, you can try using a hot nail or a heated metal rod to create a hole in the ceramic pot. Simply heat up the metal object, press it against the spot where you want the hole, and apply constant pressure until it goes through the ceramic.
Are there any risks involved in creating a hole in a ceramic pot without a drill?
Yes, there are some risks involved in creating a hole in a ceramic pot without a drill. The main risk is that the ceramic pot may crack or break if too much pressure or force is applied. It is important to be patient and apply gentle, steady pressure when using alternative methods to create the hole.
Which alternative method is the easiest to use for creating a hole in a ceramic pot?
The easiest alternative method to create a hole in a ceramic pot without a drill is using a hammer and nail. Simply place the nail on the spot where you want the hole and tap it gently with a hammer until it goes through the ceramic. This method requires minimal tools and is fairly straightforward to execute.
Can I use a regular drill bit with a hammer to create a hole in a ceramic pot?
No, using a regular drill bit with a hammer is not recommended for creating a hole in a ceramic pot. Regular drill bits are not designed to handle the pressure and force that comes with hammering, and they may break or become damaged. It is best to use tools specifically designed for working with ceramic, such as diamond hole saws or hand-held rotary tools.
What should I do if the ceramic pot cracks or breaks while trying to create a hole?
If the ceramic pot cracks or breaks while trying to create a hole, there are a few options you can consider. You can try to repair the crack or break using a strong adhesive specifically designed for ceramics. Alternatively, you can repurpose the broken pot as a decorative piece by placing plants or other items in the intact parts. If the damage is beyond repair, you may need to replace the pot altogether.
Video:


Meet Harrison Clayton, a distinguished author and home remodeling enthusiast whose expertise in the realm of renovation is second to none. With a passion for transforming houses into inviting homes, Harrison's writing at https://thehuts-eastbourne.co.uk/ brings a breath of fresh inspiration to the world of home improvement. Whether you're looking to revamp a small corner of your abode or embark on a complete home transformation, Harrison's articles provide the essential expertise and creative flair to turn your visions into reality. So, dive into the captivating world of home remodeling with Harrison Clayton and unlock the full potential of your living space with every word he writes.


