Choosing the Right Size Drill Bit for Plastic Anchors

Plastic anchors are commonly used in various home improvement projects, such as installing shelves, curtain rods, or light fixtures. These anchors provide extra support and help to distribute weight evenly, making them essential for ensuring stability and preventing damage to walls or other surfaces. However, using the wrong size drill bit when installing plastic anchors can compromise their effectiveness and may result in a loose or insecure installation.
When it comes to selecting the right size drill bit for plastic anchors, there are a few key factors to consider. The diameter of the anchor is a crucial element, as it determines the size of the hole that needs to be drilled. It is important to choose a drill bit that matches the size of the anchor, as using a smaller or larger bit can lead to a loose fit or a hole that is too big.
In general, when using plastic anchors, it is recommended to choose a drill bit that is slightly smaller than the diameter of the anchor. This allows for a snug fit and ensures that the anchor will hold securely in place. It is also important to consider the material of the wall or surface where the anchor will be installed. Different materials may require different drill bits or drilling techniques, so it is essential to take this into account when selecting the right size drill bit.
Overall, choosing the right size drill bit for plastic anchors is crucial for a secure and stable installation. By selecting a drill bit that matches the diameter of the anchor and considering the material of the surface, you can ensure that your plastic anchors will provide the necessary support for your home improvement projects.
Why Choosing the Right Size Drill Bit Matters

When it comes to installing plastic anchors, using the right size drill bit is crucial for achieving a secure and long-lasting installation. The drill bit size you choose will directly impact the fit and stability of the plastic anchors, ultimately determining their ability to support the weight and load applied.
1. Proper Fit
Using the correct size drill bit ensures that the plastic anchors fit tightly into the drilled holes. If the hole is too small, the anchor may not fit or may become loose over time. On the other hand, if the hole is too large, the anchor may not provide sufficient support and can easily become dislodged or fail under load. Thus, selecting the right size drill bit is essential to achieve a precise fit that maximizes the holding power of the plastic anchors.
2. Enhanced Stability
A properly sized drill bit creates a hole with the right dimensions to accommodate the plastic anchor securely. This means that the anchor sits snugly in the hole, providing enhanced stability and preventing it from shifting or rotating. This stability is crucial for supporting the intended load and preventing any potential damage or accidents that may occur due to inadequate support.
3. Prevents Splitting or Cracking of the Plastic
Using a drill bit that is too large can cause the plastic material to split or crack during the drilling process. This can weaken the anchor’s grip and compromise its ability to support the load. Choosing the right size drill bit minimizes the risk of damaging the plastic material and ensures a clean and precise hole for the anchor.
4. Optimal Load-Bearing Capacity
By using the right size drill bit, you can achieve the optimal hole size for the plastic anchor. This facilitates the anchor’s ability to distribute the load evenly across its surface area, enhancing its load-bearing capacity. This means that the anchor can effectively support the weight or load it was designed for, providing a secure and reliable installation.

5. Time and Cost Savings
Using the correct size drill bit from the start can save you time and money. By avoiding mistakes such as drilling oversized or undersized holes, you prevent the need for re-drilling or replacing anchors, which can be both time-consuming and costly. Investing in the right drill bit size upfront ensures a smooth and efficient installation process.
In conclusion, the size of the drill bit you choose is of utmost importance when it comes to installing plastic anchors. By selecting the appropriate size, you can achieve a proper fit, enhance stability, prevent material damage, optimize load-bearing capacity, and save time and money in the long run. It’s crucial to take the time to determine the correct size drill bit for your plastic anchors to ensure a successful and durable installation.
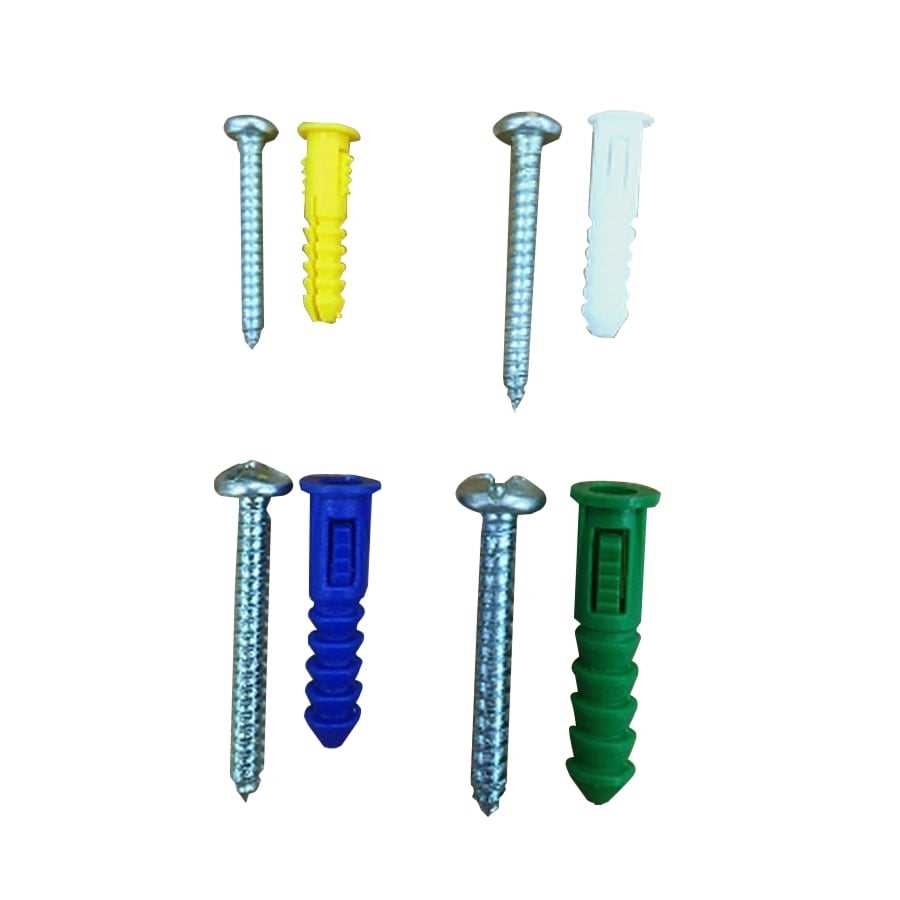
Understanding Plastic Anchors
Plastic anchors are commonly used in construction and DIY projects to securely attach objects to walls or other surfaces. They provide stability and support, especially when the material they are being anchored to is not strong enough to hold the weight on its own.
Plastic anchors are made from durable materials such as nylon or plastic composites. They come in a variety of sizes and designs to accommodate different weight requirements and installation needs.
Types of Plastic Anchors
There are several types of plastic anchors available on the market, each designed for specific applications. Some of the most common types include:

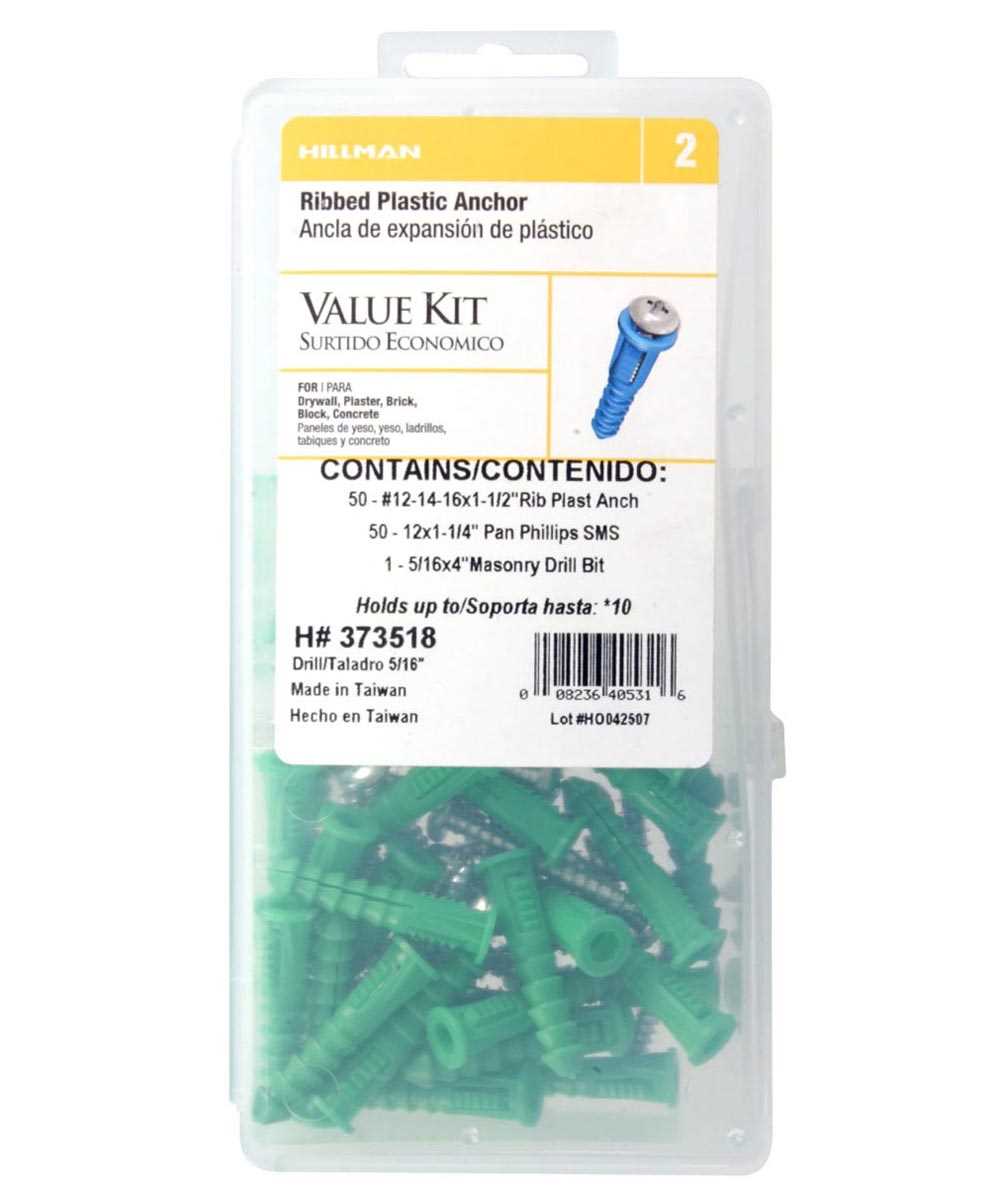
- Expansion Anchors: These anchors expand when a screw is inserted, creating a secure grip in the wall. They are ideal for medium to heavy-duty applications.
- Toggle Bolts: Toggle bolts consist of a spring-loaded mechanism that expands behind the wall when the bolt is tightened. They are suitable for heavy-duty applications.
- Self-Drilling Anchors: These anchors have built-in drill bits, making them easy to install. They are often used in drywall and offer quick and convenient installation.
Choosing the Right Size
Selecting the right size drill bit for plastic anchors is essential for proper installation. The size of the drill bit required will depend on the size and type of plastic anchor being used. It is important to refer to the manufacturer’s instructions or guidelines to determine the correct size.
In general, the size of the drill bit should match the diameter of the plastic anchor or be slightly smaller to ensure a snug fit. Using a drill bit that is too large may result in an insecure anchor that can easily pull out of the wall.
It is also important to consider the material and thickness of the wall or surface being drilled into. Different materials may require different drill bit sizes to ensure a secure installation.
Conclusion
Plastic anchors are a versatile and reliable option for anchoring objects to walls and other surfaces. Understanding the different types of plastic anchors and choosing the right size drill bit for installation is vital to ensure a secure and long-lasting attachment. It is always recommended to follow the manufacturer’s instructions and guidelines for proper installation.

The Different Types of Plastic Anchors
When it comes to choosing the right plastic anchor for your project, it’s important to consider the different types available. Each type of plastic anchor has its own unique features and is designed for specific applications.
1. Expansion Anchors
Expansion anchors are commonly used for light to medium-duty applications. These anchors are designed to expand within the drilled hole and provide a secure hold. They work well in materials such as drywall and concrete. Expansion anchors come in various sizes and can be used with different types of screws.
2. Self-Drilling Anchors
Self-drilling anchors, also known as self-tapping anchors, are designed to drill their own hole as they are screwed into the material. These anchors are ideal for quick and easy installations, as they eliminate the need for pre-drilling. Self-drilling anchors are commonly used in materials such as drywall and plaster.
3. Hollow Wall Anchors

Hollow wall anchors, also known as wall anchors or screw anchors, are designed for use in hollow walls and ceilings. These anchors are designed to expand behind the surface of the material, providing a secure hold. Hollow wall anchors can be used with various types of screws and are commonly used in materials such as drywall and plasterboard.
4. Toggle Bolts
Toggle bolts, also known as butterfly anchors or toggle anchors, are designed for heavy-duty applications. These anchors consist of a two-part mechanism that expands behind the material to provide a strong hold. Toggle bolts are commonly used in materials such as drywall and plasterboard.
5. Drive Anchors
Drive anchors, also known as pin drive anchors or hammer drive anchors, are designed for heavy-duty applications and require a hammer to install. These anchors are designed to expand within the drilled hole and provide a secure hold. Drive anchors are commonly used in materials such as concrete and masonry.
These are just a few of the many types of plastic anchors available on the market. When choosing a plastic anchor, it’s important to consider the specific requirements of your project and select the right type and size accordingly.
Factors to Consider When Choosing Plastic Anchors
1. Weight Capacity
One of the most important factors to consider when choosing plastic anchors is their weight capacity. You need to ensure that the anchors you select can support the weight of the object you want to hang. It is essential to check the maximum weight capacity indicated on the packaging or product specifications.
2. Anchor Size
The size of the anchor is also crucial in determining its holding power. The anchor should fit snugly into the drilled hole without any gaps. If the anchor is too small, it may not provide enough stability. On the other hand, if it is too large, it may not fit properly and cause the hole to be too big, compromising the anchor’s effectiveness.
3. Material Compatibility
Consider the type of material you will be drilling into when choosing plastic anchors. Different types of anchors are designed for specific materials, such as drywall, concrete, or brick. Make sure to select anchors that are compatible with the material you will be working with to ensure a secure installation.
4. Drill Bit Size
Matching the correct drill bit size to the plastic anchors is vital for a successful installation. The drill bit should be slightly smaller in diameter than the anchor’s outer diameter. This ensures a tight fit and ensures that the anchor expands properly, providing maximum holding power.
5. Environmental Considerations
It is important to consider the environmental conditions the plastic anchors will be subjected to. Factors such as moisture, temperature fluctuations, and exposure to chemicals can affect the integrity and performance of the anchors. Choose anchors that are specifically designed for the specific environmental conditions to ensure their long-term durability.
6. Installation Method
Different types of plastic anchors require different installation methods. Some anchors may require pre-drilling, while others may have self-drilling capabilities. Consider the installation method best suited for your project and choose anchors that align with the installation techniques you are comfortable using.
7. Safety Precautions
Always prioritize safety when working with plastic anchors. Follow all safety instructions provided by the manufacturer, wear appropriate protective gear, and use caution when drilling and installing the anchors. If you are unsure about any aspect of the installation, consult a professional for assistance.
Conclusion
Choosing the right plastic anchors requires careful consideration of various factors such as weight capacity, anchor size, material compatibility, drill bit size, environmental conditions, installation method, and safety precautions. By taking the time to evaluate these factors, you can ensure a secure and stable installation that meets your specific needs.
How to Select the Correct Drill Bit Size
Choosing the right drill bit size is essential for proper installation of plastic anchors. Here are some steps to help you select the correct size:
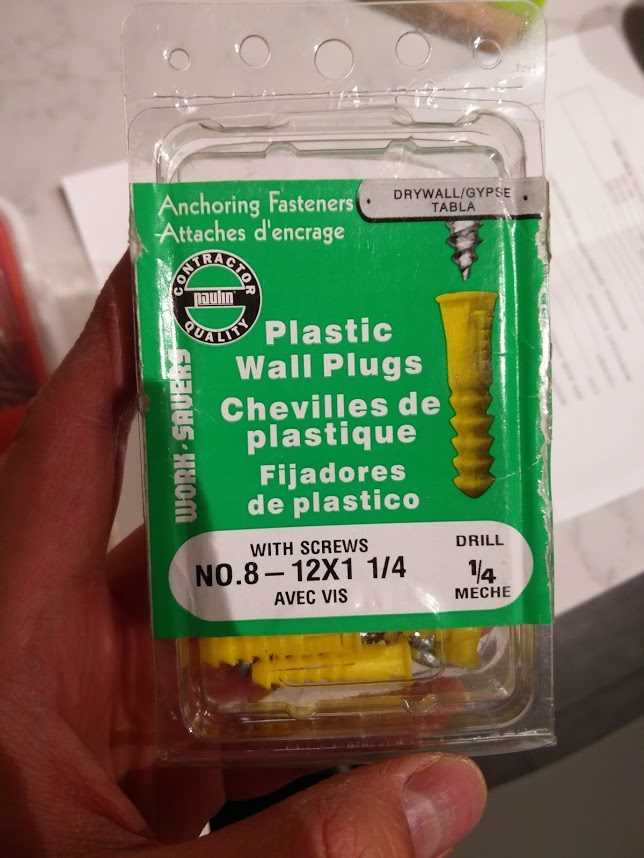
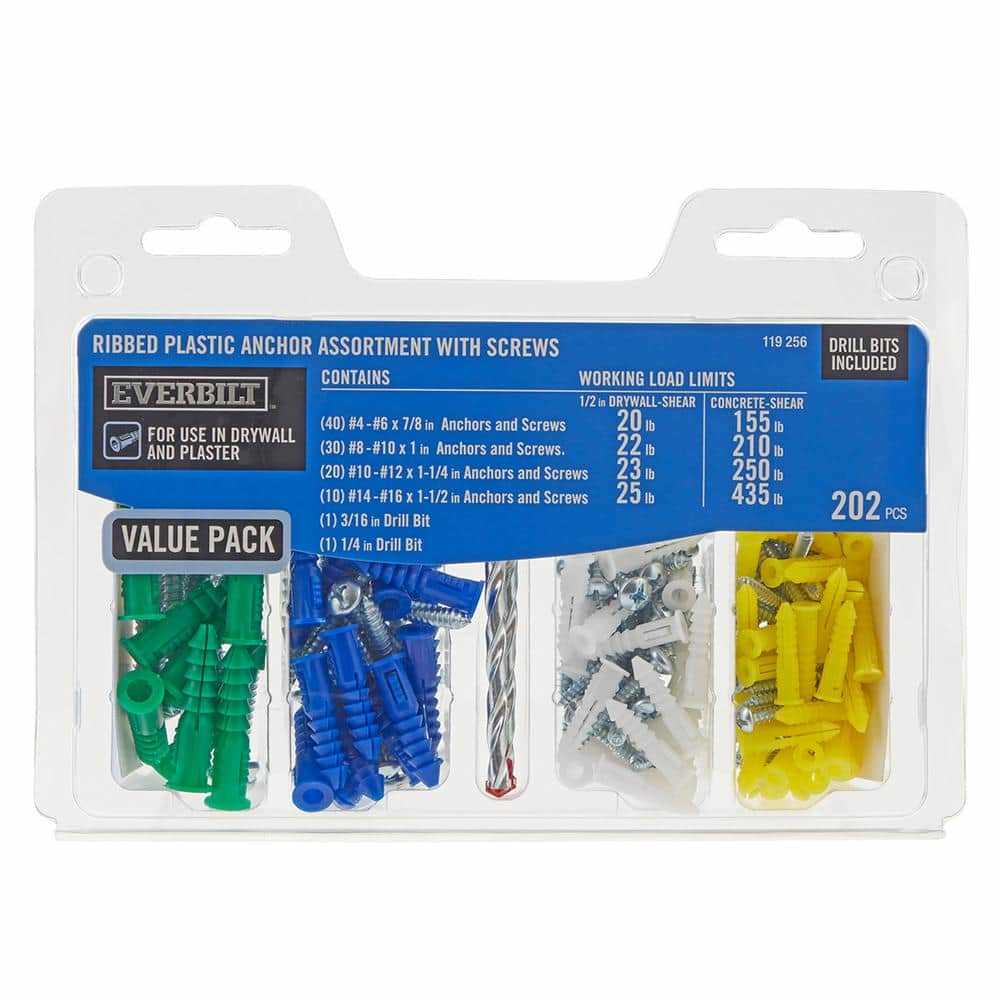
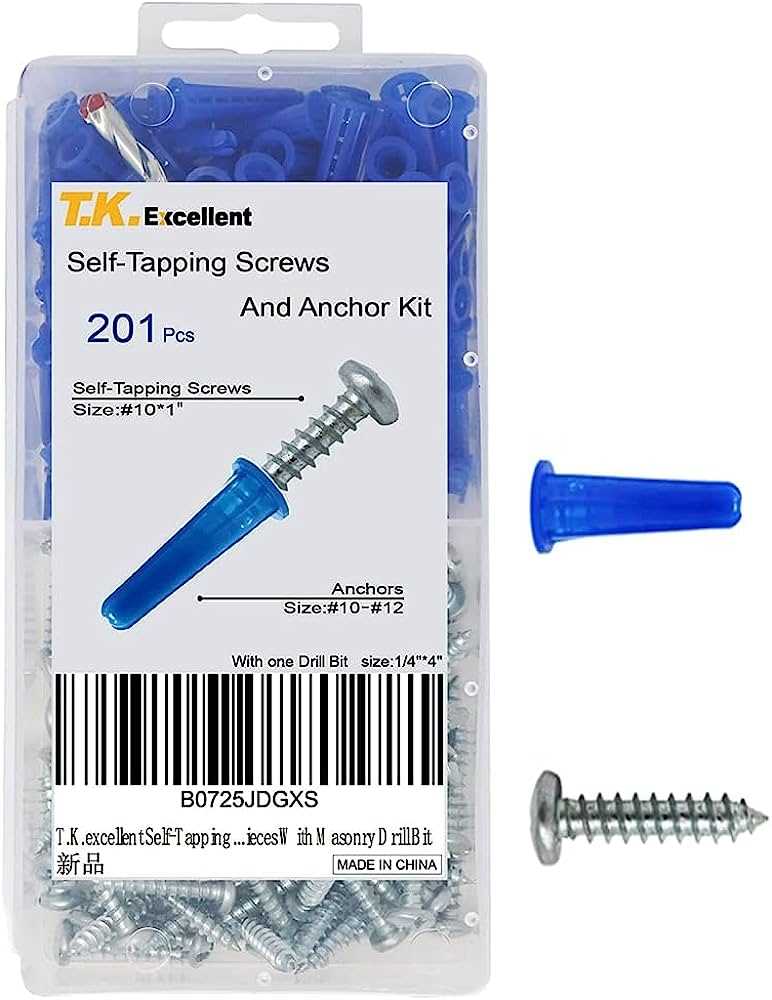
- Identify the size of the plastic anchor: Before choosing a drill bit, you need to know the size of the plastic anchor you will be using. The size is usually indicated on the packaging or can be measured directly.
- Refer to the manufacturer’s recommendations: Each plastic anchor might have specific recommendations from the manufacturer regarding the drill bit size. These recommendations ensure that the anchor will fit securely in the drilled hole.
- Consider the material being drilled into: The material in which you will be installing the plastic anchor also affects the drill bit size. For softer materials, you might need a smaller drill bit, while harder materials may require a larger one.
- Choose a drill bit slightly smaller than the plastic anchor: In most cases, it is best to select a drill bit that is slightly smaller in diameter than the plastic anchor. This allows for a tight fit and prevents the anchor from wobbling or slipping in the hole.
It is always a good idea to test the drill bit size on a sample piece of the material before drilling the actual hole. This way, you can ensure that the size is correct and make any necessary adjustments before starting the installation.
In summary, selecting the correct drill bit size for plastic anchors involves identifying the anchor size, referring to the manufacturer’s recommendations, considering the material being drilled into, and choosing a drill bit slightly smaller than the anchor. Taking these steps will help ensure a secure and successful installation.
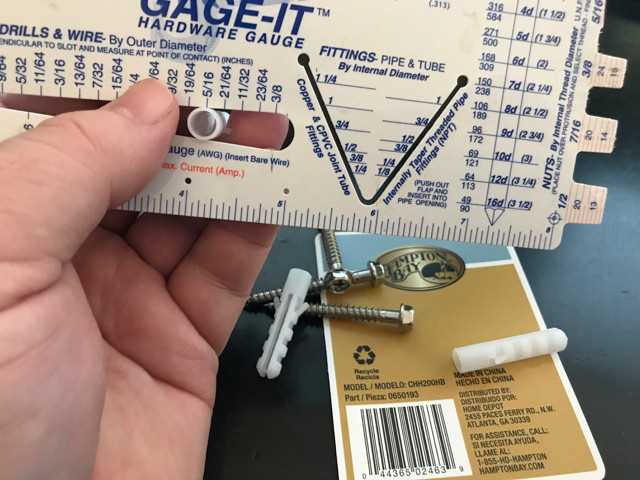
Measuring the Diameter of the Plastic Anchor
Before choosing the right size drill bit for your plastic anchor, it is important to accurately measure the diameter of the anchor itself. This will ensure that the hole you drill will be the correct size for the anchor, allowing for a secure installation.
To measure the diameter of the plastic anchor, you can follow these steps:
- Prepare your plastic anchor by removing any screws or other hardware that may be attached to it.
- Inspect the anchor to determine if it is a cylindrical or conical shape.
- For cylindrical anchors, use a ruler or tape measure to measure the diameter of the anchor at its widest point. Take note of this measurement.
- For conical anchors, measure the diameter at both the base and the top of the anchor. Take note of both measurements.
It is important to be as precise as possible when measuring the diameter of the plastic anchor. Use a ruler or tape measure with clear markings to ensure accurate measurements.
If you are unsure about the exact diameter of the plastic anchor, it is recommended to choose a drill bit that is slightly smaller in size. This will prevent the hole from being too large, which could result in a loose or unstable anchor installation.
By taking the time to accurately measure the diameter of the plastic anchor, you can ensure that you choose the right size drill bit for a secure and reliable installation.
Choosing the Appropriate Drill Bit for the Anchor Size
When it comes to installing plastic anchors, it’s important to choose the right size drill bit to ensure a secure and sturdy anchor installation. The drill bit size you need will depend on the size of the anchor you are using.
To determine the correct drill bit size for your plastic anchors, refer to the manufacturer’s instructions or packaging. They will usually provide a recommended drill bit size for each anchor size. It’s essential to follow these guidelines to ensure the anchor fits properly and holds securely.
Steps to Choose the Correct Drill Bit Size:
- Refer to the manufacturer’s instructions or packaging to find the recommended drill bit size for your anchor.
- Collect the necessary tools, including the drill, recommended drill bit, and safety goggles.
- Put on the safety goggles to protect your eyes from any flying debris.
- Attach the recommended drill bit securely to your drill.
- Mark the spot on the wall where you want to install the anchor using a pencil or marker.
- Hold the drill perpendicular to the wall and apply gentle pressure to start drilling.
- Continue drilling, applying steady pressure, until the desired depth is reached.
- Remove the drill bit from the hole, making sure to clear any debris.
- Insert the plastic anchor into the hole, ensuring it fits snugly.
- If necessary, tap the anchor gently with a hammer until it is fully inserted and flush with the wall surface.
Choosing the right size drill bit for plastic anchors is crucial to ensure a successful installation. Using the correct drill bit size will help prevent the anchor from being too loose or too tight in the hole, ensuring a secure hold. Always refer to the manufacturer’s instructions for the recommended drill bit size to achieve the best results.
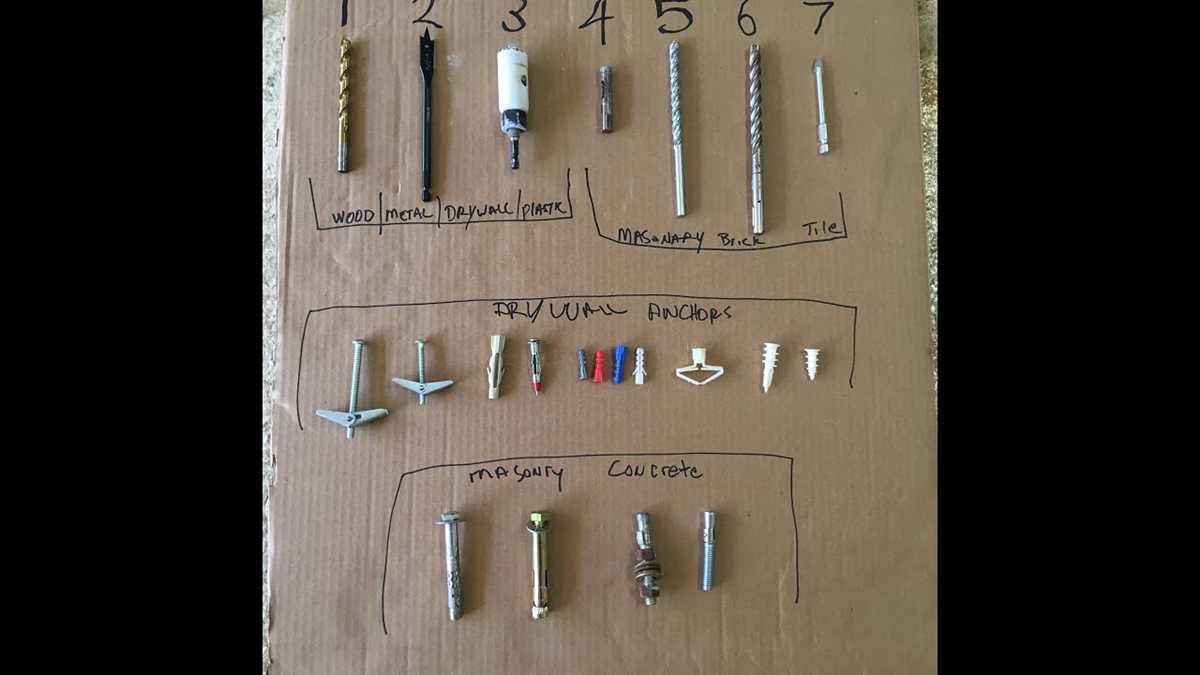
Guidelines for Drilling into Different Surfaces
When it comes to drilling into different surfaces, it’s important to choose the right tools to ensure successful and accurate holes. Here are some guidelines to follow:
Wood Surfaces:
- Use a wood drill bit specifically designed for drilling into wood.
- Choose a drill bit size based on the diameter of the screw or fastener you will be using.
- Drill at a low speed to avoid splintering or damaging the wood.
- Use a drill with a depth stop to control the depth of the hole.
Metal Surfaces:
- Use a high-speed steel (HSS) drill bit for drilling into metal.
- Select the appropriate drill bit size for the hole you need to create.
- Apply cutting fluid or lubricant to the drill bit to reduce friction and heat.
- Start drilling at a slow speed and gradually increase the speed as you progress.
Concrete Surfaces:
- Choose a masonry drill bit with a carbide or diamond tip for drilling into concrete.
- Select a drill bit size based on the diameter of the anchor or fastener you will be using.
- Use a hammer drill or rotary hammer for more efficient drilling.
- Apply steady pressure and let the drill do the work, without forcing it.
Plastic Surfaces:
- Use a multipurpose drill bit, such as a twist drill bit, for drilling into plastic.
- Choose a drill bit size based on the diameter of the anchor or fastener you will be using.
- Drill at a slower speed to prevent melting or cracking of the plastic.
- Use light pressure and let the drill bit cut through the plastic gradually.
Glass Surfaces:
- Use a carbide or diamond-tipped drill bit specifically designed for drilling into glass.
- Select a drill bit size based on the diameter of the hole you need to create.
- Apply a lubricant, such as water or oil, to keep the drill bit cool and reduce the risk of cracking or breaking the glass.
- Drill at a slow speed and with light pressure to avoid shattering the glass.
Tile Surfaces:
- Use a carbide-tipped masonry drill bit for drilling into tile.
- Choose a drill bit size based on the diameter of the screw or anchor you will be using.
- Place masking tape over the tile to prevent cracking or chipping.
- Drill at a slow speed and with light pressure to avoid damaging the tile.
Remember to always wear appropriate safety gear, such as safety glasses and gloves, when drilling into any surface. Follow these guidelines to ensure successful drilling and avoid any accidents or damage to your materials.
Drilling into Drywall
Drilling into drywall may seem like a simple task, but it’s important to approach it correctly to avoid damaging the wall or causing any accidents. Here are some steps to follow when drilling into drywall:
- Choose the right drill bit: Use a drill bit that is appropriate for the material you are drilling into. For drywall, a regular twist bit or a pilot point bit should work well.
- Locate the studs: Before drilling into drywall, it’s important to locate the studs behind the wall. This will give you a sturdy surface to anchor your screws or nails. Use a stud finder or tap on the wall to listen for a solid sound, indicating the presence of a stud.
- Mark the drilling point: Once you have located the studs, use a pencil or a marker to mark the exact spot where you want to drill. This will help you ensure accuracy and prevent any unnecessary holes.
- Prepare the drill: Insert the appropriate drill bit into your drill and tighten it securely. If you are using a cordless drill, make sure the battery is fully charged.
- Drill slowly and steadily: Position the drill bit on the marked point and apply gentle pressure. Start drilling at a slow speed while keeping the drill perpendicular to the wall. As you feel the bit penetrate the drywall, increase the speed slightly.
- Remove the drill bit: Once you have reached the desired depth, release the trigger and slowly remove the drill bit from the hole. Be careful not to damage the surrounding area.
- Clean up the debris: Use a brush or a vacuum cleaner to remove any dust or debris left behind after drilling. This will help prevent any mess and ensure a clean finish.
- Secure your fixtures: If you are drilling into drywall to install a fixture or hang an object, make sure to use appropriate anchors or screws for the weight of the item. Follow the manufacturer’s instructions for proper installation.
Drilling into drywall can be done by anyone with the right tools and technique. By taking the necessary precautions and following these steps, you can achieve a successful and secure installation without causing any damage to your walls.
Drilling into Concrete
When it comes to drilling into concrete, it’s important to choose the right tools and techniques to ensure success. Concrete is a dense and hard material, so drilling into it requires using a powerful drill and the appropriate drill bit.
1. Choose the right drill: When drilling into concrete, it’s best to use a hammer drill or a rotary hammer drill. These drills use a pounding action to break through the concrete, making the drilling process easier and faster.
2. Select the correct drill bit: It’s crucial to use a drill bit that is specifically designed for drilling into concrete. These bits are made of durable materials like carbide, which can withstand the hardness of the concrete. Common types of drill bits for concrete include masonry bits and SDS (Special Direct System) bits.
3. Mark the drilling spot: Before you start drilling, mark the exact spot where you want to place your hole. This will help ensure accuracy and prevent any unnecessary damage to the concrete.
4. Secure your work area: Make sure to secure the concrete piece that you are drilling into. This can be done by clamping it down or using a vice grip. Securing the piece will prevent it from moving and will make the drilling process easier.
5. Start drilling: Put on your safety goggles and gloves before you start drilling. Position the drill bit on the marked spot and apply light pressure to the drill. Gradually increase the pressure as you drill deeper, keeping a steady and slow speed. Take breaks to remove any dust or debris that may accumulate in the hole.
6. Keep the drill bit cool: Drilling through concrete can generate a lot of heat, which can damage the drill bit. To prevent overheating, it’s important to keep the drill bit cool. You can do this by periodically spraying the drill bit with water or lubricant while drilling.
7. Clean up: Once you have drilled the hole, remove any concrete dust or debris from the area. This will ensure that the plastic anchors or other materials you intend to use will fit properly into the hole.
By following these steps, you can drill into concrete effectively and securely. Remember to always prioritize safety and use proper protective equipment when working with concrete and power tools.
FAQ:
What type of drill bit should I use for plastic anchors?
For plastic anchors, it is recommended to use a drill bit that is the same size as the plastic anchor itself. This will ensure a snug fit and prevent the anchor from slipping or becoming loose.
Can I use any type of drill bit for plastic anchors?
No, it is important to use the correct type of drill bit for plastic anchors. A standard drill bit may not be suitable and could cause damage to the material or result in a loose anchor. It is best to use a drill bit specifically designed for use with plastic anchors.
What happens if the drill bit is too small for the plastic anchor?
If the drill bit is too small for the plastic anchor, it will not create a hole that is large enough for the anchor to fit properly. This can result in a loose anchor that is not securely fastened to the wall or surface.
What happens if the drill bit is too large for the plastic anchor?
If the drill bit is too large for the plastic anchor, the anchor may not fit securely in the hole. This can lead to the anchor being loose or wobbly, and it may not provide the necessary support or stability.
Can I use a smaller drill bit and then enlarge the hole with a larger bit for the plastic anchor?
It is not recommended to use a smaller drill bit and then enlarge the hole with a larger bit for plastic anchors. This can result in an uneven or irregular hole that may not provide a proper fit for the anchor. It is best to use the correct size drill bit from the start.
Should I use a different size drill bit if I am using a larger plastic anchor?
If you are using a larger plastic anchor, you may need to use a slightly larger drill bit to create a hole that is the appropriate size for the anchor. It is important to read the instructions or consult the manufacturer’s guidelines to determine the recommended drill bit size for the specific anchor you are using.
What are the potential risks of using the wrong size drill bit for plastic anchors?
Using the wrong size drill bit for plastic anchors can result in a variety of issues. If the drill bit is too small, the anchor may not fit properly and can become loose or wobbly. If the drill bit is too large, the anchor may not fit securely in the hole and may not provide the necessary support or stability. It is important to use the correct size drill bit to ensure a proper fit and secure installation.
Video:


Meet Harrison Clayton, a distinguished author and home remodeling enthusiast whose expertise in the realm of renovation is second to none. With a passion for transforming houses into inviting homes, Harrison's writing at https://thehuts-eastbourne.co.uk/ brings a breath of fresh inspiration to the world of home improvement. Whether you're looking to revamp a small corner of your abode or embark on a complete home transformation, Harrison's articles provide the essential expertise and creative flair to turn your visions into reality. So, dive into the captivating world of home remodeling with Harrison Clayton and unlock the full potential of your living space with every word he writes.


