Choosing the Right Size Drill Bit for Cabinet Hardware Installation

Installing cabinet hardware can be a great way to update the look of your kitchen or bathroom. Whether you are replacing old hardware or adding it for the first time, it’s important to choose the right size drill bit for the installation process. Using the correct drill bit will ensure that your hardware is securely attached to the cabinet and will prevent any damage to the surrounding area.
One of the first things to consider when choosing a drill bit is the size of the screw that will be used to secure the hardware. Most cabinet hardware will come with screws that are either 8-32 or 10-32 in size. The number before the dash represents the gauge of the screw, while the number after the dash represents the number of threads per inch. To determine the correct size drill bit, you will want to choose one that closely matches the diameter of the screw, without being larger.
Another important factor to consider is the material of your cabinet. If you have wooden cabinets, you will want to choose a drill bit that is appropriate for wood. A standard twist drill bit is typically a good choice for wooden cabinets. However, if you have cabinets made of other materials such as metal or laminate, you may need a specialty drill bit designed specifically for that material. It’s important to use the appropriate drill bit to ensure a clean and accurate hole.
In addition to the size and material considerations, you may also want to consider the type of drill bit you will be using. There are several different types of drill bits available, including twist bits, brad point bits, and spade bits. Twist bits are the most commonly used and are suitable for most cabinet hardware installations. Brad point bits have a sharp point that helps to prevent the wood from splintering, making them a good choice for more delicate materials. Spade bits are designed for large holes and may be suitable for certain types of hardware installations.
To ensure a successful cabinet hardware installation, it’s important to choose the right size drill bit for the job. Take into consideration the size of the screw, the material of the cabinet, and the type of drill bit that will be most appropriate. By doing so, you can ensure that your hardware is securely attached and will enhance the overall look of your cabinets.
Why Size Matters: How to Choose the Perfect Drill Bit for Installing Cabinet Hardware
When it comes to installing cabinet hardware, choosing the right drill bit size is crucial. The size of the drill bit you use will determine the fit and stability of your cabinet hardware, so it’s important to choose the perfect size for a successful installation. Here are some key factors to consider when choosing a drill bit size for installing cabinet hardware.

1. Consider the Diameter of the Hardware Screws
One of the most important factors to consider when choosing a drill bit size is the diameter of the screws that will be used to attach the hardware. The drill bit should be slightly smaller in diameter than the screws to ensure a secure fit. Measure the diameter of the screws and choose a drill bit that is slightly smaller by at least a fraction of a millimeter.
2. Take the Material of the Cabinet into Account
The material of the cabinet also plays a role in determining the drill bit size. If you are working with softwood cabinets, a smaller drill bit may be sufficient. However, if you are installing hardware on hardwood cabinets, a slightly larger drill bit may be necessary to help prevent splitting or cracking of the wood.
3. Use Pilot Holes for Added Accuracy
Using pilot holes can help ensure accurate drilling and prevent any potential damage to the cabinet. A pilot hole is a small hole drilled before the actual drilling is done. It serves as a guide for the drill bit and helps prevent any slipping or sliding that can occur when drilling directly into the cabinet. In addition, using a pilot hole can help you determine the right drill bit size by testing it first on a scrap piece of wood.
4. Test Fit the Drill Bit
Before drilling into the actual cabinet, it’s always a good idea to test fit the drill bit and the hardware to ensure a proper fit. Insert the drill bit into the cabinet hardware holes and check for proper alignment and fit. If the fit is too loose or too tight, you may need to choose a different drill bit size to ensure a secure and snug fit.
5. Seek Professional Advice
If you’re unsure about the right drill bit size to choose for installing cabinet hardware, don’t hesitate to seek professional advice. Consult with a knowledgeable salesperson at a hardware store or a professional contractor who can guide you and provide recommendations based on their expertise and experience.

Choosing the right drill bit size for installing cabinet hardware is essential for a successful and secure installation. By considering the diameter of the hardware screws, the material of the cabinet, using pilot holes, test fitting, and seeking professional advice when needed, you can ensure that your cabinet hardware installation is flawless.
Understanding the Importance of Drill Bit Size
When it comes to cabinet hardware installation, choosing the right size drill bit is crucial. The drill bit size you use can greatly affect the quality and durability of your installation, as well as the overall appearance of your cabinets. Here are a few reasons why understanding drill bit size is important:
1. Proper Fit
Using the correct drill bit size ensures that your cabinet hardware will fit securely in place. If the drill bit is too large, the hardware may slide around or even fall out over time. On the other hand, if the drill bit is too small, it can damage the cabinets or cause the hardware to become loose. It’s important to find the right balance and choose a drill bit size that matches the diameter of your hardware screws.
2. Prevents Splitting
Using a drill bit that is too large can cause the wood of your cabinets to split, especially if the wood is soft or fragile. This can lead to a weakened installation that may not be able to support the weight of the hardware over time. By choosing the correct drill bit size, you can prevent splitting and ensure a sturdy and long-lasting installation.

3. Professional Appearance
Drill holes that are too large can make your hardware look mismatched or out of place. On the other hand, using a drill bit that is too small can result in crooked or misaligned holes. By using the correct drill bit size, you can achieve a professional and precise appearance for your cabinet hardware installation.
4. Time Efficiency
Using the right size drill bit can also save you time and effort during the installation process. When you choose the correct size, you can easily drill the holes without the need for extra adjustments or modifications. This helps streamline the installation process and allows you to complete the job more efficiently.
5. Avoids Damage
Using the incorrect drill bit size can cause damage to both the hardware and the cabinets. If the drill bit is too large, it can chip or crack the wood, or even break the hardware. On the other hand, if the drill bit is too small, it can strip the screw heads or cause them to become stuck. By selecting the right drill bit size, you can avoid unnecessary damage and ensure a successful installation.
Overall, understanding the importance of drill bit size is essential for a successful and professional cabinet hardware installation. By choosing the correct size, you can achieve a proper fit, prevent splitting, maintain a professional appearance, save time, and avoid damage to your cabinets and hardware.
The Basics of Cabinet Hardware Installation
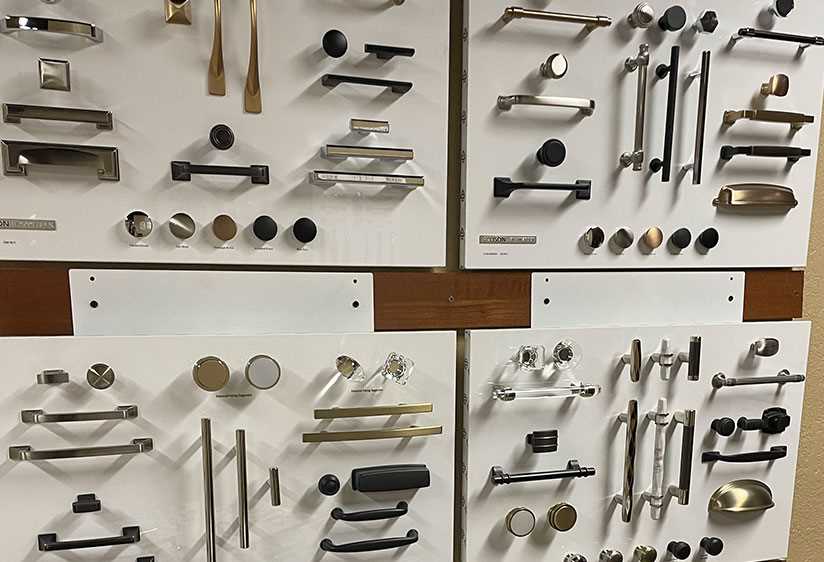
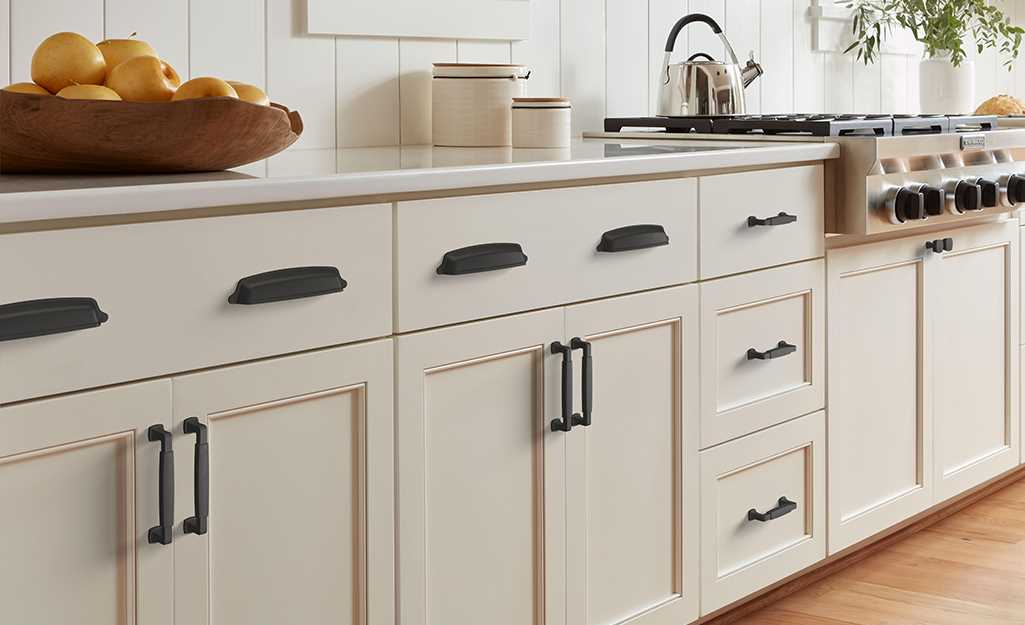
Choose the Right Hardware
Before starting the installation process, it’s important to choose the right hardware for your cabinets. Take into consideration the overall style and design of your cabinets, as well as the functionality you desire. Whether you’re looking for knobs or pulls, make sure to select hardware that complements the overall aesthetic of your space.

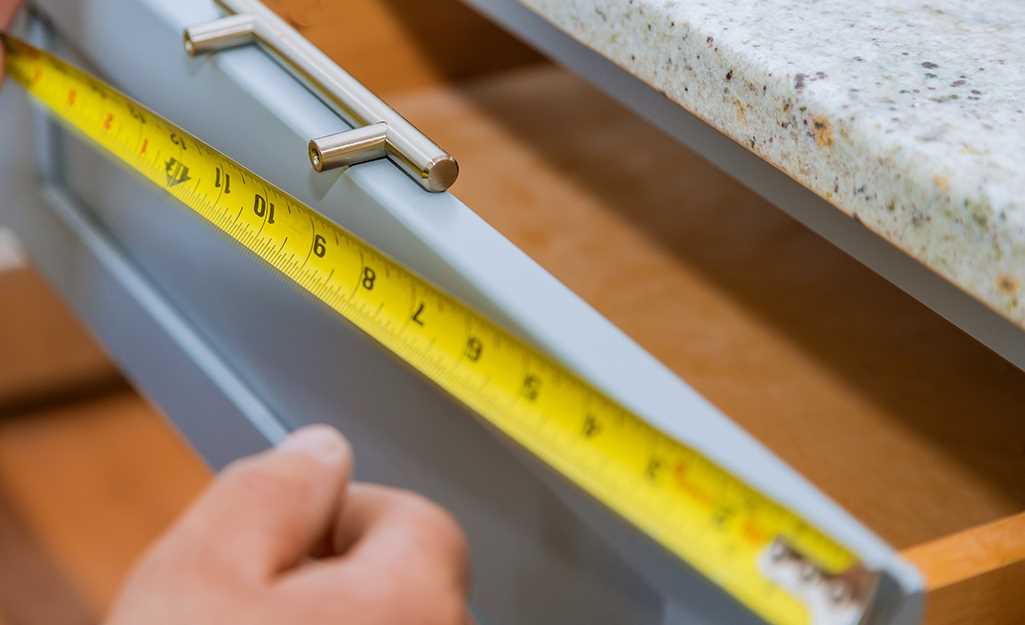
Measure and Mark
Once you have chosen your cabinet hardware, it’s important to measure and mark the desired location for each piece. Use a tape measure to find the center of the cabinet door or drawer, and mark it with a pencil. This will serve as your starting point for installation.
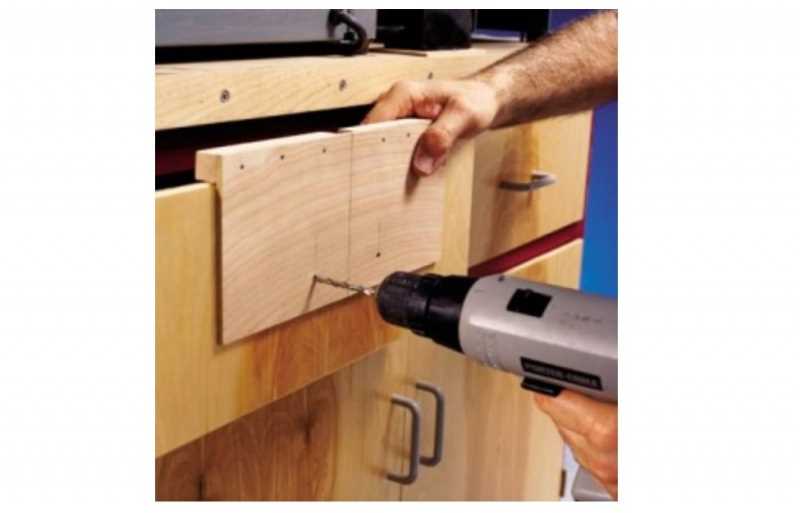
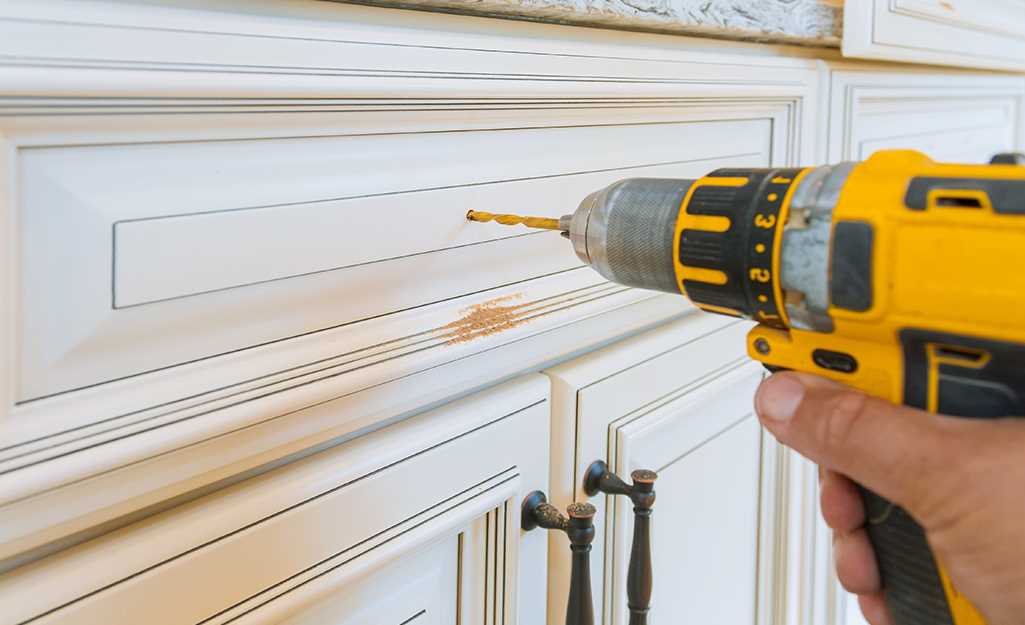
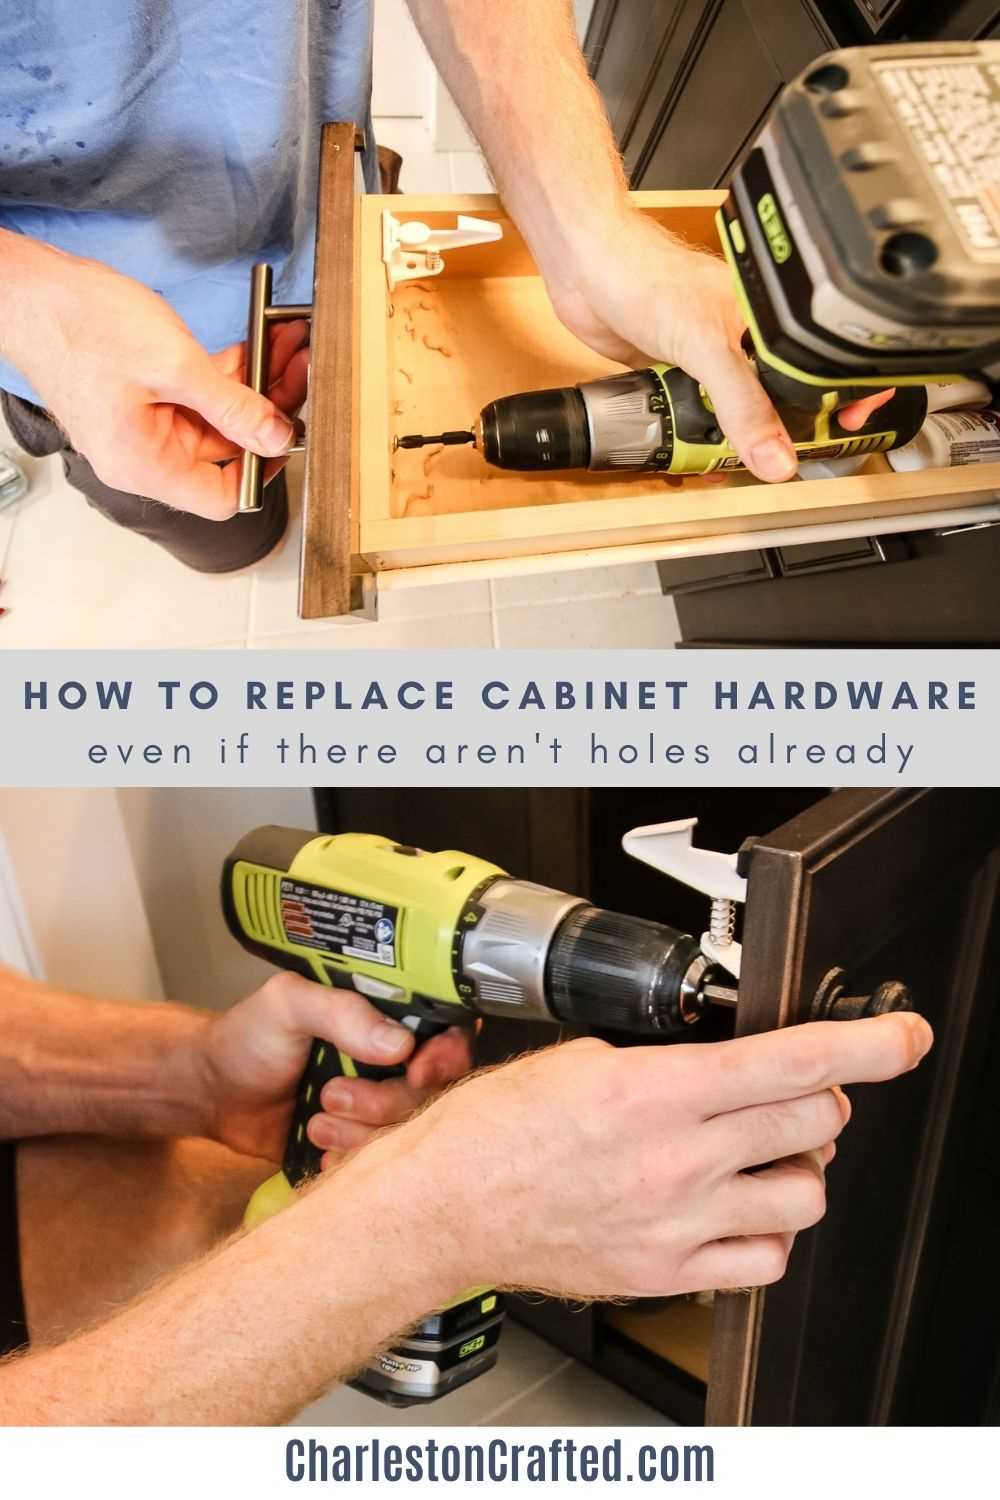
Drill Pilot Holes

Next, you will need to drill pilot holes for your cabinet hardware. Pilot holes help to prevent the wood from splitting when you install the screws. Use an appropriate sized drill bit for your hardware, and carefully drill into the marked location. Be mindful of the depth you are drilling to avoid damaging the cabinet door or drawer.
Align and Attach
After drilling the pilot holes, it’s time to align and attach your cabinet hardware. Hold the hardware in place, aligning the mounting holes with the pilot holes you drilled. Insert the screws provided with your hardware into the pilot holes and tighten them using a screwdriver or drill. Make sure to not overtighten, as this can damage the hardware or the cabinet.
Secure and Test
Once all of the hardware is attached, give each piece a final tightening to ensure they are secure. After securing the hardware, test each knob or pull to ensure they are properly installed and won’t come loose. If any adjustments are needed, make them before finishing the installation process.

Clean and Finish
Finally, clean up any debris left behind from the installation process and give your cabinets a final polish. This will help ensure a clean and finished look for your newly installed cabinet hardware. Step back and admire your work!
Determining the Right Size for Your Cabinet Hardware
Choosing the right size drill bit for your cabinet hardware installation is important to ensure a secure and proper fit. Here are some steps to help you determine the correct size for your cabinet hardware:
- Measure the diameter of the screw: Before selecting a drill bit, measure the diameter of the screws that came with your cabinet hardware. This will help you determine the size of the hole that needs to be drilled.
- Add clearance to the diameter: It’s important to add a bit of clearance to the diameter of the screw. This will allow the screw to easily pass through the hole without causing any damage to the cabinet or hardware. Adding 1/32 inch to the diameter is typically sufficient.
- Choose the appropriate drill bit size: Once you have the diameter of the screw plus the added clearance, you can select the corresponding drill bit size. Most cabinet hardware screws are standard sizes, such as 3/16 inch or 1/4 inch. Match the drill bit size to the total diameter obtained in the previous step.
- Test the fit: After drilling the hole, test the fit of the screw by inserting it into the hole. It should fit snugly without being too tight or too loose. If the fit is not right, you may need to select a slightly larger or smaller drill bit size and redrill the hole.
By following these steps, you can ensure that your cabinet hardware is securely installed and will not loosen over time. Properly sized holes also prevent any potential damage to the cabinet or hardware.
Additional Tips:
- Consult the manufacturer: If you are unsure about the appropriate drill bit size for your specific cabinet hardware, check the manufacturer’s instructions or contact them directly for guidance.
- Consider using a pilot hole: If you are working with hard or dense materials, such as hardwood cabinets, it may be helpful to create a pilot hole before drilling the full-size hole. This can prevent splintering or cracking of the material.
- Use the right drilling technique: When drilling the hole, make sure to use a steady and controlled motion. Apply even pressure and avoid forcing the drill through the material, as this can cause damage.
- Double-check the depth: In addition to the diameter, it’s important to consider the depth of the hole. Measure the length of the screw and mark the drill bit accordingly to ensure that the hole is not too shallow or too deep.
| Drill Bit Size | Hardware Screw Size |
|---|---|
| 3/16 inch | #6 and #8 screws |
| 1/4 inch | #10 and #12 screws |
| 5/16 inch | #14 screws |
Remember to always measure carefully and double-check your drill bit size before drilling. Taking the time to determine the right size will ensure a professional and secure installation of your cabinet hardware.
Taking Measurements: A Step-by-Step Guide
Before you start installing cabinet hardware, it’s important to take accurate measurements to ensure the drill bit you choose is the right size. Here’s a step-by-step guide to help you take the right measurements:
Step 1: Gather your materials
Before you begin, gather all the materials you’ll need for taking measurements, including a tape measure, a pencil, and a notepad to jot down your measurements.
Step 2: Measure the center-to-center distance
The center-to-center distance is a crucial measurement for selecting the right size drill bit. Place the tip of your tape measure at the center of one existing cabinet hardware hole and measure to the center of the adjacent hole. Note down this measurement.
Step 3: Determine the width of the hardware
Next, measure the width of the cabinet hardware you plan to install. This measurement will help you determine the appropriate size of the drill bit. Place the tape measure across the widest part of the hardware and note down the measurement.
Step 4: Consider the diameter of the screw
Take into account the diameter of the screw that will be used to attach the hardware to the cabinet. This will also play a role in determining the correct drill bit size.
Step 5: Choose the right drill bit size
Based on your measurements, consult a drill bit size chart to determine the appropriate drill bit size for your hardware installation. Make sure to choose a drill bit size that matches the center-to-center distance, the width of the hardware, and the diameter of the screw.
Step 6: Test the drill bit size
Before drilling into your cabinet, it’s always a good idea to test the drill bit size on a scrap piece of wood. This will ensure that the drill bit is the correct size and the hardware will fit properly.
Step 7: Mark the drilling spots
Using your measurements and the appropriate drill bit, mark the drilling spots on the cabinet where you’ll be installing the hardware. Use a pencil to make small dots or use a template to ensure accurate placement.
Step 8: Drill the holes
Now that you have your measurements and drilling spots marked, it’s time to drill the holes for the cabinet hardware. Place the drill bit into your drill and carefully drill into the marked spots, making sure to maintain a straight and steady motion.
Following these step-by-step instructions will help ensure that you choose the right size drill bit for your cabinet hardware installation. Remember to always measure accurately and test the drill bit size before drilling into your cabinets to avoid any mistakes or damage.
Choosing the Correct Size Drill Bit
When it comes to cabinet hardware installation, one of the most important things to consider is choosing the correct size drill bit. Using the wrong size bit can result in a loose or misaligned hardware, or even damage to the cabinet door or drawer front.
Measure the Hardware
The first step in choosing the correct size drill bit is to measure the hardware. Most cabinet hardware will have a specified diameter, which will determine the size of the hole you need to drill. To measure the hardware, use a caliper or a ruler with millimeter markings to measure the diameter of the mounting posts or screws.
Select the Drill Bit Size
Once you have determined the diameter of your hardware, you can select the appropriate size drill bit. It is important to choose a drill bit that matches the diameter of the hardware, as using a drill bit that is too small will result in a loose fit, while using a drill bit that is too large can cause the hole to be too big and the hardware to be unstable.
You can find drill bit size charts online or at your local hardware store. These charts will list the corresponding drill bit sizes for various hardware diameters. Look for the closest match to your hardware diameter and choose the corresponding drill bit size.
Test the Fit
Before drilling into your cabinet door or drawer front, it is always a good idea to test the fit of the drill bit and hardware. Insert the drill bit into the drill and drill a hole in a scrap piece of wood. Then, insert the hardware into the hole to ensure that it fits snugly and securely. If the hardware is too tight or too loose, you may need to adjust the drill bit size accordingly.
Drill the Hole
Once you have chosen the correct drill bit size and tested the fit, you can proceed to drill the hole. Place a piece of scrap wood behind the cabinet door or drawer front to prevent any tear-out. Position the drill bit perpendicular to the surface and start drilling at a slow speed. Apply steady pressure and drill through the surface until the desired depth is reached.
Conclusion
Choosing the correct size drill bit is crucial for a successful cabinet hardware installation. By accurately measuring the hardware, selecting the appropriate drill bit size, and testing the fit, you can ensure that your hardware will be properly installed and securely mounted to your cabinets.
Exploring Different Types of Drill Bits
When it comes to cabinet hardware installation, choosing the right drill bit is crucial. There are several types of drill bits available, each designed for specific materials and applications. Understanding the different types can help you make an informed decision for your project.
1. Twist Drill Bits
Twist drill bits are the most common type of drill bits and are suitable for a wide range of materials, including wood, plastic, and metal. They have a spiral-shaped flute that helps to remove chips and debris as you drill. Twist drill bits come in various sizes and can be used with either a handheld drill or a drill press.
2. Spade Drill Bits
Spade drill bits, also known as paddle bits, are used for drilling large holes in wood. They have a flat blade with a pointed center and are ideal for creating holes for cabinet knobs and pulls. These bits are best used with a drill press to ensure precision and prevent any damage to the wood.
3. Forstner Drill Bits
Forstner drill bits are designed specifically for drilling clean and precise flat-bottomed holes. They are commonly used for drilling holes for hinges and dowels in cabinet-making. Forstner bits create minimal splintering and are best used with a drill press, although they can also be used with a handheld drill.
4. Step Drill Bits
Step drill bits, also known as cone drill bits or unibits, are used for drilling holes of various sizes in thin materials like sheet metal, plastic, and wood. They have a conical shape with multiple stepped diameters and can create different hole sizes without the need to switch to different bits. Step drill bits are commonly used for cabinet hardware installation because they offer versatility and convenience.
5. Hole Saw Drill Bits
Hole saw drill bits are used for cutting large circular holes in materials like wood and plastic. They have a cylindrical shape with a serrated edge and can create holes of varying diameters. Hole saw bits are commonly used for installing cabinet knobs and pulls, as well as other larger hardware items.
6. Brad Point Drill Bits
Brad point drill bits, also known as dowel bits, are used for drilling precise holes in wood. They have a pointed tip and a sharp outer edge that helps prevent wandering and ensures accuracy. Brad point bits are commonly used for drilling holes for dowels and other types of fasteners in cabinet-making.
| Drill Bit Type | Materials | Applications |
|---|---|---|
| Twist Drill Bits | Wood, Plastic, Metal | General drilling |
| Spade Drill Bits | Wood | Creating large holes |
| Forstner Drill Bits | Wood | Flat-bottomed hole drilling |
| Step Drill Bits | Sheet Metal, Plastic, Wood | Hole drilling with multiple sizes |
| Hole Saw Drill Bits | Wood, Plastic | Cutting large circular holes |
| Brad Point Drill Bits | Wood | Precise hole drilling |
Tips and Tricks for Successful Cabinet Hardware Installation
1. Measure Twice, Drill Once
Before drilling any holes for your cabinet hardware, it is important to measure and mark the correct placement. Use a measuring tape to ensure the placement is centered and level.
2. Choose the Right Size Drill Bit
Using the correct size drill bit is crucial for a successful cabinet hardware installation. Measure the diameter of the screws that came with your hardware and choose a drill bit that matches this size to ensure a secure fit.
3. Use a Drill Stop or Tape
To prevent drilling too deep into your cabinets, use a drill stop or tape to mark the desired depth on your drill bit. This will help prevent accidentally drilling through the other side of the cabinet.
4. Start with Pilot Holes
Before drilling the final holes, start with pilot holes. This will help guide the drill bit and prevent the wood from splitting. Use a smaller drill bit than the one needed for the final hole.
5. Secure the Hardware Properly
When attaching the hardware, make sure to tighten the screws securely. Use a screwdriver or drill with a low torque setting to avoid overtightening and potentially damaging the cabinet.
6. Take Time to Align the Hardware
To ensure a professional-looking installation, take your time to align the hardware properly. Pay attention to the spacing and make adjustments as needed before securing the screws.
7. Check for Level
Using a level, check the alignment of your hardware to ensure it is straight. Adjust as necessary before tightening the screws.
8. Clean and Maintain
After installation, clean the hardware and cabinets to remove any dust or debris. Regularly check and tighten the screws to ensure the hardware remains secure over time.
9. Test the Hardware
Before considering the installation complete, test the hardware to ensure it opens and closes smoothly without any issues. Make any necessary adjustments before finishing the project.
10. Seek Professional Help if Needed
If you are unsure or uncomfortable with the installation process, it is always best to seek professional help. They can ensure the hardware is installed correctly and provide any additional guidance or advice.
| Note: | It is always recommended to follow the manufacturer’s instructions for specific hardware installation. |
Common Mistakes to Avoid When Selecting Drill Bits
1. Choosing the Wrong Size
One of the most common mistakes people make when selecting drill bits for cabinet hardware installation is choosing the wrong size. It is essential to measure the diameter of the cabinet hardware screws accurately and select a drill bit that matches that diameter. Using a drill bit that is too small will make it impossible for the screw to fit properly, while using a drill bit that is too large can damage the cabinet or the hardware.
2. Ignoring the Material
Another mistake to avoid is ignoring the material of the cabinet and hardware when selecting drill bits. Different materials require different types of drill bits. For example, if the cabinet and hardware are made of softwood, a standard HSS (high-speed steel) drill bit would be suitable. However, if the cabinet and hardware are made of metal or hard material, a cobalt or carbide-tipped drill bit would be a better choice.
3. Failing to Consider the Depth
Not considering the depth of the hole is another mistake that can lead to problems when installing cabinet hardware. Drill bits come in different lengths, and it is important to choose a drill bit that is long enough to create a hole that accommodates the entire length of the screw. Failing to do so can result in a loose-fitting screw or hardware that does not sit flush against the cabinet.
4. Neglecting the Shank Size
The shank size of the drill bit is often overlooked but can cause issues during installation. The shank is the smooth part of the drill bit that fits into the chuck of the drill. It is important to choose a drill bit with a shank size that matches the chuck size of the drill to ensure a secure fit. Using a drill bit with a larger or smaller shank size can lead to wobbling or slippage during drilling, which can affect the accuracy of the hole.
5. Not Using a Pilot Hole
One of the biggest mistakes people make is not using a pilot hole before drilling into the cabinet. A pilot hole helps to guide the drill bit and prevents the wood from splitting. It also ensures that the hole is drilled precisely where it needs to be. Skipping the pilot hole can result in a crooked or inaccurate hole, making it difficult to properly install the cabinet hardware.
6. Using Dull Drill Bits
Lastly, using dull drill bits is a mistake that can make the drilling process more difficult, time-consuming, and less precise. Dull drill bits can cause the drill to overheat, create excessive friction, and result in rough, jagged holes. It is important to regularly check the sharpness of drill bits and replace them when necessary to ensure clean and accurate holes for cabinet hardware installation.
Conclusion
Avoiding these common mistakes when selecting drill bits for cabinet hardware installation will help ensure smoother and more accurate drilling, preventing damage to the cabinet and hardware. Taking the time to measure correctly, consider the material and depth, choose the right shank size, use a pilot hole, and use sharp drill bits will result in a successful installation and a professional-looking finish.
FAQ:
What is cabinet hardware?
Cabinet hardware refers to the knobs, handles, pulls, and other accessories that are installed on cabinets to open and close them easily.
How do I choose the right size drill bit for cabinet hardware installation?
To choose the right size drill bit, you need to measure the diameter of the screws that come with the hardware. Then, select a drill bit that is slightly smaller in diameter than the screws so that the holes will be tight enough to hold the hardware securely.
What happens if I use a drill bit that is too large?
If you use a drill bit that is too large, the holes will be too big for the screws and the hardware will not be secure. It may come loose over time or even fall off completely.
Can I use a drill bit that is slightly larger than the screws?
No, it is not recommended to use a drill bit that is larger than the screws. The holes should be slightly smaller than the screws to ensure a tight fit and secure installation.
What should I do if I don’t have the right size drill bit?
If you don’t have the right size drill bit, you can either purchase one that is the correct size or try to find an alternative method of installation, such as using adhesive or different hardware that fits the holes you already have.
Video:

Meet Harrison Clayton, a distinguished author and home remodeling enthusiast whose expertise in the realm of renovation is second to none. With a passion for transforming houses into inviting homes, Harrison's writing at https://thehuts-eastbourne.co.uk/ brings a breath of fresh inspiration to the world of home improvement. Whether you're looking to revamp a small corner of your abode or embark on a complete home transformation, Harrison's articles provide the essential expertise and creative flair to turn your visions into reality. So, dive into the captivating world of home remodeling with Harrison Clayton and unlock the full potential of your living space with every word he writes.


