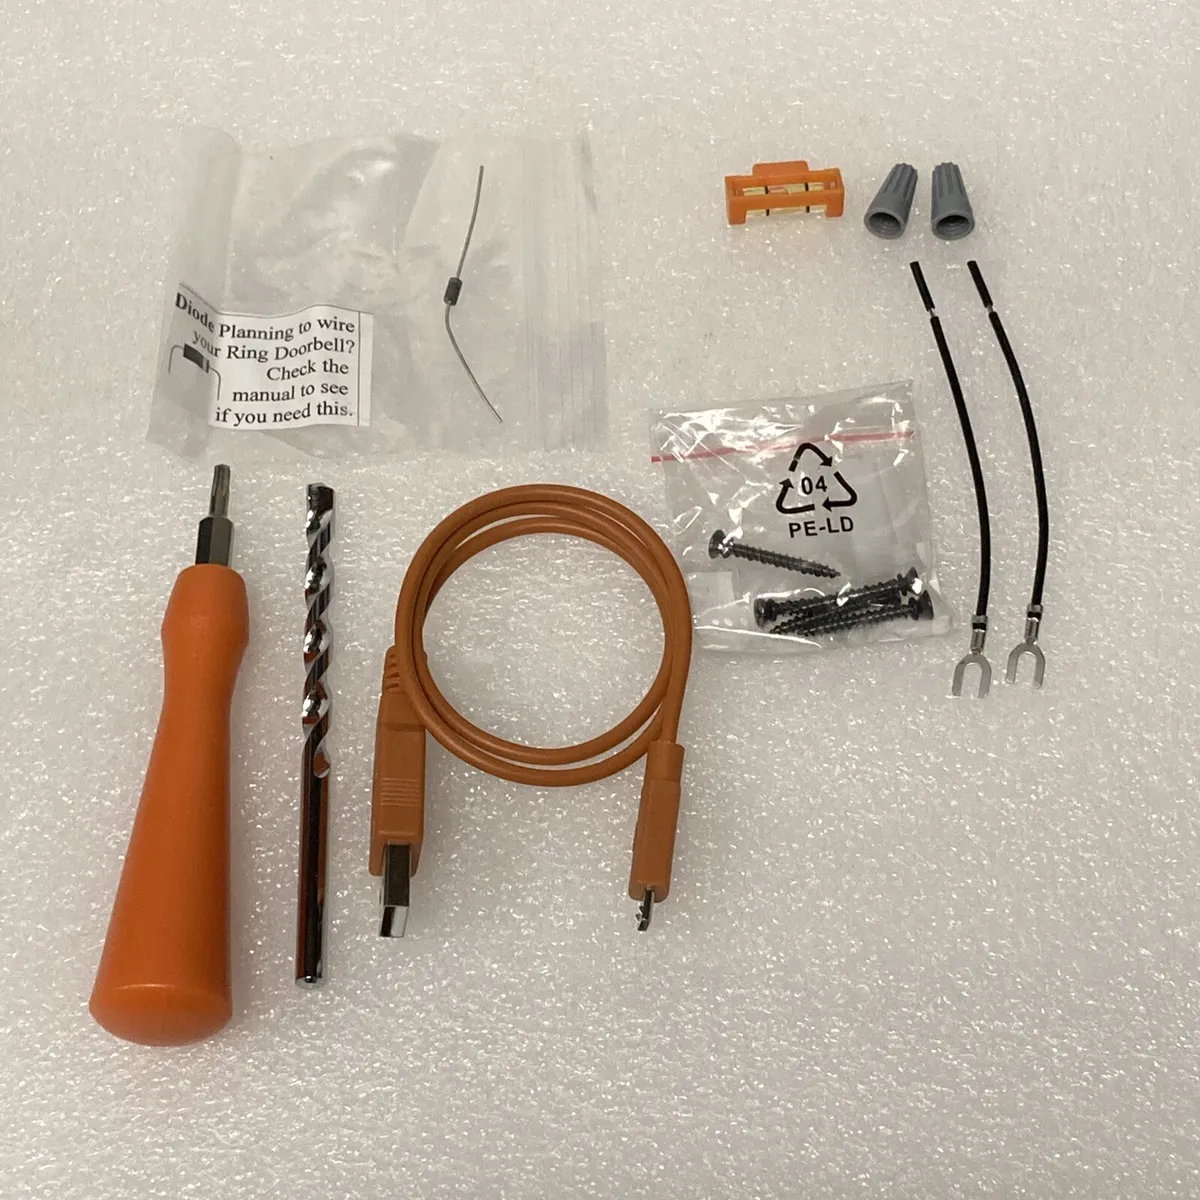
Choosing the Right Drill Bit Size for Your Ring Doorbell Installation

Installing a Ring doorbell can enhance the security and convenience of your home. However, before you can install your new doorbell, you need to make sure you have the right tools, including the correct drill bit size. Choosing the right drill bit size is crucial for a successful and secure installation. This guide will help you determine the right drill bit size for your Ring doorbell installation.
The first step in choosing the right drill bit size is to consult the installation manual provided by Ring. The manual will typically provide specific instructions on the drill bit size required for your particular doorbell model. It is important to follow these instructions carefully to ensure a proper fit and secure installation.
If you don’t have access to the installation manual, you can determine the drill bit size by measuring the diameter of the mounting holes on your Ring doorbell. Use a caliper or a ruler to measure the diameter of the holes. Once you have the measurement, choose a drill bit that is slightly smaller in diameter to ensure a snug fit.
It is also important to consider the material of your door or wall when choosing the drill bit size. For example, if you are installing your Ring doorbell on a wooden door, you may need a smaller drill bit size compared to a metal door. This is because wood is softer and requires less force to drill through. On the other hand, drilling into a metal door may require a larger drill bit size to create the necessary hole.
Why Choose the Right Drill Bit Size?
Choosing the right drill bit size is crucial for the successful installation of your Ring Doorbell. The size of the drill bit you use will determine the size of the hole that needs to be drilled in your door or wall. Here are a few reasons why it’s important to choose the right drill bit size:

- Proper fit: Using the correct drill bit size ensures that the hole is the right size for your Ring Doorbell. A hole that is too small may not allow the device to fit properly, while a hole that is too large may result in a loose or unstable installation.
- Secure installation: When a drill bit of the correct size is used, it creates a snug fit between the mounting bracket of the Ring Doorbell and the hole. This ensures that the device is securely attached to your door or wall, reducing the risk of it being knocked off or coming loose.
- Prevents damage: Using the wrong drill bit size can result in damage to your door or wall. A drill bit that is too small may cause the material to crack or splinter, while a drill bit that is too large may cause unnecessary damage and make it difficult to achieve a secure installation.
By choosing the right drill bit size for your Ring Doorbell installation, you can ensure a proper and secure fit without causing any damage to your door or wall. It’s important to consult the installation instructions provided by Ring to determine the recommended drill bit size for your specific model of the Ring Doorbell.
Finding the Perfect Fit for Your Ring Doorbell
When it comes to installing a Ring Doorbell, one of the most important factors to consider is finding the perfect fit. This not only ensures that your doorbell will be securely mounted but also helps to optimize its functionality. Here are some tips to help you find the perfect fit for your Ring Doorbell installation.
1. Measure the space
Before you start drilling any holes, it’s crucial to measure the space where you plan to install your Ring Doorbell. Take note of the dimensions and make sure that you have enough space for the doorbell to fit comfortably. Measure the height, width, and depth of the area to be sure.
2. Check the compatibility
Ring Doorbells come in different models and sizes, so it’s essential to check the compatibility of your doorbell with the mounting space. Some doorbells may require specific mounting brackets or adapters, so be sure to read the product manual or consult the manufacturer’s website for compatibility information.
3. Consider the installation method

Ring Doorbells can be installed using different methods, such as drilling holes or using adhesive mounts. If you choose to drill holes, it’s crucial to match the drill bit size with the specifications provided by the manufacturer. This ensures that the holes will be the right size for the mounting screws and helps to prevent any damage to the doorbell.
4. Consult the installation guide
Each Ring Doorbell comes with an installation guide that provides step-by-step instructions on how to mount the doorbell correctly. Take the time to read and follow the guide carefully to ensure a proper fit. The guide may also provide useful information on recommended drill bit sizes and other installation tips.
5. Test the fit before mounting
Before you permanently mount your Ring Doorbell, it’s a good idea to test the fit and placement. Use painter’s tape or a temporary adhesive to position the doorbell on the wall or door frame. This will allow you to check if the doorbell is positioned correctly and if there is enough clearance for the wiring and any additional features like a charging cable.
6. Seek professional help if needed
If you’re unsure about the installation process or if you’re dealing with unusual mounting situations, it’s always a good idea to seek professional help. A skilled technician or electrician can help you find the perfect fit for your Ring Doorbell and ensure that it’s securely and correctly installed.
By following these tips, you can ensure that your Ring Doorbell is mounted securely and functions optimally. Take the time to measure, check compatibility, and read the installation guide to find the perfect fit for your doorbell.

Identifying the Compatible Drill Bit Sizes
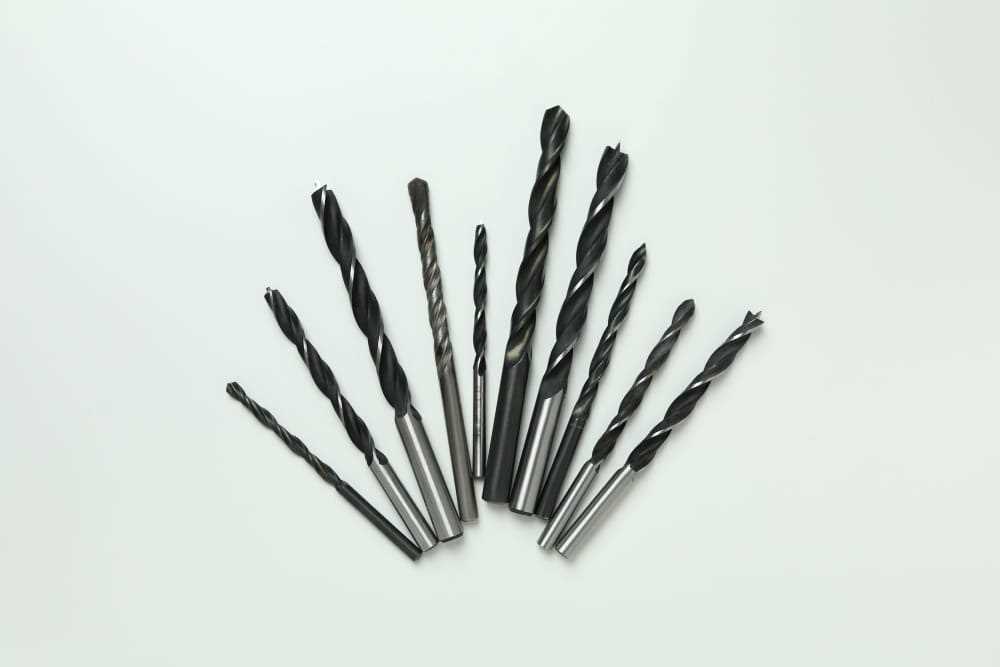
When it comes to installing your Ring Doorbell, it’s important to use the right size drill bit to ensure a secure and successful installation. The compatible drill bit sizes will depend on the specific model of your Ring Doorbell, so it’s essential to identify the correct sizes for your particular device.
Here are the steps to help you identify the compatible drill bit sizes:
- Consult the User Manual: Start by referring to the user manual that came with your Ring Doorbell. It should provide you with detailed information about the recommended drill bit sizes for your device.
- Visit the Ring Website: If you no longer have access to the user manual or it doesn’t provide the necessary information, visit the official Ring website. They typically have product specifications and FAQs sections that can guide you in identifying the compatible drill bit sizes.
- Contact Customer Support: If you’re still unsure about the drill bit sizes after checking the user manual and website, consider reaching out to Ring’s customer support. They should be able to provide you with accurate and up-to-date information about the compatible drill bit sizes for your specific model.
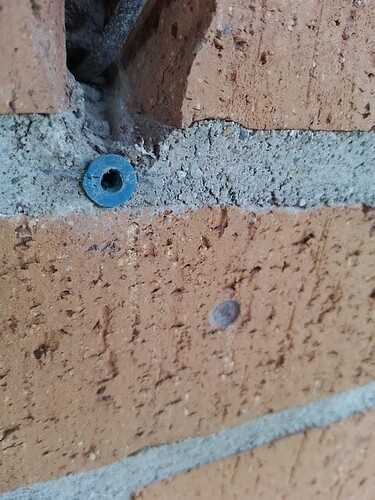
- Measure the Mounting Holes: If you prefer a more hands-on approach, you can measure the mounting holes on your Ring Doorbell with a ruler or a caliper. This will give you an idea of the diameter that the drill bit should have.
Note: It’s important to choose a drill bit that matches the size of the mounting holes on your Ring Doorbell to ensure a proper fit. Using a drill bit that is too small or too large can result in a loose or damaged installation.

| Ring Doorbell Model | Drill Bit Size |
|---|---|
| Ring Doorbell (1st generation) | 3/32 inch |
| Ring Video Doorbell 2 | 5/64 inch |
| Ring Video Doorbell Pro | 1/8 inch |
| Ring Video Doorbell 3 | 3/32 inch |
Remember to always check the user manual or consult with Ring’s customer support to ensure the compatibility of drill bit sizes for your specific Ring Doorbell model. Using the proper drill bit size will help you achieve a secure and successful installation of your Ring Doorbell.
Avoiding Damage to Your Ring Doorbell
Installing a Ring Doorbell can greatly enhance the security and convenience of your home. However, it is important to take certain precautions to avoid damaging your Ring Doorbell during the installation process. Here are some tips to help you avoid damage:
1. Choose the right drill bit size
Before drilling any holes, make sure to choose the correct drill bit size as mentioned in the previous section. Using the wrong size can result in the hole being too small or too large, which can cause the Ring Doorbell to not fit properly or become loose.
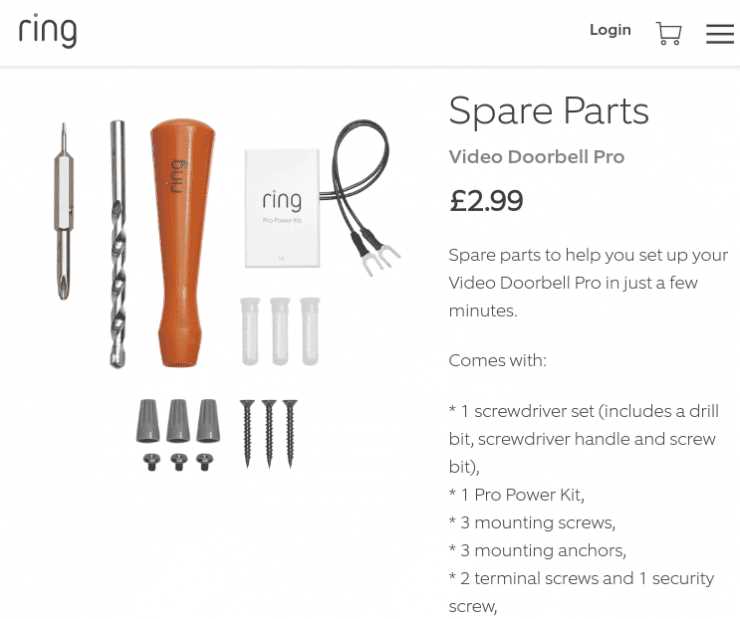
2. Use the proper mounting hardware
Your Ring Doorbell comes with a set of mounting hardware, which includes screws and anchors. It is important to use these specific hardware pieces to ensure a secure and stable installation. Using different screws or anchors may not provide the necessary support and can lead to damage.
3. Avoid overtightening the screws
While it is important to securely fasten the screws during installation, it is equally important to avoid overtightening them. Over-tightening can damage the plastic housing of the Ring Doorbell or strip the screw holes, making it difficult to secure the device properly. Use a screwdriver or drill with an adjustable torque setting to avoid applying excessive force.

4. Protect the wiring
If your Ring Doorbell is a hardwired version, make sure to protect the wiring during the installation process. Avoid bending or pinching the wires, as this can lead to breakages or loose connections. If necessary, use wire nuts or electrical tape to secure and protect the connections.
5. Check for water damage
Before installing your Ring Doorbell, check the area where it will be mounted for potential water leaks or areas prone to pooling water. Water damage can affect the functionality of the device and can lead to costly repairs. If there are any water-related concerns, consider installing the Ring Doorbell at a different location or take measures to waterproof the installation area.
6. Follow the manufacturer’s instructions
Always refer to the manufacturer’s instructions and guidelines for proper installation. The instructions provided by Ring are designed to ensure a safe and successful installation. Following these instructions will help you avoid any unintended damage to your Ring Doorbell.
By following these tips, you can minimize the risk of damaging your Ring Doorbell during installation and ensure that it functions properly to enhance the security of your home. If you are unsure about any aspect of the installation process, it is recommended to consult a professional for assistance.
Steps to Determine the Correct Drill Bit Size
Before you start drilling holes for your Ring Doorbell installation, it is important to determine the correct drill bit size. Following these steps will help ensure a proper fit and secure installation:
- Refer to the Ring Doorbell Installation Manual: The first step is to consult the installation manual provided by Ring for your specific doorbell model. It will typically include information on the recommended drill bit size for the mounting holes.
- Measure the Diameter of the Mounting Screws: If the installation manual doesn’t specify the drill bit size, you can measure the diameter of the mounting screws using a caliper or ruler. This will give you an idea of the approximate size of the hole needed.
- Choose the Correct Bit Size: Based on the measurements taken in the previous step or the information provided in the installation manual, select a drill bit that is slightly larger than the diameter of the mounting screws. This will ensure a snug fit without compromising the structural integrity of the wall.
- Perform a Test Hole: Before drilling the actual holes for the mounting screws, it is a good idea to perform a test hole on a scrap piece of material with similar characteristics to your wall (e.g., thickness and composition). This will allow you to verify that the drill bit size is appropriate and make any necessary adjustments.
- Drill the Mounting Holes: Once you have determined the correct drill bit size, you can proceed to drill the mounting holes at the desired location on the wall. Make sure to use proper drilling techniques, such as applying steady pressure and using a level to ensure the holes are straight.
- Clean Up any Debris: After drilling the mounting holes, use a brush or vacuum to clean up any debris or dust that may have accumulated. This will help ensure a clean and secure installation.
By following these steps, you can determine the correct drill bit size for your Ring Doorbell installation and ensure a proper and secure mounting.
Measuring the Screw Size on Your Ring Doorbell
Before you start the installation process for your Ring Doorbell, it’s important to measure the screw size to ensure you have the correct drill bit. The screw size will determine the diameter of the hole you need to drill.
Step 1: Gather the necessary tools
To measure the screw size on your Ring Doorbell, you will need the following tools:
- Tape measure or ruler
- Calipers (optional)
Step 2: Measure the screw diameter
Using a tape measure or ruler, measure the diameter of the screw on your Ring Doorbell. Place the tape measure or ruler directly on the threaded part of the screw and measure from one side to the other. Alternatively, you can use calipers for a more precise measurement.
Step 3: Determine the drill bit size
Once you have measured the screw diameter, you can determine the appropriate drill bit size. The drill bit should be slightly smaller than the screw diameter, allowing for a snug fit. For example, if the screw diameter measures 4mm, you may choose a 3mm or 3.5mm drill bit.
Step 4: Verify the screw size with the manual
It’s always a good idea to double-check the screw size recommended by the manufacturer. Consult the installation manual or any included documentation to ensure you have the correct drill bit size for your specific Ring Doorbell model.
By accurately measuring the screw size on your Ring Doorbell, you can ensure a proper installation and avoid any potential issues or damage to the device.
Using an Appropriate Drill Bit Size Chart
When it comes to installing your Ring Doorbell, it’s crucial to use the correct drill bit size to ensure a secure and properly fitting installation. To determine the right drill bit size, you can refer to an appropriate drill bit size chart.
A drill bit size chart is a handy tool that provides information on the recommended drill bit size for different types of screws, bolts, and fasteners. It helps you choose the right size to perfectly fit the installation requirements of your Ring Doorbell.
How to use a drill bit size chart
Using a drill bit size chart is simple and straightforward. Here are the steps to follow:
- Identify the type of fastener you will be using for your Ring Doorbell installation. This could be a screw, bolt, or anchor.
- Refer to the drill bit size chart to find the recommended drill bit size for the chosen fastener. The chart will list the corresponding drill bit size next to the fastener type.
- Once you have the recommended drill bit size, use a ruler or measuring tape to mark the appropriate depth on the drill bit. This will ensure that you drill the hole to the correct depth.
- Attach the correctly sized drill bit to your drill and proceed with drilling the hole for your Ring Doorbell installation.
Benefits of using a drill bit size chart
Using a drill bit size chart offers several benefits, including:
- Accuracy: The chart provides precise recommendations, ensuring that you select the correct drill bit size for your Ring Doorbell installation.
- Time-saving: Instead of guessing or trial and error, the drill bit size chart allows you to quickly find the right size, saving you time during the installation process.
- Prevents damage: Using the wrong drill bit size can lead to stripped screws or loose fittings, potentially damaging your Ring Doorbell. The chart helps you avoid such issues by providing the correct information.
- Professional finish: By using the appropriate drill bit size, you can achieve a professional-looking installation with a secure and snug fit for your Ring Doorbell.
Common drill bit sizes for Ring Doorbell installation
While the specific drill bit size for your Ring Doorbell installation may vary depending on the model and installation instructions, here are some common sizes used:
| Fastener Type | Recommended Drill Bit Size |
|---|---|
| Screw | 3/16 inch |
| Anchor | 1/4 inch |
Always refer to the manufacturer’s instructions or the drill bit size chart provided with your Ring Doorbell for the most accurate and up-to-date information on the recommended drill bit size for your specific installation.
Tips for Successful Ring Doorbell Installation
1. Choose the Right Drill Bit Size
Before you begin the installation process, make sure you have the correct drill bit size for the mounting holes. Ring doorbells typically require a 3/16-inch (4.8mm) drill bit for drilling into masonry or wood surfaces. Using the wrong size drill bit can lead to improper fitting and potential damage to your doorbell.
2. Measure and Mark Placement
Proper placement is crucial for optimal functionality and security. Before drilling any holes, carefully measure and mark the desired location for your Ring doorbell. Ensure that it is at a height that allows for easy use and within the recommended distance from your front door for clear video capture.
3. Use Anchors for Secure Mounting
If you are mounting your Ring doorbell onto a masonry surface, use the provided anchors to ensure a secure hold. Insert the anchor into the drilled hole and tap it gently until it is flush with the surface. For wood surfaces, drilling pilot holes may be sufficient, but using anchors can provide added stability.
4. Connect Wires Properly
When connecting the wiring for your Ring doorbell, ensure that you follow the manufacturer’s instructions carefully. Make sure the wires are securely connected to the corresponding terminals and are not loose. Improper wiring can result in the doorbell not functioning correctly.
5. Test the Doorbell before Finalizing Installation
Once you have completed the installation, test your Ring doorbell to ensure it is functioning as expected. Check the video feed, audio quality, and motion detection capabilities. Make any necessary adjustments or troubleshoot any issues before finalizing the installation.
6. Consider a Wi-Fi Extender
If your Wi-Fi signal in the doorbell area is weak, consider installing a Wi-Fi extender to improve signal strength. A strong and stable Wi-Fi connection is essential for optimal performance and uninterrupted access to your Ring doorbell’s features.
7. Regularly Check and Update Firmware
To ensure your Ring doorbell remains secure and up to date, regularly check for firmware updates. These updates may include bug fixes, feature enhancements, and security patches. Following the manufacturer’s instructions, update the firmware when necessary to keep your device functioning at its best.
| Tool | Purpose |
|---|---|
| Drill | For drilling holes for mounting |
| Level | To ensure proper alignment during installation |
| Screwdriver | For attaching the doorbell and any necessary screws |
| Tape Measure | To measure and mark the desired placement |
| Pliers | For connecting and securing wires |
FAQ:
What is the best drill bit size for installing a Ring Doorbell?
The best drill bit size for installing a Ring Doorbell is 3/8 inch.
Can I use a smaller drill bit for installing a Ring Doorbell?
While you can use a smaller drill bit, it is recommended to use a 3/8 inch drill bit for the best fit and stability.
Is it possible to use a larger drill bit for installing a Ring Doorbell?
Using a larger drill bit may result in a loose fit for the Ring Doorbell and could compromise its stability on the wall.
What should I do if I don’t have a 3/8 inch drill bit?
If you don’t have a 3/8 inch drill bit, you can use a slightly smaller size and then enlarge the hole with a round file or sandpaper until it is the perfect size for the Ring Doorbell.
Will using the wrong drill bit size affect the installation of a Ring Doorbell?
Using the wrong drill bit size can result in a loose fit for the Ring Doorbell and may cause it to be unstable on the wall.
Can I use a drill bit with a different measurement system for installing a Ring Doorbell?
It is recommended to use a drill bit with the same measurement system as the instructions provided with the Ring Doorbell. If the instructions specify 3/8 inch, it is best to use a drill bit with that measurement in inches.
Video:


Meet Harrison Clayton, a distinguished author and home remodeling enthusiast whose expertise in the realm of renovation is second to none. With a passion for transforming houses into inviting homes, Harrison's writing at https://thehuts-eastbourne.co.uk/ brings a breath of fresh inspiration to the world of home improvement. Whether you're looking to revamp a small corner of your abode or embark on a complete home transformation, Harrison's articles provide the essential expertise and creative flair to turn your visions into reality. So, dive into the captivating world of home remodeling with Harrison Clayton and unlock the full potential of your living space with every word he writes.


