Choosing the Right Drill Bit Size for Cabinet Pulls

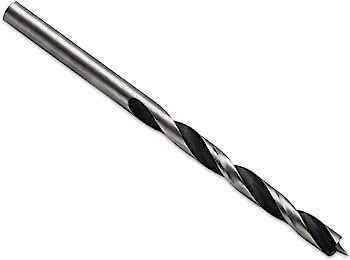
When it comes to installing cabinet pulls, one of the most important factors to consider is the size of the drill bit. Choosing the right drill bit size is crucial for ensuring that the pulls fit snugly and securely in place. Too small of a hole and the pull might not fit at all, while too large of a hole can result in a loose and unstable pull.
To determine the right drill bit size for your cabinet pulls, you’ll first need to measure the diameter of the screws that come with the pulls. This can be done by using a caliper or measuring tape. Once you have the diameter measurement, you can choose a drill bit that is slightly smaller, usually about 1/64 inch or 1/32 inch smaller, to ensure a tight fit.
It’s also important to consider the material of the cabinet pulls when choosing the drill bit size. If the pulls are made of a soft material such as wood or plastic, a slightly larger drill bit size may be necessary to prevent splitting or cracking. On the other hand, if the pulls are made of a harder material such as metal, a smaller drill bit size may be required to create a snug fit.
Remember, it’s always a good idea to test the drill bit size on a scrap piece of wood or material similar to your cabinet before drilling into the actual cabinet. This will allow you to make any necessary adjustments before installing the pulls.
In conclusion, choosing the right drill bit size for cabinet pulls is essential for a successful installation. By accurately measuring the diameter of the screws and considering the material of the pulls, you can ensure a secure and aesthetically pleasing result.
Choosing the Right Drill Bit Size
When it comes to choosing the right drill bit size, there are several factors to consider. The size of the hole you need to drill, the material you are drilling into, and the type of bit you are using all play a role in determining the correct bit size.

Step 1: Determine the Size of the Hole
The first step in choosing the right drill bit size is to determine the size of the hole you need to drill. Measure the diameter of the object you are attaching, such as a cabinet pull, and use that measurement as a guide. If you are drilling into wood, you may want to choose a slightly larger bit size to allow for expansion.
Step 2: Consider the Material
The material you are drilling into will also impact the drill bit size you choose. Different materials require different bit sizes to achieve the desired result. For example, drilling into metal may require a smaller bit size to prevent the material from cracking or splitting, while drilling into wood may require a larger bit size to accommodate the softer material.
Step 3: Select the Bit Type
In addition to considering the size of the hole and the material, you will also need to choose the right type of drill bit. There are a variety of bit types available, each designed for specific purposes. Some common types of drill bits include twist bits, spade bits, and Forstner bits. Each bit type may require a different size to achieve the best results.
Step 4: Consult a Drill Bit Size Chart
If you are unsure of the appropriate drill bit size for your project, consult a drill bit size chart. These charts provide recommendations based on the material you are drilling into and the type of bit you are using. They can be a helpful tool in selecting the right drill bit size.

Step 5: Test the Bit Size
Before drilling into your actual project, it is always a good idea to test the drill bit size on a scrap piece of material. This will allow you to ensure that the bit size is appropriate and make any necessary adjustments before drilling into your final project.
By following these steps and considering the size of the hole, the material, the bit type, and consulting a drill bit size chart, you can confidently choose the right drill bit size for your project.
for Cabinet Pulls
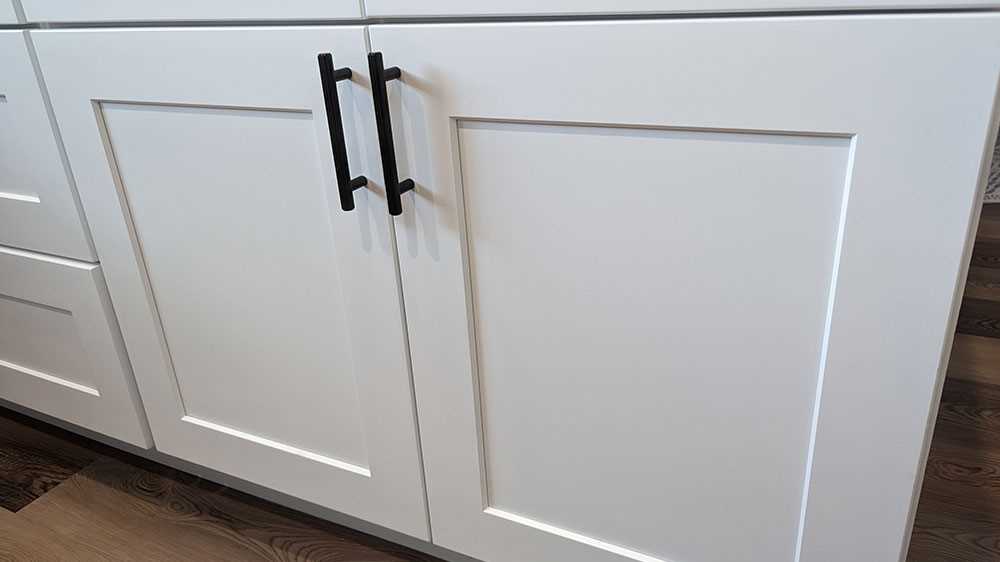
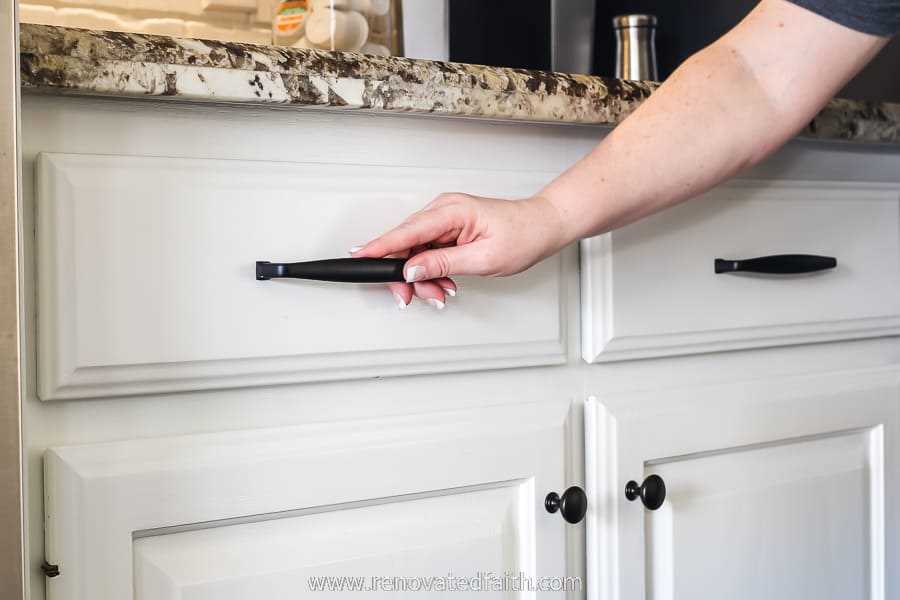
Cabinet pulls are a popular choice for adding style and functionality to cabinets. When installing cabinet pulls, it’s important to choose the right drill bit size to ensure a proper fit and prevent any damage to the wood or hardware.
Here are some factors to consider when choosing the drill bit size for cabinet pulls:

Width of the Cabinet Pulls
The width of the cabinet pulls will determine the size of the hole you need to drill. Most cabinet pulls have standard widths ranging from 3-5 inches. Measure the width of your cabinet pulls and choose a drill bit size that matches or is slightly larger than the width.
Type of Cabinet Material
The type of material your cabinet is made of will also affect the drill bit size you need. For softer materials like wood or laminate, a standard twist drill bit will work well. However, for harder materials like metal or glass, you may need to use a special drill bit designed for that material.
Drill Bit Size Chart
| Cabinet Pull Width | Drill Bit Size |
|---|---|
| 3 inches or less | 3/16 inch |
| 3-4 inches | 1/4 inch |
| 4-5 inches | 5/16 inch |
It’s always a good idea to test the drill bit size on a scrap piece of wood before drilling into your cabinet. This will ensure that the size is correct and will prevent any mistakes.
Remember to take your time and be careful when drilling the holes for cabinet pulls. Use a steady hand and apply gentle pressure to avoid any accidents or damage to the cabinet.
By choosing the right drill bit size for your cabinet pulls, you can ensure a professional-looking installation and avoid any unnecessary repairs or replacements down the line.

Importance of Choosing the Right Drill Bit Size
When it comes to installing cabinet pulls, choosing the right drill bit size is essential. The drill bit size plays a crucial role in ensuring that the cabinet pulls are securely and properly installed. Here are a few reasons why choosing the right drill bit size is important:
1. Ensures a Secure Fit
Using the right drill bit size ensures that the holes drilled into the cabinet are the perfect size to fit the screws that come with the pulls. If the drill bit size is too small, the screws may not fit properly, resulting in loose pulls that can easily come off. On the other hand, if the drill bit size is too large, the screws may not have enough material to grip onto, making the pulls wobbly. By choosing the correct drill bit size, you can ensure a secure fit for your cabinet pulls.
2. Prevents Damage to the Cabinet
If the drill bit size is too large, there is a risk of damaging the cabinet. The oversized hole can weaken the structure and cause cracks or splits in the wood. This not only compromises the durability of the cabinet but also affects its aesthetic appeal. Choosing the right drill bit size minimizes the risk of damaging the cabinet and ensures a clean and professional-looking installation.
3. Saves Time and Effort
Using the right drill bit size saves time and effort during the installation process. With the correct drill bit size, you can easily drill the necessary holes without any issues. On the other hand, using the wrong drill bit size can result in difficulties, such as the drill bit getting stuck or not being able to drill through the material properly. This can lead to wasted time and effort, as well as potential damage to the material. By choosing the right drill bit size, you can make the installation process faster and more efficient.

4. Ensures a Professional Finish
Choosing the right drill bit size is crucial for achieving a professional finish. When the holes drilled into the cabinet are the correct size, the screws will sit flush with the pulls, giving them a seamless appearance. This adds to the overall aesthetic of the cabinets and enhances the visual appeal of the room. On the other hand, using the wrong drill bit size can result in screws sticking out or the pulls not sitting properly, giving the installation a sloppy and unprofessional look. In order to achieve a polished and finished look, it is important to choose the right drill bit size.
Conclusion
Choosing the right drill bit size is essential for the proper installation of cabinet pulls. It ensures a secure fit, prevents damage to the cabinet, saves time and effort, and ensures a professional finish. Taking the time to select the correct drill bit size before starting the installation process can make a significant difference in the functionality and appearance of your cabinets.
Factors to Consider
- Material of the cabinet – Different types of cabinet materials may require different drill bit sizes. For example, drilling into solid wood might require a larger drill bit compared to drilling into particle board.
- Size of the cabinet pulls – The size of the cabinet pulls will determine the size of the hole needed. Smaller pulls will generally require smaller drill bit sizes, while larger pulls will require larger drill bit sizes.
- Style and design of the cabinet pulls – Some cabinet pulls have unique designs or shapes that may require specific drill bit sizes. It’s important to consider the shape and design of the pulls when choosing the drill bit size.
- Depth of the hole – The depth of the hole needed for the cabinet pulls should be considered when choosing the drill bit size. It’s important to ensure that the drill bit is long enough to drill the necessary depth without going too deep.
- Type of drill – The type of drill being used can also impact the drill bit size. Different drills may have different chuck sizes, which can limit the range of drill bit sizes that can be used.
- Accuracy of the hole – If precision is important, such as when drilling holes for hinges or other hardware, a smaller drill bit size may be necessary to ensure accuracy.
- Availability of drill bits – It’s important to choose a drill bit size that is readily available. Using a common size will make it easier to find replacement bits if needed.
Measuring Cabinet Pull Hole Size
Before you start drilling holes for your cabinet pulls, it’s important to accurately measure the hole size needed. The hole size will vary depending on the type and size of cabinet pull you choose. Here’s a step-by-step guide on how to measure cabinet pull hole size:
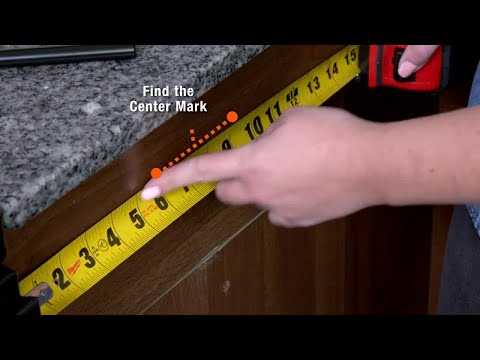
1. Determine the Center-to-Center Measurement
The center-to-center measurement, also known as the mounting hole spacing, refers to the distance between the centers of the two mounting holes on the cabinet pull. Measure this distance by placing a tape measure or ruler against the center of one hole and extending it to the center of the other hole.
2. Choose an Appropriate Drill Bit Size
Once you have the center-to-center measurement, you can determine the appropriate drill bit size. The drill bit size should match the width of the mounting holes on the cabinet pull. Most cabinet pulls come with pre-drilled holes, so you’ll typically need to use a bit that matches the size of these holes.
3. Use a Depth Stop Collar
To ensure that the holes are drilled to the correct depth, it’s helpful to use a depth stop collar on your drill bit. The depth stop collar allows you to drill the holes to a consistent depth, preventing the bit from drilling too deep and potentially damaging the cabinet material.
4. Mark the Hole Placement
Before drilling the holes, mark the exact placement on your cabinet. Use a level or a measuring tape to ensure that the holes are evenly spaced and align with the center line of the cabinet.
5. Drill the Holes
With the appropriate drill bit and depth stop collar in place, carefully drill the holes at the marked locations. Keep the drill level and apply even pressure to prevent any damage to the cabinet material. It’s a good idea to drill a small pilot hole first before using the larger drill bit to ensure accuracy.
By following these steps, you can accurately measure and drill the cabinet pull holes, ensuring a professional and secure installation of your cabinet pulls.
Choosing the Correct Drill Bit Size
When it comes to installing cabinet pulls, it is important to choose the correct drill bit size. The right size of the drill bit will ensure that the holes you drill are the perfect fit for the pulls, allowing them to be secured firmly and evenly.
1. Measure the Pulls
To choose the correct drill bit size, you need to start by measuring the diameter of the cabinet pulls. Use a caliper or ruler to get an accurate measurement of the width of the pulls at their widest point. This measurement will determine the size of the drill bit you should use.
2. Matching the Pulls with Drill Bit Size
Once you have measured the pulls, you can match this size with the appropriate drill bit size. Drill bit sizes are generally indicated in fractions of an inch or in millimeters. Look for a drill bit size that matches the diameter of your pulls as closely as possible. If you cannot find an exact match, it is generally better to go with a slightly smaller size than a larger one.
3. Consider the Mounting Hardware
When choosing the drill bit size, also consider the mounting hardware that will be used to attach the pulls to the cabinet. Some mounting hardware requires larger holes than others. Check the specifications of the hardware and ensure that the drill bit you choose will accommodate it.
4. Test the Drill Bit Size
Before drilling your cabinet, it is a good idea to test the drill bit size on a scrap piece of wood or a hidden area of the cabinet. This will allow you to make sure that the size is correct and that it will create a clean and precise hole.
5. Use a Depth Guide
When drilling the holes for the cabinet pulls, it is important to use a depth guide to ensure that the holes are drilled to the correct depth. This will prevent the drill bit from going too deep and damaging the cabinet surface.
By following these steps and choosing the correct drill bit size, you can ensure that your cabinet pulls are installed securely and evenly, enhancing the overall appearance of your cabinets.
Common Drill Bit Sizes for Cabinet Pulls
When installing cabinet pulls, it’s important to choose the right drill bit size to ensure a secure and professional-looking installation. Here are some common drill bit sizes for cabinet pulls:
- 3/16 inch (4.8 mm): This drill bit size is commonly used for cabinet pulls with smaller screw sizes, such as 4-40 or 6-32. It creates a hole with a slight clearance for the screw, allowing for easy installation.
- 1/4 inch (6.4 mm): This drill bit size is often used for medium-sized cabinet pulls with screw sizes like 8-32 or 10-24. It provides a slightly larger hole than the 3/16-inch bit, allowing for a snug fit for the screw.
- 5/16 inch (7.9 mm): This drill bit size is suitable for larger cabinet pulls with screw sizes like 10-32 or 12-24. It creates a hole that gives enough clearance for the screw while still providing a secure fit.
It’s important to choose a drill bit size that matches the screw size of your cabinet pull. Using a drill bit that is too small can result in a hole that is too tight, making it difficult to insert the screw. On the other hand, using a drill bit that is too big can result in a hole that is too loose, compromising the stability of the pull. Always consult the manufacturer’s instructions or the packaging of the cabinet pull to determine the recommended drill bit size.
Remember to always wear protective eyewear and follow proper safety precautions when using power tools.
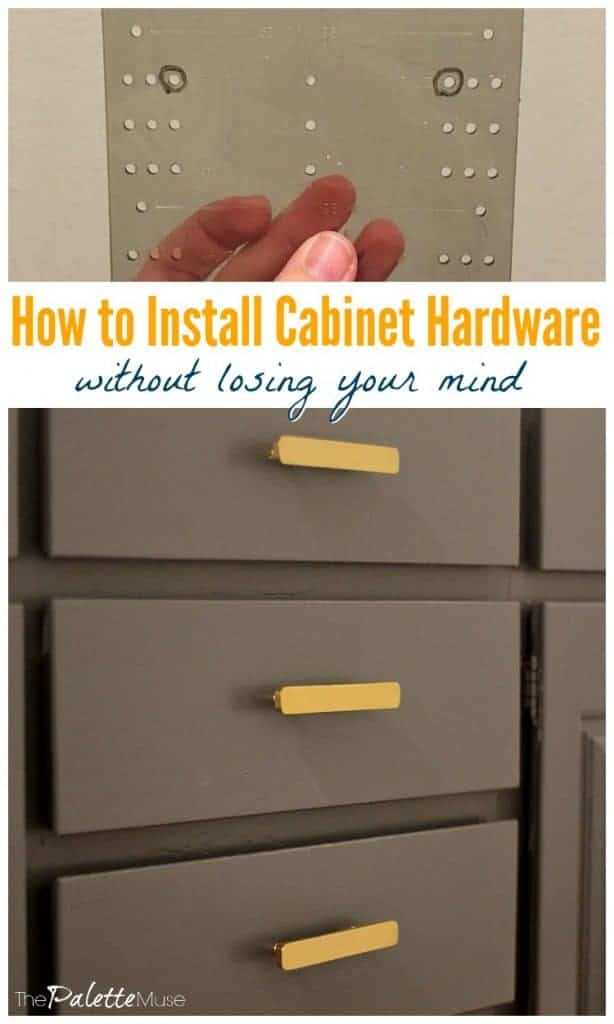
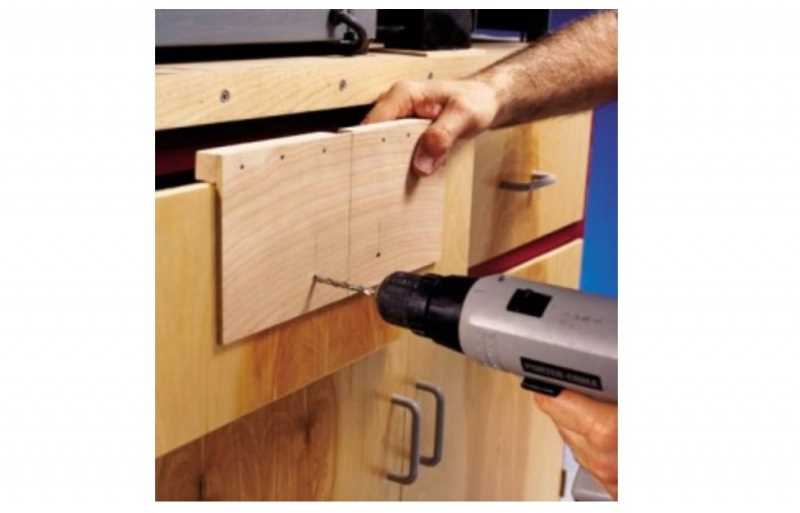
Using a Drilling Template
Using a drilling template can help ensure that your cabinet pulls are installed properly and evenly. A drilling template is a guide that you can use to mark the correct locations for drilling the holes for the pulls. It eliminates the need for measuring and guessing, resulting in a more precise installation.
Benefits of Using a Drilling Template
- Accuracy: By using a drilling template, you can ensure that the holes for your cabinet pulls are drilled at the exact right locations. This helps to create a professional finish and eliminates the risk of unevenly placed pulls.
- Efficiency: A drilling template saves you time and effort by eliminating the need for measuring and marking the hole locations. You can simply align the template with the desired position, mark the holes, and start drilling.
- Consistency: Using a drilling template ensures that all the pulls in your project are installed at the same position and angle. This creates a cohesive look and avoids any visual inconsistencies that may result from manual measurements.
Steps to Use a Drilling Template
- Select the Right Template: Choose a drilling template that matches the hole spacing and size of your cabinet pulls. Templates are typically designed for common pull sizes, so make sure to check the specifications.
- Mark the Cabinet: Position the template on the cabinet door or drawer front and align it according to your desired pull placement. Use a pencil or marker to mark the hole locations through the template holes.
- Prepare for Drilling: Secure the cabinet door or drawer front to prevent it from moving during the drilling process. You can use clamps or a vice grip to hold it in place.
- Drill the Holes: Using a drill bit that matches the size of the holes in the template, carefully drill through the marked locations. Make sure to drill straight and steady to avoid any damage to the cabinet or the template.
- Remove the Template: Once you have drilled all the holes, remove the drilling template from the cabinet. Clean any pencil or marker marks that may be left behind with a soft cloth or an eraser.
- Install the Cabinet Pulls: With the holes drilled, you can now install your cabinet pulls. Insert the screws through the pulls and into the drilled holes, tightening them securely with a screwdriver or drill.
Using a drilling template can make the installation of cabinet pulls much easier and more accurate. It takes the guesswork out of measuring and marking, resulting in a professional-looking finish. So, consider using a drilling template for your next cabinet pull installation project.
Testing the Drill Bit Size
Before drilling any holes in your cabinets, it is important to test the drill bit size to ensure it matches the size of your cabinet pulls. Here are a few steps to follow when testing the drill bit size:
1. Gather your materials
Make sure you have all the necessary materials on hand. This includes your chosen drill bit set, a piece of scrap wood, your cabinet pulls, and a measuring tape or ruler.
2. Mark your test holes
Using a pencil or marker, mark the locations where you want to drill your test holes on the scrap piece of wood. Make sure to position the marks at the same distance apart as on your cabinets.
3. Drill the test holes
Using your drill and the selected drill bit, carefully drill the test holes on the marked spots of the scrap wood. Apply even pressure and avoid tilting the drill to ensure accurate results.
4. Test the drill bit size
Now it’s time to test the drill bit size. Insert the cabinet pull into one of the test holes and check if it fits snugly. If the hole is too large and the pull feels loose, you will need to use a smaller drill bit. Conversely, if the pull doesn’t fit into the hole, you will need a larger drill bit.
5. Adjust the drill bit size if necessary
If the test hole is not the correct size, try using a different drill bit from your set and repeat the process until you find the perfect fit. It’s better to err on the side of caution and choose a slightly smaller drill bit rather than a larger one, as you can always widen the hole if needed.
Remember to double-check the measurements and test the fit of the drill bit on the scrap wood before drilling any holes on your cabinets. This will help prevent any mistakes and ensure that your cabinet pulls fit perfectly.
FAQs: Drill Bit Sizes for Cabinet Pulls
1. What is the recommended drill bit size for cabinet pulls?
The recommended drill bit size for cabinet pulls is typically 3/16 inch. However, it is always important to check the instructions provided by the manufacturer of the cabinet pulls you are using, as they may have specific recommendations for their products.
2. Can I use a different drill bit size for cabinet pulls?
While it is generally recommended to use the recommended drill bit size, you may be able to use a slightly different size if necessary. However, using a drill bit that is too large or too small can result in problems with the installation and may compromise the stability and functionality of the cabinet pulls.
3. How do I determine the correct drill bit size for cabinet pulls?
The correct drill bit size for cabinet pulls can be determined by measuring the diameter of the mounting holes on the pulls themselves. Most cabinet pulls have a standard diameter, but it is still important to measure each individual pull to ensure accuracy.
4. Are there any other factors to consider when choosing a drill bit size for cabinet pulls?
Yes, there are a few other factors to consider when choosing a drill bit size for cabinet pulls. These include the material of the pulls and the type of cabinet or drawer front you are installing them on. For harder materials, such as metal or hardwood, a slightly larger drill bit size may be necessary to ensure a proper fit.
5. Are there any guidelines for drilling holes for cabinet pulls?
Yes, there are a few guidelines to follow when drilling holes for cabinet pulls. First, make sure to measure and mark the correct placement for each pull before drilling. Use a drilling template if necessary to ensure consistent hole placement. When drilling, start with a pilot hole using a smaller drill bit before using the recommended drill bit size for the final hole. This will help prevent any damage or splintering of the cabinet or drawer front.
| Cabinet Pull Diameter | Recommended Drill Bit Size |
|---|---|
| 1 inch or smaller | 3/16 inch |
| 1 ⅛ inch to 1 ¼ inch | ¼ inch |
| 1 ½ inch to 2 inch | ⅜ inch |
These are general guidelines and it is always important to check the specific recommendations of the manufacturer for the cabinet pulls you are using.
FAQ:
What is the standard drill bit size for cabinet pulls?
The standard drill bit size for cabinet pulls is typically 3/16 inch.
Can I use a different size drill bit for cabinet pulls?
Yes, you can use a different size drill bit for cabinet pulls if you prefer, but it is recommended to stick to the standard 3/16 inch size to ensure a secure fit.
What happens if I use a drill bit that is too small for the cabinet pulls?
If you use a drill bit that is too small, the cabinet pulls may not fit properly and could be loose or wobbly.
What happens if I use a drill bit that is too large for the cabinet pulls?
If you use a drill bit that is too large, the cabinet pulls may be oversized and may not look aesthetically pleasing. Additionally, they may not fit securely and could cause damage to the cabinet doors or drawers.
How do I determine the correct size drill bit for my cabinet pulls?
To determine the correct size drill bit for your cabinet pulls, you can refer to the manufacturer’s instructions or measure the diameter of the screw that comes with the pulls. You should then choose a drill bit that is slightly smaller than the screw diameter to ensure a snug fit.
Video:


Meet Harrison Clayton, a distinguished author and home remodeling enthusiast whose expertise in the realm of renovation is second to none. With a passion for transforming houses into inviting homes, Harrison's writing at https://thehuts-eastbourne.co.uk/ brings a breath of fresh inspiration to the world of home improvement. Whether you're looking to revamp a small corner of your abode or embark on a complete home transformation, Harrison's articles provide the essential expertise and creative flair to turn your visions into reality. So, dive into the captivating world of home remodeling with Harrison Clayton and unlock the full potential of your living space with every word he writes.


