Charging Tips: How to Charge a Black and Decker Drill Battery

Having a fully charged battery is essential for any drill, and the Black and Decker drill is no exception. Whether you’re working on a DIY project or tackling a professional job, knowing how to effectively charge your Black and Decker drill battery can save you time and frustration. In this article, we will provide you with some valuable charging tips to ensure that your Black and Decker drill battery is always ready to go when you need it.
1. Use the original charger: To ensure the best performance and longevity of your Black and Decker drill battery, it is recommended to use the original charger that came with the drill. Other chargers may not provide the necessary voltage or current, leading to subpar charging results.
2. Plug it in correctly: When connecting your drill battery to the charger, make sure to match the polarity correctly. Most Black and Decker drill batteries have clear markings indicating the positive and negative terminals. Plugging it in the wrong way may result in ineffective charging or even damage to the battery.
3. Avoid overcharging: While it may be tempting to leave your drill battery charging overnight, it is essential to avoid overcharging. Overcharging can decrease the battery’s overall lifespan and may even lead to safety hazards. Most Black and Decker drill batteries come with built-in safeguards to prevent overcharging, but it is still advisable to unplug the charger as soon as the battery is fully charged.
4. Store in a cool, dry place: When not in use, it is important to store your Black and Decker drill battery in a cool and dry place. Extreme temperatures and humidity can have a negative impact on the battery’s performance and lifespan. Additionally, keeping it away from direct sunlight and other heat sources can prevent overheating and potential damage to the battery.

By following these charging tips, you can ensure that your Black and Decker drill battery remains in optimal condition, allowing you to tackle any project with confidence. Remember to always prioritize safety and refer to the manufacturer’s guidelines for specific charging instructions.
Tips for Charging Black and Decker Drill Battery
1. Use the Correct Charger
It is important to use the correct charger for your Black and Decker drill battery. using a charger not specifically designed for your battery can lead to damage or reduced battery life. Always check the user manual or manufacturer’s instructions for the recommended charger.
2. Fully Drain and Recharge Regularly
To maintain optimal battery performance, it is recommended to fully drain and recharge your Black and Decker drill battery regularly. This helps to prevent memory effect and keeps the battery in good condition. However, do not fully discharge lithium-ion batteries, as this can also reduce their lifespan.
3. Charge in a Cool Environment
Avoid charging your Black and Decker drill battery in extreme temperatures. Charging in high temperatures can decrease the battery’s lifespan, while charging in low temperatures can slow down the charging process. Ideally, charge your battery in a cool environment for the best results.
4. Avoid Overcharging
Overcharging can damage the battery and reduce its lifespan. Once your Black and Decker drill battery is fully charged, unplug it from the charger. Leaving it connected to the charger for extended periods can lead to overcharging.
5. Check the Charging Status
Most Black and Decker drill batteries have a charging indicator light to show the charging status. Make sure to check the light regularly to ensure proper charging. If the light does not turn on or indicates a problem, consult the user manual or contact the manufacturer for assistance.

6. Store the Battery Properly
If you need to store your Black and Decker drill battery for an extended period, make sure to store it in a cool and dry place. Avoid extreme temperatures and moisture, as they can damage the battery. It is also recommended to charge the battery to around 40-50% before storage.
7. Replace the Battery if Necessary
If your Black and Decker drill battery no longer holds a charge or does not perform as expected, it may be time to replace it. Consider purchasing a genuine replacement battery from the manufacturer or an authorized dealer to ensure compatibility and optimal performance.
8. Safety Precautions
- Always follow the safety instructions provided by Black and Decker for charging batteries.
- Avoid exposing the battery to fire or extreme heat.
- Do not disassemble the battery or attempt to repair it yourself.
- If you notice any abnormalities such as swelling or leakage, stop using the battery and contact the manufacturer.
- Keep the battery out of reach of children.
Understanding the Battery
The battery is an essential component of your Black and Decker drill, as it provides the power needed for the tool to operate. Understanding how the battery works and how to charge it properly is essential for extending its lifespan and ensuring optimal performance.
Battery Types
Black and Decker offers a variety of battery types for their drills, including Nickel-Cadmium (NiCd) and Lithium-Ion (Li-Ion) batteries.

NiCd batteries are known for their durability and ability to handle high-power applications. However, they can suffer from the memory effect, which can result in reduced battery capacity over time if not properly charged and discharged.
Li-Ion batteries, on the other hand, are lighter and have a higher energy density, providing longer runtimes and fewer restrictions on charging cycles. They do not suffer from the memory effect and can be charged at any time during their discharge cycle.
Battery Capacity
The battery capacity is measured in ampere-hours (Ah) and determines how long the battery can provide power to the drill. A higher Ah rating indicates a longer runtime.
It is important to match the battery capacity to the demands of your drilling tasks. If you frequently tackle heavy-duty projects, a higher capacity battery is recommended to ensure sufficient power throughout the job.
Battery Charging
To charge your Black and Decker drill battery, follow these steps:

- Make sure the charger is compatible with your battery type.
- Insert the battery into the charger, ensuring proper alignment of the contacts.
- Plug the charger into a power outlet.
- Wait for the charging process to complete. The charger’s indicator light may change color or turn off when the battery is fully charged.
- Remove the battery from the charger.
Battery Maintenance
To prolong the lifespan of your drill battery, consider the following maintenance tips:
- Avoid overcharging the battery, as it can lead to reduced capacity and performance.
- Store the battery in a cool, dry place when not in use.
- Keep the battery terminals clean and free from dirt or debris.
- Avoid exposing the battery to extreme temperatures, as it can affect its performance.
- Periodically discharge and recharge the battery to help prevent the memory effect (for NiCd batteries only).
Conclusion

Understanding the battery and following proper charging and maintenance practices can prolong its lifespan and ensure optimal performance of your Black and Decker drill. Take the time to familiarize yourself with the specific battery type and capacity requirements of your drill to maximize its capabilities.
Choosing the Right Charger
When it comes to charging your Black and Decker drill battery, using the right charger is essential. The charger you choose will have a significant impact on the charging time and the overall lifespan of your battery.
Here are some factors to consider when selecting a charger:

- Compatibility: Ensure that the charger you select is compatible with your Black and Decker drill battery. Using a charger that is not designed for your specific battery may lead to inefficient charging or even damage to the battery.
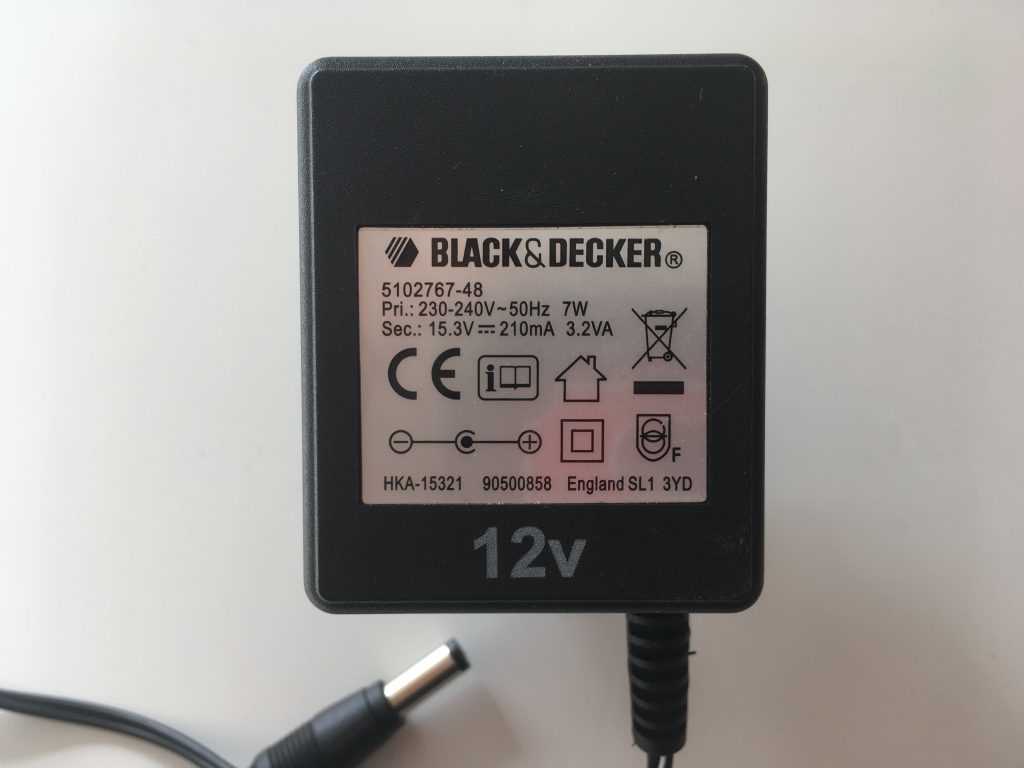
- Voltage and Amperage: Check the voltage and amperage ratings of your battery and choose a charger that matches or closely matches these specifications. Using a charger with significantly different voltage or amperage can result in improper charging and may shorten the lifespan of the battery.
- Charging Time: Consider the charging time offered by the charger. Some chargers are designed to provide faster charging, while others may take longer. Select a charger that suits your needs and preferences.
- Safety Features: Look for chargers with built-in safety features such as overcharge protection, short circuit protection, and temperature control. These features can help prevent damage to the battery and reduce the risk of accidents during the charging process.
- Brand Authenticity: It is recommended to choose chargers from reliable brands or manufacturers. Authentic chargers often have better quality control, ensuring optimal charging performance and safety.
Remember to always follow the manufacturer’s guidelines and recommendations when charging your Black and Decker drill battery. Using the right charger will ensure efficient and safe charging, prolonging the lifespan of your battery and maintaining its performance.
Checking the Battery Level
It is important to check the battery level of your Black and Decker drill before starting any project. This will ensure that you have enough power to complete the task at hand.
Step 1: Remove the Battery
Before checking the battery level, make sure the drill is turned off and remove the battery from the tool.
Step 2: Inspect the Battery
Take a look at the battery and check for any damages, such as cracks or leaks. If you notice any such damage, do not attempt to charge the battery and replace it instead.
Step 3: Check the Battery Indicator
Most Black and Decker drill batteries come with a built-in battery indicator. This indicator can be in the form of LED lights or a gauge on the battery itself.
- If there are LED lights, check how many of them are lit up. Typically, more lights indicate a higher battery level.
- If there is a gauge, check the position of the needle or the level indicated. A higher position or a higher level indicates a higher battery capacity.
Based on the battery indicator, you can determine if the battery needs to be charged or if it still has enough power for your project.
Step 4: Use a Multimeter (Optional)
If your Black and Decker drill battery does not have a built-in battery indicator, you can use a multimeter to measure the voltage of the battery. This will give you an idea of its current charge level.
- Set the multimeter to the DC voltage setting.
- Connect the red probe to the positive terminal of the battery and the black probe to the negative terminal.
- Read the voltage displayed on the multimeter. A fully charged battery should have a voltage close to its rated voltage, while a partially charged or empty battery will have a lower voltage.
By following these steps, you can easily check the battery level of your Black and Decker drill and ensure that it is properly charged before starting any project.
Proper Charging Technique
Charging your Black and Decker drill battery properly is essential for ensuring optimal performance and longevity. Here are some tips to help you charge your battery correctly:
1. Use the Right Charger
Always use the charger that came with your Black and Decker drill. Using a charger from a different manufacturer may not provide the correct voltage and could damage your battery.
2. Plug into a Stable Power Source
When charging your battery, make sure to plug the charger into a stable power source. Avoid using extension cords or power strips, as they can cause voltage fluctuations, which may affect the charging process.
3. Check the Battery Capacity
Before charging, check the remaining capacity of your battery. If the battery is completely drained, it’s recommended to allow a short resting period before charging. This will help maintain the battery’s overall health.
4. Remove the Battery from the Drill
Detach the battery from the drill before charging. Charging the battery while it’s still connected to the drill may lead to inefficient charging or even cause damage to the drill.
5. Connect the Charger
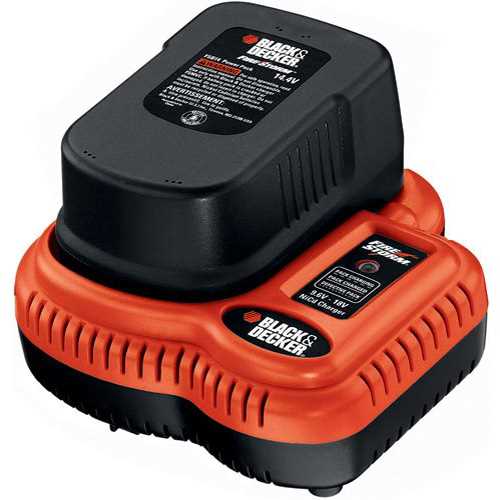
Connect the charger to the battery by aligning the charging pins on the charger with the corresponding slots on the battery. Ensure a secure fit to maintain a proper connection throughout the charging process.
6. Monitor the Charging Process
Once the charger is connected, the charging process will begin. Most Black and Decker drill chargers have an LED indicator that will show the charging progress. Monitor the indicator to ensure the battery is charging as expected.
7. Allow Sufficient Charging Time
Black and Decker drill batteries typically take a few hours to fully charge. Make sure to allow sufficient time for the battery to charge completely. Avoid interrupting the charging process as it may affect the battery’s performance.
8. Store the Battery Properly
After charging, remove the battery from the charger and store it in a cool, dry place. Avoid exposing the battery to extreme temperatures or moisture, as this can degrade its performance and shorten its lifespan.
Following these proper charging techniques will help ensure that your Black and Decker drill battery stays in good condition and provides optimal performance for your DIY projects.
Safety Measures
- Always read the user manual and instructions provided by Black and Decker before charging your drill battery. This will ensure that you are aware of any specific safety precautions or guidelines.
- Before inserting the battery into the charger, make sure both the battery and charger are in good condition. Inspect them for any damage or signs of wear. If you notice any issues, do not use the battery or charger and contact Black and Decker for assistance.
- Never expose the battery or charger to extreme temperatures. Avoid charging the battery in hot environments or placing it near sources of heat. Also, do not expose it to freezing temperatures.
- Always use the charger provided by Black and Decker or a compatible charger specifically designed for the drill battery. Using an improper charger can damage the battery or pose a safety risk.
- Ensure that the charger is plugged into a grounded outlet. Avoid using extension cords or power strips, as they may not provide a stable electrical connection.
- Do not charge the battery in close proximity to flammable materials or liquids. Keep the charging area clean and free from any potential hazards.
- If you notice any unusual smells or smoke coming from the battery or charger during the charging process, immediately unplug the charger and remove the battery. Contact Black and Decker for further instructions.
- Always store the drill battery in a cool, dry place. Avoid storing it in direct sunlight or near sources of excessive heat.
- Do not disassemble the battery or attempt to repair it yourself. All repairs should be done by a qualified technician.
- If you no longer need the battery or it becomes damaged, dispose of it properly according to local regulations. Do not throw it in the trash or incinerate it.
Length of Charging Time
One important factor to consider when charging a Black and Decker drill battery is the length of charging time. The charging time required can vary depending on the model of the drill and the capacity of the battery.
It is recommended to consult the user manual or the manufacturer’s instructions for the specific charging time required for your Black and Decker drill battery. However, as a general guideline, it usually takes around 3 to 5 hours to fully charge a Black and Decker drill battery.
It is important to note that overcharging the battery can reduce its overall lifespan and performance. Therefore, it is crucial to ensure that you do not exceed the recommended charging time. Most modern Black and Decker drill batteries are equipped with a built-in mechanism that automatically shuts off the charging process once the battery is fully charged, preventing overcharging.
During the charging process, it is advisable to monitor the battery and charger to ensure that there are no unusual heating or overheating issues. If you notice any abnormalities or the charging process takes significantly longer than usual, it is recommended to stop the charging process and consult the manufacturer or a professional for further assistance.
Avoiding Overcharging
In order to maximize the lifespan of your Black and Decker drill battery, it is important to avoid overcharging. Overcharging can lead to decreased battery performance and capacity over time. Follow these tips to prevent overcharging:
- Use the correct charger: Ensure that you are using the charger specifically designed for your Black and Decker drill battery. Using a charger with different specifications may result in overcharging.
- Do not leave the battery plugged in: Once your drill battery is fully charged, unplug it from the charger. Leaving the battery plugged in for extended periods of time can cause overcharging.
- Monitor charging time: Keep track of the charging time recommended by the manufacturer. Overcharging can occur if you exceed the recommended charging time.
- Store the battery at the right temperature: Extreme temperatures can affect the performance of your drill battery and increase the risk of overcharging. Store the battery in a cool, dry place away from direct sunlight or excessive heat.
- Inspect the charger and battery: Regularly check the charger and battery for any signs of damage or wear. Damaged equipment can lead to overcharging, so it is important to replace any faulty components.
By following these tips, you can ensure that your Black and Decker drill battery remains in good condition and avoids overcharging, resulting in optimal performance during your drilling tasks.
Storing the Battery
Properly storing your Black and Decker drill battery is important for maintaining its performance and extending its lifespan. Here are some tips on how to store your battery:
- Remove the Battery: Before storing the battery, it is recommended to remove it from the drill. This prevents any accidental discharge or damage to the battery while in storage.
- Store in a Cool and Dry Place: Find a cool, dry place to store your battery. Extreme temperatures can degrade the battery, so avoid storing it in areas that are too hot or too cold.
- Avoid Moisture: Moisture can damage the battery, so it is best to keep it away from any damp environments or areas with high humidity. If the battery does get wet, make sure to dry it thoroughly before storing.
- Protect from Impact: To prevent any physical damage to the battery, store it in a protective case or wrap it in a soft cloth. This will help protect it from accidental drops or bumps.
- Avoid Long-Term Storage: It is not recommended to store the battery for long periods without use. Regular use and charging can help maintain the health of the battery. If you need to store the battery for an extended period, make sure to charge it to around 40-60% capacity before storing.
Following these storage tips will help ensure your Black and Decker drill battery remains in good condition, ready for use whenever you need it.
FAQ:
How long does it take to fully charge a Black and Decker drill battery?
The charging time for a Black and Decker drill battery depends on several factors, including the age and condition of the battery, as well as the charger being used. In general, it can take anywhere from 1 to 4 hours to fully charge a Black and Decker drill battery.
Can I leave my Black and Decker drill battery on the charger overnight?
It is generally not recommended to leave your Black and Decker drill battery on the charger overnight. Overcharging can reduce the lifespan of the battery and may even cause it to overheat or re. It is advisable to monitor the charging progress and remove the battery from the charger once it is fully charged, or follow the manufacturer’s instructions for charging times and procedures.
What should I do if my Black and Decker drill battery is not holding a charge?
If your Black and Decker drill battery is not holding a charge, there are a few things you can try to resolve the issue. First, make sure the battery is securely attached to the drill and that the contacts are clean and free from dirt or debris. If the problem persists, try using a different charger or charging the battery in a different outlet. If none of these steps work, it may be time to replace the battery.
Can I use a third-party charger to charge my Black and Decker drill battery?
While it is possible to use a third-party charger to charge your Black and Decker drill battery, it is generally recommended to use the charger that came with the drill or a charger that is specifically designed for use with Black and Decker batteries. Third-party chargers may not provide the correct voltage or current for optimal charging, which can result in reduced battery life or potential damage to the battery.
Video:


Harrison Clayton
Meet Harrison Clayton, a distinguished author and home remodeling enthusiast whose expertise in the realm of renovation is second to none. With a passion for transforming houses into inviting homes, Harrison's writing at https://thehuts-eastbourne.co.uk/ brings a breath of fresh inspiration to the world of home improvement. Whether you're looking to revamp a small corner of your abode or embark on a complete home transformation, Harrison's articles provide the essential expertise and creative flair to turn your visions into reality. So, dive into the captivating world of home remodeling with Harrison Clayton and unlock the full potential of your living space with every word he writes.


