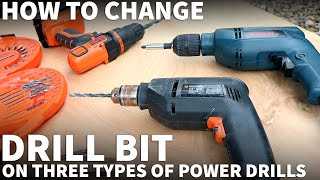
Changing Drill Bit on Black and Decker: No Key Required

Changing drill bits can be a hassle, especially when you need to find the right key or wrench to loosen and tighten the chuck. However, with the Black and Decker drill, you can change drill bits without the need for any keys or tools. This feature makes it quick and easy to switch between different drill bits, saving you time and frustration.
The Black and Decker drill utilizes a keyless chuck, which allows you to easily change drill bits by hand. The chuck is designed to securely hold the drill bit in place during use, preventing any slippage or wobbling. To change the drill bit, simply twist the chuck counterclockwise to loosen it, remove the old drill bit, and insert the new one. Then, twist the chuck clockwise to tighten it and ensure that the drill bit is securely in place.
This keyless chuck system not only simplifies the process of changing drill bits, but it also provides a secure and reliable connection between the drill bit and the drill. This is important for maintaining stability and accuracy while drilling. Whether you are a professional tradesperson or a DIY enthusiast, the keyless chuck feature on the Black and Decker drill will surely enhance your drilling experience.
“With the Black and Decker drill, you can change drill bits without the need for any keys or tools.”
So, next time you find yourself needing to change drill bits, consider using a Black and Decker drill. With its keyless chuck feature, you can quickly and easily switch between different drill bits, saving you time and effort. Whether you are working on a small home improvement project or a larger construction job, the Black and Decker drill is a reliable and convenient tool that will help you get the job done efficiently.
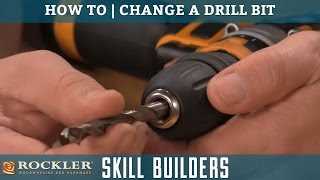
How to Change Drill Bit on Black and Decker
Changing the drill bit on a Black and Decker drill is a simple process that can be done without the need for a key. Follow these steps to safely and easily change your drill bit:

- Prepare the drill: Ensure that the drill is turned off and unplugged from any power source before beginning the process.
- Locate the chuck: The chuck is the part of the drill that holds the drill bit in place. It is typically located at the front of the drill.
- Unlock the chuck: Some Black and Decker drills have a locking mechanism to secure the chuck in place. If your drill has this feature, locate the lock button or switch and release it to unlock the chuck.
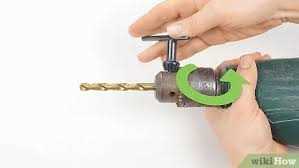
- Insert the hex key: Many Black and Decker drills come with a special hex key for changing the drill bit. Insert the hex key into the chuck and turn it counterclockwise to loosen the chuck jaws.
- Remove the old drill bit: Once the chuck jaws are loose, remove the old drill bit by pulling it out of the chuck.
- Choose a new drill bit: Select the appropriate drill bit for your project and ensure that it is compatible with your Black and Decker drill.
- Insert the new drill bit: Align the shank of the new drill bit with the jaws of the chuck and insert it firmly. Use the hex key to tighten the chuck jaws by turning it clockwise.
- Secure the chuck: Once the new drill bit is in place, secure the chuck by locking it, if applicable, or ensuring that the chuck jaws are tightened securely.
- Test the drill: After changing the drill bit, turn on the drill and test it to ensure that it is working properly.
Following these steps will allow you to easily change the drill bit on your Black and Decker drill without the need for a key. Remember to always handle the drill and drill bits with care to prevent injury.
Step-by-Step Guide
Gather the necessary tools
Before starting the process of changing the drill bit on your Black and Decker drill, make sure you have the following tools:
- Black and Decker drill
- Replacement drill bit
- Chuck key (if required)
Prepare the drill
- Make sure the drill is turned off and unplugged from the power source.
- If your Black and Decker drill has a chuck key, locate it and insert it into the chuck.
- Rotate the chuck key counterclockwise to loosen the chuck jaws.
Remove the old drill bit


- Hold the drill bit with one hand to prevent it from falling out.
- Rotate the chuck key counterclockwise to loosen the chuck jaws further.
- Once the jaws are loose enough, pull out the old drill bit.
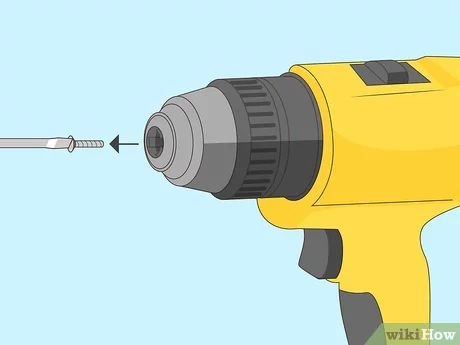
Insert the new drill bit
- Take the new drill bit and align the shank with the jaws of the chuck.
- Push the new drill bit into the chuck until it is secure.
- If your Black and Decker drill has a chuck key, use it to rotate the chuck key clockwise to tighten the jaws around the drill bit.
- Continue tightening until the drill bit is firmly held in place.
Test the drill
After inserting the new drill bit, it’s important to test the drill to ensure it is functioning properly.
- Plug the drill back into the power source.
- Turn on the drill and engage the trigger.
- Listen for any unusual noises or vibrations.
- Try drilling into a test material to confirm the functionality of the new drill bit.
Secure the drill
Once you have confirmed that the drill is working properly, you can secure it for storage or future use.
- Turn off the drill and unplug it from the power source.
- If your Black and Decker drill has a chuck key, remove it from the chuck.
- Store the drill and the chuck key in a safe place.
Necessary Tools
Before you begin changing the drill bit on your Black and Decker, you will need to gather the necessary tools. These tools will help make the process easier and ensure a successful drill bit change.
- Replacement drill bit: Depending on the project you are working on, you may need a specific type and size of drill bit.
- Protective gloves: Safety should always be a priority, so make sure to wear protective gloves to prevent any accidents or injuries.
- Safety glasses: Similar to gloves, safety glasses will protect your eyes from any flying debris or particles.
- Phillips head screwdriver: This tool will be used to loosen and tighten the screws that hold the drill bit in place.
- Optional: Drill bit extender: If you need to reach deeper or narrower areas, a drill bit extender can be helpful.
Having these tools ready before you start the drill bit change will ensure a smooth and hassle-free process. Additionally, it is always a good idea to read the manufacturer’s instructions and follow any safety guidelines provided.
Safety Precautions
- Always wear safety goggles to protect your eyes from flying debris.
- Make sure the power tool is turned off and unplugged before changing the drill bit.
- Do not touch the drill bit immediately after use, as it can be hot and cause burns.
- Keep your fingers away from the drill chuck and moving parts to prevent injury.
- Do not force the drill bit into the chuck, as this can damage the tool and cause injury.
- Do not use a drill bit that is damaged or worn out. Replace it with a new one.
- Always work in a well-lit and well-ventilated area to ensure proper visibility and minimize the risk of inhaling dust or fumes.
- Store the drill bits in a secure location, away from children and pets.
- Read and follow the manufacturer’s instructions and safety guidelines for your specific drill model.
Note: The above safety precautions are general guidelines. Please refer to the user manual of your Black and Decker drill for specific safety instructions.

Removing the Old Drill Bit
To remove the old drill bit from your Black and Decker drill, follow these steps:
- Power off the drill: Before removing the drill bit, make sure the drill is powered off and unplugged from the power source.
- Secure the drill: Place the drill on a stable surface to ensure that it won’t move around during the removal process.
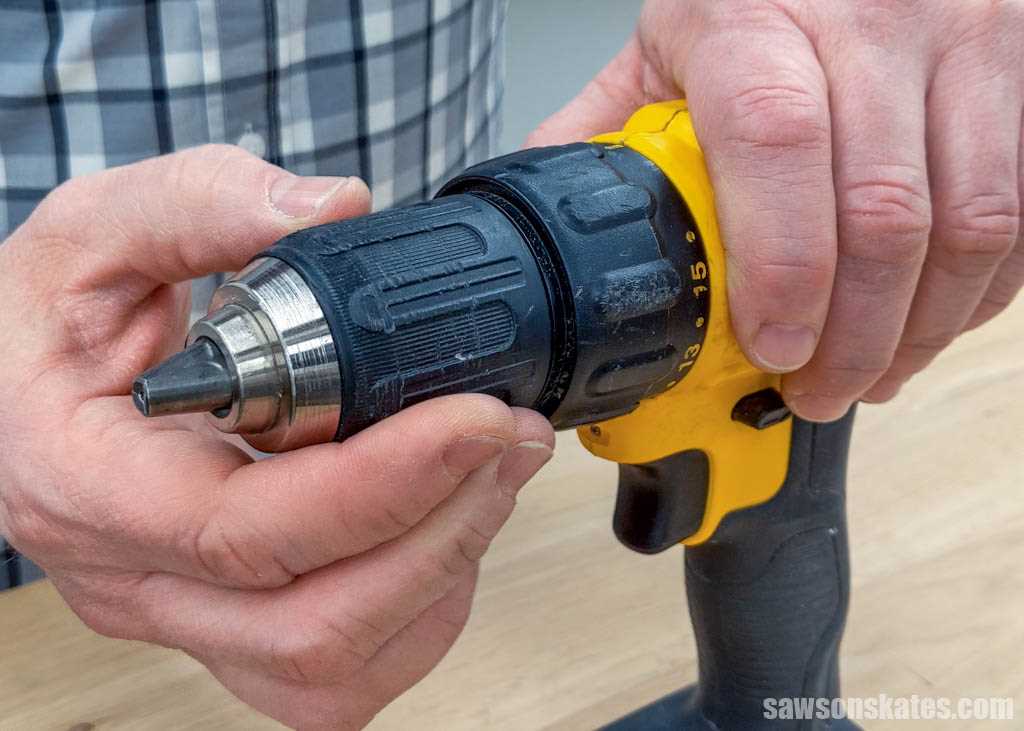
- Identify the chuck type: Take a look at the chuck of your drill to determine the type. Black and Decker drills typically use keyless chucks.
- Release the chuck: Hold the drill securely with one hand and use your other hand to hold the chuck sleeve. Rotate the chuck sleeve counterclockwise to release the jaws and open the chuck.
- Remove the old drill bit: Once the chuck is open, you can easily slide out the old drill bit from the jaws of the chuck.
Note: If the drill bit is stuck, you can tap on it lightly with a hammer or use a pair of pliers to provide extra grip for removal.
Now that you have successfully removed the old drill bit, you can proceed to the next step of inserting a new drill bit into the chuck of your Black and Decker drill.
Choosing the New Drill Bit
When it comes to choosing a new drill bit for your Black and Decker drill, there are a few factors to consider. The right drill bit can make all the difference in the success and ease of your drilling project.
Type of Material

The type of material you will be drilling into is an important consideration when choosing a new drill bit. Different materials, such as wood, metal, or concrete, require different types of drill bits. Make sure to select a drill bit specifically designed for the material you will be working with.
Size
The size of the drill bit is another important factor to consider. The size of the hole you need to drill will determine the size of the drill bit you should choose. Drill bits come in various sizes, typically measured in inches or millimeters. Consider the specifications of your project to determine the appropriate size.
Drill Bit Coating
Some drill bits come with special coatings that can enhance their performance and durability. For example, titanium-coated drill bits are known for their strength and ability to drill through tough materials. Consider the requirements of your project and choose a drill bit with an appropriate coating, if necessary.
Brand and Quality
Lastly, consider the brand and quality of the drill bit. Choosing a trusted brand and high-quality drill bit can ensure better performance and longevity. Look for reputable brands that have positive reviews and a track record of producing reliable drill bits.

By considering these factors, you can choose the right drill bit for your Black and Decker drill and tackle your drilling projects with confidence.
Installing the New Drill Bit
Step 1: Prepare the drill
Before installing the new drill bit, make sure your Black and Decker drill is turned off and unplugged. This ensures your safety during the installation process.
Step 2: Remove the old drill bit
- Locate the chuck on your Black and Decker drill. This is the part of the drill that holds the drill bit.
- Rotate the chuck counterclockwise to loosen it and open the jaws.
- Remove the old drill bit from the chuck by pulling it out gently.
- Inspect the chuck to make sure there are no obstructions or debris that could prevent the new drill bit from fitting properly.
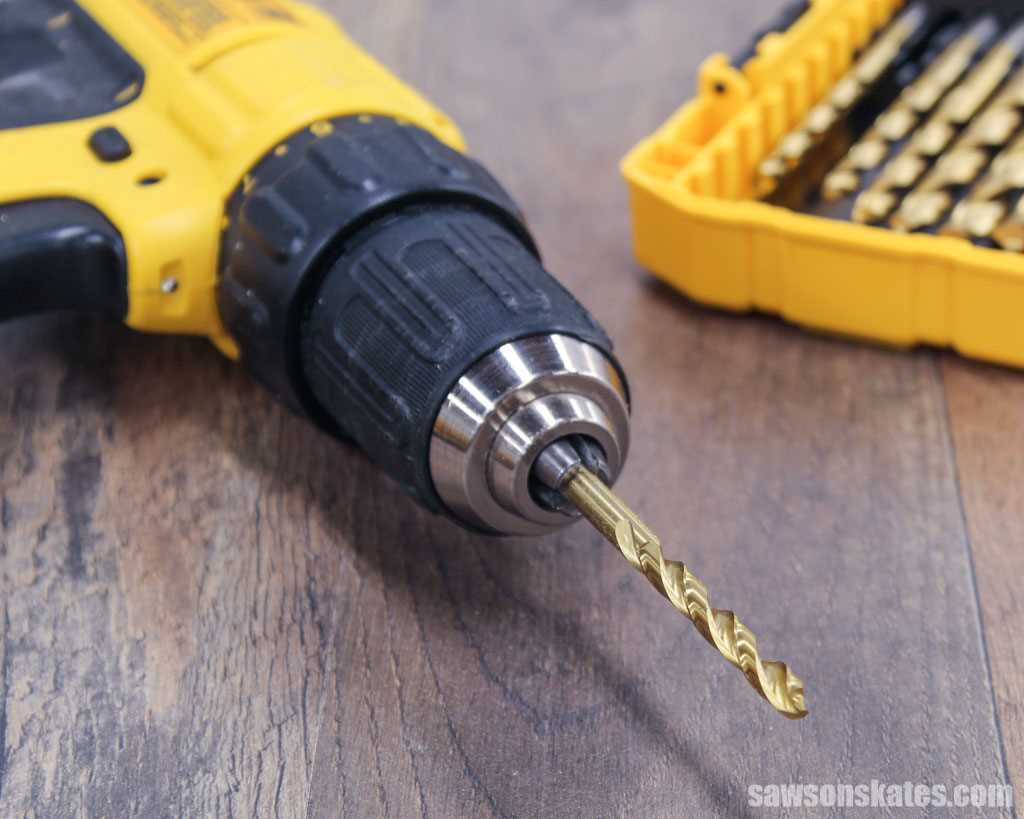
Step 3: Insert the new drill bit
- Choose the appropriate new drill bit for your specific task. Make sure the size and type of the new drill bit are suitable for the material you are planning to drill.
- Hold the new drill bit by the shank, which is the non-cutting end of the bit.
- Align the shank of the new drill bit with the chuck and insert it into the jaws of the chuck.
- Make sure the new drill bit is fully seated in the chuck.
- Tighten the chuck by rotating it clockwise until it firmly grips the new drill bit.
Step 4: Test the new drill bit
Once you have installed the new drill bit, you can test it by turning on your Black and Decker drill and running it at a low speed. This will help ensure that the new drill bit is securely held in the chuck and ready for use.
Note: It’s always a good idea to wear appropriate safety gear, such as safety glasses and gloves, when using power tools like drills.
Testing the New Drill Bit
Once you have successfully changed the drill bit on your Black and Decker drill, it’s time to test it out and see how it performs. Here are a few steps to follow when testing your new drill bit:
1. Select the Desired Speed and Torque
Before starting any drilling tasks, you need to select the appropriate speed and torque settings on your drill. This will depend on the material you are drilling into and the size of the hole you need to make. Consult the user manual or the manufacturer’s recommendations to determine the best settings for your specific application.
2. Secure the Workpiece
Next, make sure that the workpiece you are drilling into is securely clamped or held in place. This will prevent it from moving or spinning while drilling, ensuring accurate and safe results.
3. Align the Drill Bit
Position the tip of the drill bit at the desired starting point on the workpiece. Make sure it is perpendicular to the surface and aligned with the intended drilling angle. Double-check the position before proceeding to avoid any mistakes.
4. Start Drilling
Hold the drill firmly with both hands, keeping a stable grip. Apply gentle pressure and start the drilling motion. Keep the drill straight and steady as you penetrate the workpiece. Let the drill bit do the work and avoid excessive force, as this can cause damage to the bit or the workpiece.
5. Monitor Progress
As you drill, keep an eye on your progress. Pay attention to the speed and stability of the drill, as well as the quality of the hole being created. If you notice any issues or difficulties, stop drilling immediately and reassess the situation.
6. Clean Up
Once you have finished drilling, remove the drill bit from the workpiece. Clean up any debris or dust that may have accumulated during the drilling process. This will help maintain the performance and longevity of your drill bit.
By following these steps, you can effectively test your new drill bit and ensure that it is performing as expected. Remember to always prioritize safety and wear appropriate protective gear when operating power tools.
Maintenance Tips
Clean your drill regularly
Cleaning your drill regularly is an important step in its maintenance. This helps prevent the accumulation of dirt, dust, and debris, which can affect its performance. Use a dry cloth to wipe off any external dirt or dust from the drill body. If there is stubborn dirt or grime, you can use a mild soap solution and a soft brush to clean it. Avoid using harsh chemicals or abrasive materials that can damage the surface of the drill.
Inspect the drill bit
Regularly inspect the drill bit for any signs of wear or damage. Check for any chips, cracks, or dullness in the cutting edges. If you notice any damage, it’s important to replace the drill bit to ensure optimal performance and safety. You can easily remove and replace the drill bit according to the instructions mentioned in the previous section.
Lubricate moving parts
Lubricating the moving parts of your drill is essential for its smooth operation. Apply a small amount of lubricating oil to the chuck and chuck key to keep them functioning properly. Additionally, you can also lubricate the gears and other moving parts using a light machine oil. Be sure to follow the manufacturer’s instructions and recommendations for lubrication.
Store your drill properly
Proper storage is important to protect your drill from damage and maintain its performance. Store your drill in a dry and clean area where it is protected from moisture, dust, and extreme temperatures. Use the original storage case or a designated tool box to prevent any accidental damage. Additionally, always remove the drill bit before storing to prevent any unnecessary strain on the chuck.
Check the power cord
Regularly inspect the power cord for any signs of wear or damage. If you notice any frayed wires, exposed insulation, or loose connections, it’s important to replace the cord immediately. A damaged power cord can be a safety hazard and may cause electrical malfunctions. Always unplug the drill before inspecting or replacing the power cord.
Follow the manufacturer’s instructions
Always refer to the manufacturer’s instructions and guidelines for the proper use and maintenance of your drill. These instructions provide valuable information on recommended maintenance routines, safety precautions, and troubleshooting steps. Following the manufacturer’s instructions will help ensure the longevity and performance of your drill.
FAQ:
Is it difficult to change the drill bit on a Black and Decker drill?
No, changing the drill bit on a Black and Decker drill is a relatively simple process. Just follow the steps mentioned in the previous answer, and you should be able to change the drill bit without any issues. It may take a little bit of practice at first, but with time, you will become more proficient at it.
Do I need any special tools to change the drill bit on my Black and Decker drill?
No, you do not need any special tools to change the drill bit on your Black and Decker drill. The drill is designed to be easily adjustable without the need for any additional tools. Just follow the steps outlined in the previous answer, and you will be able to change the drill bit using only your hands.
Can I change the drill bit without using a key?
Yes, you can change the drill bit on a Black and Decker drill without using a key. The drill is equipped with a keyless chuck system, which allows you to change the drill bit by hand. Simply follow the steps mentioned earlier to loosen and tighten the chuck without the need for a key.
Is it safe to change the drill bit without turning off the drill?
No, it is not safe to change the drill bit without turning off the drill. Before changing the drill bit, always make sure that the drill is turned off and unplugged to avoid any accidental startup. By following this safety precaution, you can prevent any potential injuries or accidents while changing the drill bit.
Can I use any brand of drill bits with my Black and Decker drill?
Yes, you can use drill bits from any brand with your Black and Decker drill as long as they have the same shank size and type. However, it is always recommended to use drill bits that are specifically designed for your drill to ensure optimal performance and compatibility. Using the correct drill bits will also help prevent any unnecessary wear and tear on the drill chuck.
Video:


Meet Harrison Clayton, a distinguished author and home remodeling enthusiast whose expertise in the realm of renovation is second to none. With a passion for transforming houses into inviting homes, Harrison's writing at https://thehuts-eastbourne.co.uk/ brings a breath of fresh inspiration to the world of home improvement. Whether you're looking to revamp a small corner of your abode or embark on a complete home transformation, Harrison's articles provide the essential expertise and creative flair to turn your visions into reality. So, dive into the captivating world of home remodeling with Harrison Clayton and unlock the full potential of your living space with every word he writes.


