Best at home drill for putting up pictures
Decorating your walls with pictures can instantly transform any space and make it feel more personal and welcoming. However, hanging pictures can be a challenging task, especially if you want to achieve a perfectly straight and balanced look. Luckily, there is a simple at-home drill that can help you master the art of picture hanging.
The first step in this drill is to measure and mark the desired height and position for your picture on the wall. Take into consideration the size and weight of your picture, as well as the overall aesthetic of the room. Use a tape measure and a level to ensure accuracy in your measurements.
Next, it’s time to prepare the wall for hanging. Use a stud finder to locate the studs in the wall, as these will provide the most stability for your picture. Once you’ve located the studs, mark their positions with a pencil. If you can’t find any studs in the desired location, you can use wall anchors to secure your picture.
Best Drill for Hanging Pictures at Home
When it comes to hanging pictures at home, it’s important to make sure they are level and securely hung. One of the best drills for this task is to use a measuring tape and a pencil to mark the desired height and position on the wall.
After measuring and marking the wall, another effective drill is to use a level to make sure the line is straight. This can be done by placing the level against the wall and adjusting the position of the picture until it is level.
An additional drill that can be helpful is to use a stud finder to locate the studs in the wall. Hanging pictures on a stud will provide extra stability and prevent them from falling. The stud finder can be run along the wall until it detects a stud, and then the picture can be hung using a screw or nail.
Finally, a useful drill to consider is to use picture hanging hooks or adhesive strips. These can help to securely hold the picture in place without damaging the wall. The hooks or strips should be carefully positioned on the back of the picture and then pressed firmly against the wall to ensure they adhere properly.
In conclusion, the best drill for hanging pictures at home involves measuring and marking, checking for level, locating studs, and using appropriate hanging hooks or adhesive strips. By following these steps, you can ensure that your pictures are hung securely and level, adding a beautiful touch to your home decor.
Importance of a Level Picture
When putting up pictures in your home, it is important to ensure that they are level. Hanging a picture that is not level can not only be visually unappealing, but it can also create an unbalanced and unprofessional look in your space. Having a level picture demonstrates attention to detail and adds a sense of harmony to your decor.
One of the main reasons why a level picture is important is because it helps create a cohesive and balanced look in your home. When a picture is hanging crookedly, it throws off the symmetry of the room and can make everything feel off-kilter. A level picture, on the other hand, aligns with the surrounding elements and helps to pull the room together.
Additionally, a level picture also creates a more professional and polished look in your space. Whether you are hanging pictures in your home or in a professional setting, having them properly levelled shows that you take pride in your space and pay attention to even the smallest details. It gives off an impression of professionalism and care.
To ensure that your pictures are level, it is recommended to use a spirit level or a laser level. These tools can help you accurately determine if a picture is straight and assist you in achieving the desired level. Taking the time to properly level your pictures will not only enhance the aesthetic of your space but also showcase your commitment to quality and precision.
Tools and Materials Needed
When it comes to putting up pictures at home, you’ll need a few essential tools and materials to make the process easier and more efficient. Here are some of the key items you’ll need:
- Hammer: A hammer is a necessary tool for driving nails into the wall and hanging your pictures securely. Make sure to choose a hammer that is comfortable to hold and has a sturdy head.
- Nails: Nails are used to hang pictures on walls. It’s important to select the right length and thickness of nails based on the weight of your pictures and the type of wall you are working with.
- Measuring tape: To ensure that your pictures are properly aligned, it’s essential to have a measuring tape. This tool will help you accurately measure the distance between the pictures and the furniture or other objects in the room.
- Pencil: A pencil is useful for marking the spot on the wall where you want to place your picture. This helps ensure that you have the right placement before you start hammering.
- Level: A level is crucial for making sure that your pictures are perfectly straight. It will help you detect any tilting or misalignment and allow you to make the necessary adjustments.
- Wall anchors: If you are hanging pictures on drywall or plaster, you may need to use wall anchors to provide extra support. These anchors help distribute the weight of the picture and prevent the nail from damaging the wall.
- Screws and screwdriver: If you are hanging pictures on wooden surfaces or using picture frames with built-in hangers, screws and a screwdriver may be necessary tools.
Having these tools and materials on hand will make the process of putting up pictures at home much easier and ensure that your artwork is securely hung on the wall. It’s always a good idea to have a well-stocked toolbox for any home improvement projects like this.
Step-by-Step Guide to the Drill
Putting up pictures can be a challenging task, but with the right drill, it becomes much easier. Follow the step-by-step guide below to learn the best at-home drill for putting up pictures.
1. Gather the necessary materials: Before starting the drill, gather all the materials you will need. This includes a drill with the appropriate drill bit for your wall type, a measuring tape, a pencil, and the pictures or frames you want to hang.
2. Measure and mark: Use the measuring tape to determine the desired height and location for your pictures. Once you have determined the measurements, mark the spots on the wall with a pencil.
3. Prepare the drill: Attach the appropriate drill bit to the drill, making sure it is securely fastened. If you are unsure which drill bit to use, consult the instructions or ask for assistance at a hardware store.
4. Drill the holes: Position the drill over one of the marked spots on the wall and slowly drill a hole. Be sure to apply enough pressure to penetrate the wall without damaging it. Repeat this process for each marked spot.
5. Insert anchors: If you are hanging heavy pictures or frames, it is recommended to insert anchors into the drilled holes for added stability. Gently tap the anchors into the holes until they are flush with the wall.

6. Hang the pictures: Once the anchors are in place, use screws or hooks to hang your pictures or frames. Make sure they are secure and level before moving on to the next one.
7. Step back and admire: Take a step back and admire your handiwork. Adjust the pictures if necessary, and enjoy the new addition to your home decor.
By following this step-by-step guide, you can confidently put up pictures in your home using the best at-home drill for the job.
Benefits of Using the Drill
When it comes to putting up pictures at home, using a drill can bring several benefits. First and foremost, a drill provides the necessary power and precision to securely attach the picture frame to the wall. This ensures that the picture will be well-supported and won’t easily fall or get damaged. Additionally, using a drill allows for easier and quicker installation compared to manual methods such as using a hammer and nails. The drill’s efficiency helps save time and effort, making the overall process more convenient.

Another benefit of using a drill is that it offers versatility. Different drills come with various drill bits that can be adjusted according to the type of wall and picture frame being used. This versatility allows for greater flexibility when it comes to hanging pictures on different wall surfaces, such as drywall, concrete, or wood. Additionally, drills often have adjustable speeds and torque settings, allowing for precise control and preventing damage to the wall or frame.
Furthermore, using a drill can make the task of putting up pictures more accurate. Most drills come with built-in spirit levels or laser guides, which help ensure that the picture frame is perfectly level. This eliminates the need for additional tools and helps achieve a professional-looking result. Additionally, drills make it easier to create evenly spaced and aligned arrangements of multiple pictures, adding a touch of aesthetic appeal to any room.
In conclusion, the use of a drill when putting up pictures at home brings several benefits. It provides power and precision, saves time and effort, offers versatility, and enables accuracy in the installation process. By utilizing a drill, homeowners can ensure that their pictures are securely and correctly mounted on the wall, enhancing the overall appearance of their living space.
5 Best at home drill for putting up pictures

Electric Nail Files, Professional Nail Drill for Acrylic Nails Gel, Electric Nail Drill 20000 RPM, Adjustable Speed E File for Nails, Electric Manicure...
Features
| Part Number | CND-001-Purple |
| Model | CND-001 |
| Color | Purple |
| Size | Purple |

JYGMPRO Cordless Drill Driver 21V, Cordless Hammer Drill with 2 Batteries 2000mAh, 25+3 Torque, 42N.m Max Electric Drill, 30PCS Drill Bits, 2 Speed, LED...
Features
| Part Number | DZL00010 |
| Model | DZL00010 |
| Color | Cordless Drill 21v-uk |
| Size | 21V Electric Drill & 30pcs Kit |
Cordless Drill 18V, Electric Drill Driver 1500mAh Battery, 28N.m, 15+1 Torque Setting with 15 Pcs of Accessories, 0-1500RPM Variable Speed for DIY, Drilling...
Features
| Color | Black |

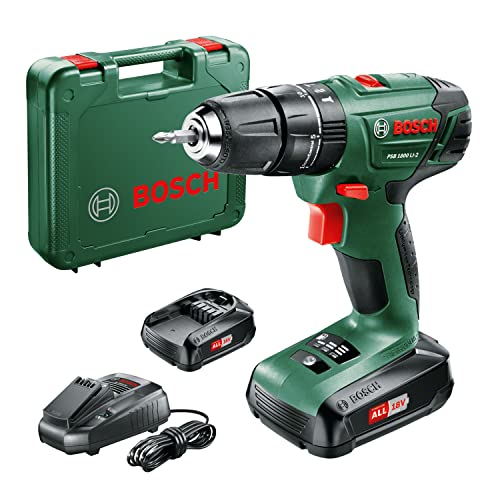
Bosch Home and Garden Cordless Combi Drill PSB 1800 LI-2 (2 x 18 volt batteries, 20 torque settings, drill and impact function, in carrying case)
Features
| Part Number | 06039A3371 |
| Model | 06039A3371 |
| Color | Psb 1800 Li-2 |
| Release Date | 2014-07-11T00:00:01Z |
| Size | PSB 1800 LI-2 |
BEAUTURAL Professional Electric Manicure and Pedicure Kit, Nail File Drill, Powerful 13-Speed Nail Drill and 7 Attachment for Salon-Quality Care of Hands and...
Features
| Part Number | 719UK-0003 |
| Model | 719-0003 |
| Color | White |
| Is Adult Product | |
| Size | 8 Count (Pack of 1) |
Question-answer:,
What are the benefits of using a drill?
Using a drill allows for faster and more efficient drilling of holes in various materials.
Can a drill be used for tasks other than drilling holes?
Yes, drills can also be used for driving screws and bolts, as well as for sanding, polishing, and buffing surfaces with the right attachments.
Do different types of drills offer different benefits?
Yes, different types of drills such as corded drills, cordless drills, and hammer drills offer various benefits depending on the specific task and user preferences. For example, cordless drills provide more mobility and flexibility, while hammer drills are designed for drilling into harder materials like concrete.
What are the advantages of using a cordless drill?
A cordless drill offers greater portability and freedom of movement since it doesn’t rely on a power cord or outlet. This makes it easier to work in tight spaces and areas without electrical sockets.
Are there any safety benefits to using a drill?
Yes, using a drill with proper safety precautions such as wearing safety goggles and gloves can help prevent injuries while drilling. Additionally, many drills come with built-in safety features such as a lock-off switch to prevent accidental starts.
Conclusion
In conclusion, there are numerous benefits to using a drill. Whether it is for household repairs or professional construction projects, a drill is a versatile tool that can make tasks easier and more efficient. The ability to quickly and accurately create holes, drive screws, and remove materials makes the drill a valuable asset. Additionally, the various attachments and accessories available for drills allow for a wide range of applications, making it a must-have tool for any DIY enthusiast or professional craftsman. With its power, speed, and precision, the drill proves to be an indispensable tool in any toolbox.

Best 5kilo drills

Meet Harrison Clayton, a distinguished author and home remodeling enthusiast whose expertise in the realm of renovation is second to none. With a passion for transforming houses into inviting homes, Harrison's writing at https://thehuts-eastbourne.co.uk/ brings a breath of fresh inspiration to the world of home improvement. Whether you're looking to revamp a small corner of your abode or embark on a complete home transformation, Harrison's articles provide the essential expertise and creative flair to turn your visions into reality. So, dive into the captivating world of home remodeling with Harrison Clayton and unlock the full potential of your living space with every word he writes.


