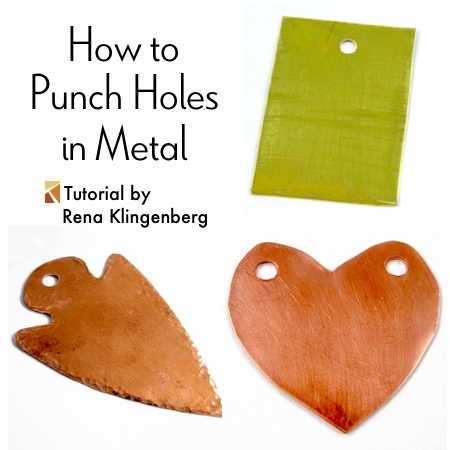
Alternative Ways to Create a Hole in a Metal Sheet without a Drill

Metal sheets are commonly used in various industries and DIY projects. However, creating a hole in a metal sheet can be a challenge if you don’t have a drill or if the material is too thick for a standard drill bit. Fortunately, there are alternative methods that can help you achieve the desired result without a traditional drill.
Sawing is one of the most common methods used to create a hole in a metal sheet without a drill. You can use a hacksaw or a reciprocating saw with a metal blade to slowly cut through the metal. This method requires patience and precision, as you need to maintain a steady hand and apply consistent pressure to achieve a clean and accurate cut.
Punching is another effective technique for creating a hole in a metal sheet. You can use a hammer and a nail to create a small pilot hole, then use a nail punch or a center punch to enlarge the hole. This method works best for thinner metal sheets and requires careful hammering to avoid damaging the surrounding area.
Burning or welding is a more extreme method that can be used to create a hole in a metal sheet. By using a blowtorch or a plasma cutter, you can melt through the metal and create a precise and clean hole. However, this method requires specialized equipment and should only be attempted by individuals who are experienced in metalworking and have the necessary safety precautions in place.
Punching Holes using a Hammer and Nail
If you don’t have access to a drill or power tools, you can still create holes in a metal sheet using basic hand tools like a hammer and nail. While this method may not be as precise or efficient as using a drill, it can be a suitable alternative for small-scale projects or temporary solutions.

To punch holes in a metal sheet using a hammer and nail, follow these steps:
- Choose an appropriate nail size: Select a nail that is slightly smaller in diameter than the desired hole size. A nail with a sharp point works best for piercing through the metal.
- Pick a sturdy surface: Place the metal sheet on a hard and stable surface, such as a workbench or concrete floor. Avoid surfaces that could be damaged by hammering, such as a wooden table.
- Mark the hole positions: Use a marker or scribe to mark the exact positions where you want the holes to be punched on the metal sheet. Measure and align the marks carefully for accuracy.
- Position the nail: Position the sharp tip of the nail directly over one of the marked positions. Hold the nail firmly and make sure it is perpendicular to the metal sheet.
- Punch the hole: While applying downward pressure on the nail, strike the top part of the nail with a hammer. Continue hammering until the nail penetrates through the metal sheet and creates a clean hole.
- Repeat the process: Repeat steps 4 and 5 for each marked position, repositioning the nail as necessary.
Note: It’s important to wear protective gloves and safety glasses when using this method to avoid injury. Additionally, keep in mind that punching holes with a hammer and nail may deform or damage the metal sheet depending on its thickness and hardness.
This alternative method may be suitable for simple DIY projects, temporary fixes, or situations where a drill is not available. However, for precise and professional results, it is recommended to use a drill with the appropriate drill bit.
Creating Holes with a Center Punch and Hammer
When you don’t have access to a drill or other power tools, a center punch and hammer can be a simple and effective alternative for creating holes in a metal sheet. This method requires precision and patience, but with the right technique, you can achieve clean and accurate holes.

Materials Needed:
- A center punch
- A hammer
- A metal sheet
- A hard surface or workbench
- Safety glasses
Instructions:
- Start by marking the desired location of the hole on the metal sheet with a pencil or marker.
- Place the metal sheet on a hard surface or workbench to provide a solid backing for the center punch.
- Position the center punch directly over the marked spot on the metal sheet.
- Hold the center punch with one hand, making sure it is perpendicular to the surface of the metal sheet.
- With the other hand, firmly strike the top of the center punch with the hammer. Apply enough force to create a small indentation in the metal. This indentation will serve as a guide for the drill bit.
- Reposition the center punch on the next marked spot, if needed, and repeat the hammering process to create additional holes.
- After creating all the desired holes, remove any metal shavings or debris from the metal sheet.
Tips and Safety Precautions:
- Wear safety glasses to protect your eyes from metal shavings.
- Make sure to hold the center punch perpendicular to the metal sheet to create straight and accurate holes.
- Use a surface or workbench that can withstand the force of the hammering.
- Start with a light tap to create a small indentation, then gradually increase the force of the hammer strikes to create a larger hole.
- Take breaks if needed, as this method requires concentration and precision.
By following these steps and taking necessary precautions, you can successfully create holes in a metal sheet using a center punch and hammer. Remember to practice patience and precision for the best results.
Utilizing a Plasma Cutter to Make Holes
A plasma cutter is a versatile tool that can be used to cut through various materials, including metal sheets. However, it can also be used to create holes in metal sheets without the need for a drill. Here are some steps to follow when using a plasma cutter to make holes:
- Prepare the metal sheet: Ensure that the metal sheet is securely clamped to avoid any movement during the cutting process.
- Set up the plasma cutter: Adjust the settings on the plasma cutter according to the thickness of the metal sheet. This will ensure that the cutter creates a clean and precise hole.
- Mark the location: Use a marker or scribe to mark the exact location where you want the hole to be made. This will serve as a guide for the plasma cutter.
- Pilot hole: Create a small pilot hole at the center of the marked location. This can be done using a punch or drilling a small hole with a drill bit.
- Start cutting: Position the plasma cutter nozzle over the pilot hole and slowly start cutting along the marked outline of the hole. Move the cutter in a controlled manner to ensure a smooth and accurate cut.
- Finish the hole: Continue cutting until the desired size of the hole is achieved.
- Clean up: Once the hole is completed, use a grinder or file to remove any burrs or rough edges.
It is important to wear appropriate safety gear, such as gloves, goggles, and a welding helmet, when using a plasma cutter. Additionally, make sure to read and follow the manufacturer’s instructions and guidelines for operating the plasma cutter.

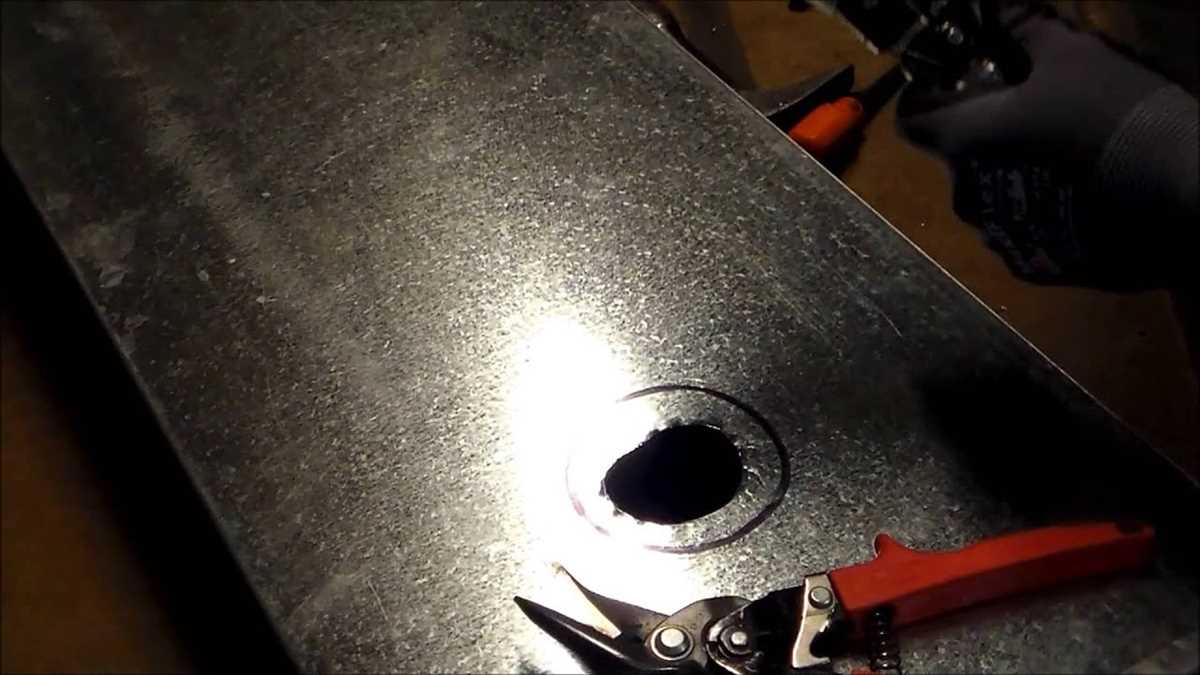
Making Holes with a Cutting or Grinding Wheel
When a drill is not available, you can still create holes in a metal sheet by using a cutting or grinding wheel. These wheels are commonly found in angle grinders and rotary tools and are designed to cut through metal.
Here are the steps to create holes with a cutting or grinding wheel:
- Measure and mark the hole: Start by measuring and marking the desired location and size of the hole on the metal sheet. Use a ruler or measuring tape to ensure the accuracy of your measurements.
- Secure the metal sheet: Place the metal sheet on a sturdy work surface and use clamps or a vice to securely hold it in place. This will prevent the sheet from moving or vibrating while you are cutting.
- Put on safety gear: Before you begin cutting, make sure to wear proper safety gear, including safety goggles, gloves, and a face mask. This will protect you from sparks, metal chips, and dust.
- Choose the appropriate wheel: Select a cutting or grinding wheel that is suitable for cutting through metal. Follow the manufacturer’s instructions to properly install the wheel onto your angle grinder or rotary tool.
- Start cutting: Hold the angle grinder or rotary tool firmly and position the cutting or grinding wheel over the marked location. Apply steady pressure and slowly move the wheel back and forth to create a hole in the metal sheet.
- Regularly cool the wheel: Metal cutting can generate a lot of heat, which can damage the cutting wheel. To prevent overheating, periodically stop and cool the wheel by dipping it in water or using a lubricant.
- Smooth the edges: After you have cut the hole, use a file or sandpaper to smooth out any rough edges or burrs on the metal sheet.
- Clean up: Finally, remove any debris or metal shavings from the work area and safely dispose of them. This will help keep your work area clean and prevent accidents.
Remember to always exercise caution and follow safety guidelines when using cutting or grinding wheels, as they can be dangerous if not used properly. If you are unsure about using these tools, it is recommended to seek assistance from a professional or use alternative methods to create holes in a metal sheet.
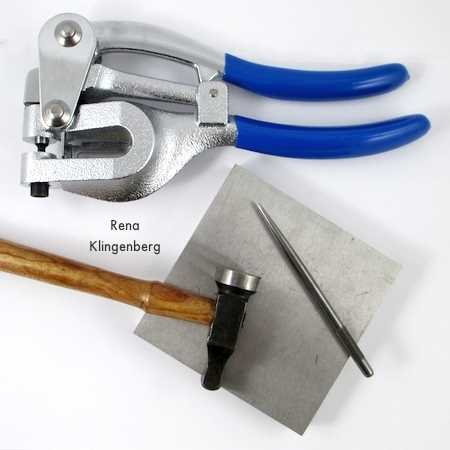
Using a Metal Punch and Mallet
Another alternative method for creating a hole in a metal sheet without a drill is by using a metal punch and mallet. This method involves manually punching a hole through the metal using a specialized hand tool.
Here is a step-by-step guide on how to use a metal punch and mallet:

- Select a metal punch that is appropriate for the size of hole you need to create. Metal punches come in different sizes, so choose one that matches your requirements.
- Place the metal sheet on a sturdy surface, such as a workbench or an anvil. Ensure that the sheet is secured in place to prevent it from moving during the punching process.
- Position the metal punch on the desired location of the hole. Make sure it is aligned properly to ensure a clean and accurate hole.
- Hold the metal punch firmly with one hand to keep it steady.
- Using a mallet or a hammer, strike the end of the metal punch forcefully. Apply consistent pressure to penetrate the metal sheet.
- Continue striking the metal punch until you have fully punched through the metal sheet.
- Remove the metal punch from the hole once it has been created.
Advantages of using a metal punch and mallet:
- Does not require a power source like a drill, making it a portable and versatile option for creating holes in metal sheets.
- Provides greater control and accuracy compared to other alternative methods.
- Can be used with a wide range of metal sheet thicknesses.
Disadvantages of using a metal punch and mallet:
- Requires physical strength and manual effort to create the hole, which can be tiring and time-consuming for large or multiple holes.
- May leave burrs or rough edges around the hole, which may require additional finishing.
- Not suitable for creating holes in certain types of metal, such as hardened steel or thick metal sheets.
Overall, using a metal punch and mallet is an effective and accessible method for creating a hole in a metal sheet without a drill. It offers versatility and control, but may not be suitable for all types of metals or large-scale hole creation.
Drilling Holes with a Rotary Tool
If you don’t have access to a drill, a rotary tool can be a great alternative for creating holes in a metal sheet. Rotary tools are versatile and can be used for a variety of tasks, including drilling.
1. Attach the Drill Bit
Start by selecting the appropriate drill bit for the size of hole you want to create. Most rotary tools come with a collet that allows you to attach different types and sizes of drill bits. Insert the selected drill bit into the collet and tighten it securely.

2. Mark the Hole
Use a marker or a scribe to mark the spot on the metal sheet where you want to create the hole. This will help guide you as you start drilling.
3. Prepare the Work Area

Before you start drilling, make sure your work area is clean and free of any debris. It’s also a good idea to secure the metal sheet in place using clamps or a vise to prevent it from moving while you drill.
4. Start Drilling
Hold the rotary tool firmly with both hands and position the drill bit on the marked spot. Start the rotary tool at a slow speed and gradually increase the speed as you drill into the metal sheet. Apply gentle pressure and let the drill bit do the work. It’s important to maintain control and avoid applying excessive pressure, as this can cause the drill bit to break or damage the metal sheet.
5. Clean Up
Once you have drilled the hole, turn off the rotary tool and remove the metal sheet from the work area. Use a file or sandpaper to smooth any sharp edges around the hole.

6. Safety Precautions
When using a rotary tool, it’s important to take proper safety precautions. Wear safety goggles to protect your eyes from flying debris and use ear protection if the rotary tool is noisy. Additionally, make sure to work in a well-ventilated area or wear a mask to avoid inhaling any metal dust or particles.
By following these steps, you can successfully drill holes in a metal sheet using a rotary tool as an alternative to a traditional drill.
Employing a Hole Saw Attachment on a Handheld Grinder
One alternative way to create a hole in a metal sheet without a drill is by using a hole saw attachment on a handheld grinder. This method can be effective when you do not have access to a drill or need to create larger holes in the metal sheet.
Materials Needed:
- Handheld grinder
- Hole saw attachment
- Metal sheet
- Clamps
- Safety goggles
- Gloves
Steps:
- Secure the metal sheet: Place the metal sheet on a workbench or any sturdy surface. Use clamps to secure it in place, ensuring it does not move while you are operating the handheld grinder.
- Attach the hole saw: Insert the hole saw attachment into the handheld grinder. Make sure it is secured tightly to prevent any accidents during the cutting process.
- Mark the desired hole location: Use a marker or scribe to mark the exact spot where you want the hole to be. Double-check the positioning to ensure accuracy.
- Put on safety gear: Before proceeding with the cutting process, put on safety goggles to protect your eyes from flying debris. Additionally, wear gloves to safeguard your hands.
- Start cutting: Turn on the handheld grinder and position the hole saw attachment on the marked spot. Apply steady pressure and let the saw do the cutting. Slowly guide the grinder in a circular motion to create the hole in the metal sheet.
- Complete the hole: Continue cutting until you have reached the desired depth or completely cut through the metal sheet. Be patient and avoid applying excessive pressure, as this can damage the hole saw or create an uneven hole.
- Clean up: Once the hole is created, turn off the handheld grinder and remove the hole saw attachment. Clean up any remaining debris and remove the metal sheet from the workbench.
Using a hole saw attachment on a handheld grinder is a suitable alternative when you cannot access a drill. However, it is important to exercise caution and follow safety protocols to prevent accidents or injuries.
Using a Plasma Arc or Laser Cutting for Precise Holes
If you need to create precise holes in a metal sheet without using a drill, you can consider using plasma arc or laser cutting techniques. These methods offer accurate and clean cuts, making them ideal for applications that require precision.
Plasma Arc Cutting
- Plasma arc cutting involves using a high-velocity jet of ionized gas, called plasma, to melt and remove the metal.
- A plasma cutter uses electrical current to create the plasma jet, which can reach temperatures over 20,000 degrees Celsius.
- The intense heat of the plasma melts away the metal, and a high-velocity stream of gas blows away the molten material.
- This process can be used to create holes of various sizes and shapes in a metal sheet.
- Plasma arc cutting is often used in industrial applications, such as metal fabrication, because of its speed and precision.
Laser Cutting
- Laser cutting utilizes a focused laser beam to melt and vaporize the metal, creating a hole with high precision.
- A laser cutting machine directs the laser beam onto the metal sheet, following a pre-programmed pattern or design.
- The heat from the laser beam melts the metal, and a stream of gas blows away the molten material, creating a clean cut.
- Laser cutting is known for its ability to create intricate and detailed cuts, making it suitable for delicate applications.
- It is commonly used in industries such as aerospace, electronics, and automotive manufacturing.
Both plasma arc cutting and laser cutting offer precise and efficient ways to create holes in metal sheets without using a drill. However, they both require specialized equipment and expertise to operate safely and accurately. Consulting with professionals or outsourcing the cutting task to a specialized service provider can ensure the best results for your specific needs.
FAQ:
Is it possible to create a hole in a metal sheet without using a drill?
Yes, it is possible to create a hole in a metal sheet without using a drill. There are alternative methods that can be used to achieve this.
What are some alternative ways to create a hole in a metal sheet?
Some alternative ways to create a hole in a metal sheet include using a punch and hammer, a plasma cutter, a laser cutter, a waterjet cutter, or a hole saw.
How does using a punch and hammer work to create a hole in a metal sheet?
Using a punch and hammer involves placing the punch on the desired location and striking it with a hammer. The force from the hammer drives the punch through the metal sheet, creating a hole.
What is a plasma cutter and how does it work to create a hole in a metal sheet?
A plasma cutter is a tool that uses a high-velocity jet of ionized gas to cut through metal. By directing the plasma jet at a specific location on the metal sheet, it can create a hole by melting and blowing away the metal.
How does using a laser cutter work to create a hole in a metal sheet?
A laser cutter uses a focused beam of light to melt and vaporize the metal at a precise location, creating a hole. The high energy of the laser allows it to cut through the metal sheet with ease.
What is a waterjet cutter and how does it work to create a hole in a metal sheet?
A waterjet cutter is a tool that uses a high-pressure stream of water to cut through metal. By focusing the water jet at a specific location on the metal sheet, it can erode the metal and create a hole.
What is a hole saw and how does it work to create a hole in a metal sheet?
A hole saw is a cylindrical saw with a drill bit in the center. It can be attached to a power drill and used to cut a round hole in a metal sheet. As the saw spins, the teeth on the edge cut through the metal.
Video:


Meet Harrison Clayton, a distinguished author and home remodeling enthusiast whose expertise in the realm of renovation is second to none. With a passion for transforming houses into inviting homes, Harrison's writing at https://thehuts-eastbourne.co.uk/ brings a breath of fresh inspiration to the world of home improvement. Whether you're looking to revamp a small corner of your abode or embark on a complete home transformation, Harrison's articles provide the essential expertise and creative flair to turn your visions into reality. So, dive into the captivating world of home remodeling with Harrison Clayton and unlock the full potential of your living space with every word he writes.


