A step-by-step guide on how to install a drill bit

Installing a drill bit may seem like a simple task, but it is important to do it correctly to ensure safe and effective use of your drill. In this step-by-step guide, we will walk you through the process of installing a drill bit in a drill.
Step 1: Choose the right drill bit
Before you start installing a drill bit, it is crucial to choose the right bit for the job. Consider the material you will be drilling into and the size of the hole you need. Different drill bits are designed for specific materials, such as wood, metal, or masonry. Make sure you select a bit that is appropriate for your project.
Step 2: Prepare the drill
Once you have chosen the right drill bit, you need to prepare your drill for installation. Start by unplugging the drill from the power source for safety. If your drill has a chuck key, insert it into the chuck and tighten the jaws. If your drill has a keyless chuck, hold the chuck in place and rotate it counterclockwise to open the jaws.

Step 3: Insert the drill bit
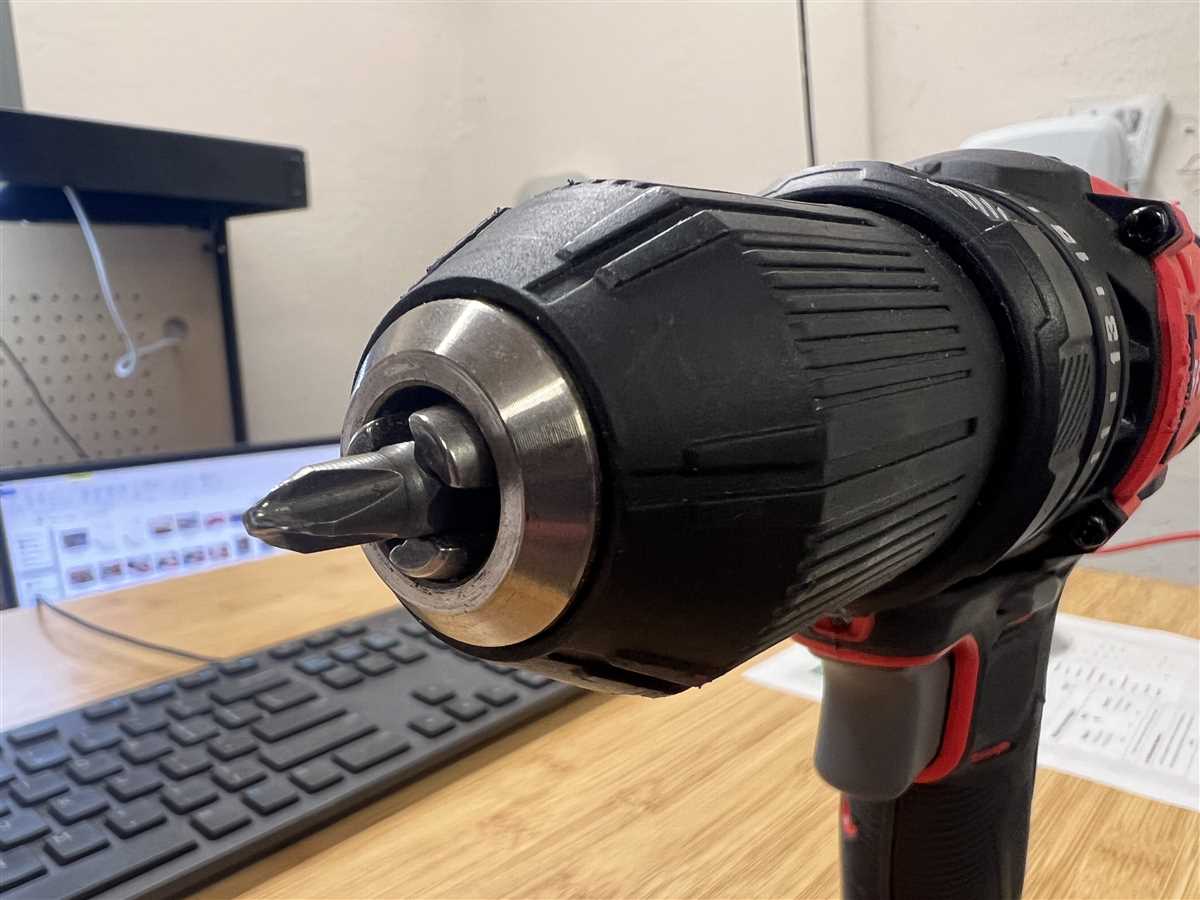
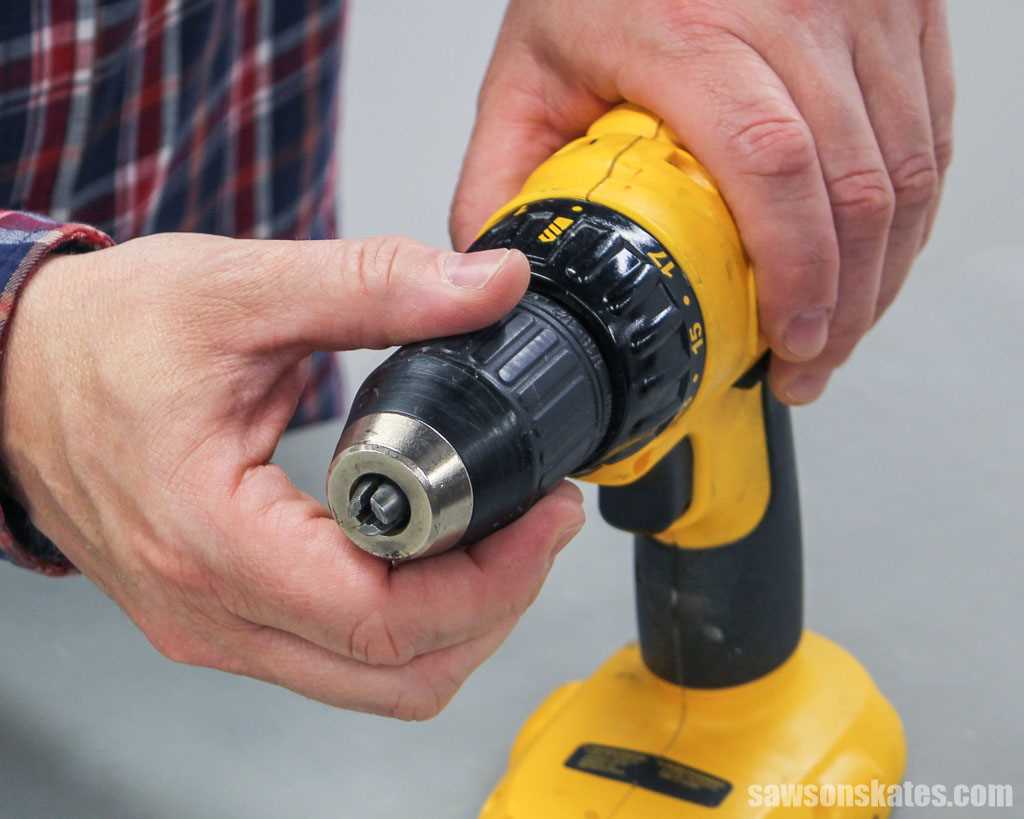
Now that your drill is ready, it’s time to insert the drill bit. Hold the bit with the cutting end facing outwards and align it with the jaws of the chuck. Push the bit into the chuck until it is held securely. For keyless chucks, release the chuck and let it tighten around the bit.
Step 4: Secure the drill bit
To ensure that the drill bit is securely held in the chuck, give it a gentle tug to make sure it doesn’t come loose. If you feel any movement, you may need to reinsert the bit and tighten the chuck further. Remember to always wear safety goggles and gloves when handling power tools.
Step 5: Test the drill

Before you start drilling, it is important to test the drill to make sure the bit is properly installed. Turn on the drill and let it run for a few seconds. If you notice any wobbling or other issues, stop the drill and recheck the installation of the bit. Once you are satisfied with the installation, you are ready to start drilling!
By following these step-by-step instructions, you can easily and safely install a drill bit in your drill. Remember to always use the appropriate bit for your project and wear the necessary safety gear. Happy drilling!
A Step-by-Step Guide on How to Install a Drill Bit
Step 1: Gather the necessary tools
Before beginning the installation process, make sure you have all the necessary tools at hand. You’ll need a drill, the appropriate size drill bit for your project, and a chuck key (if applicable).
Step 2: Choose the correct drill bit
Different projects require different types and sizes of drill bits. Determine the type of material you’ll be drilling into (wood, metal, concrete, etc.) and select the appropriate drill bit accordingly.

Step 3: Prepare the drill
If you have a cordless drill, ensure that it is fully charged or has fresh batteries. Insert the chuck key into the chuck and loosen the jaws to allow the drill bit to fit.
Step 4: Insert the drill bit
Hold the drill bit with one hand and align the shank with the chuck opening. Push the drill bit firmly into the chuck until it is fully inserted. Make sure it is centered and secure.
Step 5: Tighten the chuck
Using the chuck key, tighten the jaws of the chuck around the drill bit. Turn the key clockwise until the chuck is securely tightened, ensuring the drill bit will not slip or come loose during use.
Step 6: Test the installation
Gently pull on the drill bit to confirm that it is securely installed. It should not come loose or move within the chuck when pulled.

Step 7: Adjust the speed and direction
Before beginning your drilling project, ensure that the drill is set to the appropriate speed and direction for your specific task. Follow the instructions provided with your drill for adjusting these settings.
Step 8: Begin drilling
Now that your drill bit is installed correctly and the settings are adjusted, you are ready to begin drilling. Hold the drill with a firm grip and use steady, even pressure as you drill into your desired material.
Step 9: Carefully remove the drill bit
Once you have completed your drilling task, turn off the drill and allow it to come to a complete stop. Use the chuck key to loosen the jaws of the chuck, then remove the drill bit from the chuck by pulling it out.
Step 10: Clean and store the drill bit


After removing the drill bit, clean it to remove any debris or excess material. Store the drill bit in a safe and organized manner, ensuring it is protected from damage and easily accessible for future use.
By following these simple steps, you can confidently install a drill bit and tackle a wide range of drilling projects with ease and efficiency.
Prepare the Work Area
Before installing a drill bit, it is important to prepare the work area to ensure safety and efficiency. Follow these steps to properly prepare the work area:
- Clear the workspace: Remove any objects or debris from the work area that could interfere with the installation process or pose a safety hazard.
- Secure the workpiece: If you are drilling into a workpiece, make sure it is securely clamped or held in place to prevent movement during the drilling process.
- Wear personal protective equipment (PPE): Always wear appropriate PPE, such as safety glasses and gloves, to protect yourself from any potential hazards or injuries.
- Read the drill bit instructions: Familiarize yourself with the specific instructions provided by the manufacturer of the drill bit you are installing. These instructions may include important safety information or specific installation steps.
- Inspect the drill: Before installing the drill bit, inspect the drill itself to ensure it is in good working condition. Check for any loose parts or damage that could affect the installation process or the performance of the drill.
- Gather necessary tools: Gather all the necessary tools and accessories needed for the installation process. This may include a chuck key, if applicable, and any additional tools or accessories specified by the drill bit manufacturer.
By properly preparing the work area, you can help ensure a successful and safe installation of the drill bit. Taking these steps can help prevent accidents and maximize the efficiency of your drilling operation.

Gather the Necessary Tools
Before you begin the process of installing a drill bit, it is important to gather all the necessary tools and materials. Here is a list of the items you will need:
- A drill
- A drill bit set
- A set of drill bits
- A screwdriver (if required)
- A wrench (if required)
- Safety goggles
- Gloves (optional)
It is essential to have a drill that can accommodate the specific type of drill bit you plan to install. The drill bit set will typically come with various sizes and types of drill bits to choose from. Additionally, check if any specific tools such as a screwdriver or wrench are needed for your particular drill model.
Don’t forget to prioritize safety by wearing goggles to protect your eyes from debris and potentially harmful particles. Gloves, while optional, can provide an extra layer of protection for your hands.
Once you have gathered all the necessary tools, you are ready to proceed with the next steps in installing the drill bit.
Choose the Right Drill Bit
Choosing the right drill bit is essential for successfully completing your drilling project. The right drill bit will depend on the material you are working with and the type of hole you need to create. Here are some factors to consider when selecting a drill bit:

- Material: Determine the type of material you will be drilling into. Common materials include wood, metal, concrete, and masonry. Different materials require different drill bits.
- Bit Type: There are several types of drill bits available. The most common types include twist drill bits, spade drill bits, masonry drill bits, and auger drill bits. Each type of bit is designed for specific applications.
- Bit Size: The size of the hole you need to create will determine the size of the drill bit you should choose. Drill bits come in various sizes, ranging from small diameters to larger ones.
- Coating: Some drill bits come with special coatings that increase their durability and lifespan. For example, titanium-coated bits are known for their resistance to heat and wear.
- Shank Type: The shank is the part of the drill bit that fits into the drill chuck. The shank can be round or hexagonal, and you should choose the appropriate shank type for your drill.
It is important to keep in mind that using the wrong drill bit for the job can lead to poor results, damaged materials, or even injury. Always consult the manufacturer’s recommendations and guidelines for selecting the appropriate drill bit for your specific project.
To ensure the best results, consider investing in a set of drill bits that includes a variety of sizes and types. This will give you the flexibility to tackle different drilling tasks efficiently and effectively.
Insert the Drill Bit into the Chuck
Now that you have selected the correct drill bit for your specific project, it’s time to insert the drill bit into the chuck of your drill. The chuck is the part of the drill that holds the drill bit in place.
Follow these steps to insert the drill bit into the chuck:
- Make sure your drill is turned off and unplugged from the power source. This is important for safety reasons.
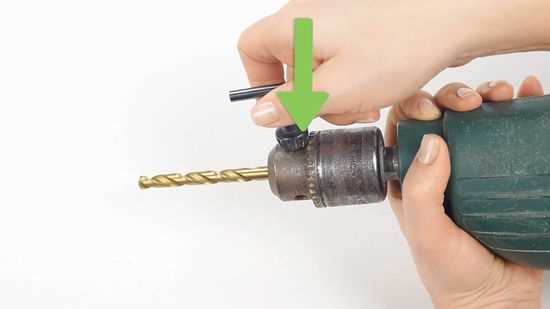
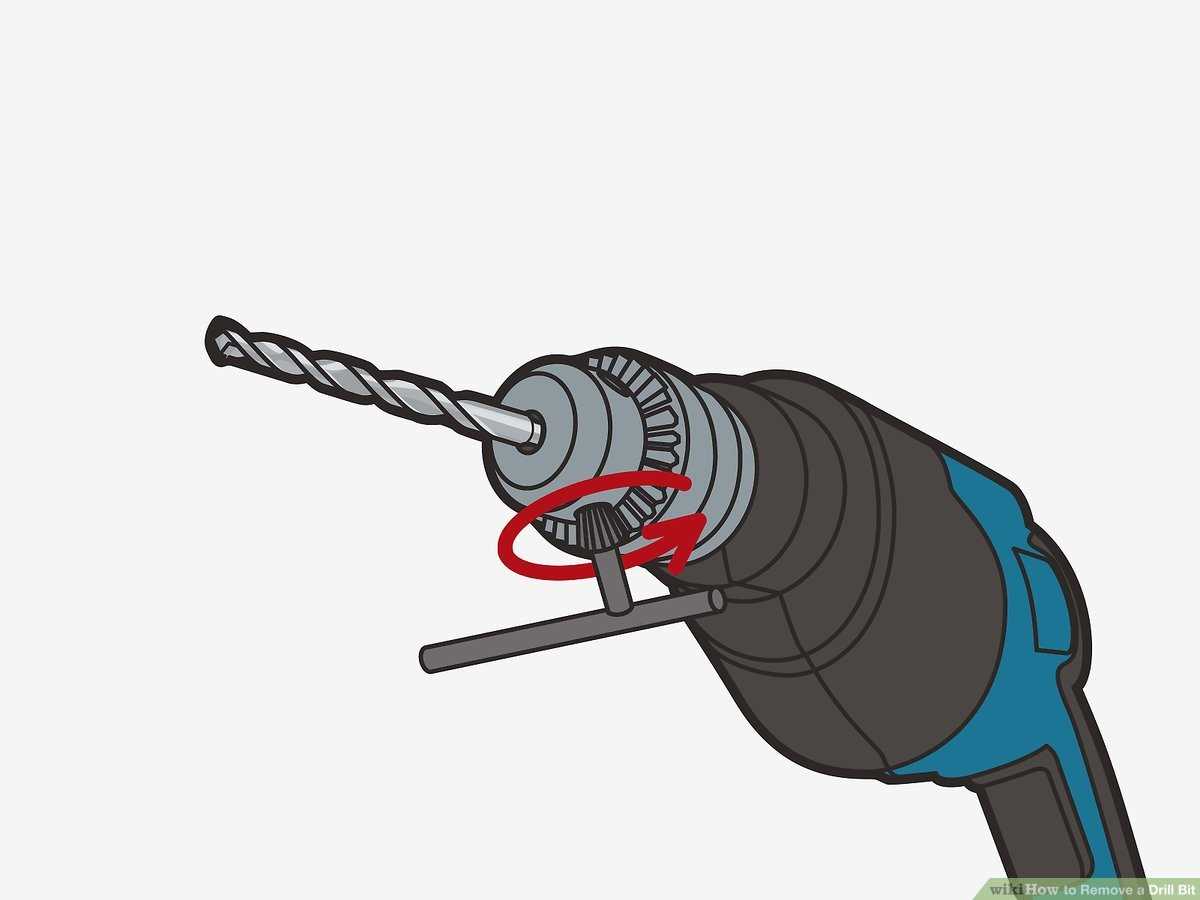
- Locate the chuck key that came with your drill. The chuck key is a small tool used to tighten or loosen the chuck.
- Insert the chuck key into the hole on the side of the chuck and turn it clockwise to loosen the chuck.
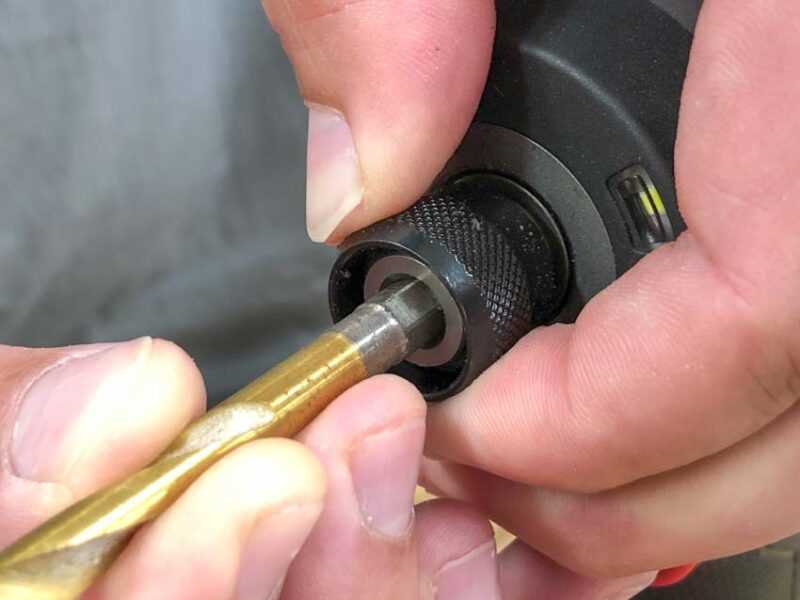
- Hold the drill bit by the non-cutting end and align the shank of the drill bit with the jaws of the chuck.
- Insert the drill bit fully into the chuck and make sure it is centered and straight.
- Use the chuck key to tighten the chuck by turning it counterclockwise. Make sure to tighten it securely to prevent the drill bit from slipping during use.
- Remove the chuck key from the chuck and double-check that the drill bit is securely locked in place.
Once you have successfully inserted the drill bit into the chuck, you are ready to use your drill for your desired project. Remember to always wear appropriate safety gear and follow the manufacturer’s instructions for your specific drill model.
Tighten the Chuck
Once you have inserted the drill bit into the chuck, it’s important to make sure it is securely tightened. Follow these steps to tighten the chuck:
- Hold the drill with one hand and the chuck key with the other hand.
- Insert the chuck key into one of the three holes on the chuck.
- Rotate the chuck key counterclockwise to loosen the chuck.
- Insert the drill bit into the chuck, making sure it is aligned correctly.
- Hold the drill bit with one hand, and use the chuck key to rotate the chuck clockwise to tighten it.
- Make sure the chuck is tightened securely by giving it a slight tug, ensuring it does not move.
- Remove the chuck key from the chuck and set it aside.
It is important to properly tighten the chuck to ensure the drill bit does not come loose while in use. This will help prevent accidents and damage to the drill or workpiece.
Check the Alignment
Before installing the drill bit, it is important to make sure that the drill chuck and the drill bit are aligned properly. Aligning the drill chuck and the drill bit correctly will ensure that the bit is centered and will minimize the risk of the bit slipping or breaking during use.
Step 1: Disconnect the Power
Before checking the alignment, always ensure that the power to the drill is turned off and unplugged. This will prevent any accidental starts or electrocution.
Step 2: Open the Chuck
With the drill turned off, loosen the chuck by turning it counterclockwise. Open the chuck wide enough to accommodate the drill bit.
Step 3: Insert the Bit
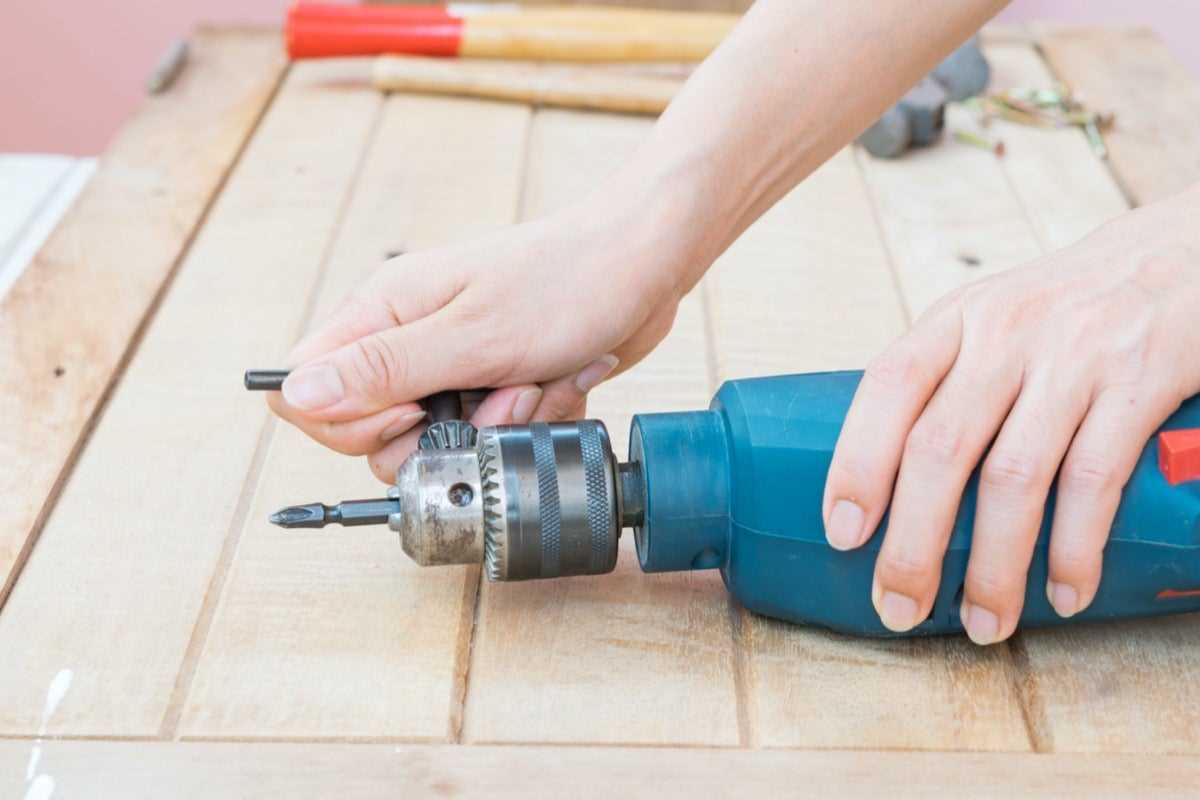
Take the drill bit and insert it into the chuck. Make sure that the shank of the drill bit is fully inserted and seated securely in the jaws of the chuck.
Step 4: Align the Bit
Hold the drill bit with one hand and gently rotate the chuck with the other hand to align the bit. Make sure that the bit is centered and straight in the chuck.
Step 5: Tighten the Chuck
Once the bit is aligned, tighten the chuck by turning it clockwise. Use your hand to tighten the chuck firmly, ensuring that the drill bit is securely held in place.
Step 6: Test the Alignment
After tightening the chuck, double-check the alignment of the drill bit. Spin the chuck by hand to make sure that the bit rotates smoothly and evenly without wobbling or vibrating.
Step 7: Reconnect the Power
If everything looks aligned, you can now reconnect the power to the drill and proceed with your drilling tasks. Always remember to wear appropriate safety gear and follow the manufacturer’s guidelines for operating the drill safely.
Secure the Workpiece
- Before starting any drilling operation, it is important to secure the workpiece properly. This will ensure both the safety of the user and the accuracy of the drilling.
- Place the workpiece on a stable surface such as a workbench or clamped securely to prevent any movement during drilling.
- If necessary, use clamps or vise grips to hold the workpiece securely in place. This is especially important when drilling materials that may be prone to shifting or sliding.
- Make sure that the workpiece is positioned in a way that allows easy access to the drilling area and provides sufficient space for the drill bit to penetrate without obstruction.
It is also important to consider the type of material being drilled and take appropriate precautions:
- Wood: When drilling wood, make sure it is firmly secured to prevent spinning or movement. Consider using a backing board to prevent tear-out on the exit side of the hole.
- Metal: When drilling metal, use a center punch to create a starting point for the drill bit. This will help prevent the bit from wandering and ensure accurate drilling.
- Masonry: When drilling into masonry, use a hammer drill and consider using a template or guide to ensure precise hole placement.
By properly securing the workpiece, you will be able to drill accurately and safely, minimizing the risk of damage or injury during the drilling process.
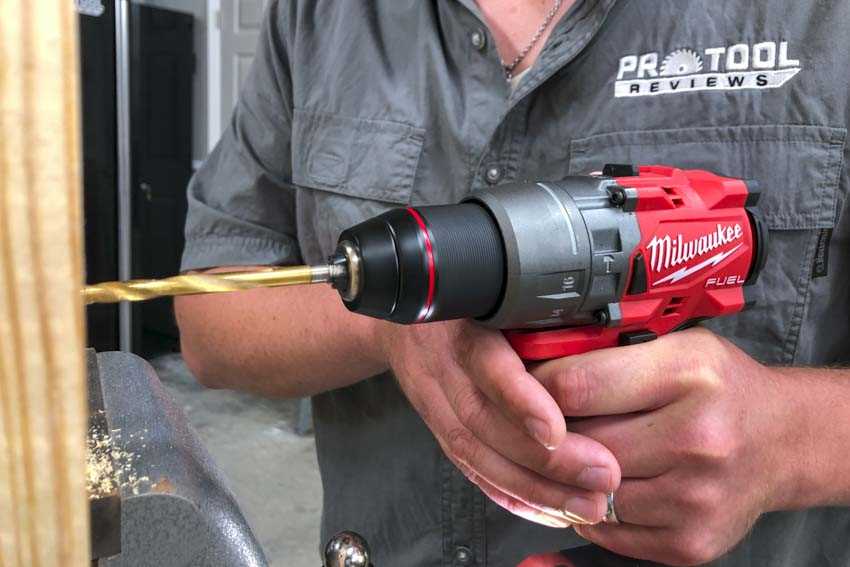
Start Drilling
Once you have properly secured the drill bit and adjusted the drill speed, you are now ready to start drilling. Follow these steps to ensure a safe and successful drilling process:
- Position yourself in a comfortable and stable stance, keeping your body balanced and away from the drilling area.
- Hold the drill firmly with both hands, using your dominant hand to grip the trigger and your other hand to support the drill.
- Align the drill bit tip with the desired drilling point on the material.
- Apply gentle pressure to the drill, making sure to keep it steady and perpendicular to the material surface.
- Slowly squeeze the trigger to start the drilling process. Begin with a low speed to create a pilot hole.
- Maintain a consistent and controlled drilling speed, gradually increasing it as necessary for larger holes.
- Monitor the drilling process, keeping an eye on the drilling depth and the material’s reaction to the drill bit.
Remember to take regular breaks as needed to avoid overheating the drill or exhausting yourself. If you encounter any difficulties or the drill starts to lose power, stop immediately and reassess the situation.
FAQ:
What tools do I need to install a drill bit?
To install a drill bit, you will need a power drill, a chuck key, and the specific drill bit you want to install.
I’m a beginner, is it difficult to install a drill bit?
No, installing a drill bit is not difficult. It just requires a few simple steps and some basic tools.
What is the first step to install a drill bit?
The first step is to ensure that your power drill is turned off and unplugged. Safety should always come first.
How do I insert the drill bit into the chuck?
You can insert the drill bit into the chuck by aligning the flat part of the bit with the jaws of the chuck and inserting it as far as it will go.
Do I need to tighten the chuck after inserting the drill bit?
Yes, you need to tighten the chuck using the chuck key. Insert the key into the holes on the side of the chuck and turn it clockwise to tighten it.
Is it important to check the drill bit for any damage before installing?
Yes, it is important to check the drill bit for any signs of damage before installing it. A damaged drill bit can cause accidents or produce poor results.
Video:

How to log out of pokemon go

Meet Harrison Clayton, a distinguished author and home remodeling enthusiast whose expertise in the realm of renovation is second to none. With a passion for transforming houses into inviting homes, Harrison's writing at https://thehuts-eastbourne.co.uk/ brings a breath of fresh inspiration to the world of home improvement. Whether you're looking to revamp a small corner of your abode or embark on a complete home transformation, Harrison's articles provide the essential expertise and creative flair to turn your visions into reality. So, dive into the captivating world of home remodeling with Harrison Clayton and unlock the full potential of your living space with every word he writes.


