7 Steps to Successfully Drill and Tap Hardened Steel

Drilling and tapping hardened steel is a challenging task that requires precision, patience, and the right tools. Whether you’re a professional machinist or a DIY enthusiast, knowing the right steps to drill and tap hardened steel can make all the difference in your project’s success.
Step 1: Choose the Right Drill Bit
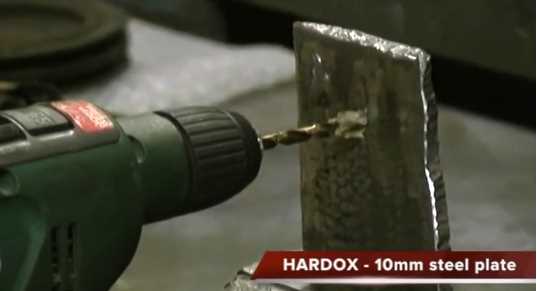
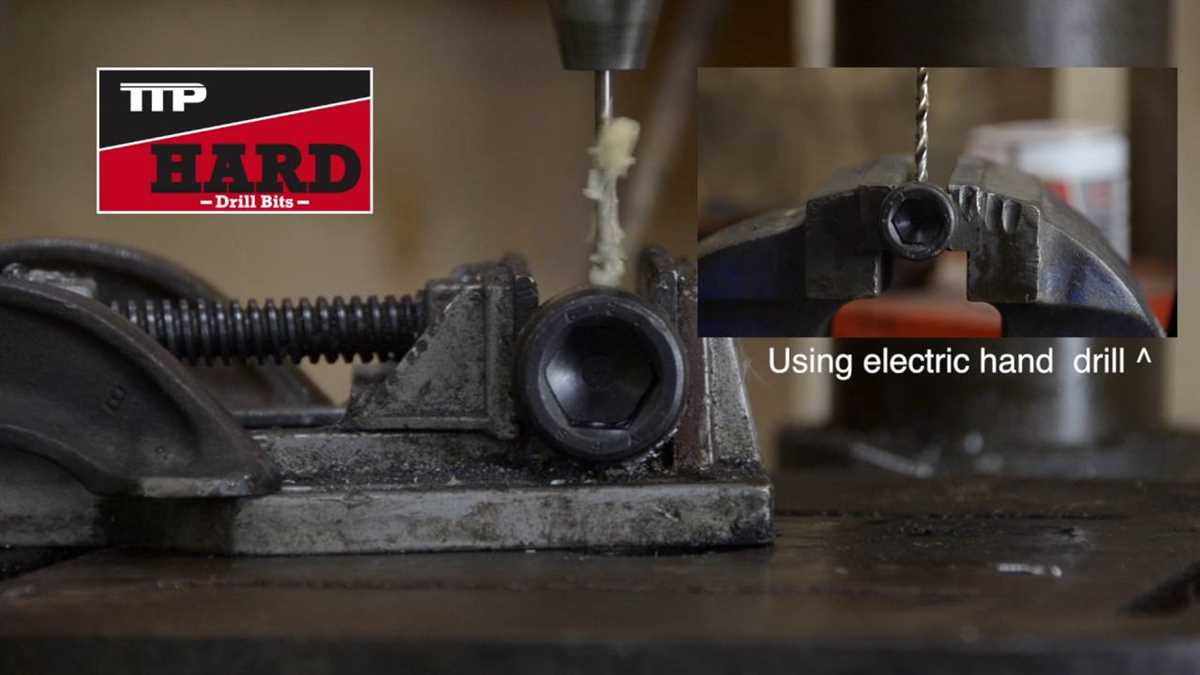
When it comes to drilling hardened steel, not all drill bits are created equal. You’ll need to use a high-speed steel (HSS) drill bit that’s been specifically designed to drill through tough materials like hardened steel. Make sure to choose a drill bit that’s suitable for the size hole you need to create.
Step 2: Use Lubrication
Hardened steel generates a lot of heat when being drilled, which can quickly dull the cutting edge of your drill bit. To prevent this, it’s crucial to use a lubricant such as cutting oil or cutting fluid while drilling. Applying lubrication will help keep the drill bit cool and extend its lifespan.

Step 3: Mark Your Spot
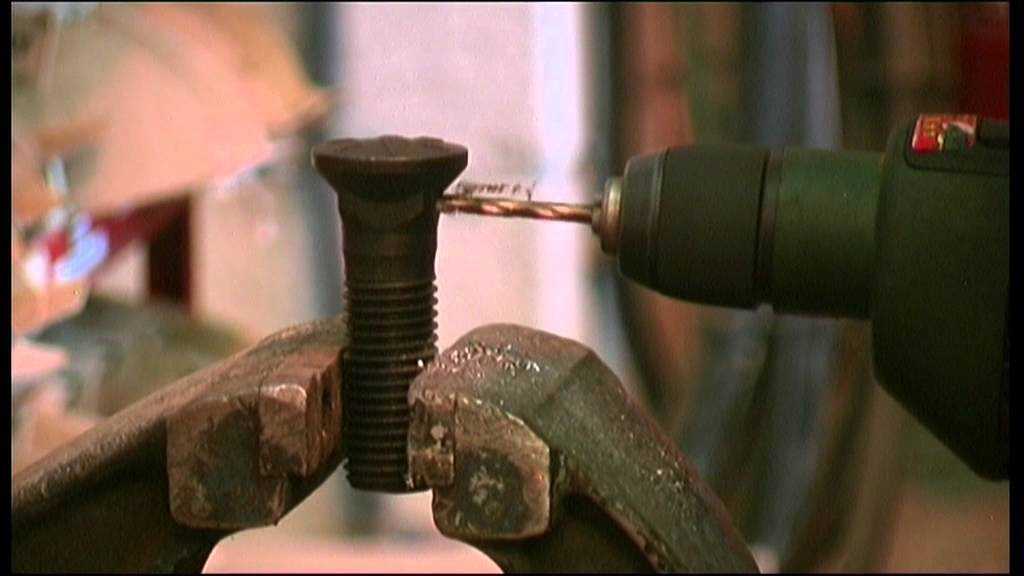
Before you start drilling, make sure to mark the exact spot where you want to create a hole. Use a center punch or a sharp nail to make a small indentation. This will help guide your drill bit and prevent it from wandering off-center.
Step 4: Start Slow
When you’re ready to start drilling, it’s essential to begin at a slow speed. This will allow the drill bit to bite into the hardened steel gradually and prevent it from slipping or wandering. Once the hole has been initiated, you can increase the drilling speed.
Step 5: Apply Even Pressure

To ensure a clean and accurate hole, it’s vital to apply even pressure while drilling. This will help prevent the drill bit from breaking or chattering. Use a steady hand and let the drill bit do the work. Applying too much force can lead to overheating and damage to both the drill bit and the workpiece.
Step 6: Reverse Drilling
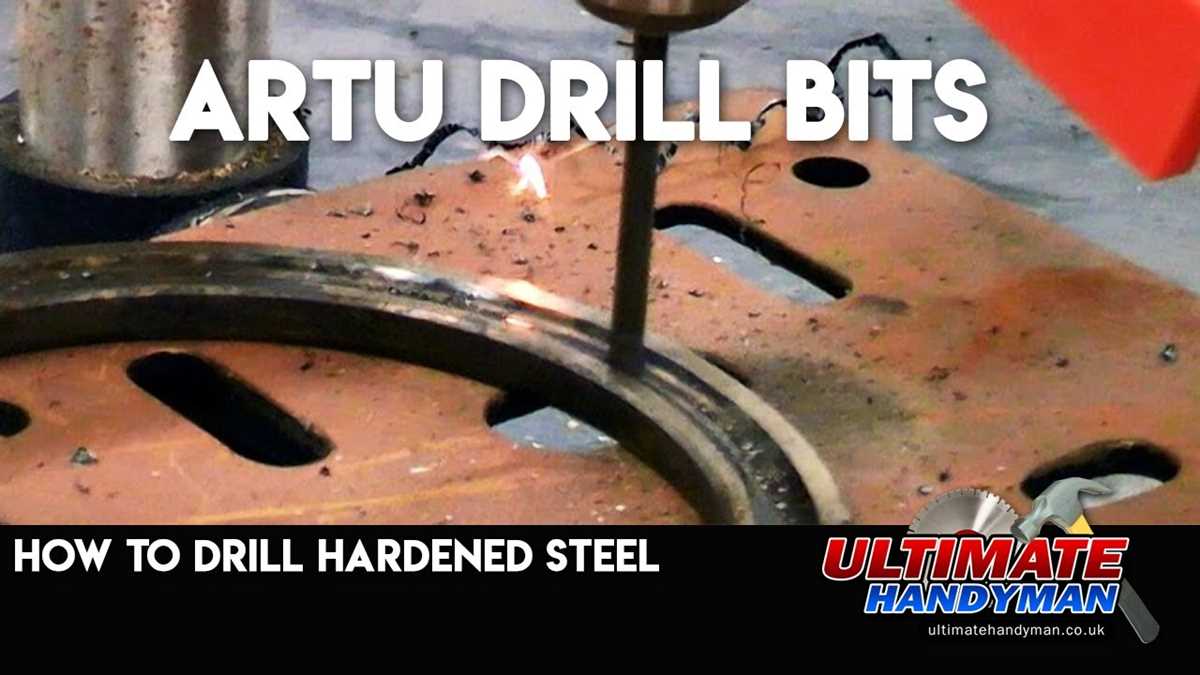
When you’re near the end of drilling through hardened steel, it’s recommended to reverse drill for a few revolutions. This will help break the chips and clear the hole of any debris. It’s also a good idea to periodically retract the drill bit during the drilling process to remove chips and prevent clogging.
Step 7: Tap the Hole
Once the hole is drilled, it’s time to tap it to create internal threads. Choose the appropriate tap size and use a tap wrench to turn the tap into the hole. Apply cutting oil or cutting fluid to lubricate the tapping process and prevent the tap from breaking. Remember to tap slowly and remove the tap periodically to clear chips.

By following these seven steps, you’ll be able to successfully drill and tap hardened steel. Remember to work slowly, use the right tools, and apply lubrication to achieve the best results.
Step 1: Determine the Type of Hardened Steel
Before starting the drilling and tapping process on hardened steel, it is important to determine the type of hardened steel you are dealing with. This is crucial because the hardness and composition of the steel will dictate the type of drill bit and tap that should be used.
Here are some common types of hardened steel:
- Tool Steel: This type of hardened steel is typically used in manufacturing tools and dies. It is known for its high hardness and abrasion resistance.
- Carbon Steel: Carbon steel is a strong and durable type of steel that has been hardened to increase its strength. It is commonly used in construction and industrial applications.
- Stainless Steel: Stainless steel is known for its corrosion resistance and high strength. It is often used in applications where hygiene and durability are important.
- Alloy Steel: Alloy steel is a type of steel that has been alloyed with other elements to improve its mechanical properties. It is commonly used in automotive and aerospace industries.
How to determine the type of hardened steel:
There are a few ways to determine the type of hardened steel you are working with:

- Check the material specifications: If you have access to the material specifications or documentation, it should indicate the type of steel used.
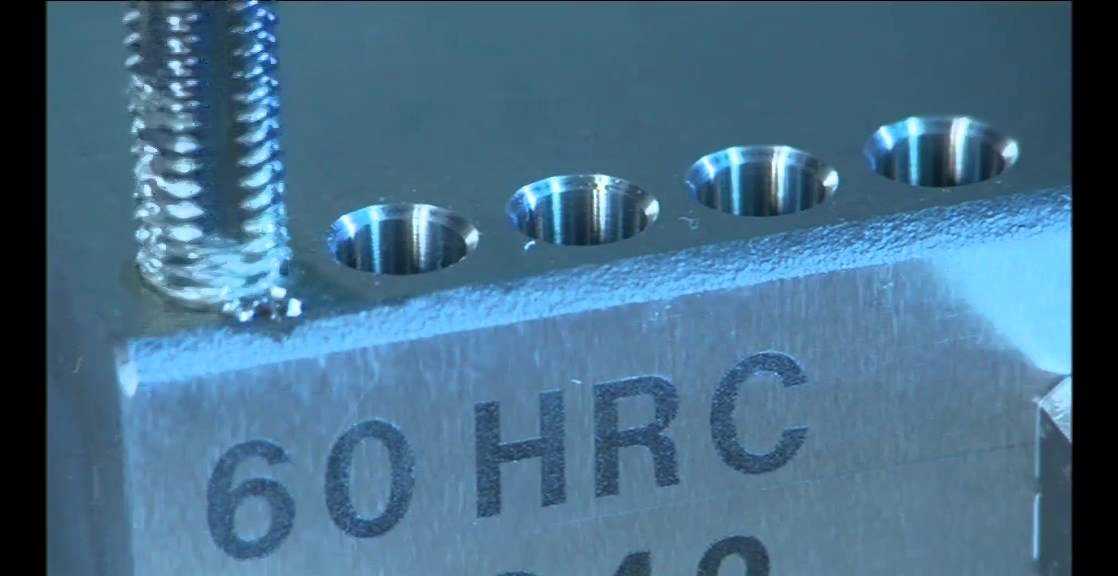
- Perform a hardness test: You can use a hardness tester to measure the hardness of the steel. This will give you an indication of the type of steel you are dealing with.
- Consult an expert: If you are unsure about the type of hardened steel, it is recommended to consult an expert or a metallurgist who can help you identify the type of steel.
Once you have determined the type of hardened steel, you can move on to the next step, which is selecting the appropriate drill bit and tap for the job.
Step 2: Choose the Right Drill Bit
Choosing the right drill bit is crucial when drilling into hardened steel. Using the wrong drill bit can result in damaged bits, dull holes, and even potential injury. Follow these guidelines to choose the right drill bit for drilling into hardened steel:
- Consider the material: Hardened steel is extremely tough and requires a drill bit that can handle the high heat and pressure. Look for drill bits specifically designed for drilling into hardened steel.
- Choose a carbide or cobalt drill bit: Carbide and cobalt drill bits are known for their durability and are ideal for drilling into hardened steel. They can withstand the high heat and are less prone to dulling.
- Check the drill bit’s coating: Some drill bits come with a coating that reduces friction and heat buildup. Look for a drill bit with a titanium or black oxide coating, as these provide added strength and protection.
- Consider the bit’s shape: Drill bits come in various shapes, such as twist, spade, or step bits. Choose a bit that is suitable for drilling into hardened steel and has a pointy tip for easy penetration.
- Look for high-speed steel (HSS) bits: High-speed steel bits are capable of withstanding the high heat generated when drilling into hardened steel. They are more affordable compared to carbide or cobalt bits.
Remember that using the right drill bit is essential for drilling into hardened steel. Investing in quality drill bits will save you time, effort, and frustration in the long run.
Step 3: Mark the Drilling Spot

Before you begin drilling into the hardened steel, it is important to mark the exact spot where you want to make the hole. By marking the drilling spot accurately, you ensure that the hole is drilled in the right place and at the right angle.
Follow these steps to mark the drilling spot:
- Clean the surface: Use a clean cloth or a mild solvent to remove any dirt, dust, or debris from the area where you plan to drill. This will ensure better adhesion of the marker or center punch.
- Use a center punch or marker: Depending on the size of the hole you want to drill, you can use a center punch or a marker to mark the spot. A center punch creates a small indentation that acts as a guide for the drill bit, while a marker provides a visible reference point.
- Align the punch or marker: Carefully position the center punch or marker on the spot where you want to drill the hole. Make sure it is centered and aligned correctly.
- Apply force: Apply steady pressure on the center punch and strike it with a hammer to create a small indentation. If you are using a marker, simply make a visible mark on the surface.
- Double-check the position: Take a moment to double-check the position of the marking. Ensure that it is aligned with your intended drilling spot and at the correct angle.
By accurately marking the drilling spot, you minimize the risk of drilling in the wrong position or at the wrong angle. This step is crucial for achieving precise and accurate results when drilling and tapping hardened steel.
Step 4: Use Lubrication
When drilling and tapping hardened steel, lubrication plays a crucial role in the success and efficiency of the process. Lubricating the drill bit and tap helps to reduce friction, heat, and tool wear, allowing for smoother drilling and tapping operations.
There are various lubricants available for use when working with hardened steel, including cutting oils, tapping fluids, and multipurpose lubricants. These lubricants provide a protective barrier between the tools and the metal surface, reducing the risk of overheating and tool breakage.
To use lubrication effectively during the drilling and tapping process, follow these steps:
-
Before starting the drilling and tapping operations, apply a generous amount of lubricant to the drill bit and tap. Ensure that the lubricant covers the cutting edges and the flutes of the tools.
-
During the drilling process, periodically apply more lubricant to the drill bit to keep it lubricated. This will help to prevent overheating, chip buildup, and tool wear.
-
While tapping, continue to apply lubricant to the tap to reduce friction and facilitate smooth cutting of the threads. Be sure to apply the lubricant to both the flutes and the threads of the tap.
-
If the lubrication starts to wear off during the drilling and tapping operations, reapply the lubricant as needed to maintain proper lubrication and performance.
Using lubrication not only helps to improve the performance and efficiency of drilling and tapping hardened steel, but it also extends the lifespan of the tools. By reducing friction and heat, lubrication minimizes tool wear and increases the tool’s effectiveness.
After completing the drilling and tapping operations, it is important to clean the tools thoroughly to remove any residual lubrication. This will prevent the lubricant from attracting dirt and contaminants, which can impact future drilling and tapping projects.
By following these steps and using lubrication effectively, you can ensure successful and efficient drilling and tapping of hardened steel.
Step 5: Drill Slowly and Steadily
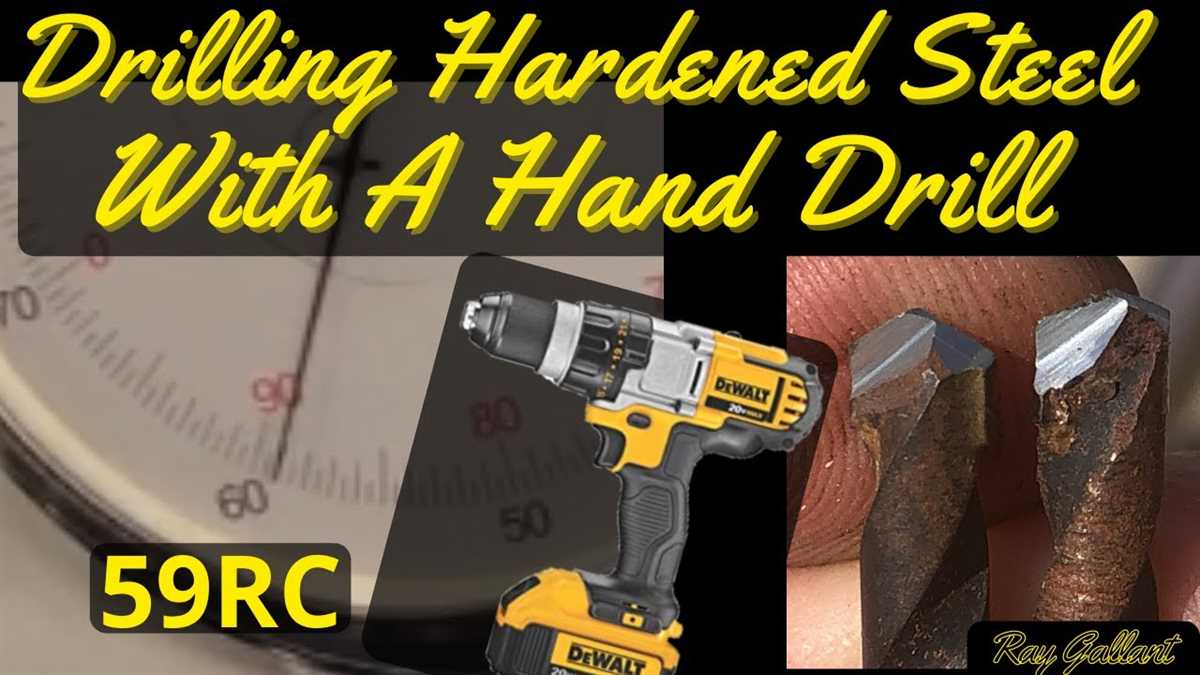
When drilling into hardened steel, it is important to proceed slowly and steadily. Rushing through the process can lead to overheating and the drill bit becoming dull, which can make the drilling process much more difficult.
To ensure a successful drill, follow these guidelines:
- Use a low speed setting: Set your drill to a low speed setting to prevent overheating. The slower speed will also allow for better control and accuracy.
- Apply constant pressure: Apply a consistent and steady pressure as you drill. This will help to create a uniform hole and prevent the drill bit from wandering or slipping.
- Use a lubricant: Apply a lubricant, such as cutting oil or drilling fluid, to the cutting area. This will help to cool the drill bit and reduce friction, making the drilling process easier.
- Clear away chips: As you drill, periodically stop to clear away any chips or debris that may be accumulating in the hole. This will prevent the drill bit from becoming clogged and ensure a smooth drilling process.
By drilling slowly and steadily, you’ll increase your chances of successfully drilling into hardened steel without damaging your drill bit or the workpiece.
Step 6: Tap the Hole
Now that you have drilled the hole in the hardened steel, it’s time to tap the hole. Tapping is the process of cutting threads into the hole so that you can screw in a bolt or other fastener.
Here are the steps to tap the hole:
- Choose the right tap: Select a tap that matches the size and thread pitch of the hole you drilled. You can use a manual tap or a tap and die set for this process.
- Prepare the tap: Apply a few drops of cutting oil to the tap to lubricate it and reduce friction. This will help prevent the tap from breaking or getting stuck in the hole.
- Insert the tap: Carefully insert the tap into the hole you drilled. Make sure it is aligned straight and start turning it clockwise.
- Turn the tap: Continue turning the tap clockwise while applying downward pressure. This will help the tap cut the threads into the hole. It’s important to maintain a steady and even pace while tapping.
- Reverse the tap: After a few turns, reverse the tap counterclockwise to break the chips and clear them from the threads. This will help keep the tap clean and prevent it from getting stuck.
- Continue tapping: Keep turning the tap clockwise and counterclockwise, periodically reversing to clear the chips. This will ensure that you cut clean and defined threads into the hole.
- Test the threads: Once you’ve tapped the hole, remove the tap and test the threads by trying to screw in a bolt or fastener. The threads should be smooth and secure.
Remember to use caution and go slowly while tapping the hole in hardened steel. It can be a challenging process, but with the right tools and technique, you can create strong, reliable threads in the steel.
Step 7: Clean and Inspect
After the drilling and tapping process, it is important to thoroughly clean and inspect the drilled and tapped holes. This step ensures that any debris or metal filings are removed, and that the holes are properly formed and ready for use.
Cleaning
Begin by using a brush or compressed air to remove any loose particles or debris from the holes. This can help prevent the build-up of contaminants that could interfere with the performance of the tapped holes.
Next, use a suitable cleaner or solvent to thoroughly clean the holes. This will help remove any remaining residue or lubricants that may have been used during the drilling and tapping process. Be sure to follow the manufacturer’s instructions for the specific cleaner or solvent being used.
Inspection
Once the holes are clean, carefully inspect each hole for any signs of damage or irregularities. Look for any burrs, cracks, or other imperfections that could affect the function or strength of the tapped holes.
Use a magnifying glass or other inspection tools to get a closer look at the holes. Pay close attention to the thread depth and thread quality, ensuring that they meet the required specifications.
If any issues are found during the inspection, it may be necessary to re-drill and re-tap the holes or consult with a professional for further assistance.
Conclusion
By properly cleaning and inspecting the drilled and tapped holes, you can ensure that they are in optimal condition for use. This final step is crucial for guaranteeing the success and longevity of your project involving hardened steel.
FAQ:
What type of drill bit should I use for drilling hardened steel?
When drilling hardened steel, it is recommended to use high-speed steel (HSS) drill bits. These bits are made from a harder and more heat-resistant material, allowing them to withstand the high temperatures generated during drilling. Cobalt drill bits are also a good choice for drilling hardened steel.
Why is it important to use cutting fluid when drilling and tapping hardened steel?
Using cutting fluid is important when drilling and tapping hardened steel because it helps to cool down the metal and lubricate the drill bit or tap. This reduces the heat generated during the drilling process and prevents the tool from becoming dull. Cutting fluid also helps to flush away metal chips, resulting in a cleaner and more efficient drilling or tapping operation.
What can I use as a starting point when drilling hardened steel?
A center punch is often used to create a starting point for drilling hardened steel. By making a small indentation with the center punch, you provide a guide for the drill bit, preventing it from wandering or slipping off the surface. This ensures that the hole is drilled accurately and prevents damage to the drill bit.
How can I prevent a tap from breaking when tapping hardened steel?
To prevent a tap from breaking when tapping hardened steel, it is important to control the tapping pressure. Applying too much force can cause the tap to break due to the high hardness of the metal. By using a slow and steady tapping motion, and periodically reversing the tap to remove metal chips, you can reduce the risk of the tap breaking and ensure a successful tapping operation.
Video:


Meet Harrison Clayton, a distinguished author and home remodeling enthusiast whose expertise in the realm of renovation is second to none. With a passion for transforming houses into inviting homes, Harrison's writing at https://thehuts-eastbourne.co.uk/ brings a breath of fresh inspiration to the world of home improvement. Whether you're looking to revamp a small corner of your abode or embark on a complete home transformation, Harrison's articles provide the essential expertise and creative flair to turn your visions into reality. So, dive into the captivating world of home remodeling with Harrison Clayton and unlock the full potential of your living space with every word he writes.


